Browse by Solutions
Browse by Solutions
How do I Setup Email in Preferences Settings?
Updated on May 4, 2020 07:03AM by Admin
Every employee in your business can connect their IMAP email server accounts, which allows you to Sync Email Accounts with Apptivo. Preferences in Apptivo help you to set up and sync email accounts. Before you set up to sync email, firstly go through what Email Forwarding and Authentication mean.
Email forwarding refers to the process of re-directing a received email message from one email address to Apptivo.
Email authentication is a verification process that verifies that the received email is from your business domain and it does not belong to the spam.
Note: Make sure to configure Email forwarding before authenticating an email address.
Go through the steps below to effectively sync the email.
Steps to Set up Email in Preferences Settings
- Log in to your account and click on "Account Name" at the top right corner.
- Click on “Preferences” from the listed options.

- You will find the set of configuration features in the left column and their actual attribute values in the right column.
Steps to Enable Email Forwarding
- Click on "Email --> IMAP" from the left navigation panel.
- Click on “Add” button

- Set up an email account and specify your "Email id" and click the "Save" button at the bottom.
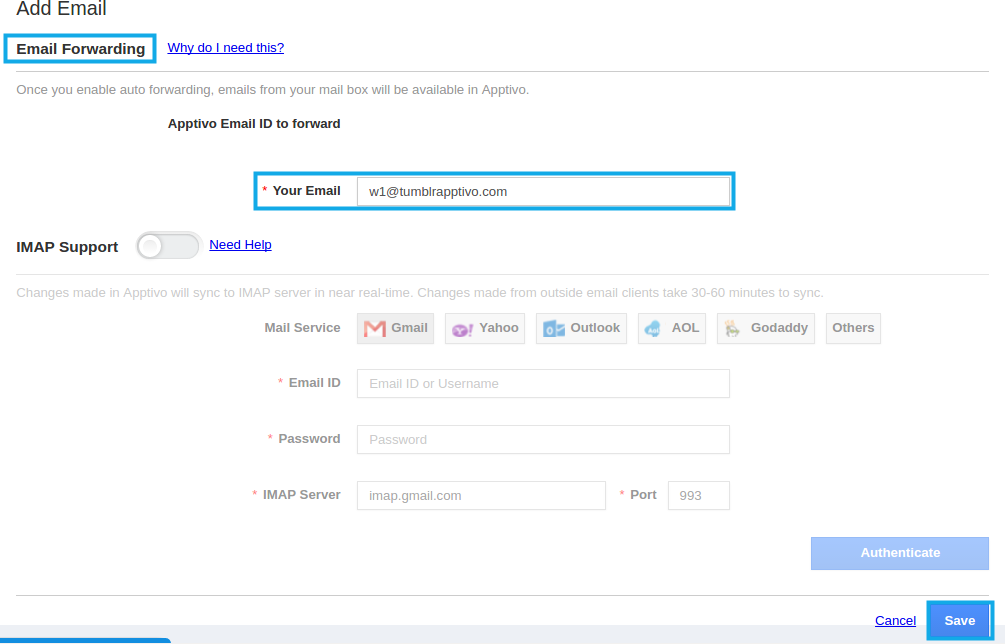
- Click on "Edit" option to get the generated code

- Now copy the generated code.

- Navigate to your account (Gmail, Yahoo, Outlook, etc) and click on the "Settings" option:
- Now select the “Forwarding and POP/IMAP” tab and click on “Add a Forwarding Address”.
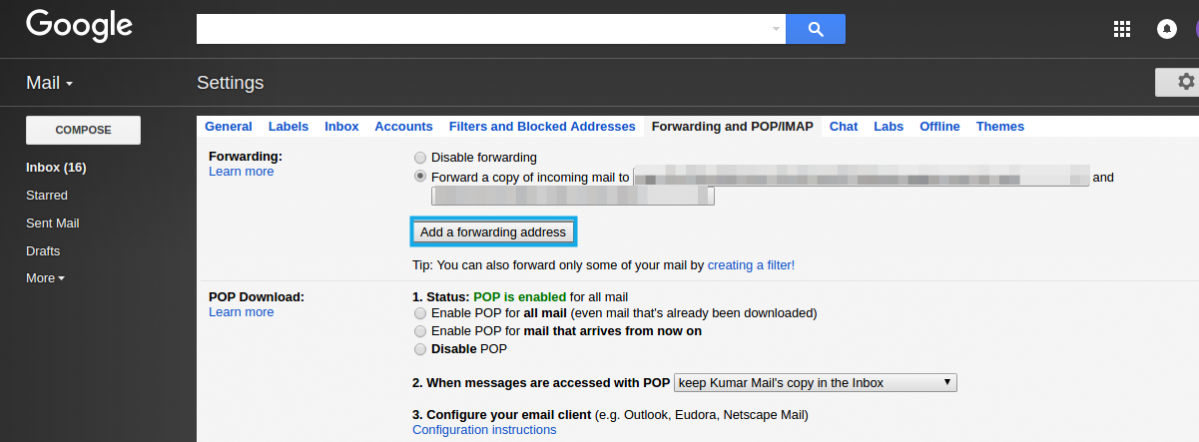
- Paste the "Forwarding email address" as shown in the image:
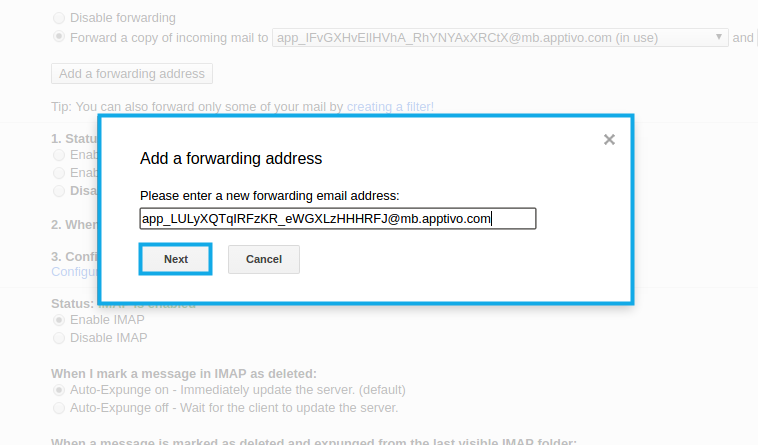
- Now a pop-up window will appear, click on the "Proceed" button to receive an acknowledgment email with a confirmation code.
- Now you can view the code in the Apptivo homepage "Emails" inbox as shown in the following image:

- Copy and paste the code in the “Verify code” field of your Gmail account as shown in the following image:

- You have to manually select the "Forward a copy of incoming mail to" option (By default "Disable forwarding" option will be enabled).

- Now all your emails received in your Gmail account will be immediately collected into apptivo account
Steps to Authenticate Email Address
- Click on “Edit” button against the email forwarding completed mail id as shown in the following image:

- Enable "IMAP Support" toggle and provide the following details
- Email Service (Optional) - Select an email service from available options.
- User Name – Email address
- Password – Password for the email address
- IMAP Host Name – Provide IMAP hostname
- Port – Provide the port number
- Click on the “Authenticate” button to validate the email address.
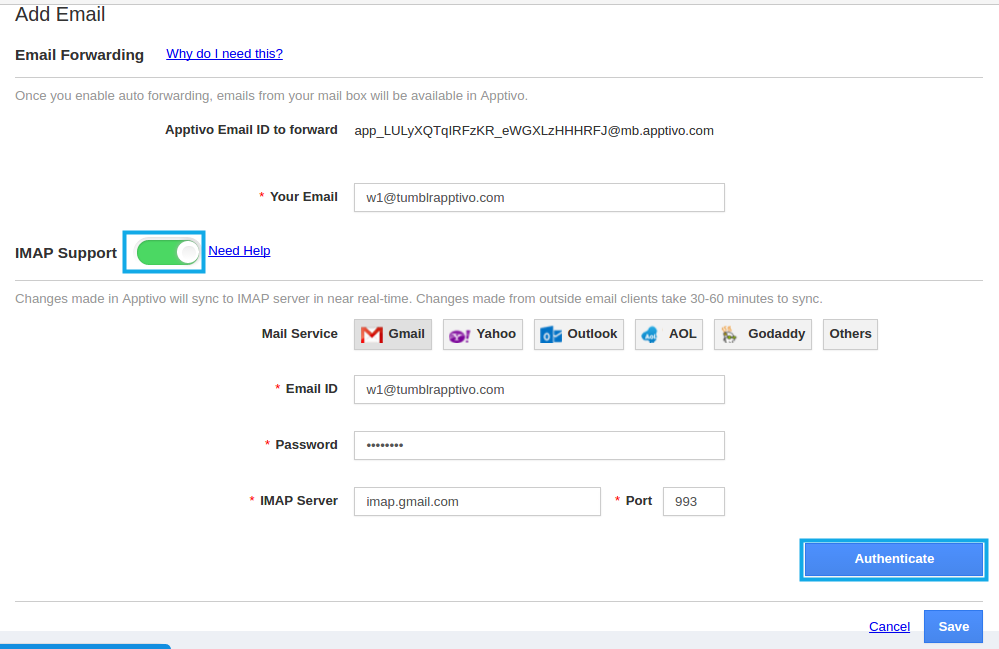
- By default, all the authenticated and not authenticated email address will be in enabled mode. You can also disable them if needed.
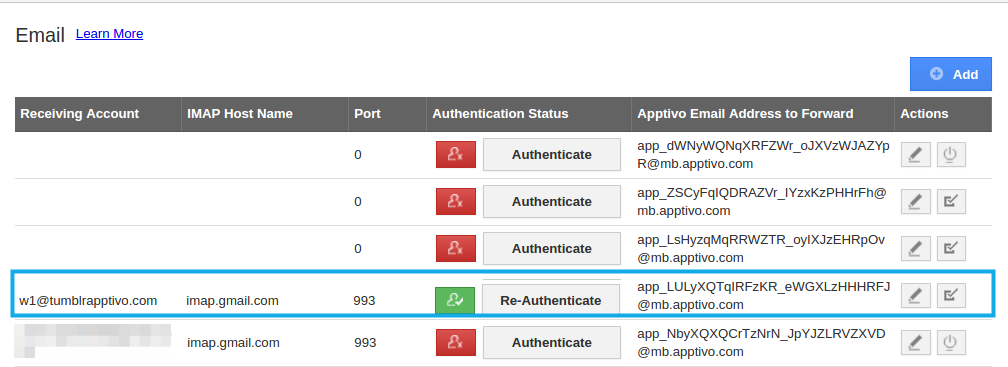
- You can update email information using the "Edit" icon if needed.
Note:
- You can also authenticate more than one email account or multiple accounts in your business firm.
- You can also send emails through the authenticated address. Read more...
- Once this CRM Gmail integration and sync is done successfully, the emails will get associated with the respective objects automatically, whenever an object (customer, contact or lead, etc.) sends an email to the authenticated email address.

