Browse by Solutions
Browse by Solutions
How can I give permissions to save the custom view in Leads App?
Updated on May 4, 2017 05:33AM by Admin
As a small business entrepreneur, you would have a specific reason to create a customized view in Apptivo Leads App. If you want to use this view over and over again, its always wise to save the view.
You can also give access privilege to a few trustworthy members of your team to view, as well as make the necessary changes and also save those changes.
The users who have privilege for saving preferred views, can use “Save As View" option in Apptivo Leads App.
Follow these steps to save the customized view you have created.
Steps to give user permission to save the custom view in Leads app
- Log in and access “Leads App” from your universal navigation menu bar.
- Click on “More” icon and select “Settings” located at the app header bar.

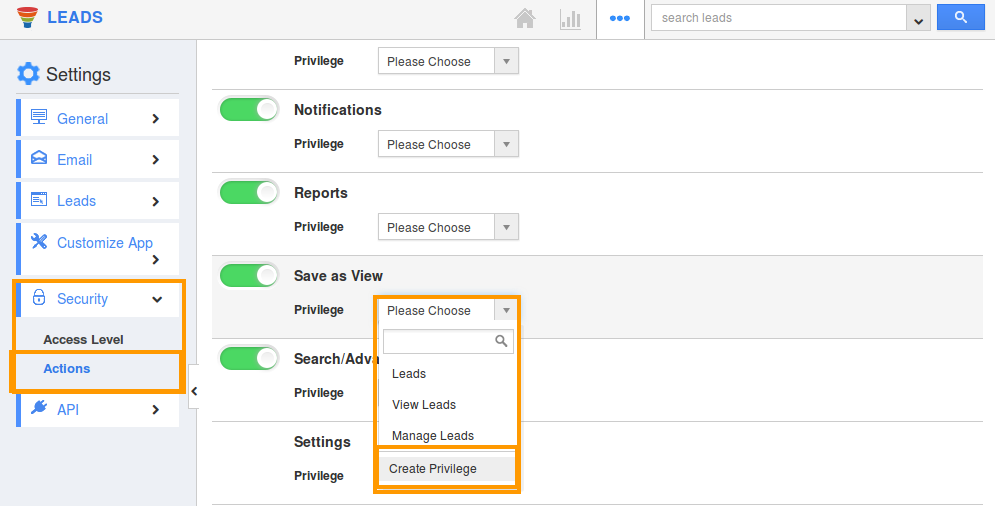
- Click on “Actions” from security drop down list on the left navigation panel.
- Locate the “Save As View” option from “App” section and click on privileges drop down.

- Click "Create privilege" option found at the bottom of the privilege drop down list.
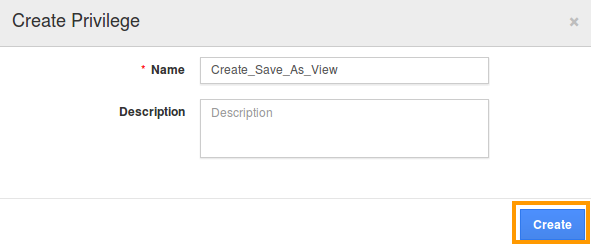
- Create privilege pop up appears. Enter the name and description of the new privilege that you want to add against the “Save As View” option.

- Click on "Create" button.
- After creating the privilege go to Employees App to give access to certain trustworthy employees.
- Now, employee James William has the privilege to save the view for a Lead. When James William logs in, the “Save As View” button will be visible as shown in the image below:

Flag Question
Please explain why you are flagging this content (spam, duplicate question, inappropriate language, etc):

