Browse by Solutions
Browse by Solutions
How do I set Default Value for the Text Area in CRM Apps?
Updated on September 2, 2016 12:39AM by Admin
Default value is one of the field properties in Master Layout. This feature allows you to define the default text in the Text Area field which can be modified/updated in the create/overview page of the CRM apps.
- Log in and access Leads App from universal navigation menu bar.
- Click on More(...) icon -> Settings -> Customize App -> Master Layout.
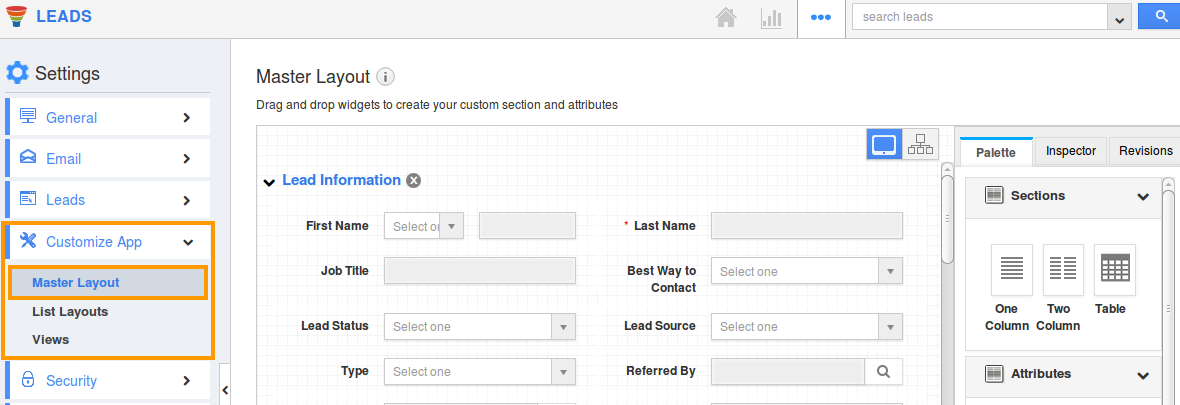
- Click on text area field to set default value. For Instance : Notes to leads
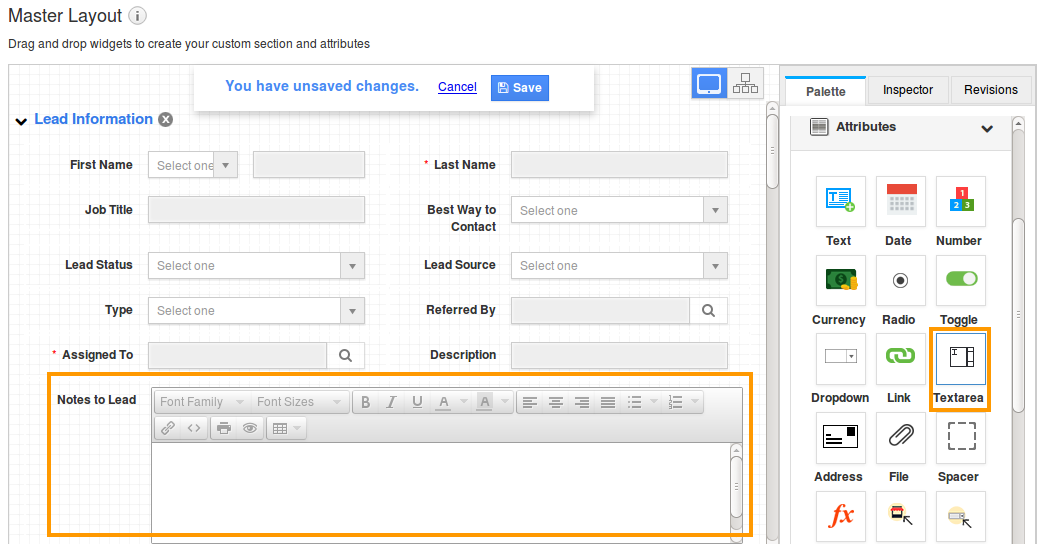
- You will view the inspector column at the right side in which you would find the field properties.
- Define the default text for that field to be shown in "Default value" properties under "Standard Behaviour" section.
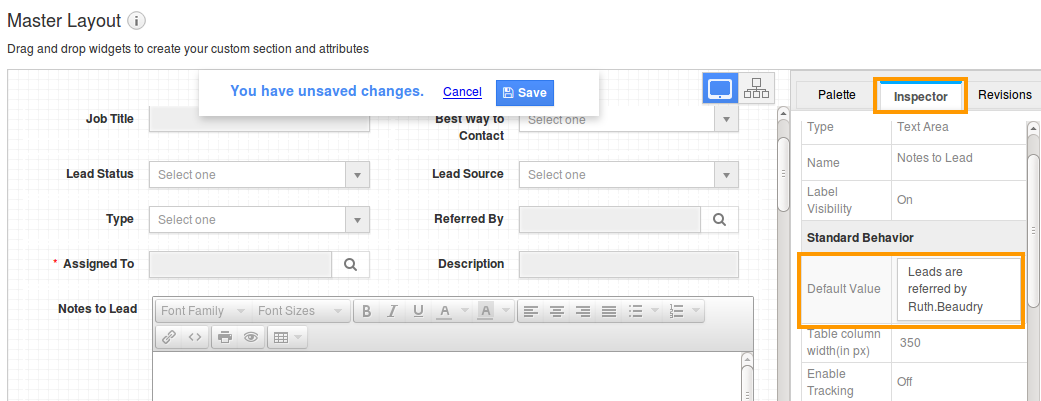
- Click on "Save" option.
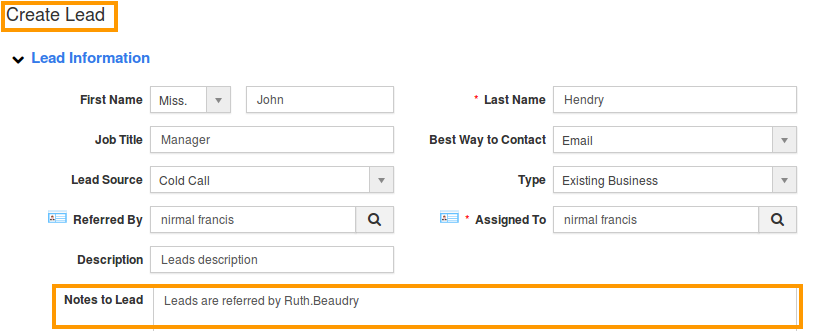
- Now you can view the default text in “Notes to lead” field while creating a new lead and also it will be viewed in overview page.
- Log in and access Opportunities App from universal navigation menu bar.
- Click on More(...) icon -> Settings -> Customize App -> Master Layout.

- Click on text area field to set default value. For Instance : Description
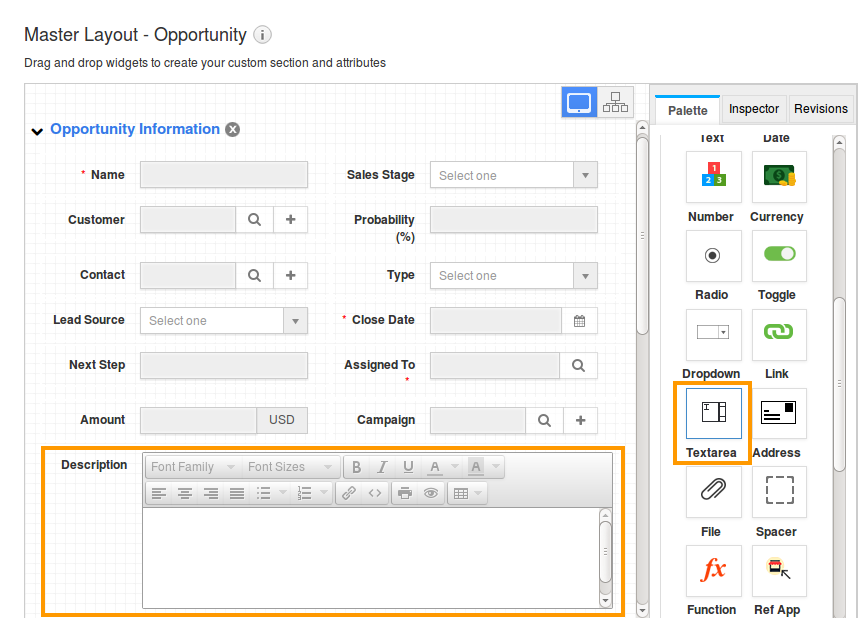
- You will view the inspector column at the right side in which you would find the field properties.
- Define the default text for that field to be shown in "Default value" properties under "Standard Behaviour" section.
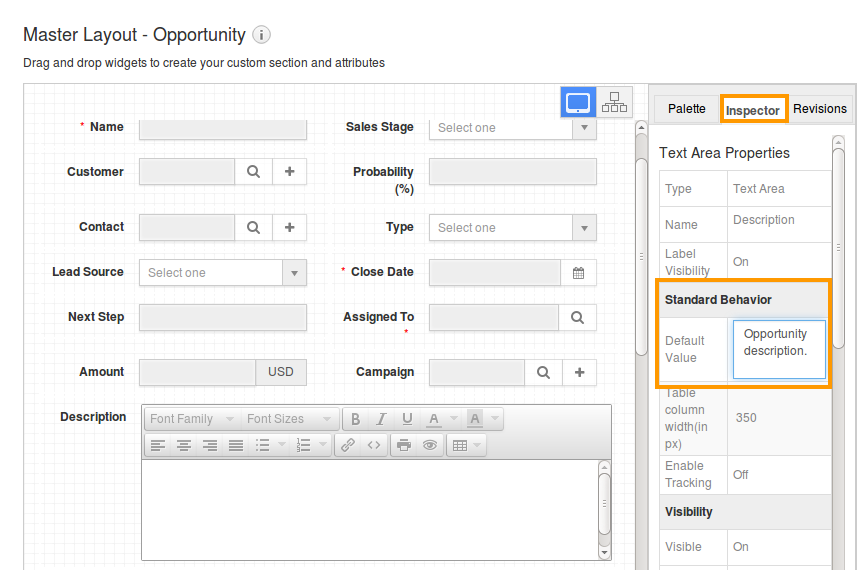
- Click on "Save" option.
- Now you can view the default text in description field while creating a new opportunity and also it will be viewed in overview page.
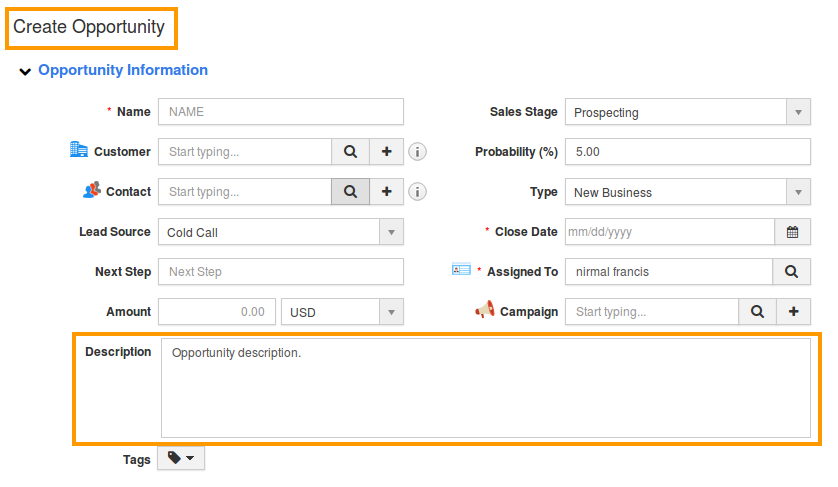
- Log in and access Customers App from universal navigation menu bar.
- Click on More(...) icon -> Settings -> Customize App -> Master Layouts.
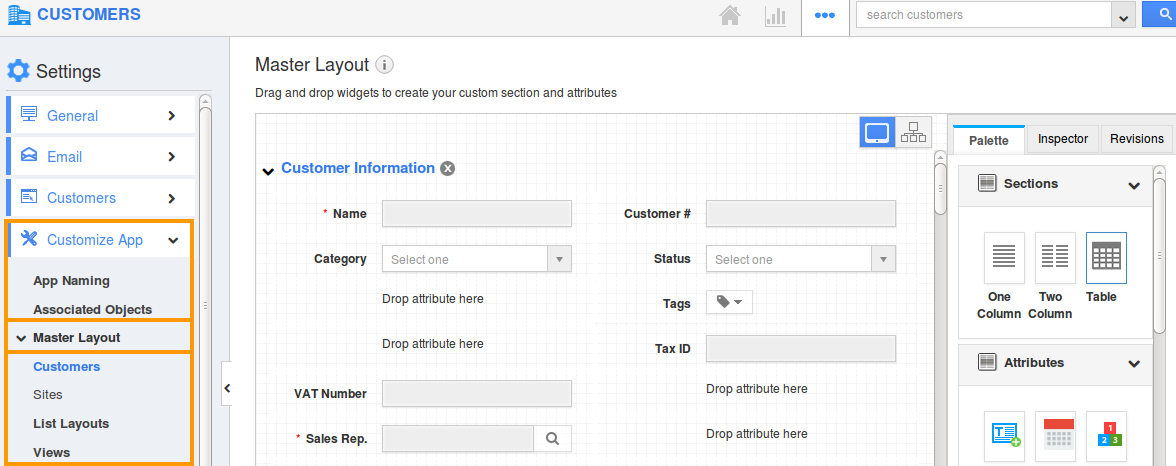
- Click on text area field to set default value. For Instance : Description field
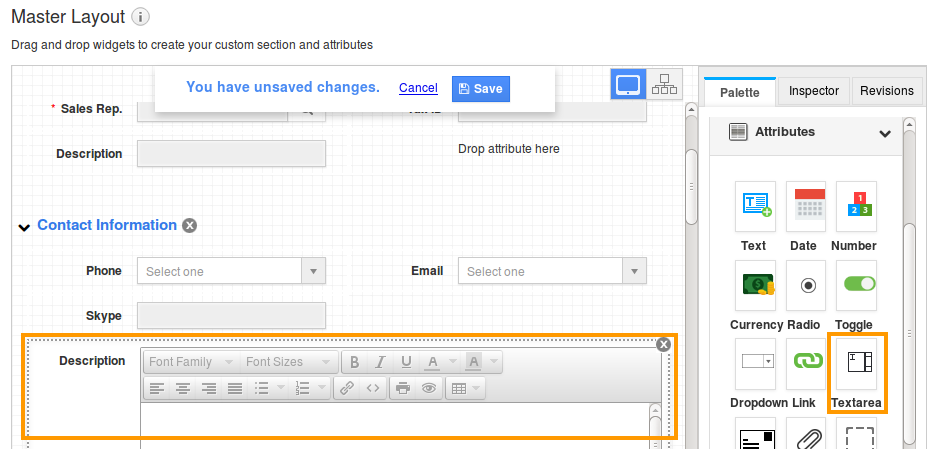
- You will view the inspector column at the right side in which you would find the field properties.
- Define the default text for that field to be shown in "Default value" properties under "Standard Behaviour" section.

- Click on "Save" option.
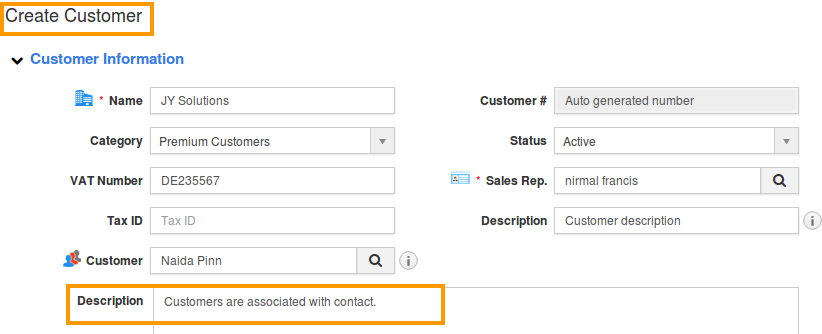
- Now you can view the default text in description field while creating a new customer and also it will be viewed in overview page.
- Log in and access Contacts App from universal navigation menu bar.
- Click on More(...) icon -> Settings -> Customize App -> Master Layout.
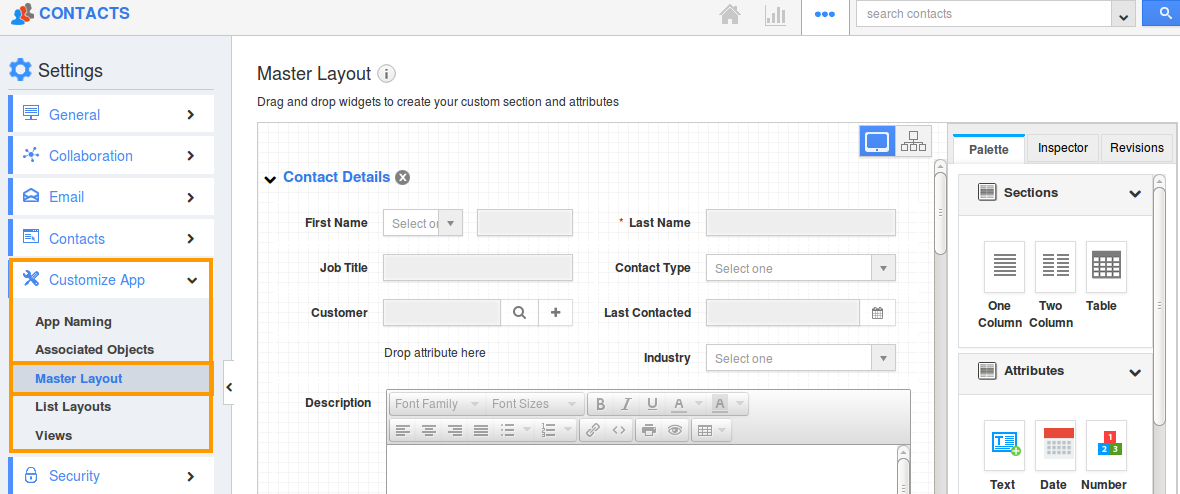
- Click on text area field to set default value. For Instance: Description
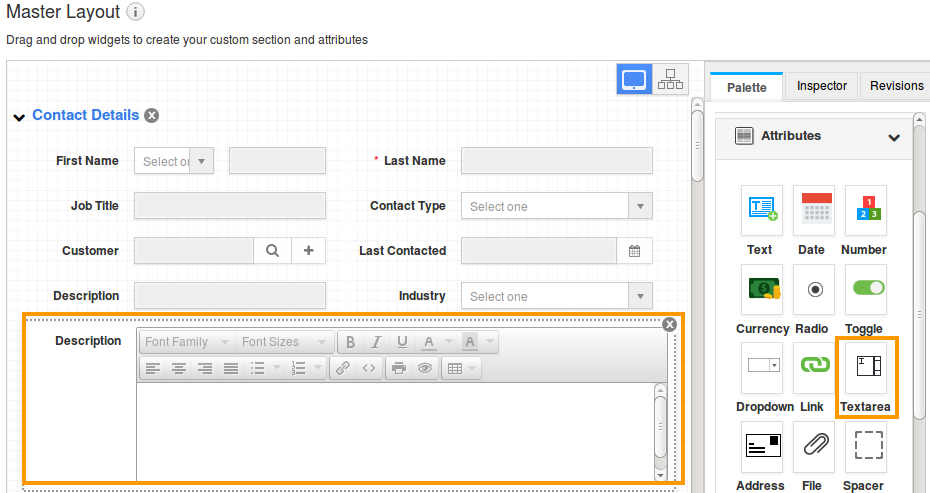
- You will view the inspector column at the right side in which you would find the field properties.
- Define the default text for that field to be shown in "Default value" properties under "Standard Behaviour" section.
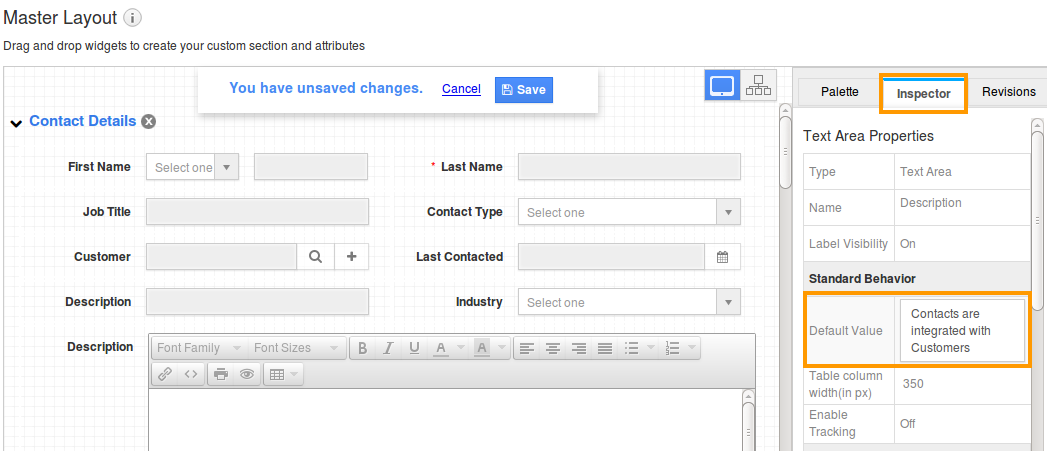
- Click on "Save" option.
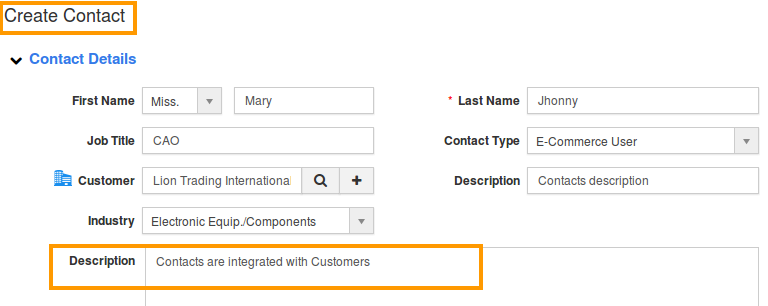
- Now you can view the default text in description field while creating a new contacts and also it will be viewed in overview page.
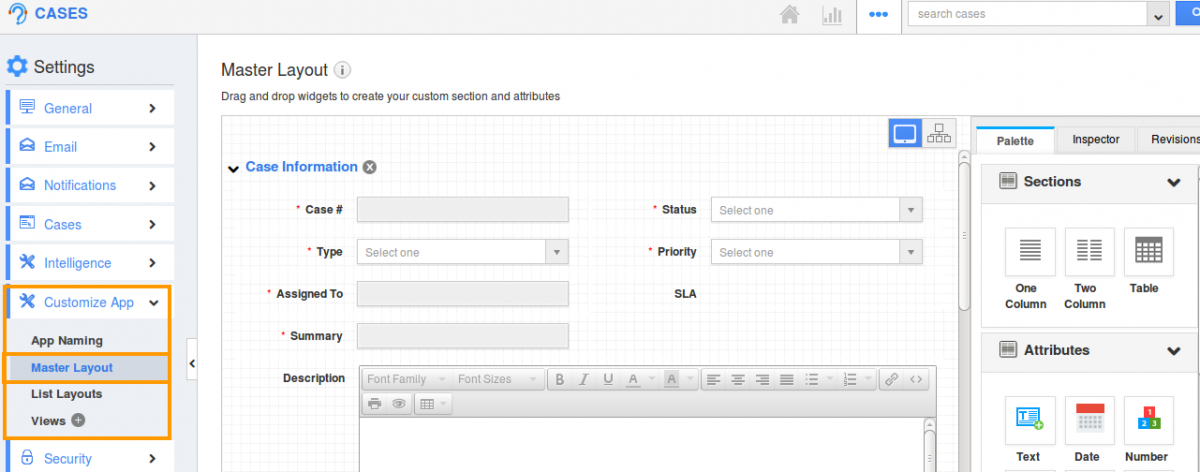
- Log in and access Cases App from universal navigation menu bar.
- Click on More(...) icon -> Settings -> Customize App -> Master Layout.
- Click on text area field to set default value. For Instance : Follow Up Description field

- You will view the inspector column at the right side in which you would find the field properties.
- Define the default text for that field to be shown in "Default value" properties under "Standard Behavior" section.
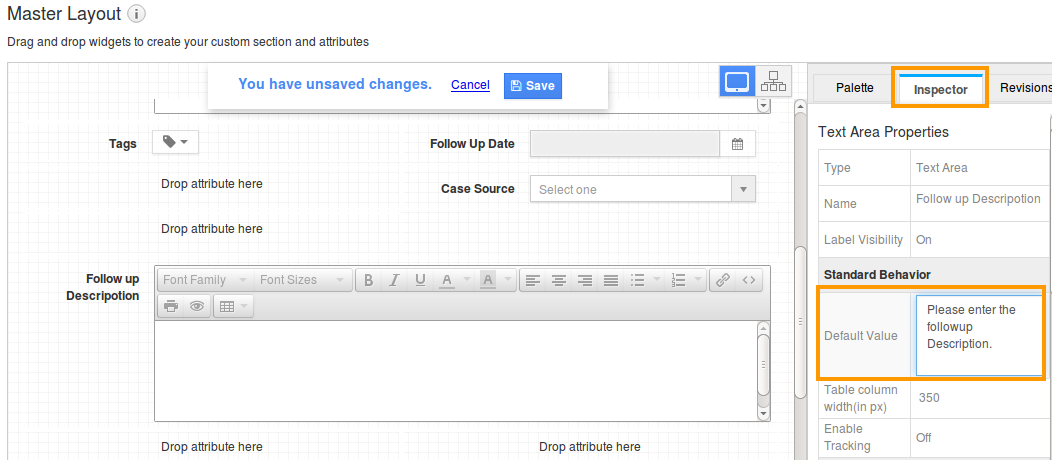
- Click on "Save" option
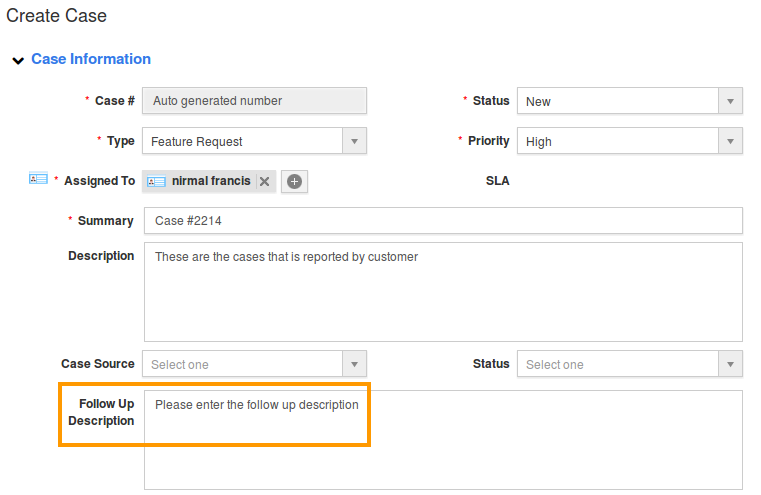
- Now you can view the default text in follow up description field while creating a new cases and also it will be viewed in overview page.
Flag Question
Please explain why you are flagging this content (spam, duplicate question, inappropriate language, etc):

