Browse by Solutions
Browse by Solutions
How to Set Time Based Triggers in Leads App?
Updated on May 2, 2017 03:34AM by Admin
There are times when you would want to perform an action many number of times or just once where you have to update a database when certain criteria is met. Instead of doing it manually each time, you can automate the action when certain criteria is fulfilled. This process is known as Trigger.
Apptivo Leads App has an option called Triggers that allows the user to perform automated actions such as triggering an email or updating an attribute when certain criteria is met.
With Apptivo Leads App you can set three types of triggers
Let's take a quick look at how to set Time Based Triggers In Apptivo Lead App.
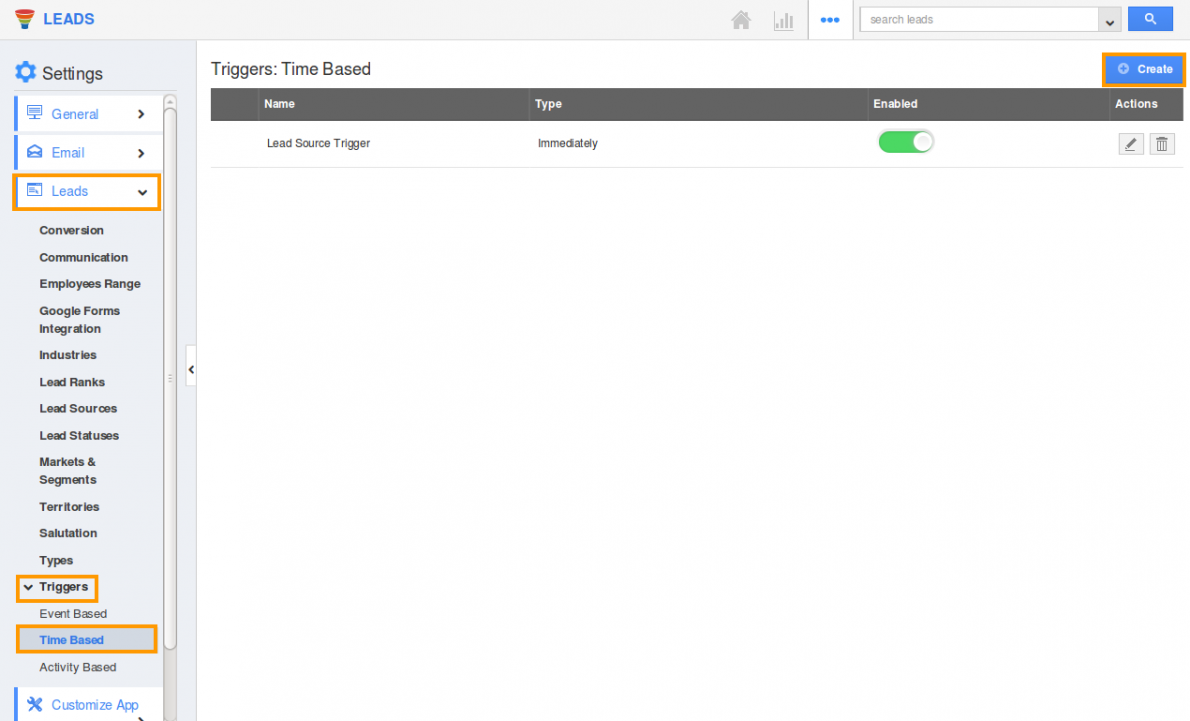
In the Create page you should enter the following details in their respective fields.
Name: Name of the time based trigger.
Enabled: The trigger created can be enabled or disabled using the toggle button.
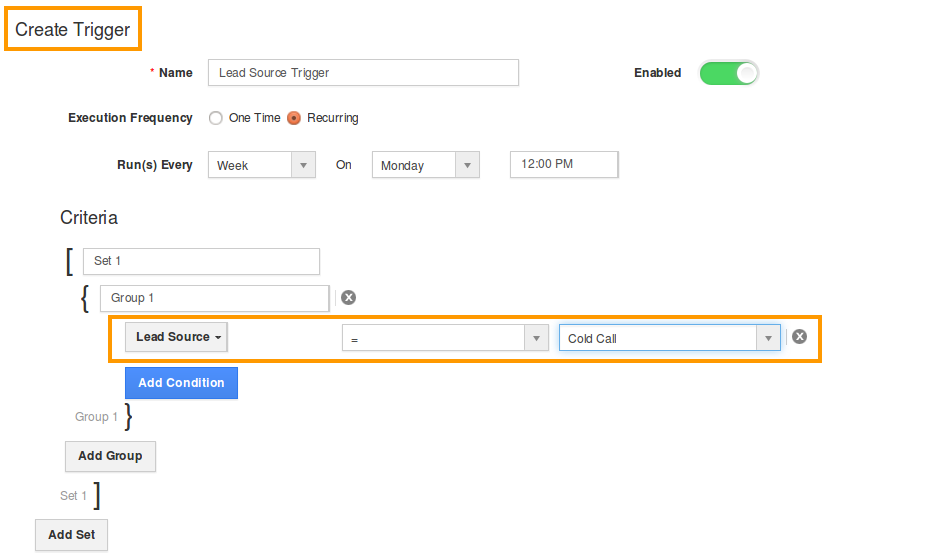
Execution Frequency: The frequency of execution can be set as One-Time or Recurring. This is as per your current requirement.
Run On: You can choose a date and time when you want the Time Based trigger to occur.
Criteria - Define the criteria for the trigger by selecting attributes and inserting equivalent values.
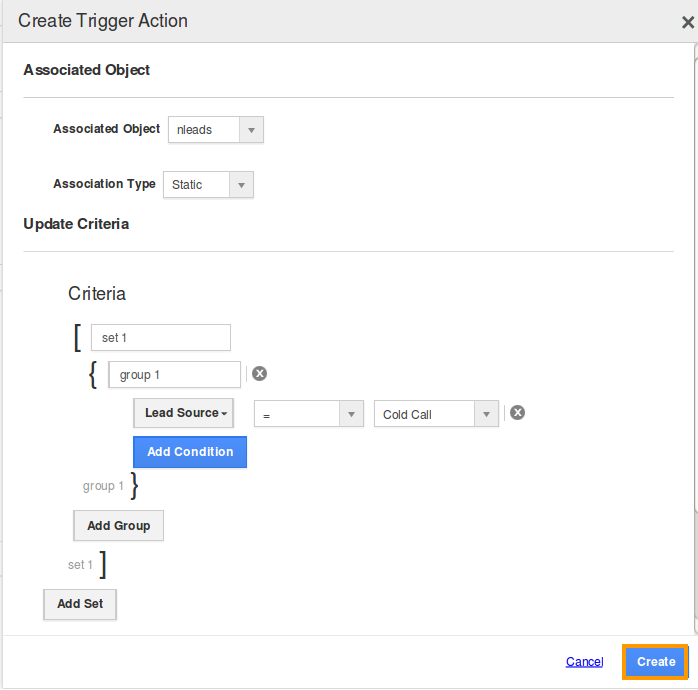
The following example will give you a clear picture about how the criteria and action works. Here the criteria is set for Recurring Trigger. Have a look.
{
Set 1
{
Group 1
{
Lead Source = Cold Call
}
}
}
The image below will make the concept clearer for you.


Apptivo Leads App has an option called Triggers that allows the user to perform automated actions such as triggering an email or updating an attribute when certain criteria is met.
With Apptivo Leads App you can set three types of triggers
- Event Based
- Time Based
- Activity Based
Let's take a quick look at how to set Time Based Triggers In Apptivo Lead App.
Steps to Set Time Based Triggers in Leads App
- Log in and access Leads App from the universal navigation menu bar.
- Click on More(...) icon → Settings located at the app header bar.

- On the left navigation panel click on Leads drop down arrow.
- Select Triggers -> Time Based.

- Click on the Create button on the top right-hand of the screen.
In the Create page you should enter the following details in their respective fields.
Name: Name of the time based trigger.
Enabled: The trigger created can be enabled or disabled using the toggle button.
Execution Frequency: The frequency of execution can be set as One-Time or Recurring. This is as per your current requirement.
Run On: You can choose a date and time when you want the Time Based trigger to occur.
Criteria - Define the criteria for the trigger by selecting attributes and inserting equivalent values.
The following example will give you a clear picture about how the criteria and action works. Here the criteria is set for Recurring Trigger. Have a look.
{
Set 1
{
Group 1
{
Lead Source = Cold Call
}
}
}
The image below will make the concept clearer for you.

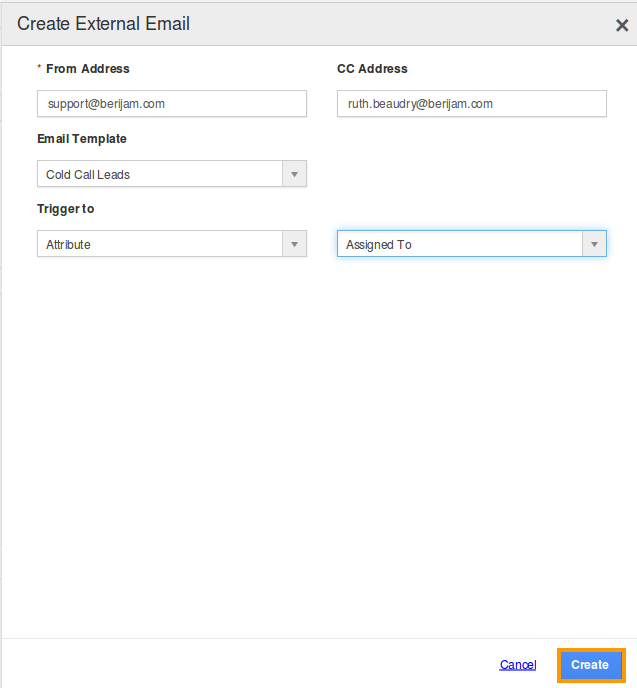
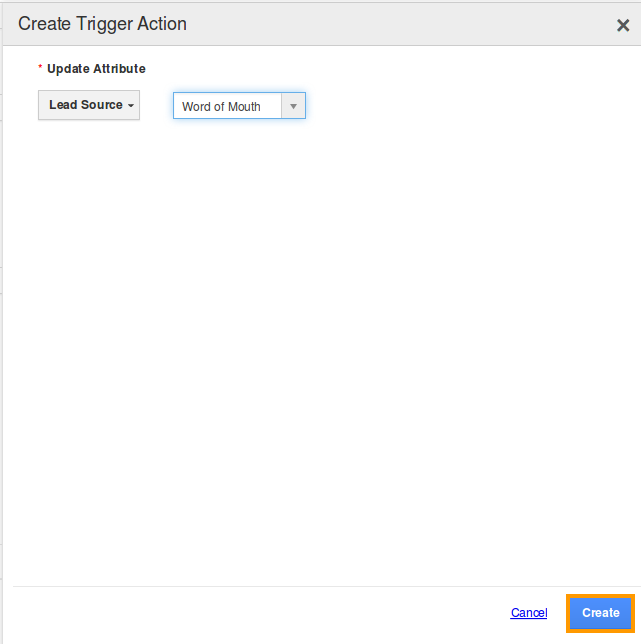
Action - Here you define the action that is to be triggered for the above mentioned criteria. On the right-hand side, you will find the Add button, when clicked will display the types of action.
- Send Email - An email will be triggered when the criteria is met.

- Update Attribute - This action updates the attribute value based on the criteria.

- Update Associated Object Attributes - This action updates the attribute values of the associated attributes.


-
Create Button - Once you have completed entering the values for the Action, click on the create button. This sets the action for the Time Based Trigger. As per the example, a Recurring Trigger is created that is set to run on every Monday. According to the criteria set, an email will be triggered off to a concerned employee when leads are created via Cold Call.


Flag Question
Please explain why you are flagging this content (spam, duplicate question, inappropriate language, etc):

