Browse by Solutions
Browse by Solutions
How do I Allow Users to Select their Preferred Timesheets Columns (fields)?
Updated on November 30, 2016 04:25AM by Admin
Customizing the Timesheets list layouts you can view the fields of your preferred choice in table format. In order to save your custom columns, your account requires the premium or enterprise plans.
Timesheets List layouts are used for displaying client particular information according to your business requirements.
Steps to Customize Timesheets List Layouts:
- Log in and access Timesheets App from your universal navigation menu bar.

- Click on “ More ”
 icon and select “ Settings ”
  located at the app header bar.
- Select “ List Layout ” under " Customize App " drop down located at the left navigation panel.

- The new column set can be added using “ Create ” button. Click on it and customize the column set with your preferred fields.
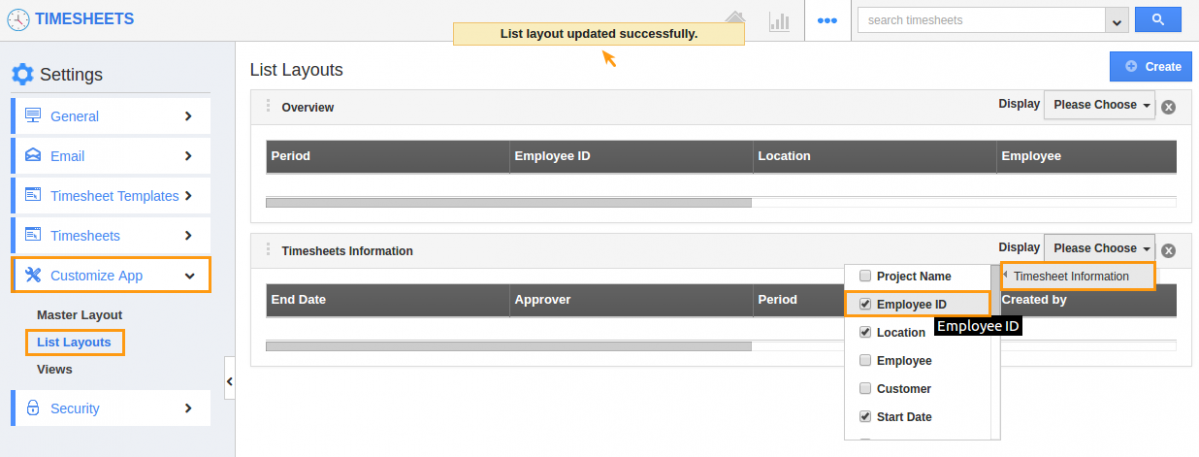
- Choose fields from “ Display ” drop down. For instance: We have created “ Timesheet Information ” column set, added “ ID ”, “Start Date”, “ Status ”, “ Created By ” fields as shown in the image below:

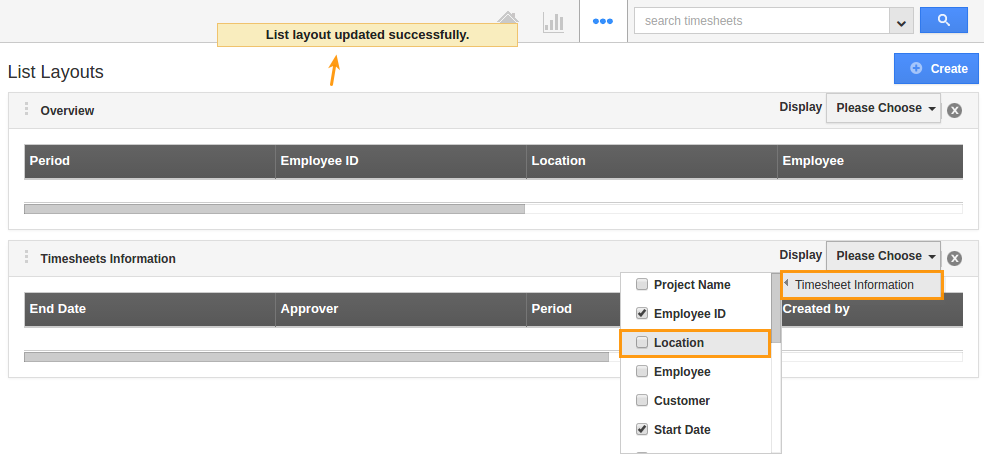
- The fields or columns can be removed from the Timesheets list layouts by unchecking the field from selection, if needed as shown in the image below:

View Timesheets by List Layouts
- After customization, go to Timesheets app dashboard. Click on Show All from left navigation panel. Click on Display drop-down, and select Timesheets Information. You can view the result as shown in the image below:

Related Links
Flag Question
Please explain why you are flagging this content (spam, duplicate question, inappropriate language, etc):

