Browse by Solutions
Browse by Solutions
How do I Set Up Custom Views in Targets App?
Updated on January 26, 2017 10:40PM by Admin
A custom view is a feature that allows you to search & filter a list of targets, then select the columns you want and save a shortcut for later. This view feature is standard, but the views can filter & display any custom fields that you configure for your business.
If you want to view more targets information, you need to select fields from “Display” field. You can save our custom view of targets information for your future reference in “My Views”.
Steps to Create My Views in Targets App
- Log in and access Targets App from your universal navigation menu bar.

- Click on the "Advanced search" down arrow in the simple search field at the app header bar.

- Click on "Search" icon at the bottom. For instance: Search for targets that are assigned to "Katie Dustin" by selecting "Assigned To" field as "Katie Dustin".

- You can view the search results as shown in the image below:

- Click on “Overview” drop down in "Display" field and select fields you would like to view in a table format.

- Click on “Save as View” blue button.
- You can view "Save as view" pop up and specify:
- View Name – Name of the view.
- Share With Other Users – Toggle “ON” to share views with others. If needed.

- Click on “Save” button.
Steps to View the Custom Fields
- Click on "My Views" from the left navigation panel on Targets dashboard.
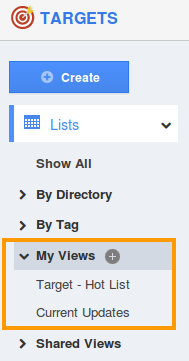
- You can view the created views, as shown in the image below:

- We have created a view in the name of "Targets - Hot List".
Related Links
Flag Question
Please explain why you are flagging this content (spam, duplicate question, inappropriate language, etc):

