Browse by Solutions
Browse by Solutions
How do I Create Custom Attributes in the License Tracker App?
Updated on June 5, 2017 04:42AM by Admin
Master Layout allows you to customize the attributes accordingly by adding a required custom field which are provided in the creation page by default.
For Instance: An Employee(Andrea) required to add a new custom field “File” attribute in master layout. Then the below steps to be followed.
Steps to Customize Master Layouts.
- Go to “License Tracker App” from your universal navigation menu bar.
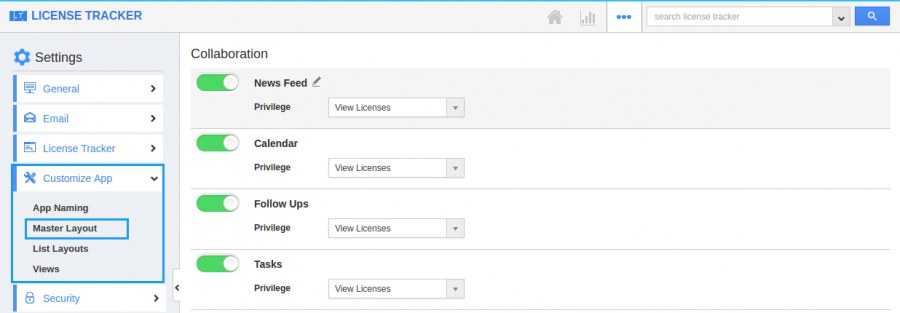
- Click on “More(...)” icon and Select “Settings”.

- Click on “Customize App” and select “Master Layouts”.

- Now you can view the custom attributes with a following fields.
- Sections: Click on “One Column” or “Two Column” section to create custom sections.
- Attributes: Drag and drop attributes in sections.
- Text - Text field for entering text values.
- Date - Date field for choosing date.
- Number - Number field for entering number.
- Currency - Currency field for entering currency values.
- Radio - Radio fields for opting the values.
- File - Browsing and Inserting files.
- Toggle - Toggle field for choosing multiple values.
- Drop down - Drop down field for choosing a specific value from a list.
- Link - Link field for entering URL’s.
- Textarea - Textarea field is to add any kind of text formats and alignments that helps user to store a descriptive data.
- Address - Address has a set of default fields such as Address type, Address Line 1, Address Line 2, City, State, Zipcode, Country.
- File - File field is used for attaching documents or notes.
- Spacer - Spacer field is to add space between two fields if required.
- Link - Link field for entering URL’s.
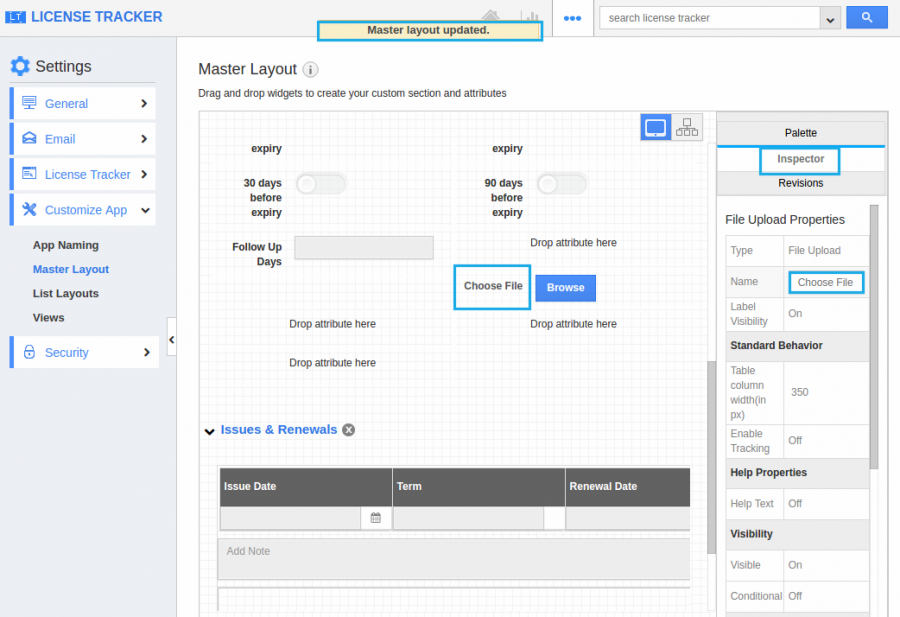
- Drag and drop the “File” attribute in the sections. Now the Inspector allows you change the attribute name as shown in the below snapshot.

Related Links
Flag Question
Please explain why you are flagging this content (spam, duplicate question, inappropriate language, etc):

