Browse by Solutions
Browse by Solutions
How do I Import Customers, Contacts, Leads, and Opportunities from a CSV?
Updated on September 23, 2019 07:34AM by Admin
Importing data from CSV is a feature that is available in Apptivo Apps such as Contacts, Customers, Opportunities, and Leads. This feature allows you to import mass information into the system. Although it takes little effort to learn, each of these applications will work the same.
For example, we'll use the Leads App. The same process will apply all other apps. Let's quickly go through the steps.
Steps to Import Leads
- Log in and access Leads App from your universal navigation menu bar.
- Click on the "More"
 icon and select the “Import” icon located at the app header bar.

- Click on "New Import" button.

- Click on "Browse" button and select CSV file from your computer and click on "Next."

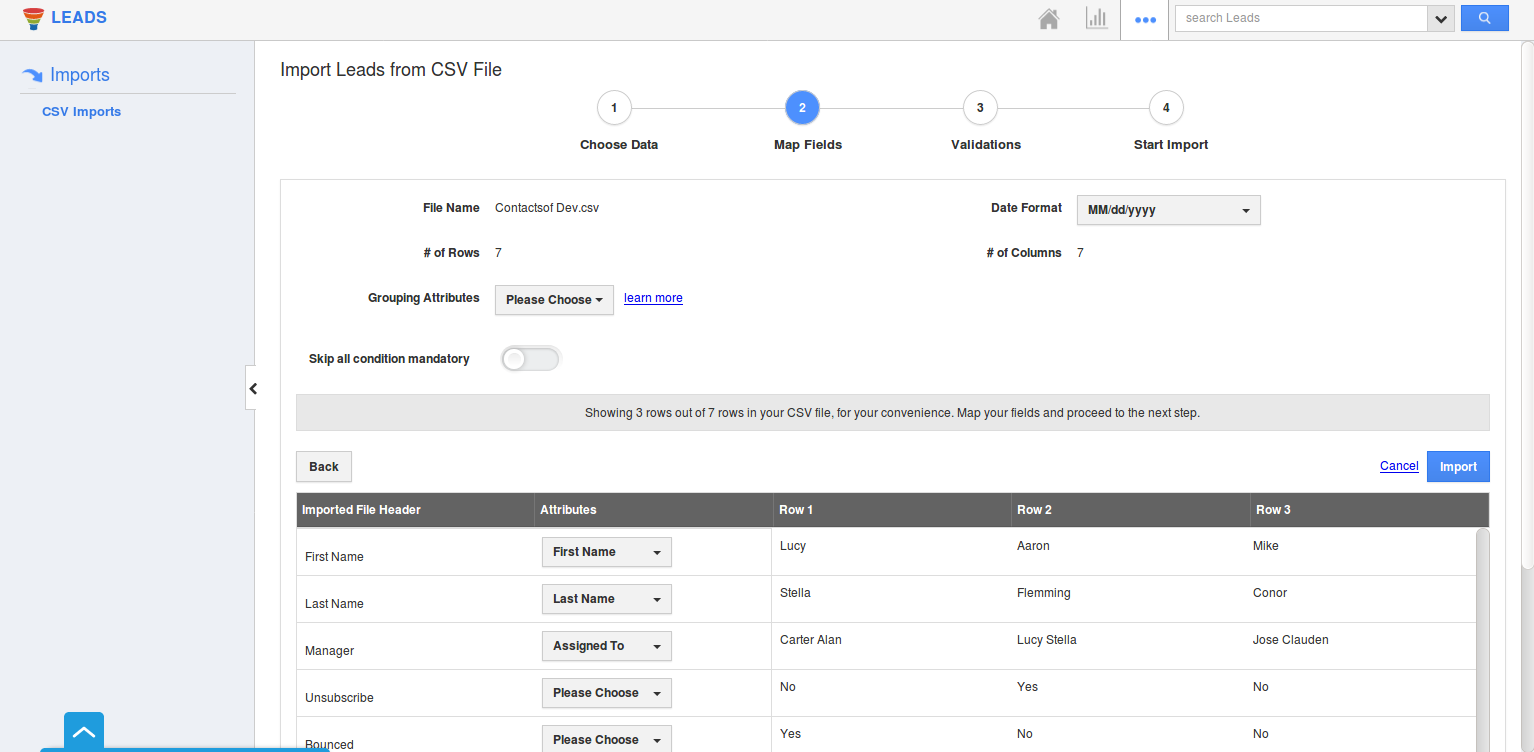
- Map customer fields to respective CSV fields, as shown in the below instance. Make sure to map the mandatory custom fields.
- After mapping, all fields, as shown in the below instance, hit the "Import" button to import records.
- You can view warning popup which alerts you for mapping standard fields such as territory, market, etc.
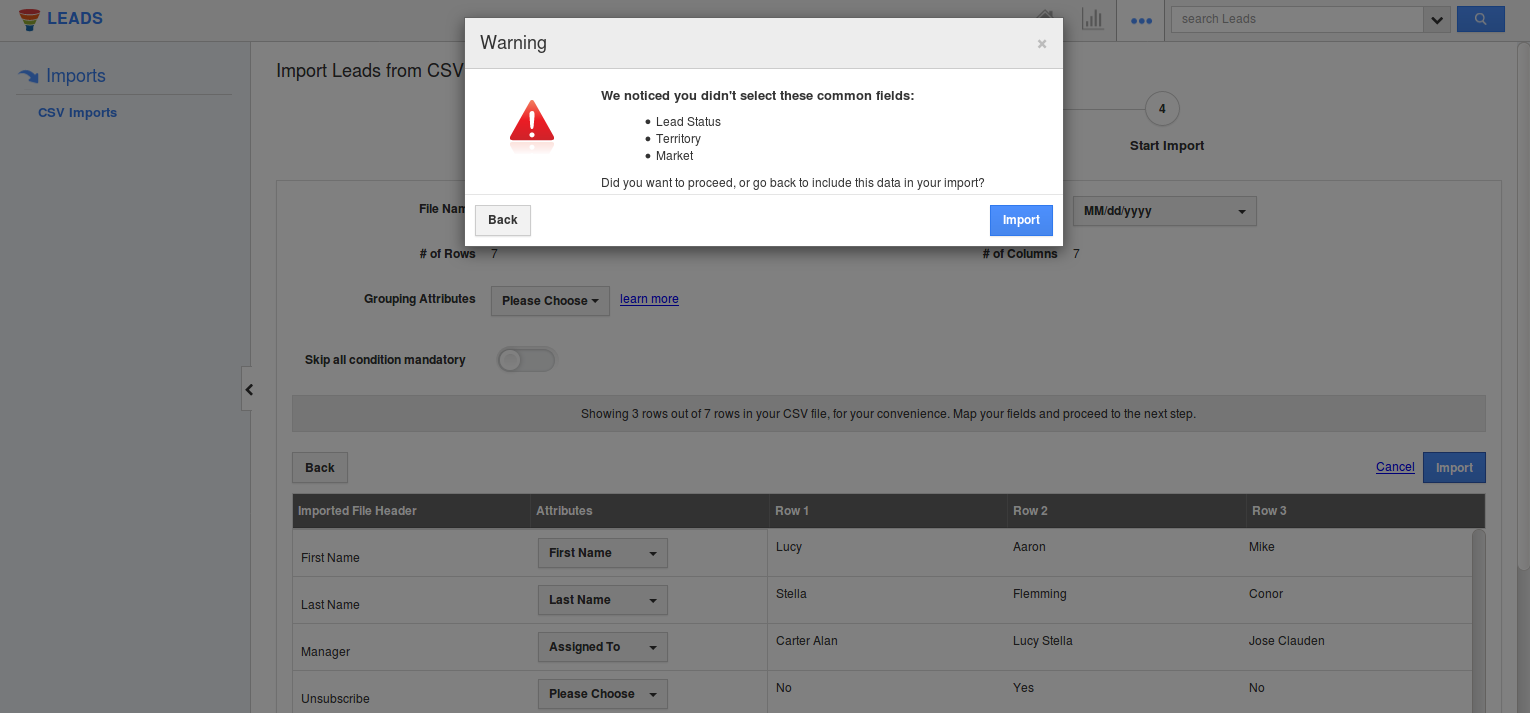
- In case of mandatory fields not having values, they are added to exceptions. If error records are added to exceptions, they will be ignored and available for download later.
- You can enable the toggle to skip all the conditional mandatory fields, the warning pop-up will not appear.
Note: You can skip the mandatory option only for conditional mandatory fields and not for standard or custom mandatory fields.
- If you want to continue, click on "Add to exceptions and proceed" button or click on the "Back" button, to include mandatory fields.
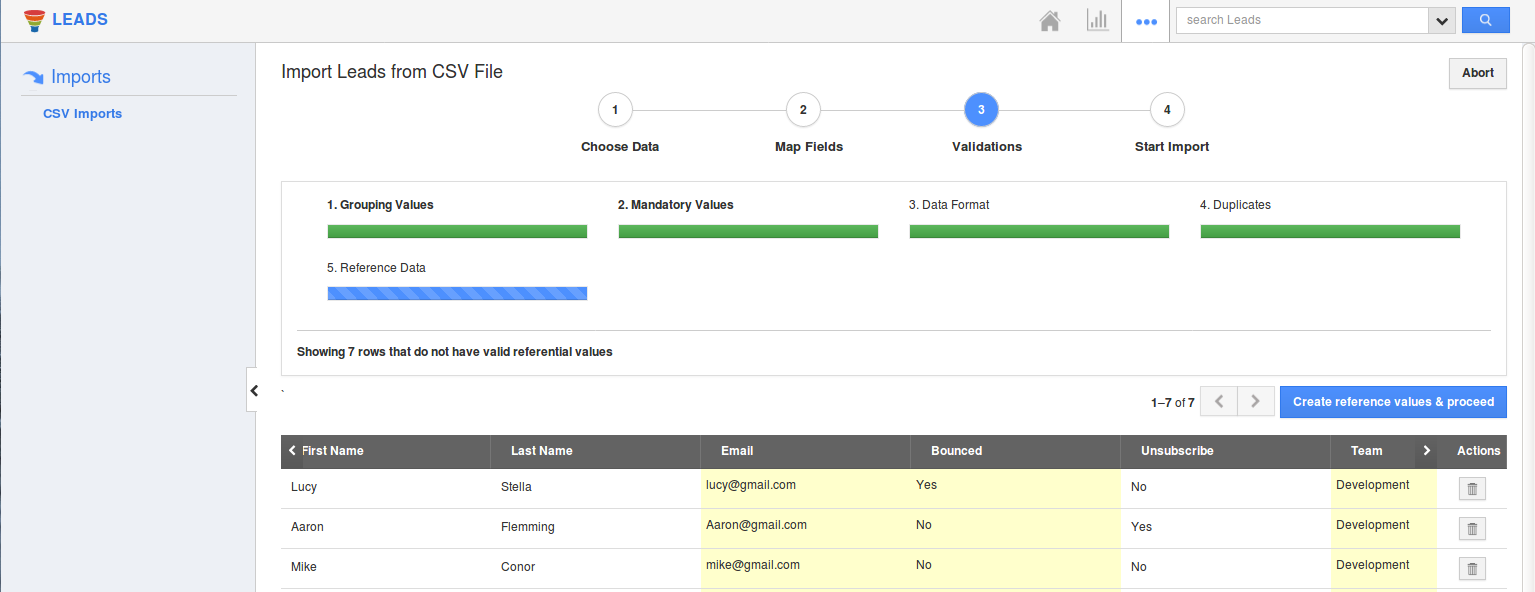
- There are four validations to do import:
- Mandatory Values - Validates mandatory value association.
- Data Format – Validates data format issues in CSV.
- Duplicates – Validates duplicates in CSV.
- Reference Format – Validates the association of other objects. This will associate existing objects; if there are new objects found in CSV, you are allowed to create new objects.
- Click on the "Proceed" button for each step.
- Once the reference data completes, click on the “Proceed” button to import records. (If you want to stop the import use abort option)
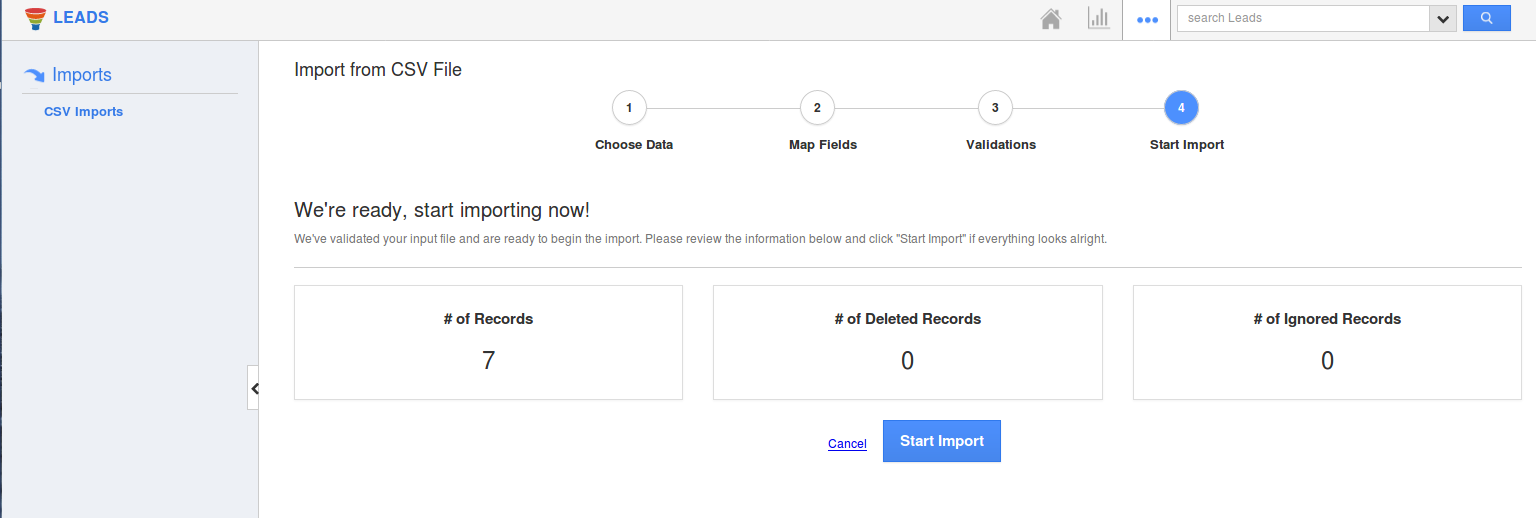
- After proceeding, the system will display the following counts:
# of Records - Total count of contact records found in a file(CSV)
# of Del Rec - Count of deleted records at the time of validating the leads
# of Ignored - Count of ignored records which are added to the exceptions at the time of mapping - Now you can view the total number of records, number of deleted records, and number of ignored records. Click on the "Start Import" button.
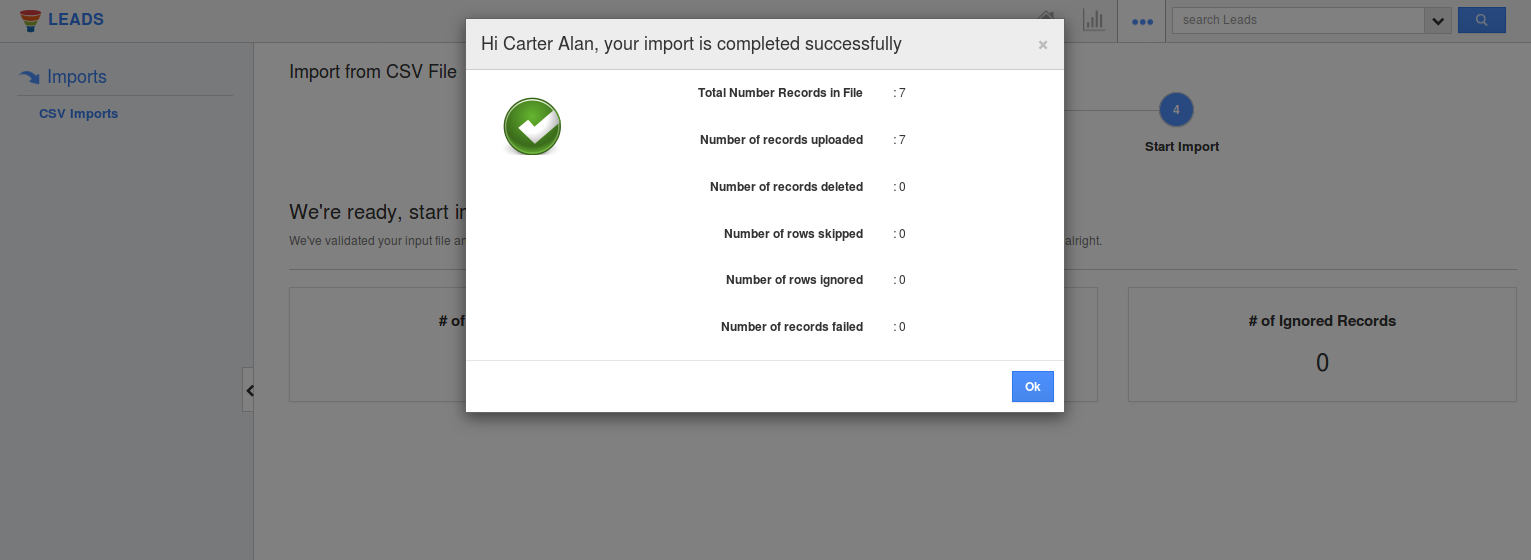
- Here we go, the import is done successfully, and the log will display the totals of imported records, failed, etc.
- The completed CSV file will be listed as shown in the image below, from where you will download the records using “Down arrow” icon found next to the columns(Total Records, Ignored Records, Failed Records)

- You can view the number of successful records imported, failed records and ignored records which can be downloaded as a separate CSV file for later import.
Note:
You can also map and import the custom Ref App Fields, but cannot create Ref App field values at run time during the import. You will be notified with the following alert pop-up. (For Instance: In Contacts App taking Leads as Ref App)
The records will be imported, where you'll have to go to the specific record Overview page and enter the Ref App values manually.

