Browse by Solutions
Browse by Solutions
How do I link or associate objects together to reduce duplicate data entry?
Updated on April 30, 2020 07:10AM by Admin
Our system is designed in a manner where everything is an object in the system. This includes leads, contacts, invoices, projects, and also activities (Tasks, call logs, notes, etc...). Certain apps allow multiple associations to other objects.
Jennifer uses Apptivo to manage her business effectively. However, she wants to relate the records present in different applications across Apptivo. This is to save time and have the data neatly organized. This will also ensure that the information is not lost while interacting with the customers. So, she makes use of the association feature present in Apptivo.
For example, you can associate many contacts to a single customer, or many projects to a single customer. Some apps allow only a single association. For instance, a sales opportunity can only have a single customer (although that customer can be linked to many opportunities). We have a feature called the “360 degrees” views, which lets you see all associated objects within the system for any given object.
How many objects can I link to?
As stated above, there is no restriction for objects to be linked, but right now you can link to an object of every type like leads, customers, items, target lists, and many more.
Activities association with Object
Activities are a bit different. They can be associated freely, too many objects & object types at once. The most common activities available in Apps of Apptivo are
- 360-degree view
- Newsfeed
- Calendar
- Call logs
- Tasks
- Notes
- Documents
 |
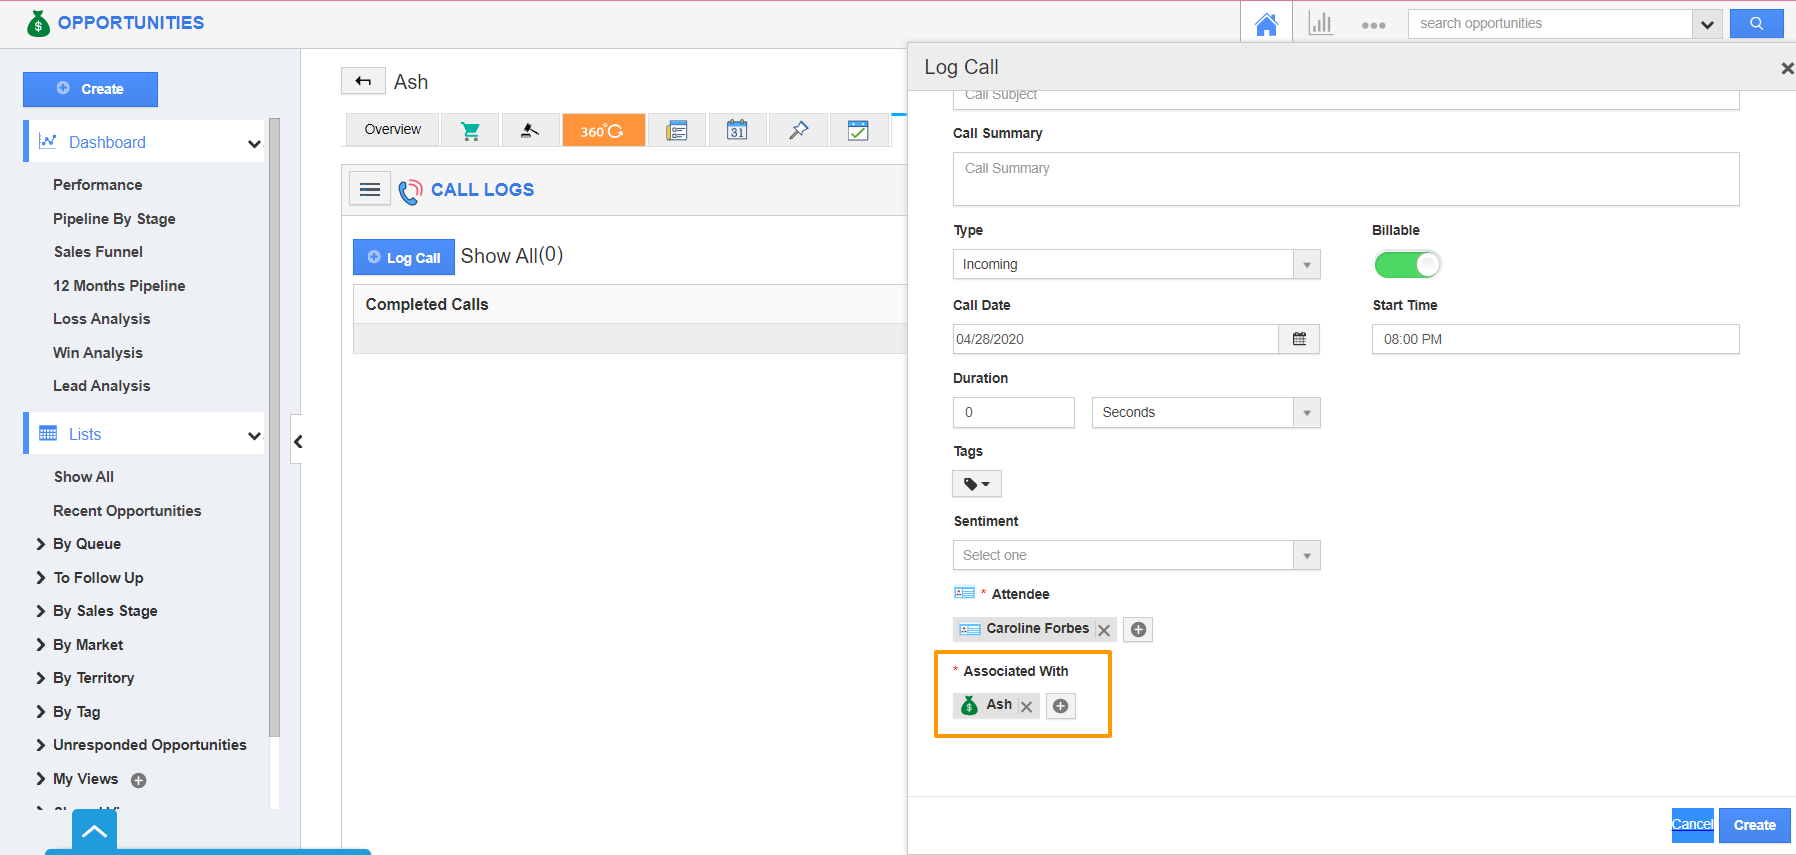
To know how these common activities work you need to make use of it. For instance, you can log calls from the call logs tab of an opportunity. But, when creating that call log, there is a section called “Associated with”. Here you’ll notice it’s associated with the current object you were viewing (the opportunity, in this case).
 |
- But, you get the option to add additional associations with the log call.
 |
- You can click Add, select “Contacts”. Then, search and select the specific contact.
 |
- Associated objects are shown as the following image:
 |
- Now call log includes the contacts selected in the “Associated with” section. Click the “Create” button, to get done with your call log.
 |
Where else are these activities available?
- Now, move to the Contacts App and select the contact which is associated with the cal log created. In the call logs tab, the log call created will be shown in a calendar view.
 |
- When you do this, it means the same call log pops up in both places, but if you edit in one place, it gets updated in the other. In this way, you can associate any number of objects within the system.

