Browse by Solutions
Browse by Solutions
How do I customize account setting in ledger app?
Updated on January 23, 2017 01:26AM by Admin
Once you've enabled the Ledger App, Click on "Ledger Settings" to identify the financial year start date.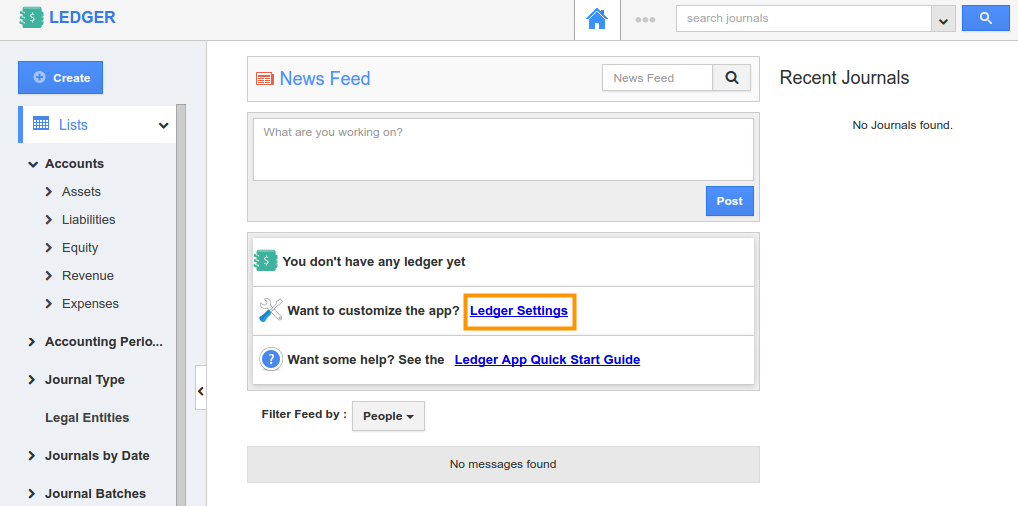
Select "Ledger" -> "Calendar" and click on "Create" button, to create fiscal year.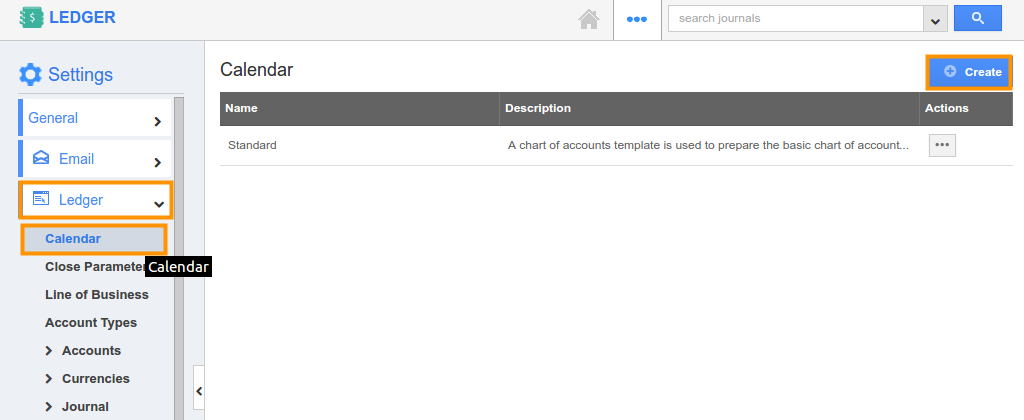
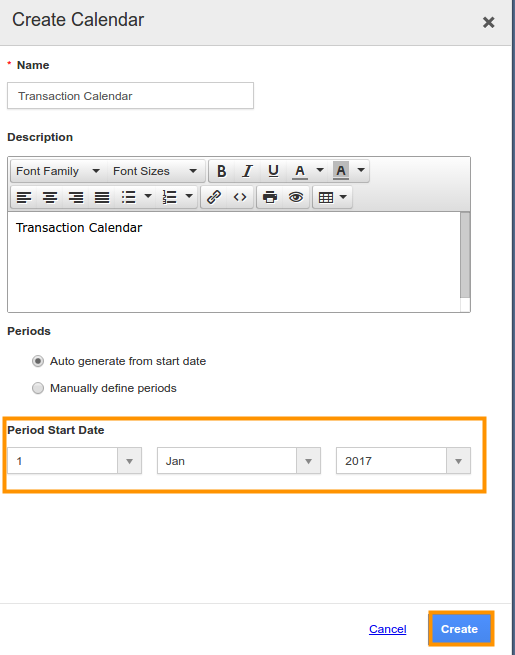
Select period from "Period Start Date" drop down and click on "Create".
There are predefined categories of accounts seeded for your convenience with complete hierarchy.
You can also create your own accounts.
How do I create a new account under a parent account?
To configure your account setting in Ledger App.
Steps to Create a New Account
- Log in and access Ledgers App from your universal navigation menu bar.
- Click on "More (...)" icon and select "Settings" located in the app header bar.

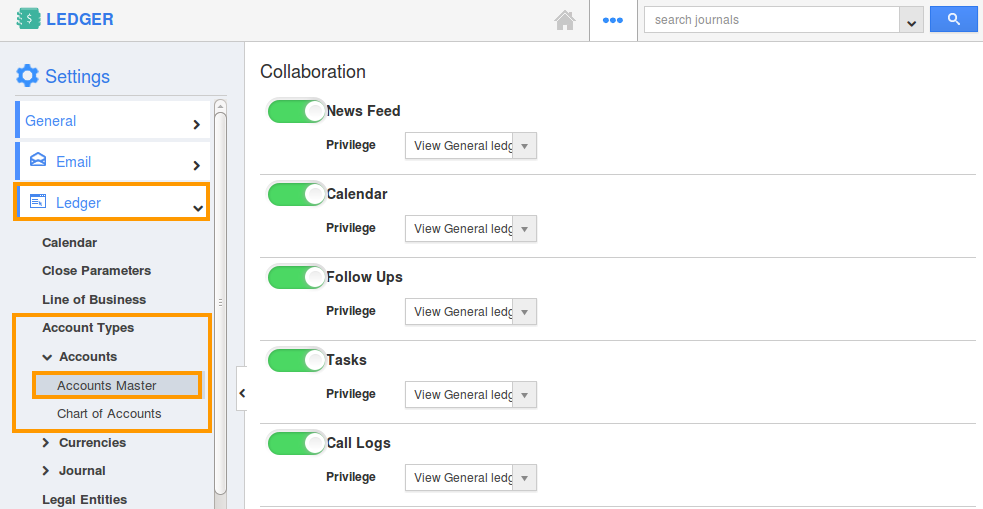
- Click on “Account Types” -> "Accounts" -> "Accounts Master" under "Ledger" drop down from the left navigation panel.
- Click on “Create” button to create a new account.
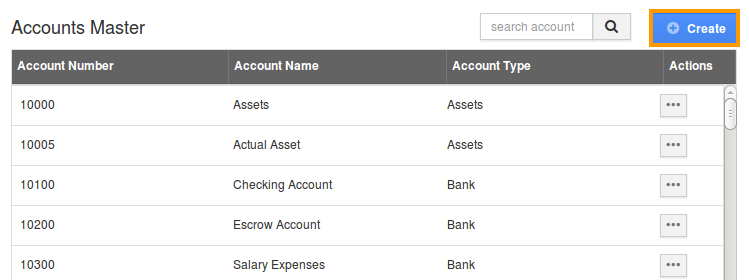
- Fill in the following details:
- Account Name – Name of the account.
- Account Number – Number of the account.
- Account Type – Type of the account. Select from a predefined list.
- Enable - Toggle it ON/OFF to make it enabled/disabled.
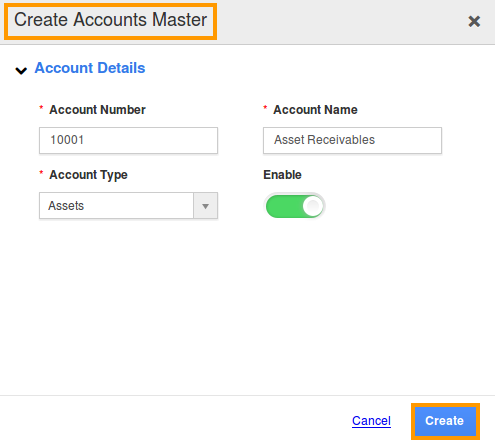
- Click on “Create” button to complete.
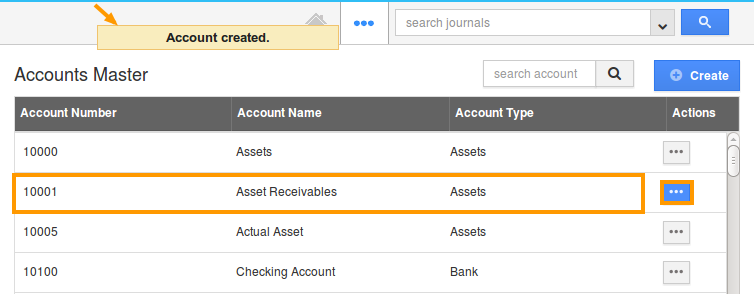
- Click on "More Details (...)" under "Actions" column to update the account.
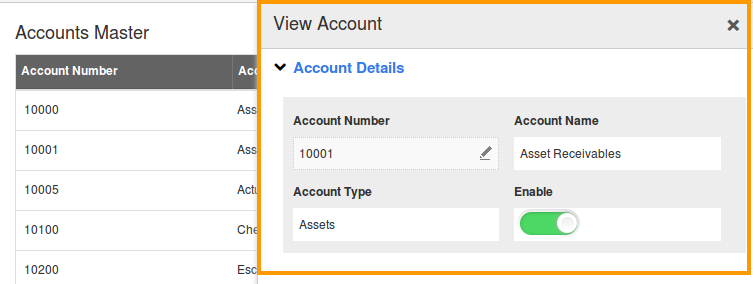
- By default, created account will be in enabled mode.
Related Links
Flag Question
Please explain why you are flagging this content (spam, duplicate question, inappropriate language, etc):

