Browse by Solutions
Browse by Solutions
How do I create a sales receipt only for my items?
Updated on July 28, 2015 11:46PM by Admin
The Sales Receipts app, although simple, is very useful for providing customer satisfaction and peace of mind. Best of all, it takes little to no effort from you to create customer receipts.
Steps to create sales receipts for items
- Log in and access Sales receipts App from your universal navigation menu bar.
- Click on “Settings” icon located at the app header bar.

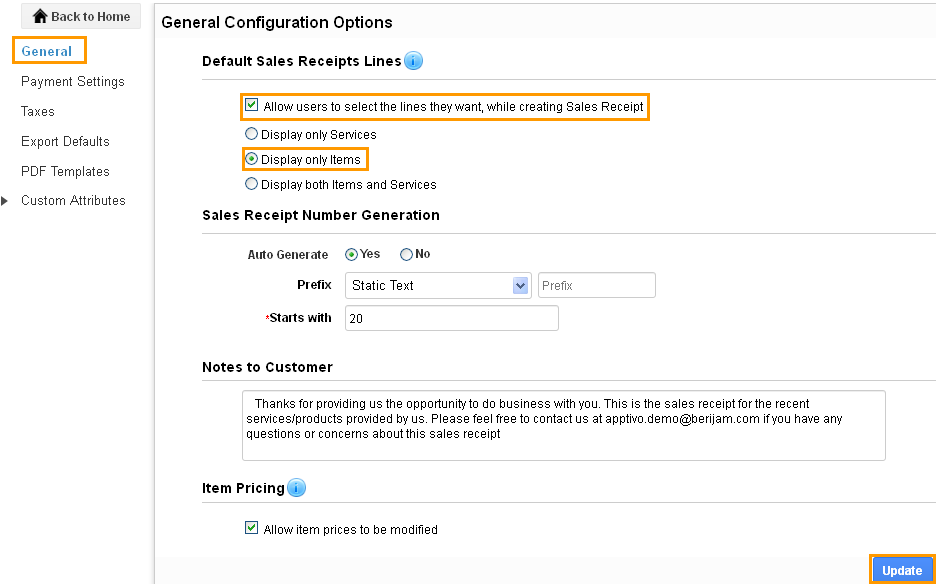
- Click on “General” from the left navigation panel.

- You can enable “Allow users to select the lines they want, while creating a Sales receipt” check box to choose your preferred sales receipt line at the time of creating a sales receipt.
- Enable “Items” to create a sales receipt with items alone.
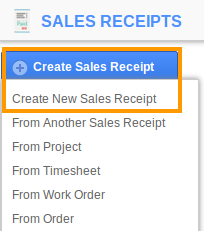
- Click on “Create Sales receipts” button from sales receipt home page.

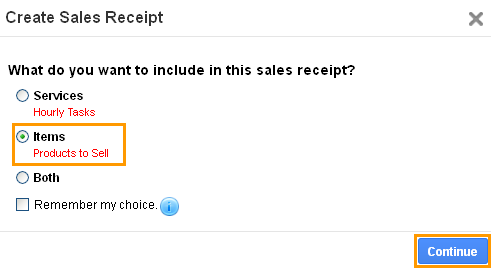
- You can view “Create Sales receipts” pop up as shown in the image below:

- Click on “Continue” button to continue creating a sales receipt.
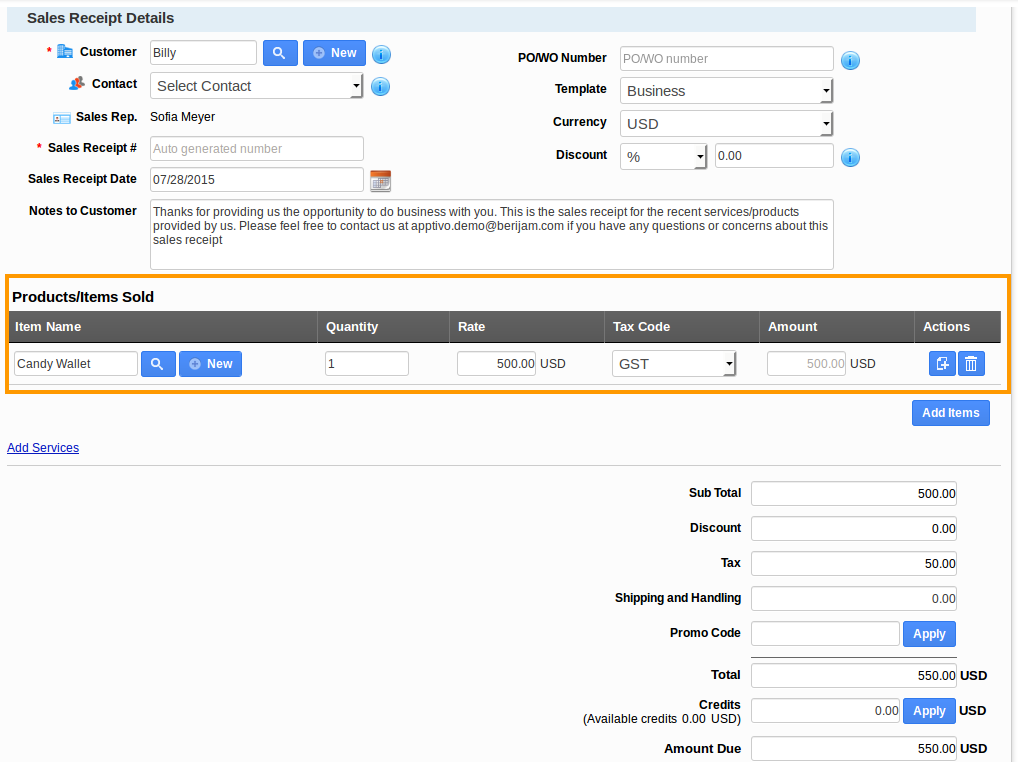
- You can view the sales receipts creation page with Products/Items as shown in the image below:

Related Links
Read more about:
Flag Question
Please explain why you are flagging this content (spam, duplicate question, inappropriate language, etc):

