Browse by Solutions
Browse by Solutions
How do I customize default invoice line in invoices app?
Updated on January 5, 2017 09:27PM by Admin
Invoices App permits to customize the default invoice lines, that is, this setting allows you to determine what type of invoices your business creates.
There are few steps that are common for customizing the default invoice lines.
Steps to Customize Default Invoice Lines
- Log in and access Invoices App from universal navigation menu bar.
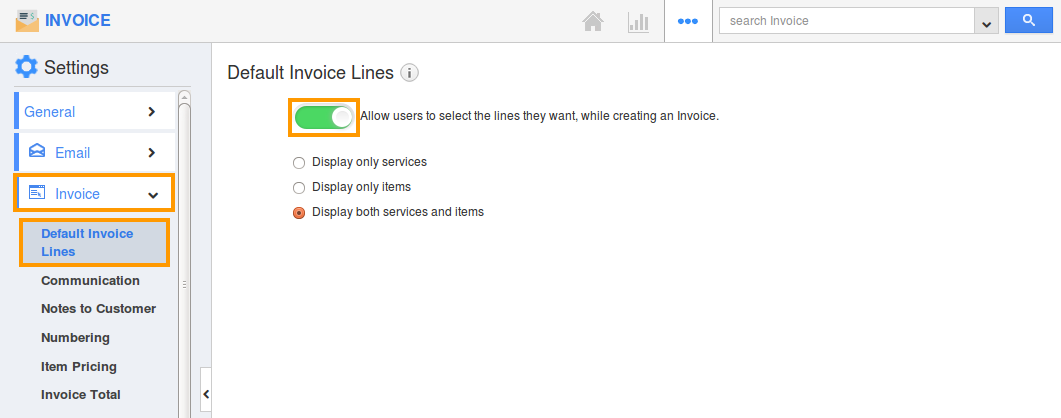
- Click on “More(...)” icon and select “Settings” located in the app header bar.

- Select “Default Invoice Lines” under “Invoices” drop down.
- Enable the Toggle "Allow users to select the lines they want, while creating an invoice".

- Now, you can view the following three options, that can be selected, while creating an invoice:
- Display only services.
- Display only items.
- Display both services and items.
Display only services
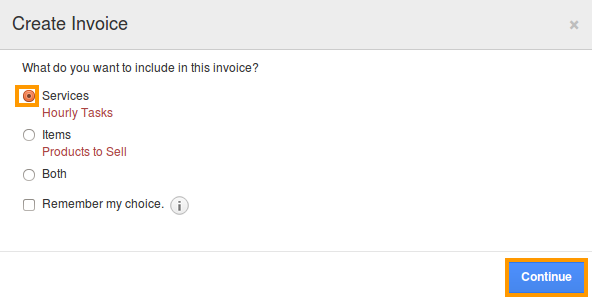
For instance: If you want to include the hourly tasks for services alone, while creating invoices, then select “Display only services” option.
- When you click on “Create” button in the homepage, you can view the create invoice popup as shown:

- Click on “Continue”.
- Now, the creation invoice page will be displayed with services provided:
Display only items
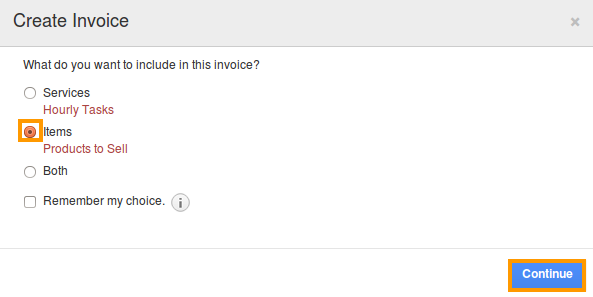
For instance: If you want to include the products or items sold alone, then select “Display only items” option.
- When you click on “Create” button in the homepage, you can view the create invoice popup as shown:

- Click on “Continue”.
- Now, the creation invoice page will be displayed with products/items provided:
Flag Question
Please explain why you are flagging this content (spam, duplicate question, inappropriate language, etc):

