Browse by Solutions
Browse by Solutions
How do I create privilege for associated information and give access to my employee?
Updated on July 9, 2017 10:40PM by Admin
There are times when you would have to give access to critical customer information to some of your trusted team members. To grant access you need to set the privilege to those users. Follow the steps given below.
Steps to Create Privilege for Associated Information
- Log in and access Customers App from your universal navigation menu bar.
- Click on “More”
 icon and select “Settings”
  located at the app header bar.
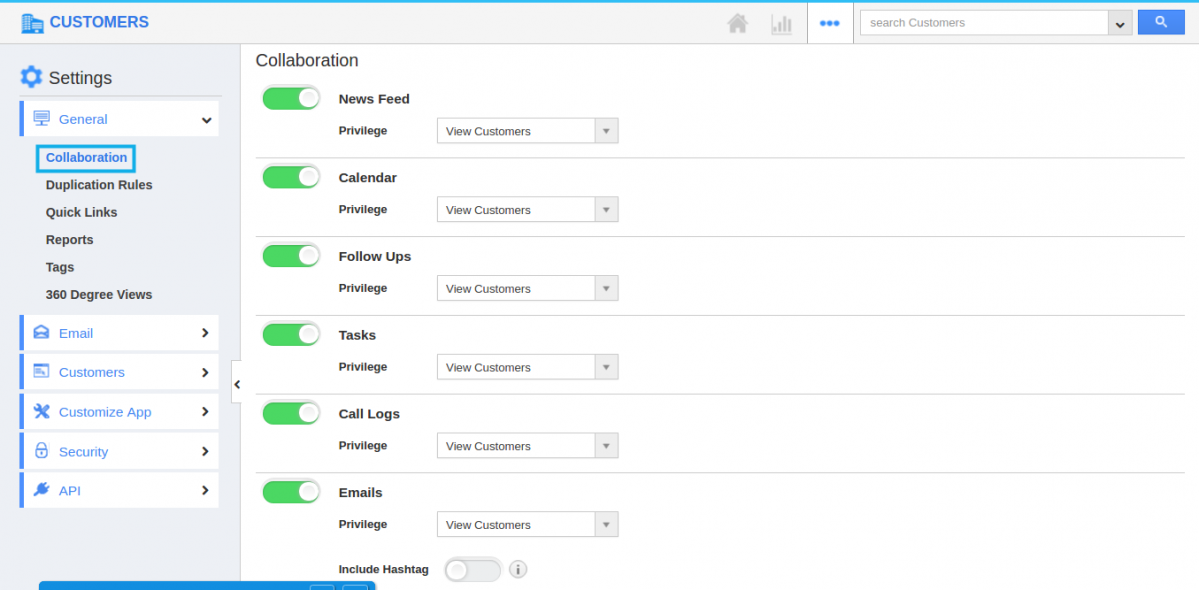
- Select "General" drop down. Click on “Collaboration” from the left navigation panel.
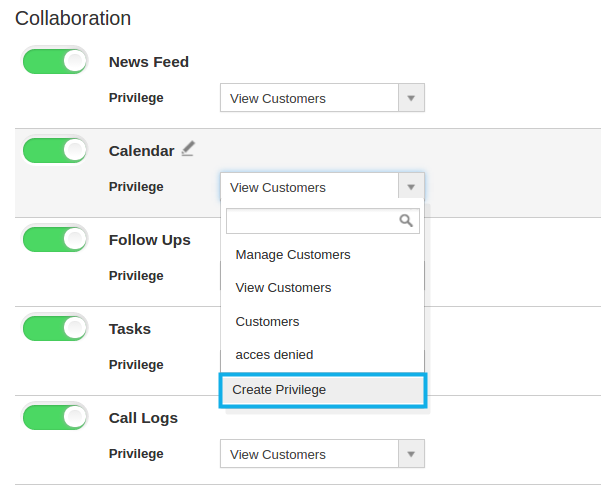
- In collaboration dashboard, Click on "Create Privilege".
- You can view "Create Privilege" popup, in which provide:
- Name
- Description
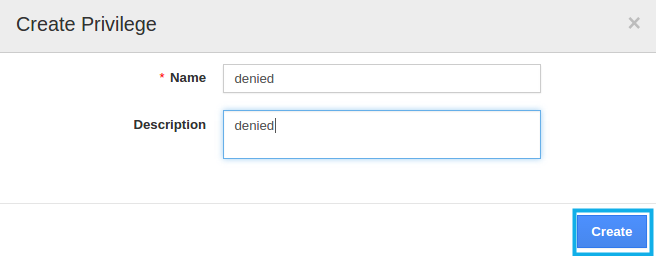
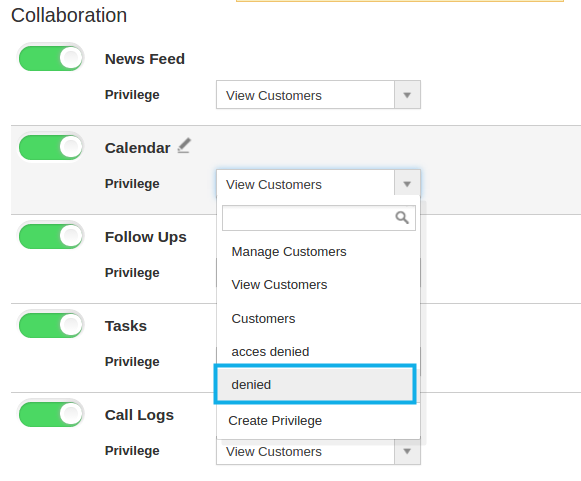
- Click on “Create” button to finish, now created privilege will be listed in the drop down. For instance: Denied
- Now you can set this privilege to associated information. For instance: Call Logs.
Steps to Create Roles and Set App Privilege
- Navigate to Employees App from your universal navigation menu bar.
- In Employees App, click on "Settings" from more icon in the App header bar.

- In settings, select "Roles" from left navigation panel.
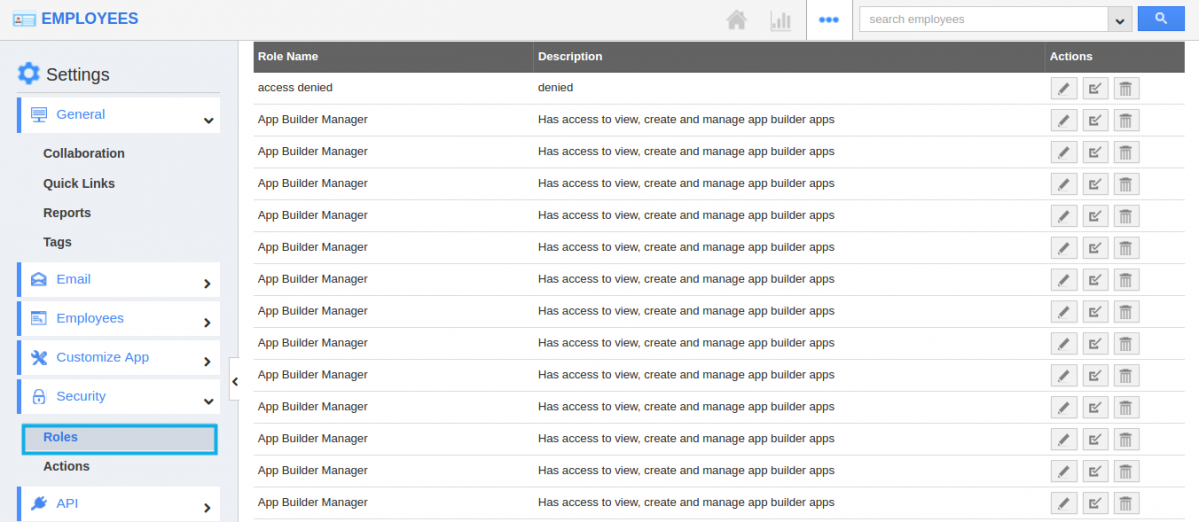
- Create a role, which you assigned as “Privilege” in Customers collaboration settings. (i.e.) “Denied”
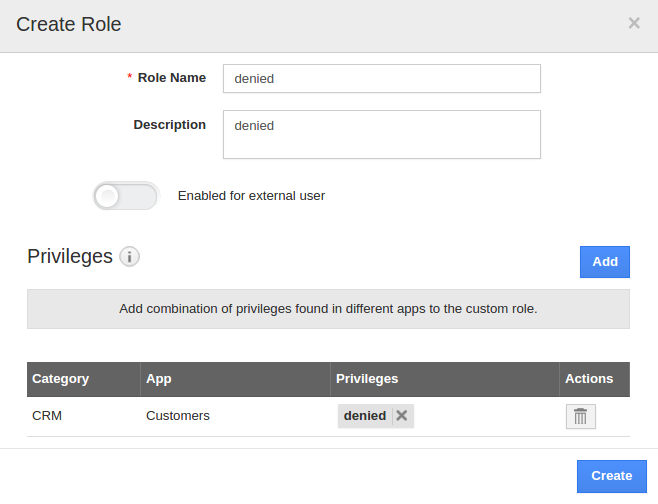
- Add the role to employee who need to access associated information.

- Once the role is added to employee, in his log in he can view the associated information as shown in the image below:
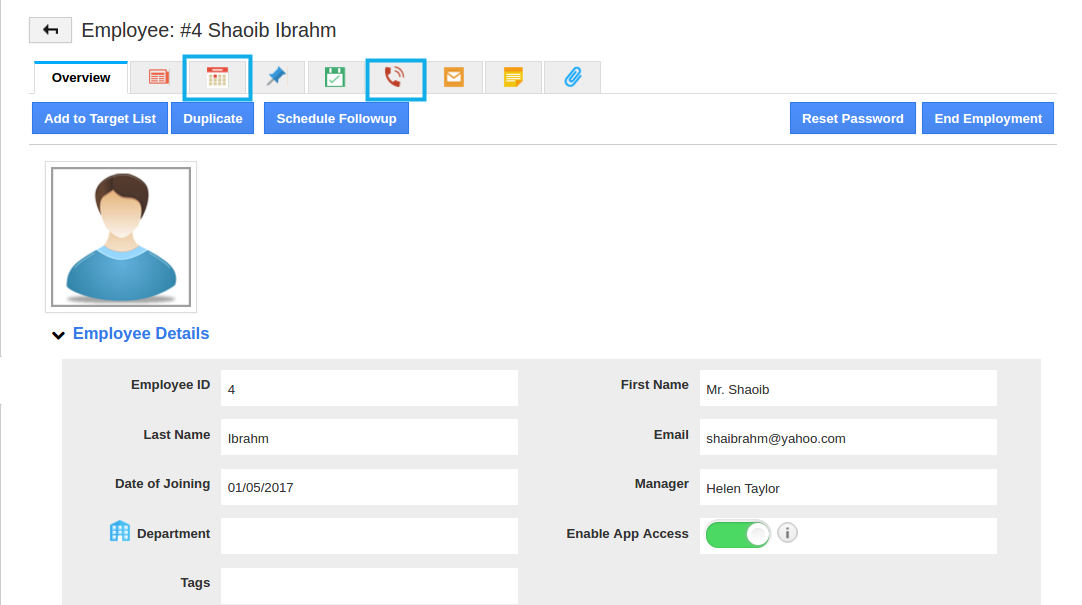
Note: An employee who has no associated information privilege cannot access common features tab such as tasks, call log, calendar etc.
Flag Question
Please explain why you are flagging this content (spam, duplicate question, inappropriate language, etc):

