Browse by Solutions
Browse by Solutions
What is Hash Tag/ ATAG and its Specifications in Email Sync?
Updated on February 18, 2019 10:47AM by Admin
ATAG/Hash Tag: In Apptivo, Hashtag/ATAG allows you to associate an email with objects such as case, leads, customers etc. The email which you compose for an object from its application will generate an automatic hashtag/ATAG in the "Subject" field, this represents the association of a particular object.
Note: From authenticated email address, you can compose an email from Gmail to a contact. This email will be synced without associating contact in the Sent folder of the Apptivo home dashboard. This is because you have not provided a unique hashtag/ATAG for a particular contact in the subject line.
Steps to Enable Hash Tag/ATAG
In order for your emails to get synced associating with the contact, you need to enable the Hash Tag/ATAG in the respective apps. For instance: Consider the Contacts App.
- Go to the Contacts App.
- Click on "More (...)" icon -> "Settings" -> "General" -> "Collaboration".
- Slide the Toggle ON for the "Include Hashtag" under "Emails".
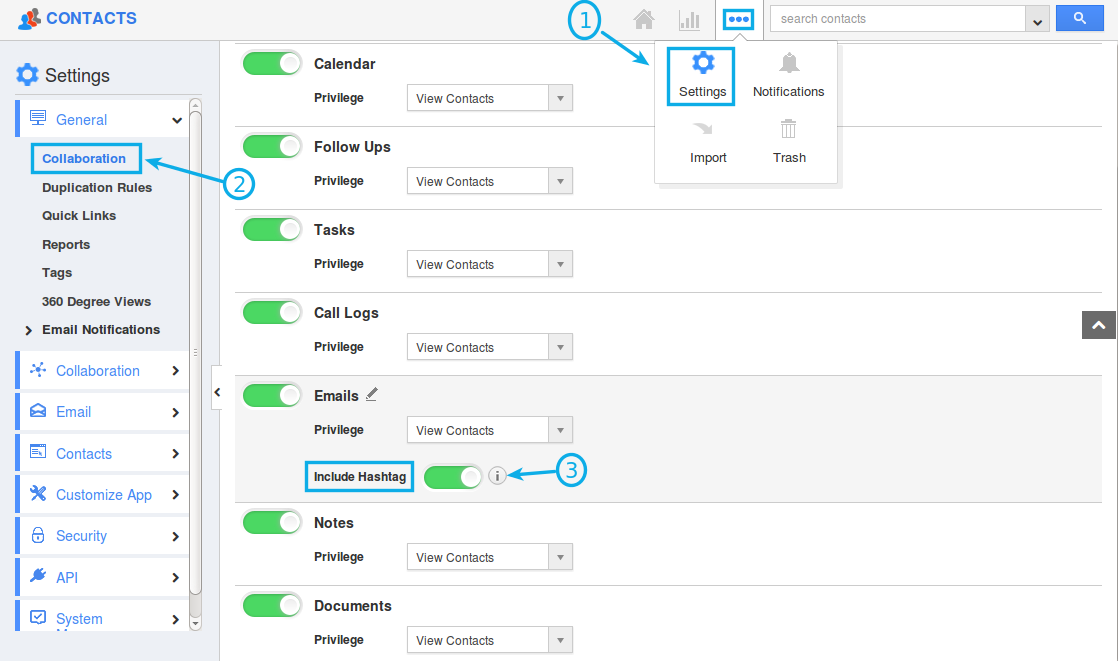
- The hashtag setting will now be enabled.
Steps to View Hash Tag
- Select a contact that you would like to send an email.
- Click on "Emails" tab, and click on "Compose Email".
- You can view the hashtag/ATAG in the "Subject" field as shown in the image below:
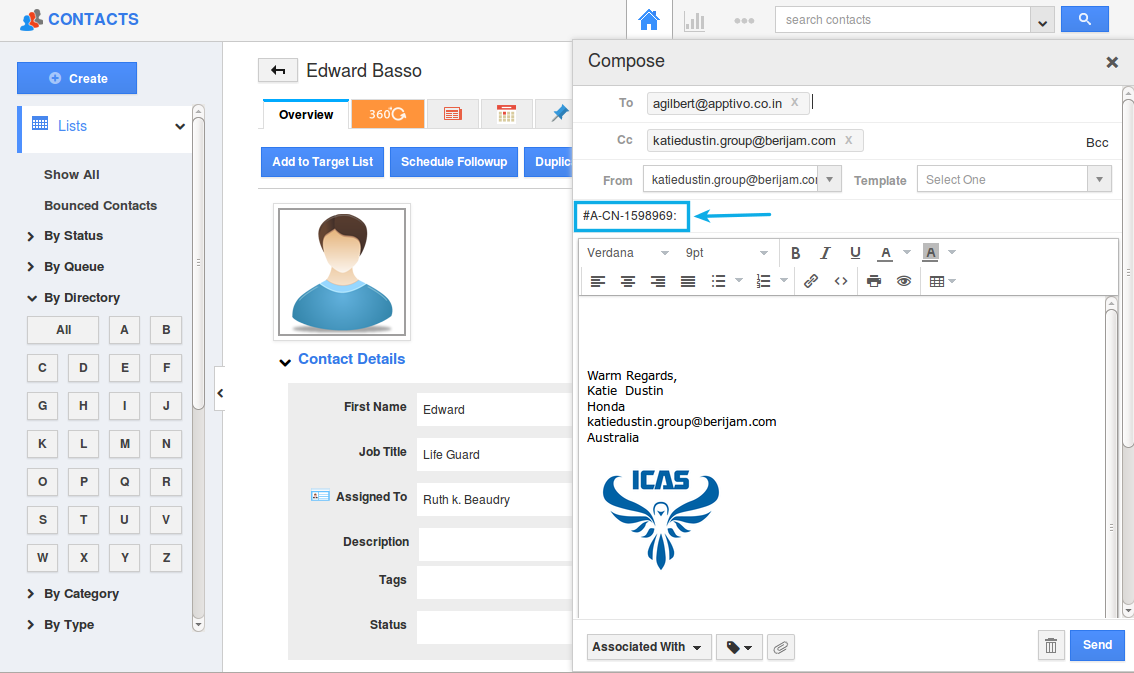
- In the above email the "Subject" field shows
 (i.e. #A for an association, CN for contact and 892532 - Reference number).
Why can't I View Emails in Associated Contact? But still, I can View in Sent folder?
If an email without #A tag, is received from Gmail (authenticated email address in Apptivo) it will sync to the sent folder without associating with the contact. If you send an email with #A tag, then there will be the contact and email association.
Here is the example of composing an email from an authenticated email address in Apptivo Contacts App to another email address.
- agilbert@apptivo.co.in - Contact email address.
- gaffhvac@gmail.com - Authenticated email address in home page dashboard through settings.
Now, when sending an email from gaffhvac@gmail.com to agilbert@apptivo.co.in, you can view the below image with From and To email address and subject with "#A (Hash)" as shown:
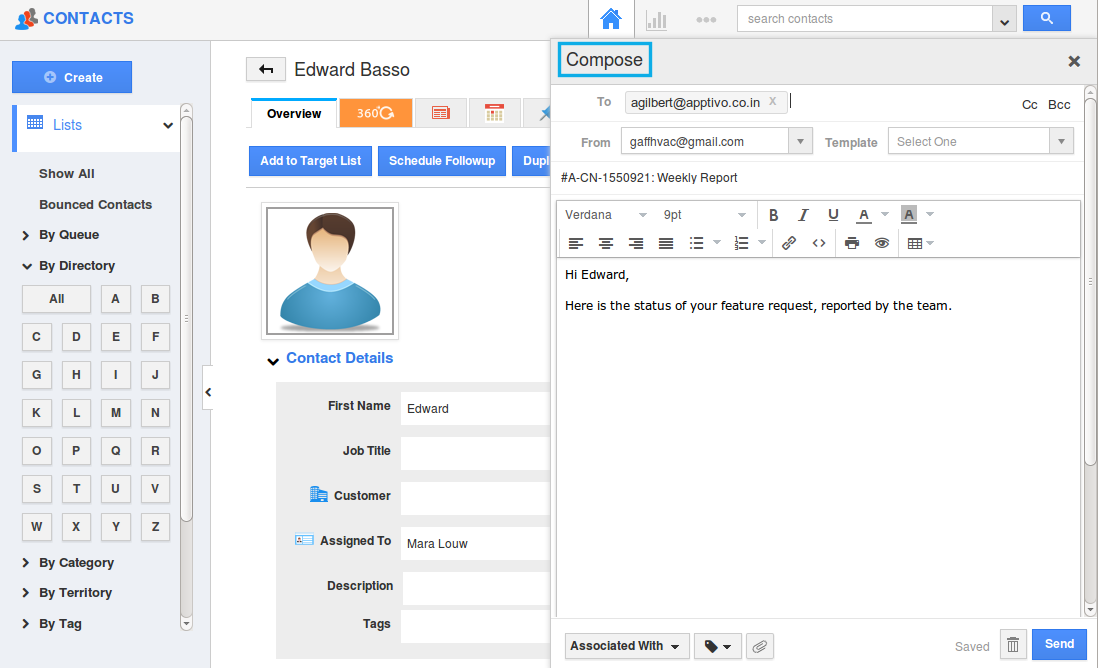
Now, the contact (agilbert@apptivo.co.in) will receive an email as shown in the image below: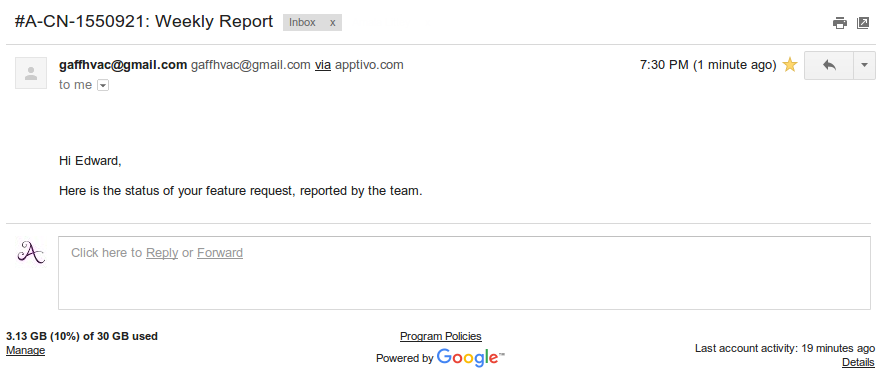
The authenticated email address gaffhvac@gmail.com replies the email by removing "Hashtag" from the subject.
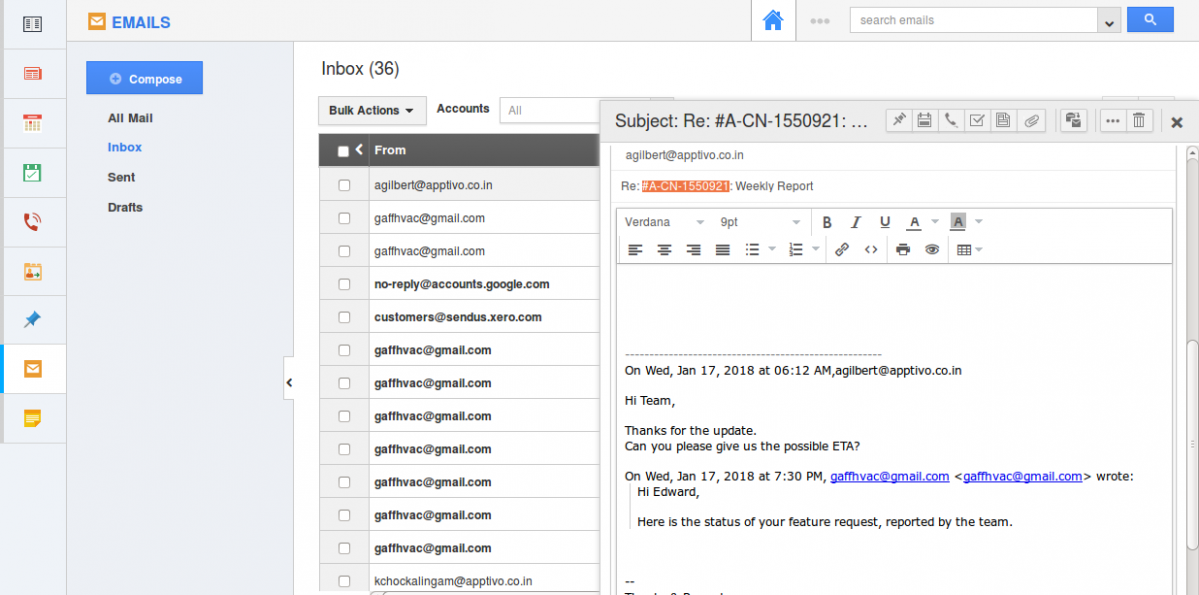
On the Apptivo home page, you can view the sent email from Gmail, but without associating contact.
An alternative way to create Hash Tag/ ATAG: </.h2>
You can also create the ATAG /Hash Tag while creating the email templates in any Apptivo Apps.
For Example: Let us consider the Contacts App. If you would like to differentiate between the emails that are sent for individual customers, you can use the feature of ATAG/Hash Tag.
Steps to include ATAG/Hash Tag while Creating email Templates:
- In the Contacts App, choose Settings from More Options(...) in the universal navigation bar.

- Select Email Templates from the Email drop-down in the left panel. Click on Create.

- Create a new email template with a template name, subject and the content of the email.
Note: You can include the Hashtag / ATAG via Insert Attribute in the Email Subject and Content and click on Create.
- Select a contact to whom you want to send the email.
- Choose the email template, and you can find the ATAG/ Hash Tag attached to the email Subject and the content. Click on Send to send the email with ATAG.


