Browse by Solutions
Browse by Solutions
How do I Remove top level action buttons found in Contact Overview page?
Updated on February 26, 2016 01:58AM by Admin
To hide the following top level button row (blue buttons) on the contact overview page follow the below steps given uniquely for each action buttons:
Add to target list
Steps to remove Add to target list
- Access Contacts App Settings.

- Click on “Actions” from security drop down from left navigation panel.

- Locate the “Add to Target List” option from “Object” section.
- Toggle off the option to remove from Contact’s overview page.

Duplicate
Steps to remove duplicate
- Access Contacts App Settings.
- Click on “Actions” from security drop down from left navigation panel.
- Locate the “Duplicate” option from “Object” section .
- Toggle off the option to remove from Contact’s overview page.

Enable Login
Steps to remove enable login
- Access Contacts App Settings.
- Click on “Actions” from security drop down from left navigation panel.
- Locate the “Enable Login” option from “Object” section .
- Toggle off the option to remove from Contact’s overview page.

Convert
Steps to remove convert
- Access Contacts App Settings.
- Click on “Actions” from security drop down from left navigation panel.
- Locate the “Convert” option from “Object” section .
- Toggle off the option to remove from Contact’s overview page.

Delete
Steps to remove delete
- Access Contacts App Settings.
- Click on “Actions” from security drop down from left navigation panel.
- Locate the “Delete” option from “Object” section .
- Toggle off the option to remove from Contact’s overview page.

How do I give user access to top level buttons?
Contacts App allows you to provide user access to top level action buttons found on the Contact overview page. You can give privilege to one or more action buttons available. Here are the common steps that explains you how to create privilege and how to assign that privilege to the user(s).
Creating New Privilege
- Click on "Create Privilege" option as shown in the image below:

- Enter the privilege name and create it.
- Assign the privilege to the employee from Employees App.
Assigning New Privilege to an Employee
- Log in and access Employees App from your universal navigation menu bar.
- Click on “Settings” icon and select “Roles” from left navigation panel.
- Click on “Create” button and specify a “Role Name” as “General Security Role”.

- The created privilege would display in all category apps.
- Select “General Security Privilege”. Click on “Save” button to save privilege.
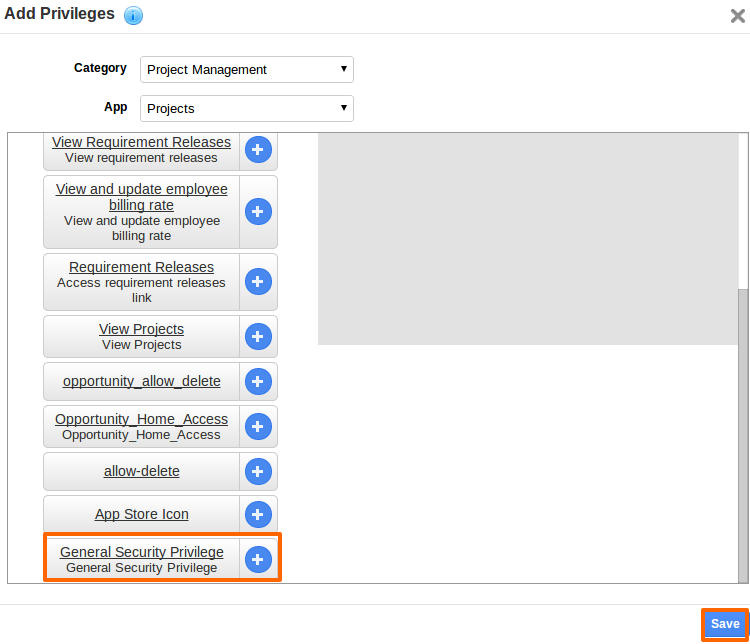
- Select an employee you would like to give access to that created record in the privilege.


