Expense Reports from Apptivo helps you to create and manage the expenses. It has many default standard reports. Through this employee can create an expense record with details and submit for manager approval.
Steps to create the New Expense Report
- Log in and access the Expense Reports from the Universal Menu.
- Click on the Create button.
- Select the New Expense Report.
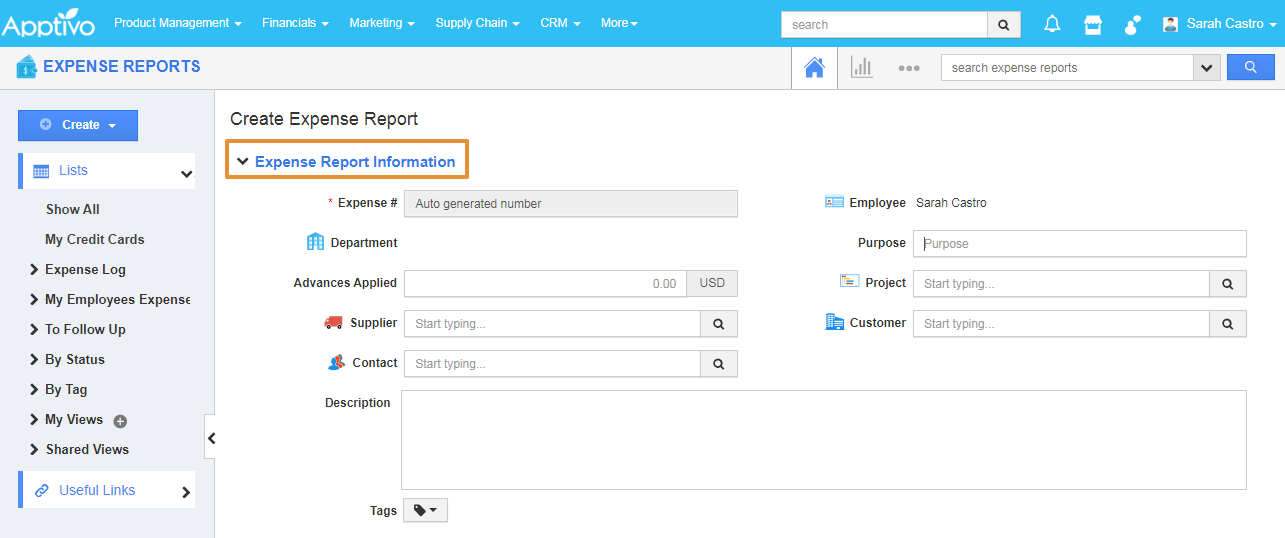
- In the creation page, you can view the Export Report Information.
- Expense Information
- Expense # - This is an auto-generated number, you can also manually key in the value by configuring the setting.
- Employee - The logged-in employee name will be auto-populated.
- Department - This field will be auto-populated with the value from employee record and other basic information like supplier name, customer name, contact name, description, etc,
 |
- Fil the additional information as follows
- Purpose - Short description of the report. Example - Expense report March 2020.
- Project - Search and select the project that reports have to be generated.
- Advanced Applied - Enter the advance Amount for the selected project.
- Supplier - Search and select the Supplier related to the project.
- Customer - Search and select the Customer related to the project.
- Contact - Search and select the Contact related to the project.
- Description - Short Notes about the reports can be noted.
- Tags - you can tag the reports as per your preferences.
- To search the Project, Customer, Supplier, and Contact.click on the Search icon you can view the list as pop up.
- In the Expense Details, fill the following details as per your preferences.
- Memo - Enter the information regarding expenses.
- Category - Select the value from the drop-down to define the expense.
- Expense Date - Enter the date for any added line items.
- Billable - Enable the toggle to indicate the expense line is billable.
- Receipt - Browse the image from your system to upload the receipt.
- Amount - Enter the amount spent on the particular expense.
- Actions - Delete the expense line or Adding notes regarding the expense line.
- By clicking on the Search Action, you can search and add the existing expense.
- You can view the list of expenses that are created.
- By clicking on the “+”, you can add an additional row.
- In the summary, you can view the total amounts for an expense report and any accommodation charges will be added in expense lines.
- Then, click on the Create button.
- And, you can view the created reports in the Show All List.


