Browse by Solutions
Browse by Solutions
How do I Create Custom Table in Cases?
Updated on December 16, 2017 11:09PM by Admin
Customize App allows you to add tables based on your business requirements. In Cases app, you can create a custom table with the columns you want to display and share it with Customers, Contacts, Leads, Opportunities, and Projects. Lets have a look at the following steps.
Steps to Create Custom Table for Cases
- Login and access Cases app from universal navigation menu bar.
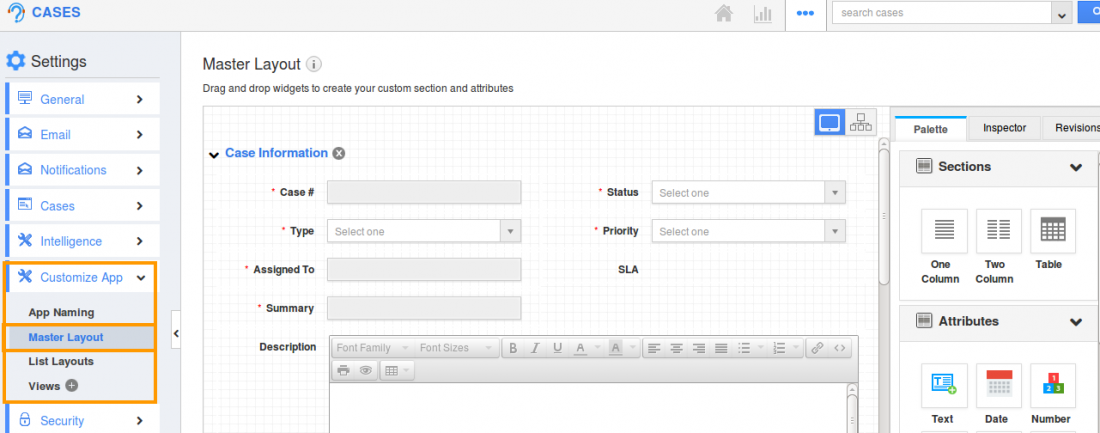
- Click on More(...) icon -> Settings -> Customize App -> Master Layout.

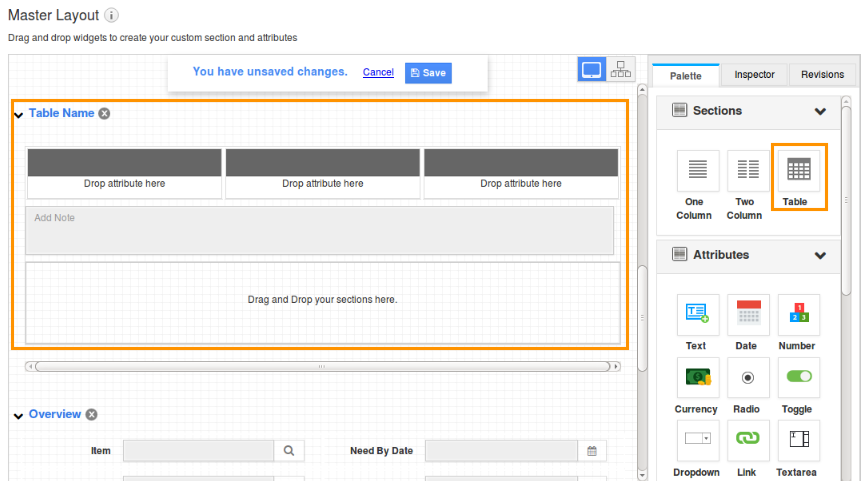
- Drag and drop the “Table” section which is under the “Palette" option.

- In table section, you can drag and drop your own custom fields with text, drop down, etc
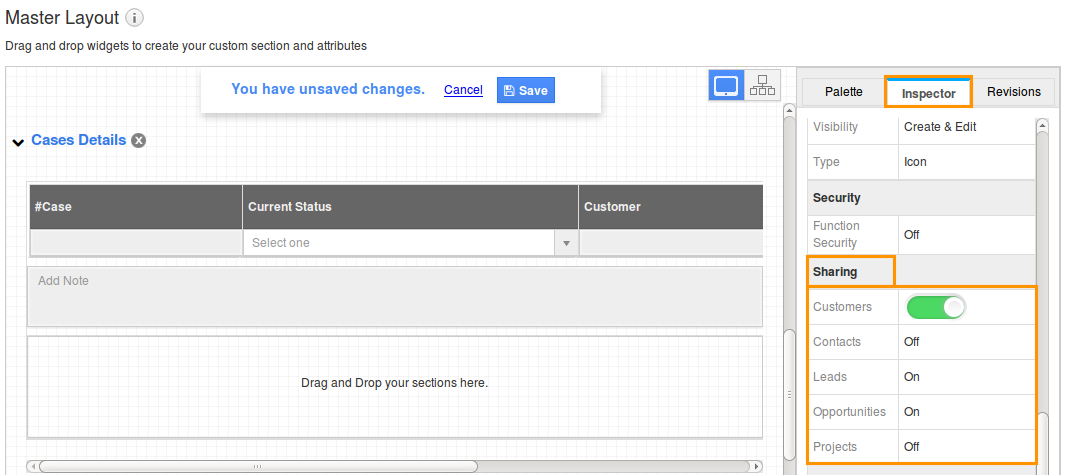
- Inspector tab allows you to enter the details of the selected specific field and also with more functionality to enhance the work flow. For instance: Cases Details
- By enabling the toggle buttons under “Sharing” section in “Inspector” tab allows the user to associate that custom table with Contacts, Customers, Leads, Opportunities and Project App.

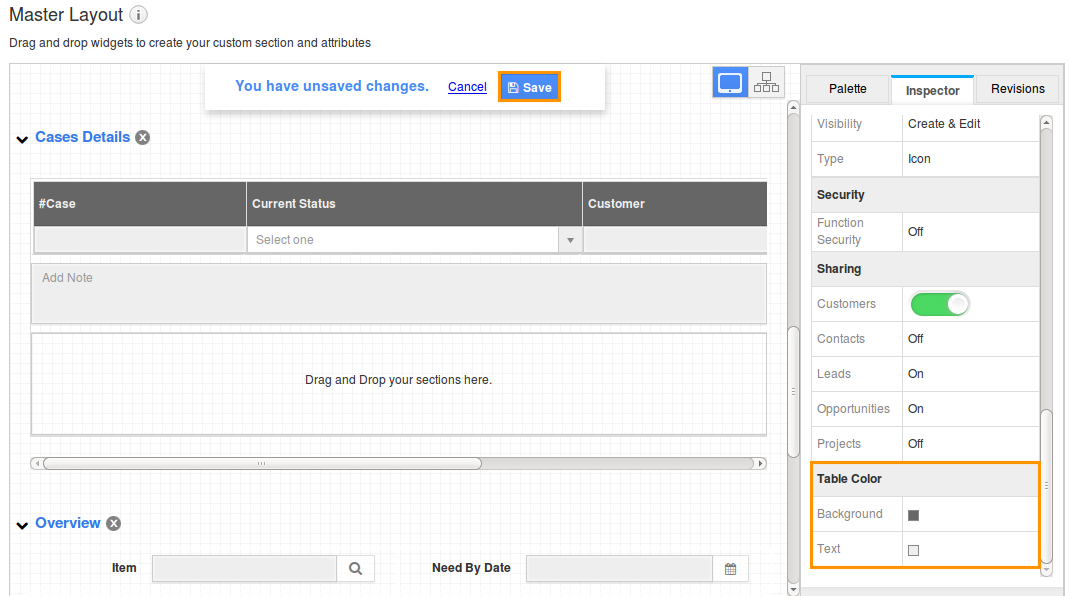
- Using “Table Color” option you can set a background and text color for that custom table.

Related Links
Flag Question
Please explain why you are flagging this content (spam, duplicate question, inappropriate language, etc):

