Browse by Solutions
Browse by Solutions
How do I Configure Custom Left Panel Views in Contacts app?
Updated on August 7, 2017 12:03AM by Admin
Views are nothing but Filters. This option is basically used for showing specific information based on a certain criteria.
There are some default views provided in the Contacts App found in the left navigation panel. They are:
- By Queue
- By Directory
- By Category
- By Territory
- By Tag
Besides these default views, you can also create your own custom views according to your business requirements.
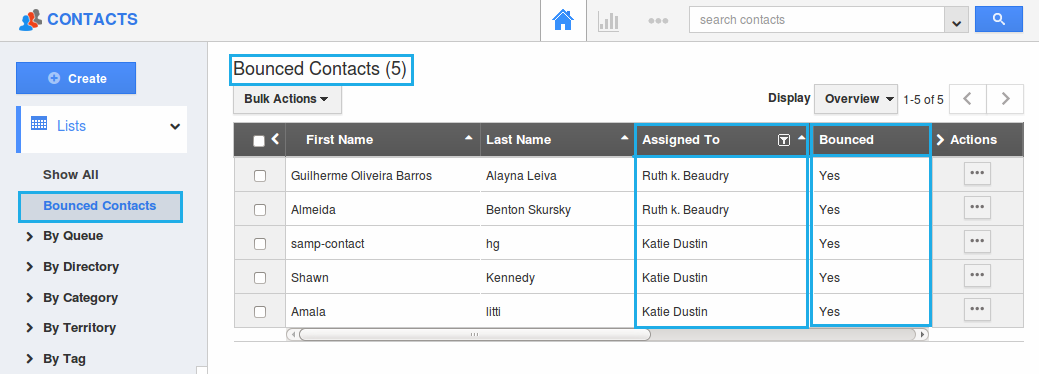
For instance: If an employee (Katie Dustin) wants to view the contacts that are assigned to her and who have opted out of the mailing list (that is, by clicking on "Unsubscribe"), then that can be created as a View.
Follow the steps below.
Steps to Create Views in Contacts App
- Go to Contacts App.
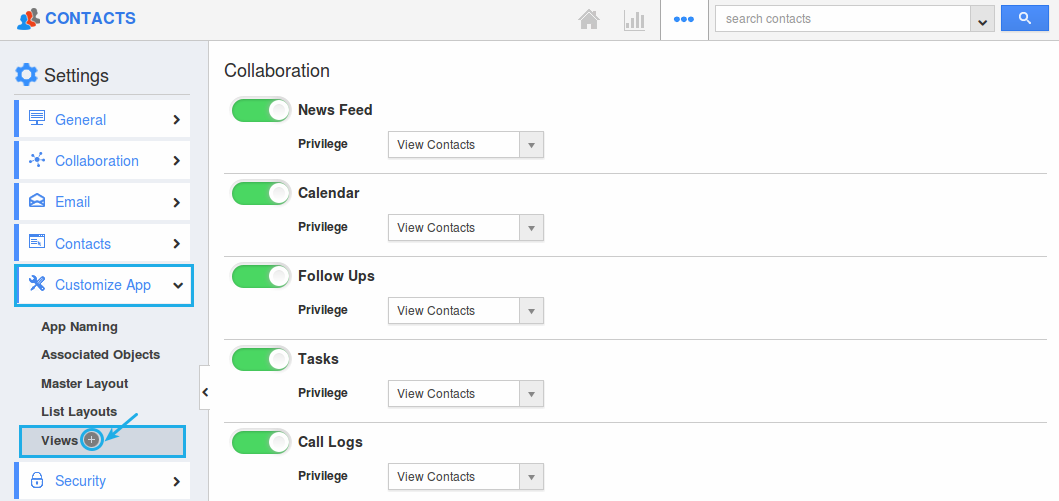
- Click on “More (...)” -> “Settings” -> “Customize App”.
- Now, you can create views, in the following two ways:
- Click on “+” icon near the “Views” to create a new view.
- Click on "Views" -> "Create" button present.
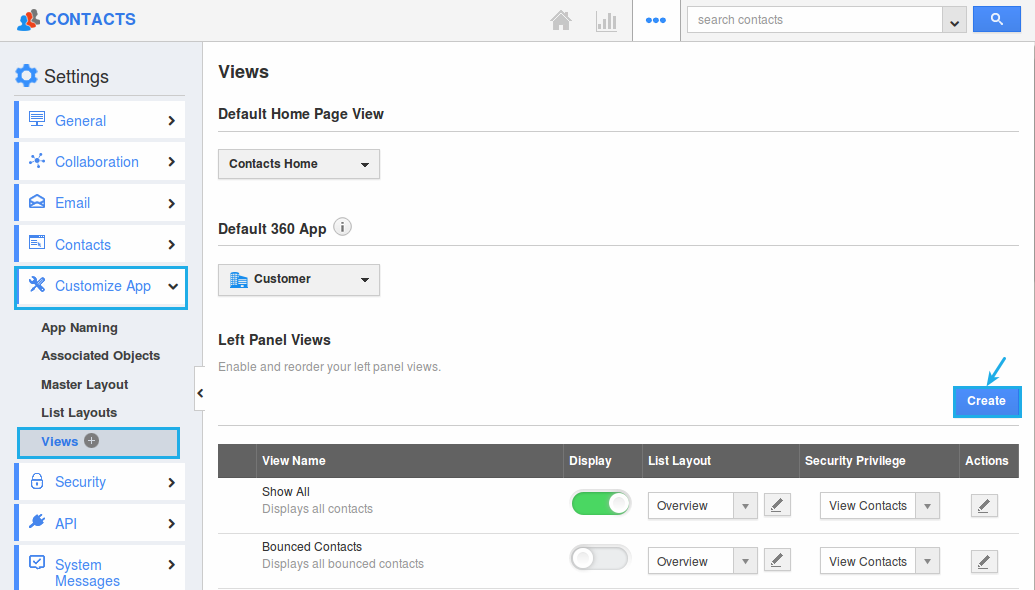
- Click on “+” icon near the “Views” to create a new view.
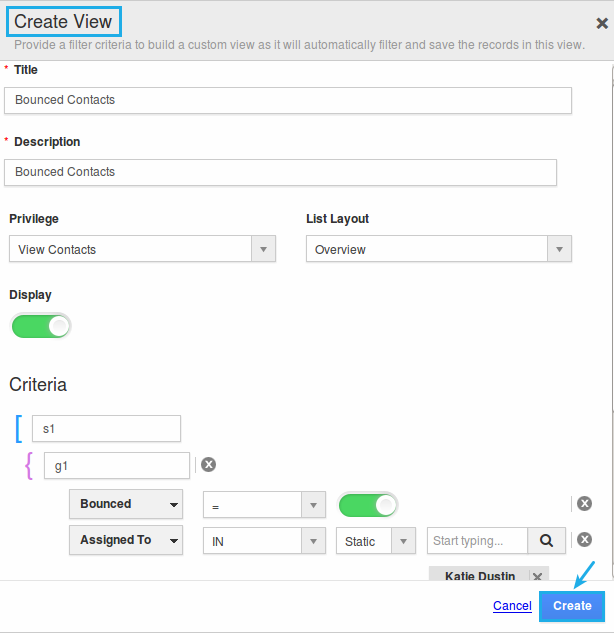
- In the Create View popup, enter the following details:
- Title - Enter the title for the view.
- Description - Enter the description of the view.
- Privilege - Select the required privilege from the drop down.
- List Layout - Select the required list layout from the drop down.
- Display - Slide the toggle ON to make it visible in the left navigation panel.
- Criteria - Set the criteria as “Assigned To = Katie Dustin” and “Bounced = Enabled”.
- Click on “Create”.
- The view is now successfully created. You can edit it anytime, by clicking on the “Edit” icon, if needed.
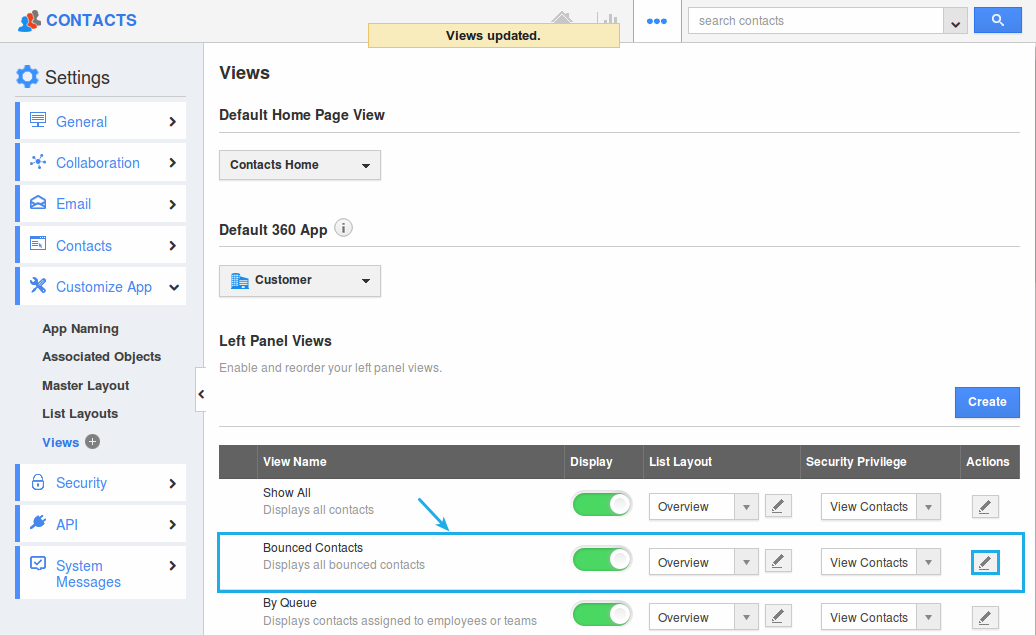
- The created view will be displayed in the left navigation panel as shown:
Flag Question
Please explain why you are flagging this content (spam, duplicate question, inappropriate language, etc):

