Browse by Solutions
Browse by Solutions
How to set up Privilege in Apptivo Customers App?
Updated on October 10, 2017 11:11PM by Admin
If the user wants to view associated objects information in the other Apptivo CRM Apps he needs to create a privilege for associated objects. The steps given below will give an insight into how set privileges so that you can view the information within the all the associated objects.
Setting Privilege to the Associated Objects
- Login and access Customers App from the universal navigation menu bar.
- Click on "More" icon and select "Settings" located at the app header bar.

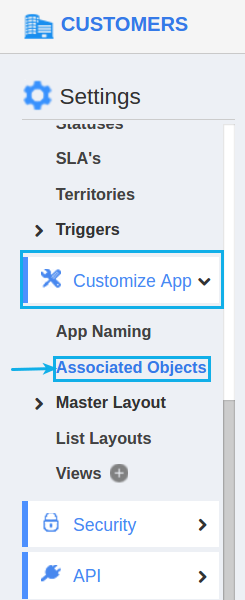
- Select “Customize App” drop down and click on “Associated Objects” from the left navigation panel.

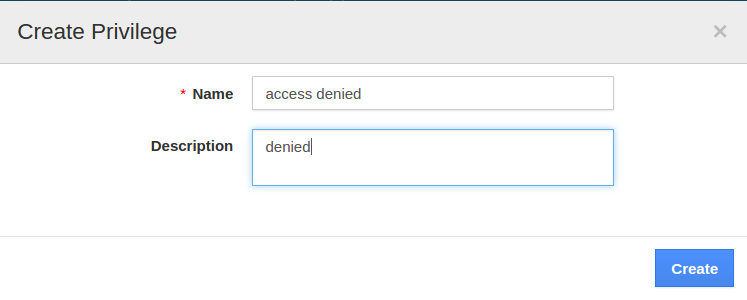
- Click on “Create Privilege” as shown in below and provide:
- Name - Name of the privilege
- Description - Description of the privilege

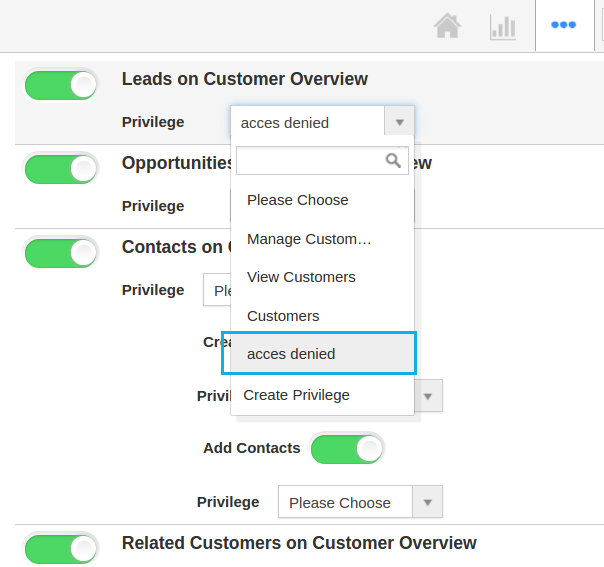
- Click on “Create” button to finish, now created privilege will be listed in the drop down.
- Now you can set this privilege to associated object.

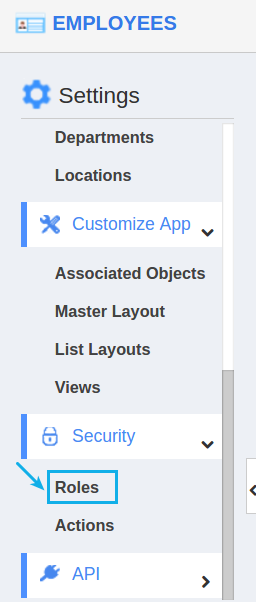
Steps to Create Roles and Set App Privilege- Navigate to Employees App from your universal navigation menu bar.
- In Employees App settings, select “Roles” from left navigation panel.

- Create a role, which you assigned as “Privilege” in associated objects settings. (i.e.) “Denied”

- Add the role to employee who need to access associated information.

- Once the role is added to employee, in his log he cannot view the associated objects.
Flag Question
Please explain why you are flagging this content (spam, duplicate question, inappropriate language, etc):

