Browse by Solutions
Browse by Solutions
How do I Create Custom Attributes in Purchase Requisitions App?
Updated on April 20, 2017 04:36AM by Admin
Customize App provides common features for Purchase Requisitions App. These are like business attributes which supports you to customize your business with the custom fields. They can be quickly and easily added for customization. Purchase Requisitions App allows you to add any custom fields that aren't provided on the creation page by default. You can load your creation page with new sections and fill them up with your own text fields, radio buttons, drop downs, etc.
To Customize Purchase Requisitions App
- Log in and access Purchase Requisitions App from your universal navigation menu bar.
- Click on "More" icon and select “Settings” located at the app header bar.

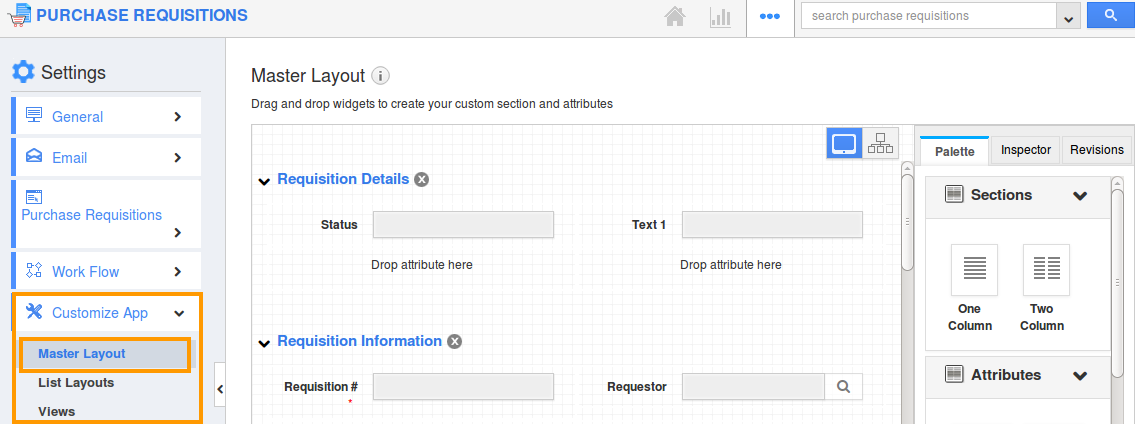
- Select on "Customize App" drop down and select "Master Layout" drop down from the left navigation panel.

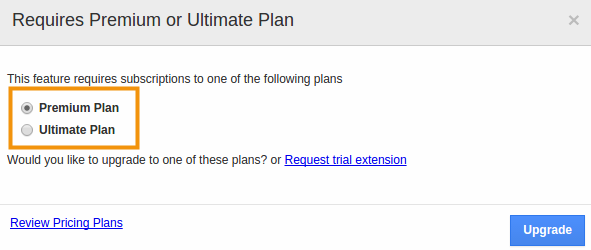
- If you are standard plan user, then you need to upgrade your account to use this feature. It would be notified as below:

- You can view custom attributes dashboard with following fields under "Palette" tab:
- Sections: Click on “One Column” or “Two Column” section to create custom sections.
- Attributes: Drag and drop attributes in sections.
- Text - Text field for entering text values.
- Date - Date field for choosing date.
- Number - Number field for entering number.
- Currency - Currency field for entering currency values.
- Radio - Radio fields for opting the values.
- Check box - Check box field for choosing multiple values.
- Drop down - Drop down field for choosing a specific value from a list.
- Link - Link field for entering URL’s
- Text Area - In order to enter paragraph on the object
- Address - Address information
- File - File format can be inserted
- Spacer - It allows to generate the space between attributes

- Drag and drop necessary attributes in the sections.
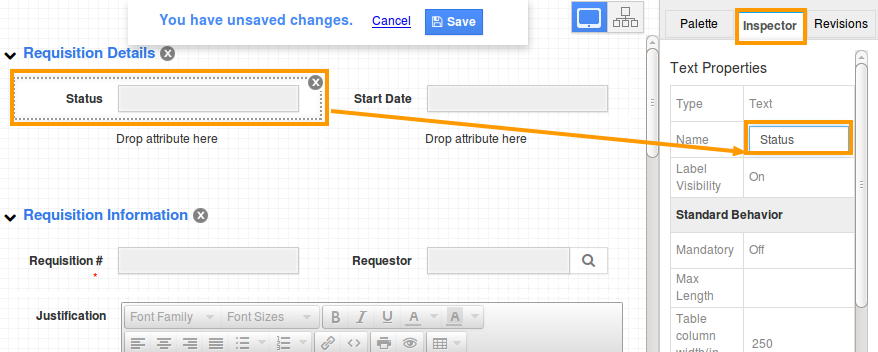
- In Master Layout there are another two tabs "Inspector" and "Revision".
- Inspector tab allows to give the details of the selected specific field , Revision tab allows to view the past changes made in the master layout and also we can restore that revision.
For Instance:
Here, creating the fields such as "Status" & "Date" has made into tour details. Inspector allows you to change the Attribute name.Master Layout.


