Browse by Solutions
Browse by Solutions
How do I Create and Manage Tags in Move Transactions App?
Updated on April 13, 2017 02:38AM by Admin
Tags are nothing but labels with one or two words which will associate with records to organize the data in personalized way. It allows to group records from various category by a common use, which facilitates finding or searching information.
Steps to create tags
- Log in and access "Move Transactions App" from your universal navigation menu bar.

- Click on “More” icon and select “Settings” located at the app header bar.

- Select "General" drop down.
- Click on “Tags” from the left navigation panel.

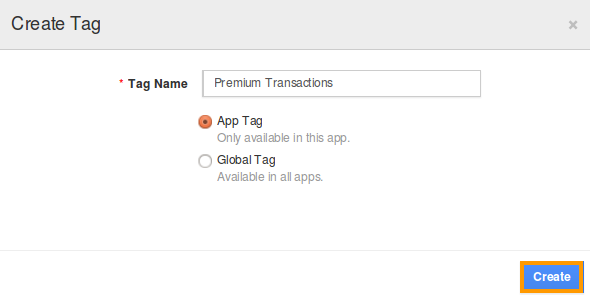
- Click on “Create” button and specify:
- Tag Name (Mandatory) – Name of the tag.
- App Tag – The tag created will be available only to this app.
- Global Tag – The tag will be available to all apps.

- Click on “Create” button to complete.
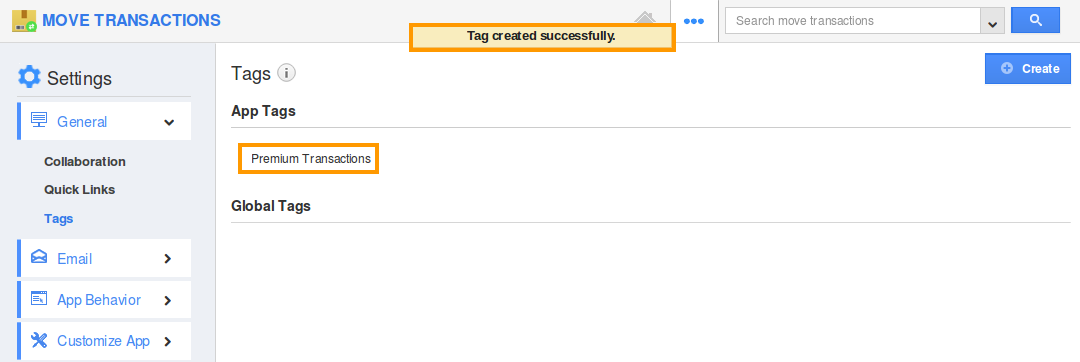
- You can view the created tag as shown in the image below:

- You can also edit the tag name using “edit” icon, if needed.

Flag Question
Please explain why you are flagging this content (spam, duplicate question, inappropriate language, etc):

