Browse by Solutions
Browse by Solutions
How do I Create Tags in Receiving App?
Updated on April 20, 2017 11:56PM by Admin
What is Tags?
Tags are the labels which are used to identify the receiving by category. It allows to group records from various category by a common use, which facilitates finding or searching information. It helps you to manage and organize your receiving.
Adding Tags to Customize your Receiving App
- Login and access Receiving App from universal navigation menu bar.
- Click More (...) -> Settings -> General -> Tags.

- In tags page, click on “Create” button from right corner.
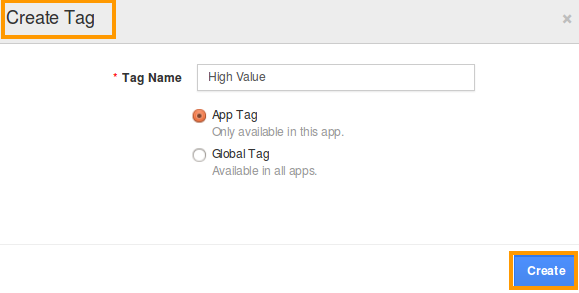
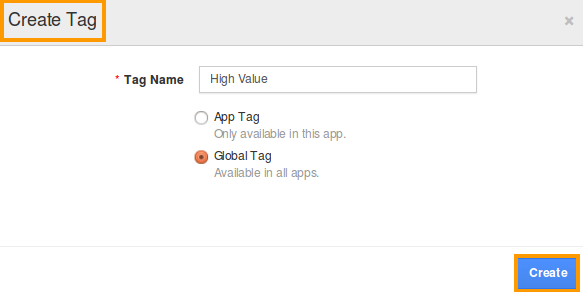
- Now, Create tag window will get appear and enter the tag name.
- Specify the tag type,
- App Tag - This is only appended to the Receiving app
For Instance : If you are creating “High Value” as App tag, this only obtained on Receiving app.
- Global Tag - It will be available to all the apps.
For Instance: If you are creating “High Value” as global tag, this will be accessible by the all other apps.
- Make a click on “Create” button.
The new tag is displayed in the tag page also you can edit the tag name,if you need. Now you can assign the tags, while creating the Receiving. For applying tags, follow the below steps:
How do I apply tags?
- Login and access Receiving app from universal navigation menu bar.
- Click on “Create” button from the left navigation panel.

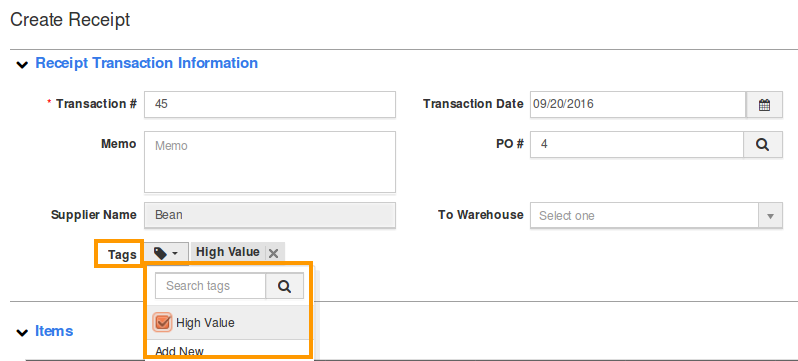
- Now, select appropriate tag from “Tags” field as shown in below:

- You can add multiple tags at once.
- By clicking on “By tags” option, you can easily view the list of Receiving which are grouped by tags.
Flag Question
Please explain why you are flagging this content (spam, duplicate question, inappropriate language, etc):

