Browse by Solutions
Browse by Solutions
How do I Set Time Based Triggers in Customers App?
Updated on June 9, 2017 04:27AM by Admin
According to a popular online library, Investopedia, "A customer is an individual or business that purchases the goods or services produced by a business." A customer plays an important role in any business because they create the demand for goods and services. That is why customers are known as Kings and the businesses follow the age old adage " Customers are always right."
When an active lead who are known as potential customers get in touch with the business the person who is handling that lead should be intimated about the same. Apptivo CRM has an option called Triggers that will alert the sales person when a certain criteria is met.
What is a trigger
Triggers allows you to perform automated actions like triggering an email or updating an attribute based on a particular criteria. Customers App allows you to set triggers on Event based, Time based, Activity based.
When are time-based triggers used
Time based triggers are utilized, when we have to execute a work process at certain time based situations. Here, the frequency of execution can be set as One-Time or Recurring.
Lets quickly walk through the steps to set time-based triggers.
To set Time Based Triggers in Customers App
- Log in and access Customers App from the universal navigation menu bar.
- Click on More(...) icon → Settings located at the app header bar.

- Click on Customers drop down from left navigation panel.
- Select Time Based under the Triggers drop down. Click on Create.
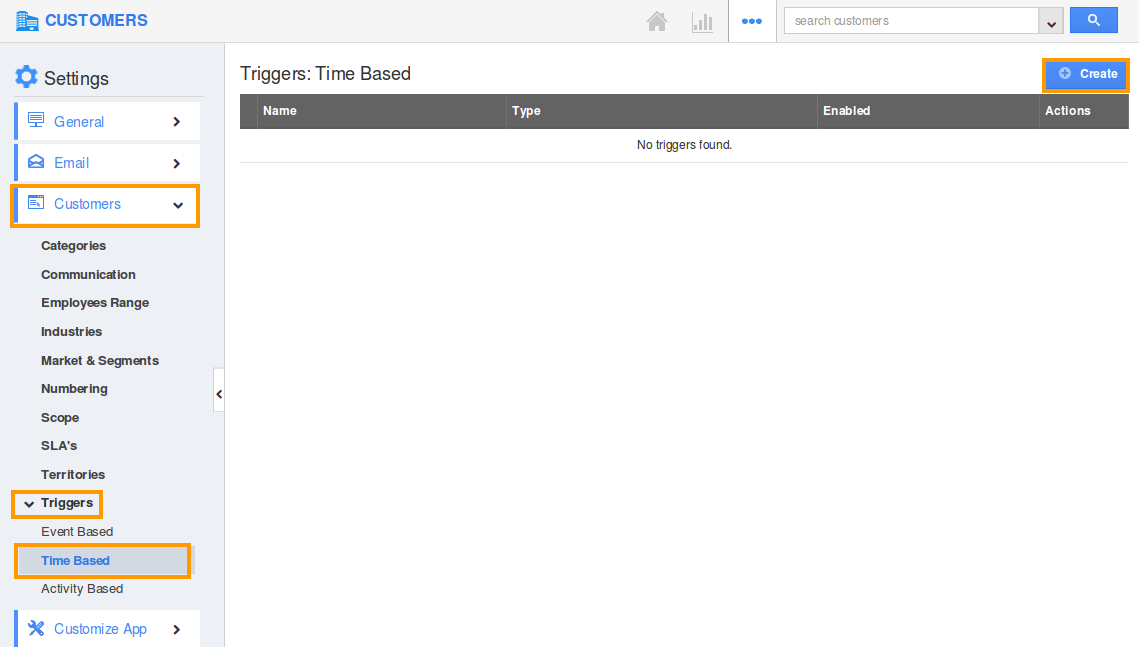
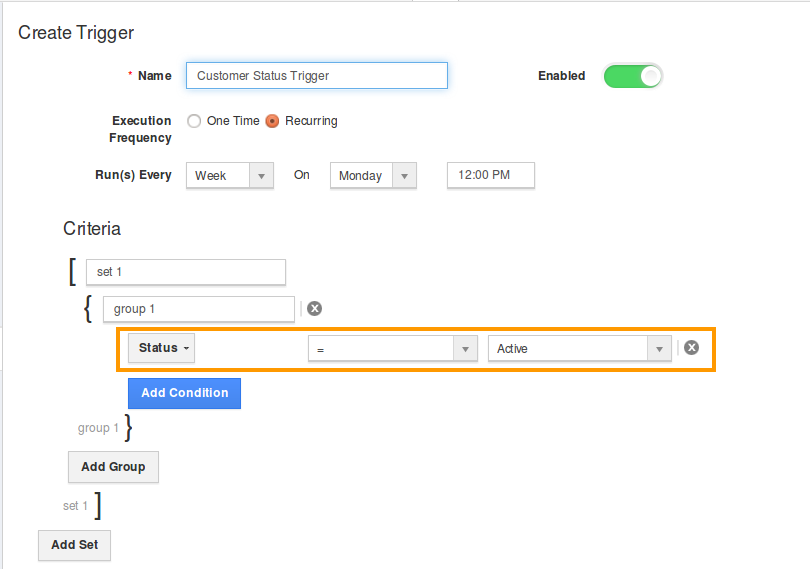
- You can view the create page where you need to define the following:
- Name: Name of the time based trigger.
- Enabled: The trigger created can be toggled on or off to enable or disable it.
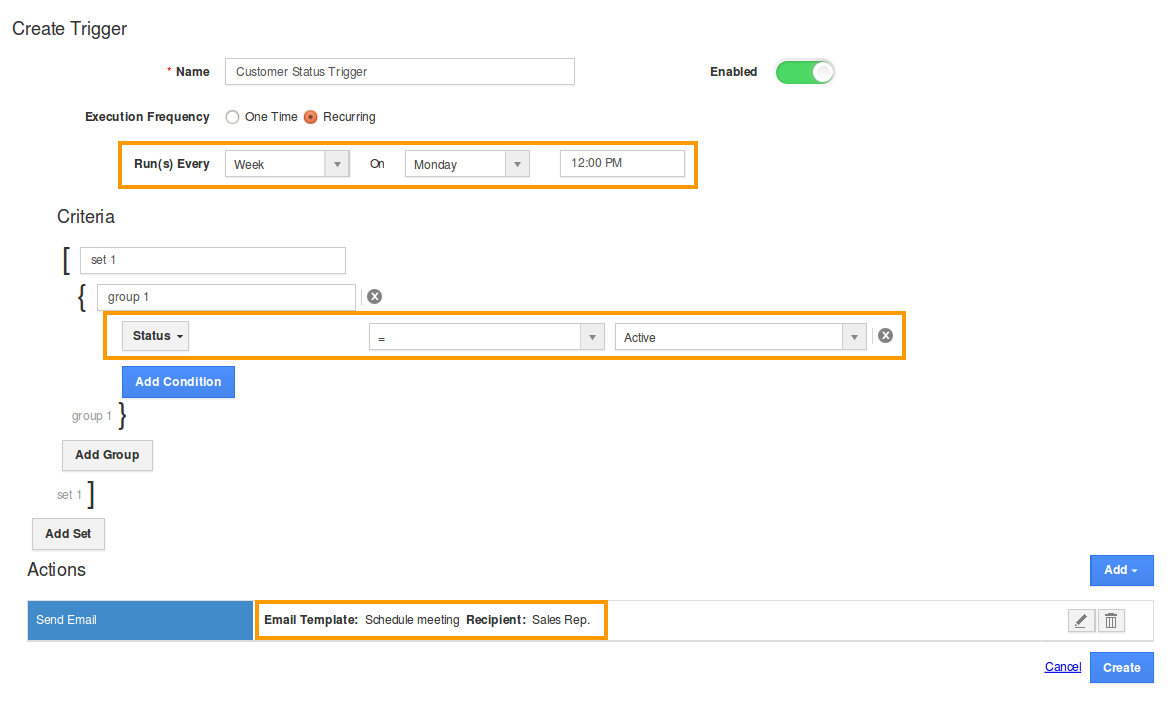
- Execution Frequency: The frequency of execution can be set as One-Time or Recurring.
- Run On: You can pick a date and time for the time based trigger to occur.
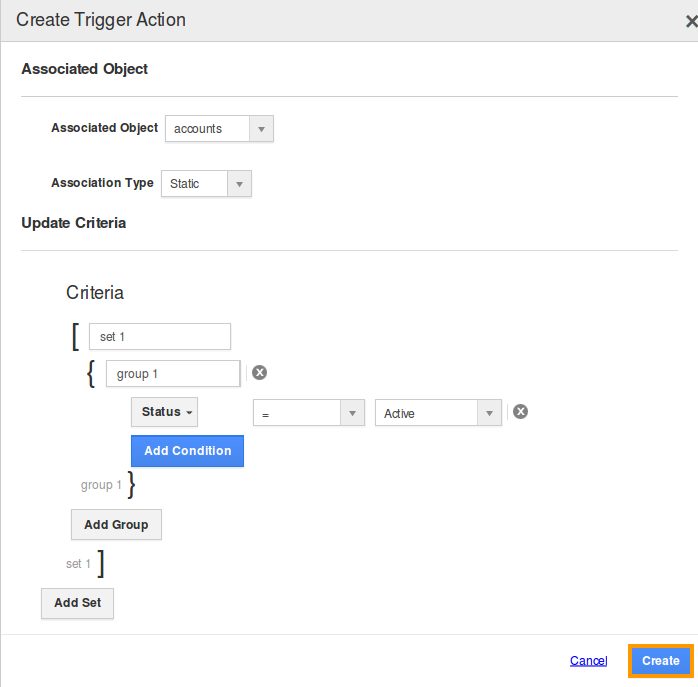
- Define the criteria which is the space where the condition for trigger can be defined by selecting attributes and its equivalent values. This example illustrates the criteria and actions as shown below:
{
Set 1
{
Group 1
{
Status = Active
}
}
}
- Under the Action session you can define the automatic action to be triggered for the above created criteria.

- Here, we can define three types of actions:
- Send Email - An email will be triggered based on the criteria created.
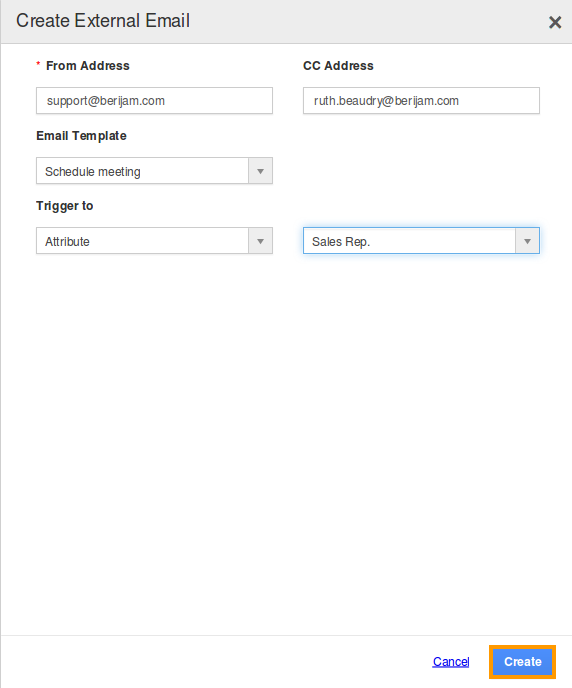
- Update Attribute - This action updates the attribute value based on the criteria created.
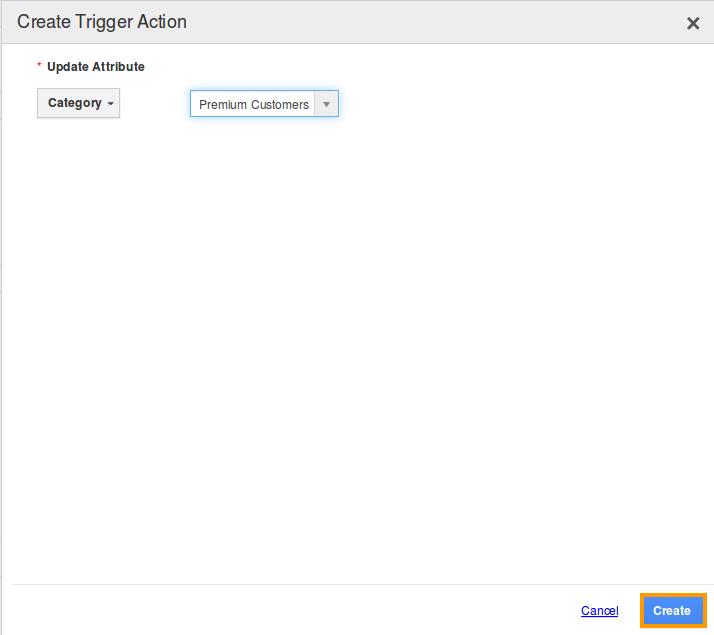
- Update Associated Object Attributes - This action updates the attribute values of the associated attributes.
- Send Email - An email will be triggered based on the criteria created.
- After creating action, finally click on “Create” button at the bottom, to complete. Thus, the time based trigger will be successfully created.

- For instance: A recurring trigger is created which is set to run on every monday, where a mail is triggered to the sales rep. when customers are created via Active status.
