Browse by Solutions
Browse by Solutions
How do I Update Existing Contact Records during Import?
Updated on August 22, 2019 07:46AM by Admin
The aim of Apptivo CRM is to reduce the manual work while creating, updating or deleting records. Consider a situation where you want to import the records into Contacts App. Also while importing the records you want to make some changes to a few of the records, and remove duplicate copies of the records.
Contacts App allows you to update existing records and also will filter out the duplicate contacts before storing them in this app.
Note: This feature of Updating Existing Contact Records during Import is available only in the Apptivo Paid Plans.
Lets quickly go through the steps.
Steps to Update Existing Contact Records
- Log in and access Contacts App from the universal navigation menu bar.
- Click on “More(...)” icon and select “Import” located in the app header bar.

- Click on “CSV Imports” present in the left navigation panel. Now, click on the “Import” button.
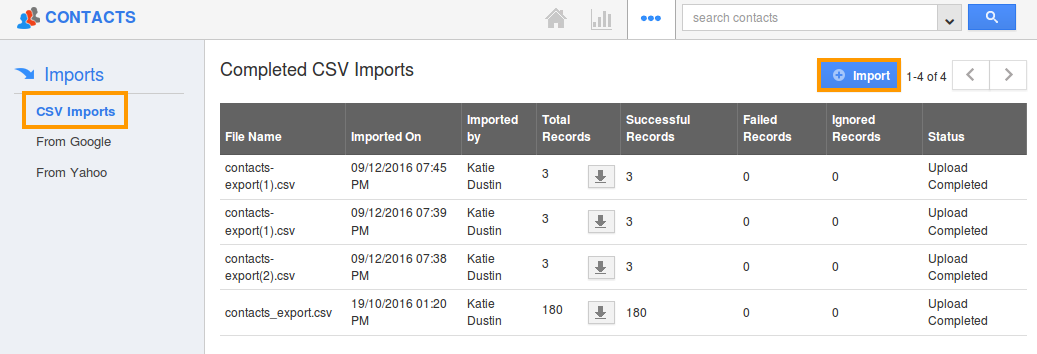
- You can import a New File or Update Existing Records. Now, to update existing records select “Update Existing Records” option.
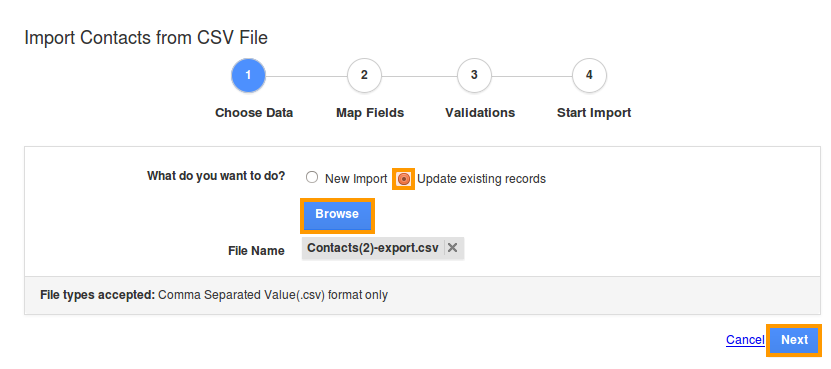
- Click on “Browse” button and select the CSV file from your computer and click on “Next”.
- Map the fields accordingly. Make sure to map the custom mandatory fields.
- Here, to avoid creating duplicate contact records select preferred field from “Uniqueness Check” drop-down. (Note: If no field is selected, duplicate records will be created).
- For instance: A unique combination of Customer and Contact can be formed. To do so, click on the Uniqueness Check drop-down -> scroll to the last and click Other Parameter -> Customer Number. Click on “Import” button to import records.
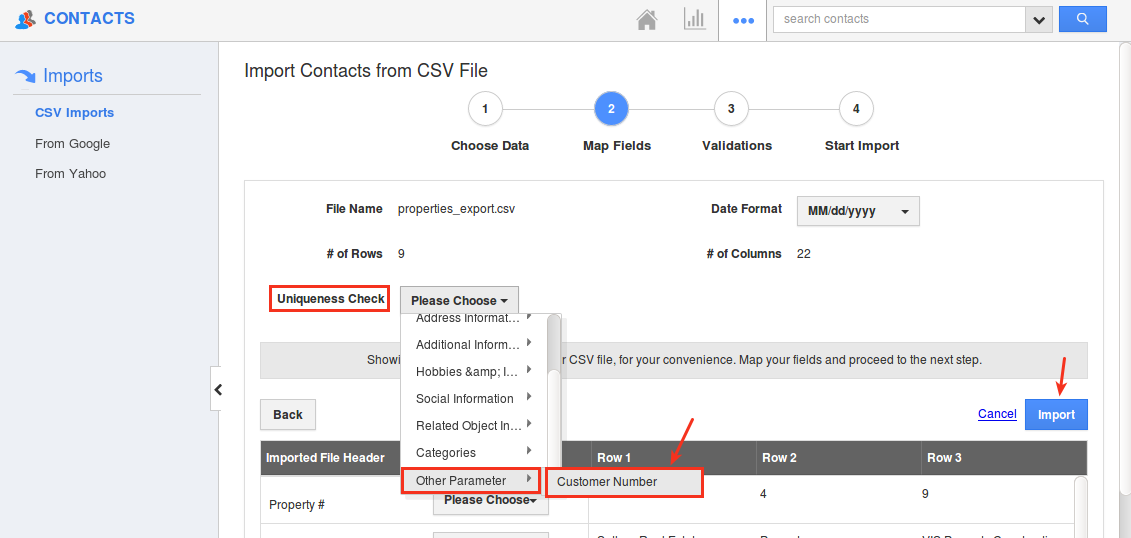
- You can view warning popup which alerts you for mapping common fields such as territory, segments, etc.
- In case of mandatory fields not having values, they are added to exceptions. If error records are added to exceptions, they will be ignored and available for download later.
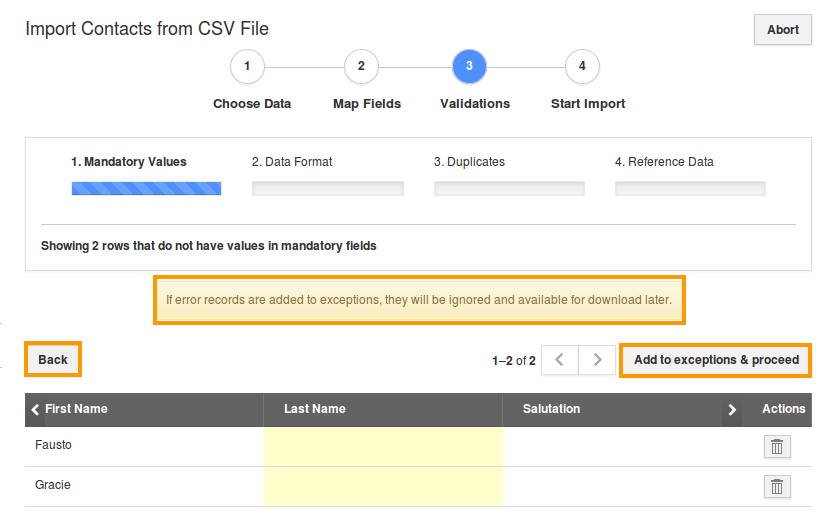
- If you want to continue to click on “Add to exceptions and proceed” button or click on the “Back” button to include mandatory fields.
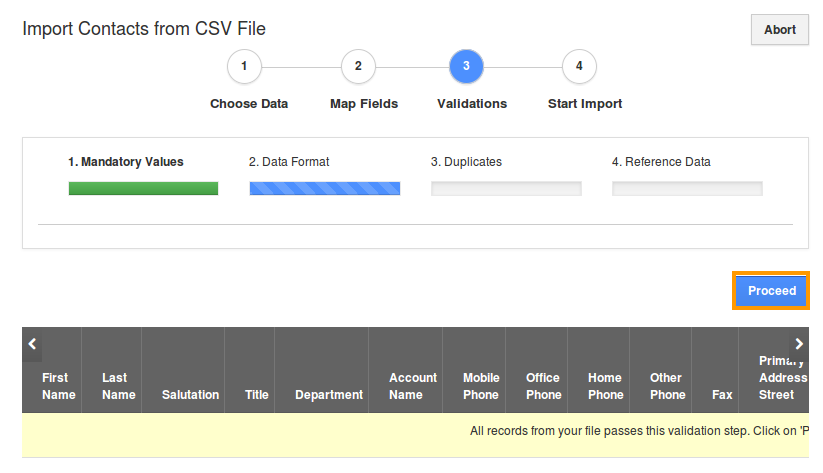
- Now, there are four validation steps to be done:
- Mandatory Values - Validates mandatory value association.
- Data Format - Validated data format issues in CSV.
- Duplicates - Validates duplication in CSV.
- Reference Data - Validates the association of other objects. This will associate existing objects, if there are new objects found in CSV, you are allowed to create new objects.
- Click on the “Proceed” button for each step.
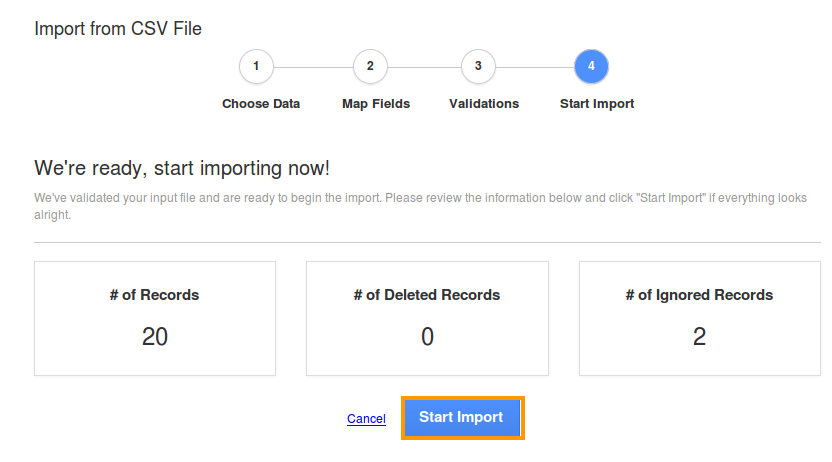
- Once the Reference Data proceeds, the system will display the following counts:
- # of Records - Total count of contact records found in the CSV file.
- # of Deleted Records - Count of deleted records at the time of validating the contacts.
- # of Ignored Records - Count of ignored records which are added to the exceptions at the time of mapping.
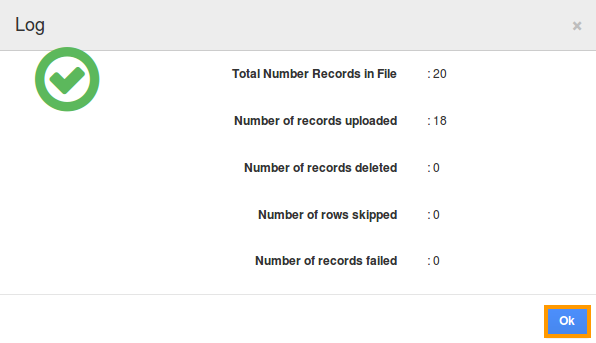
- Here we go, the import is done successfully and the log will display the total count of imported records, failed and ignored.
- The completed CSV file will be listed as shown, from where you can download the records using “Down-Arrow” icon found next to the columns(Total Records, Ignored Records, Failed Records).


