The G Suite IMAP integration enables authentication using the Apptivo Emails App. Using this, you can enable the email sync between your G Suite account and Apptivo, without providing the passwords.
Steps to Enable Oauth for G Suite
- Log in to your G Suite account.
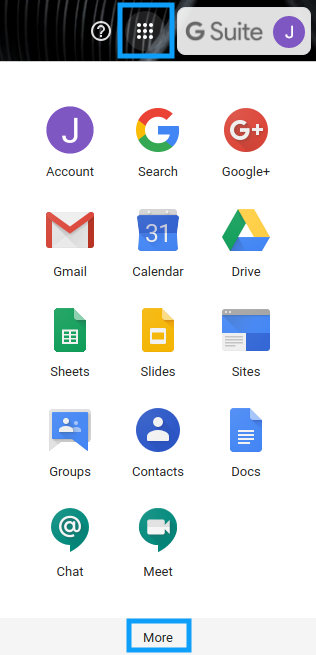
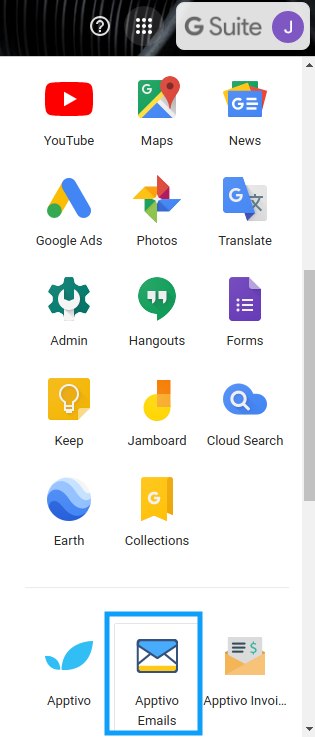
- You need to install the Apptivo Emails App from the G Suite Marketplace to start syncing your emails. Go to G Suite Marketplace and search for the Apptivo Emails app from the search box and click on it.
- Click Install.
- You can also install the Apptivo Emails app by clicking here.
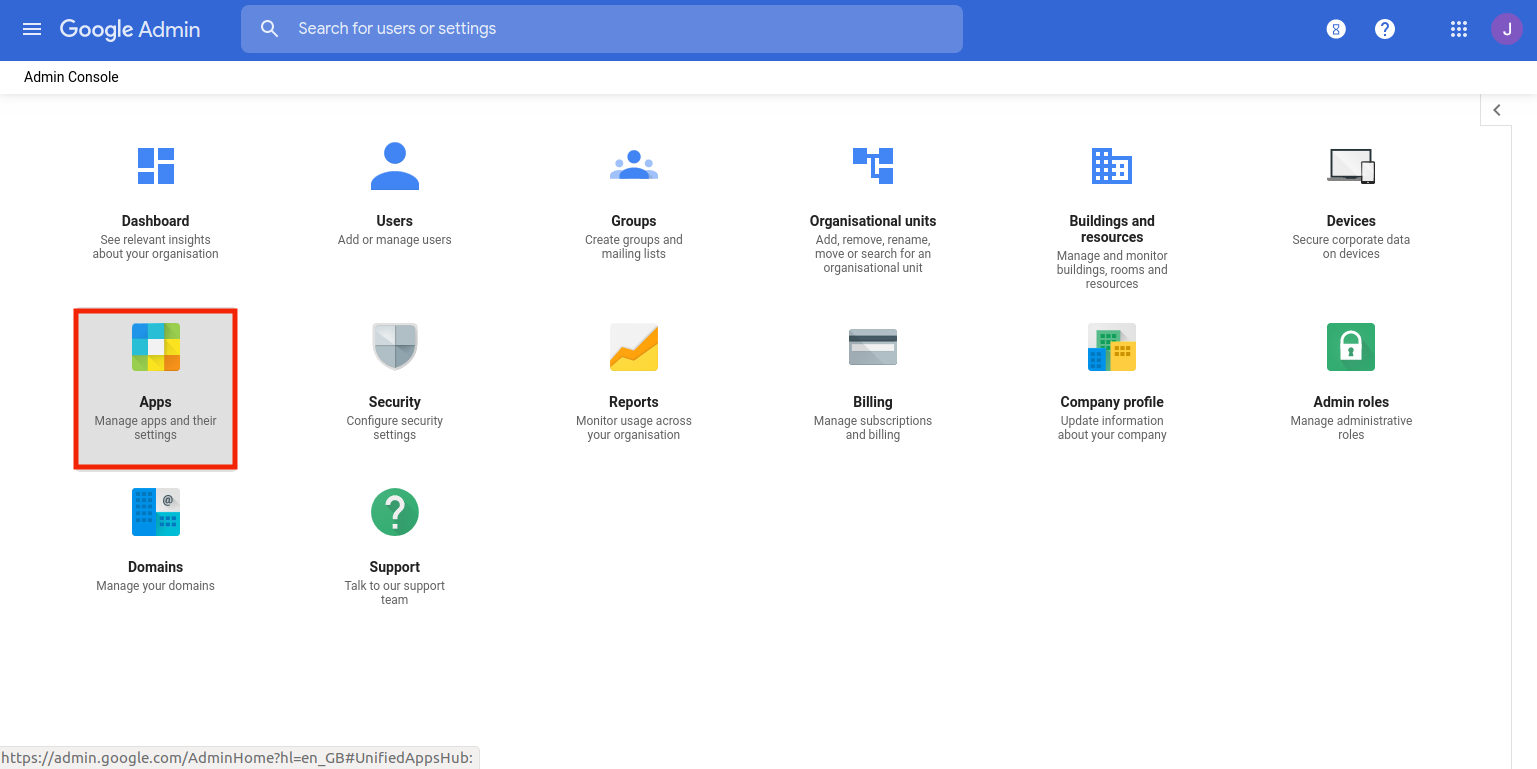
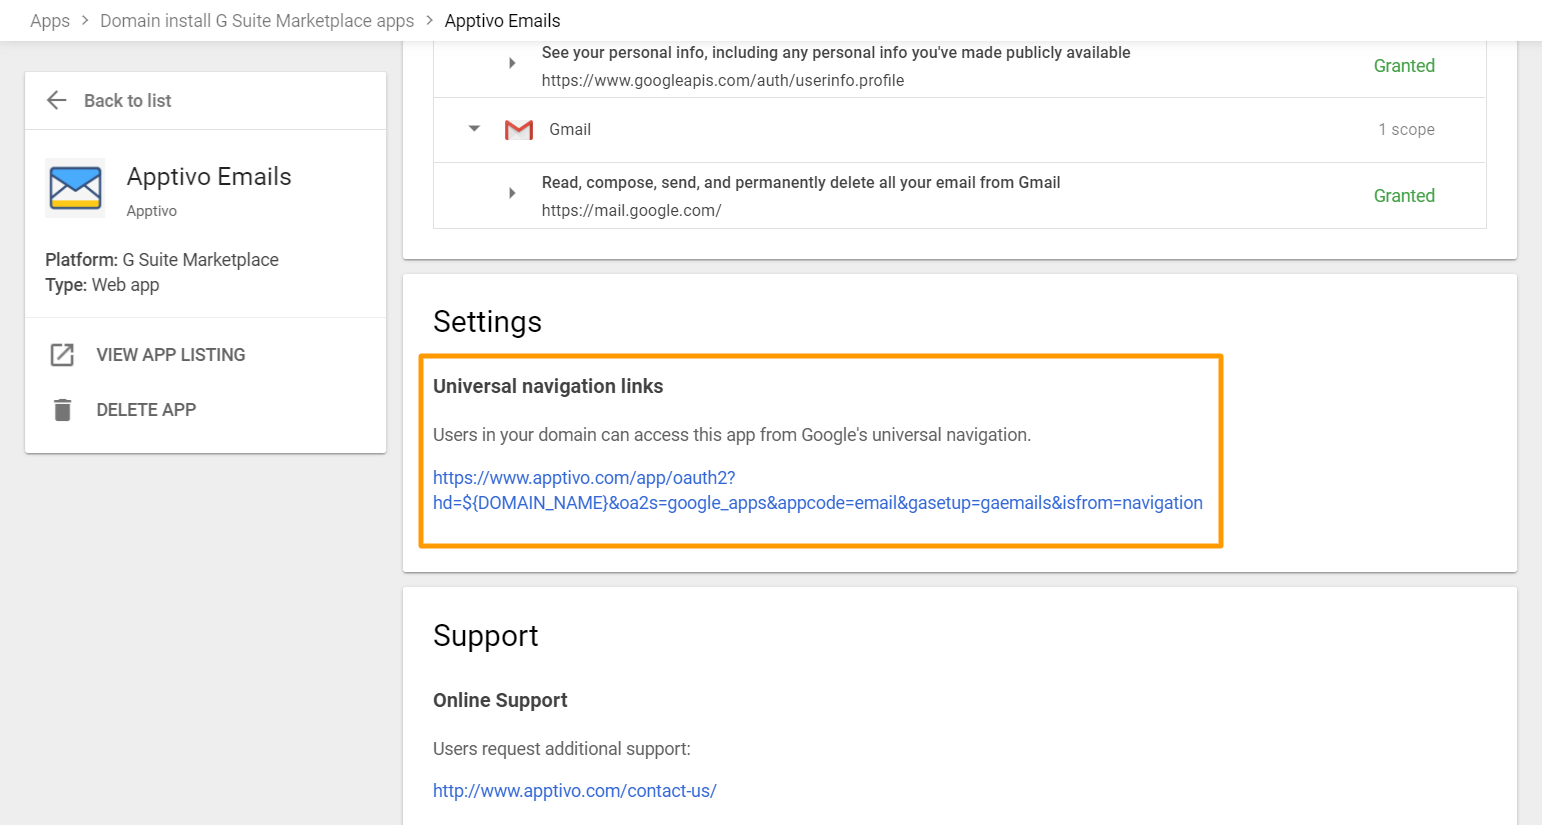
- Apptivo allows G Suite Admin to install the Apptivo Emails app and configure G Suite sync. The user can use the G Suite sync. If it is the first time installing the Apptivo Email app, then the G Suite Admin has to set up the Apptivo Emails App using the “Universal Navigation Link in G Suite Settings.”
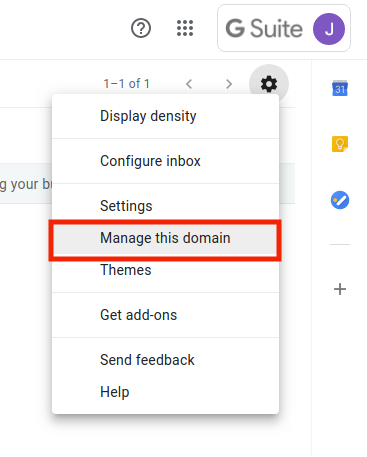
- Navigate to Settings in G Suite account and select “Manage this domain.”
- Go to Apps → Marketplace Apps → Apptivo Emails app.
- Select Settings for the Apptivo Emails app.
- Click on the link provided in the Universal navigation links.
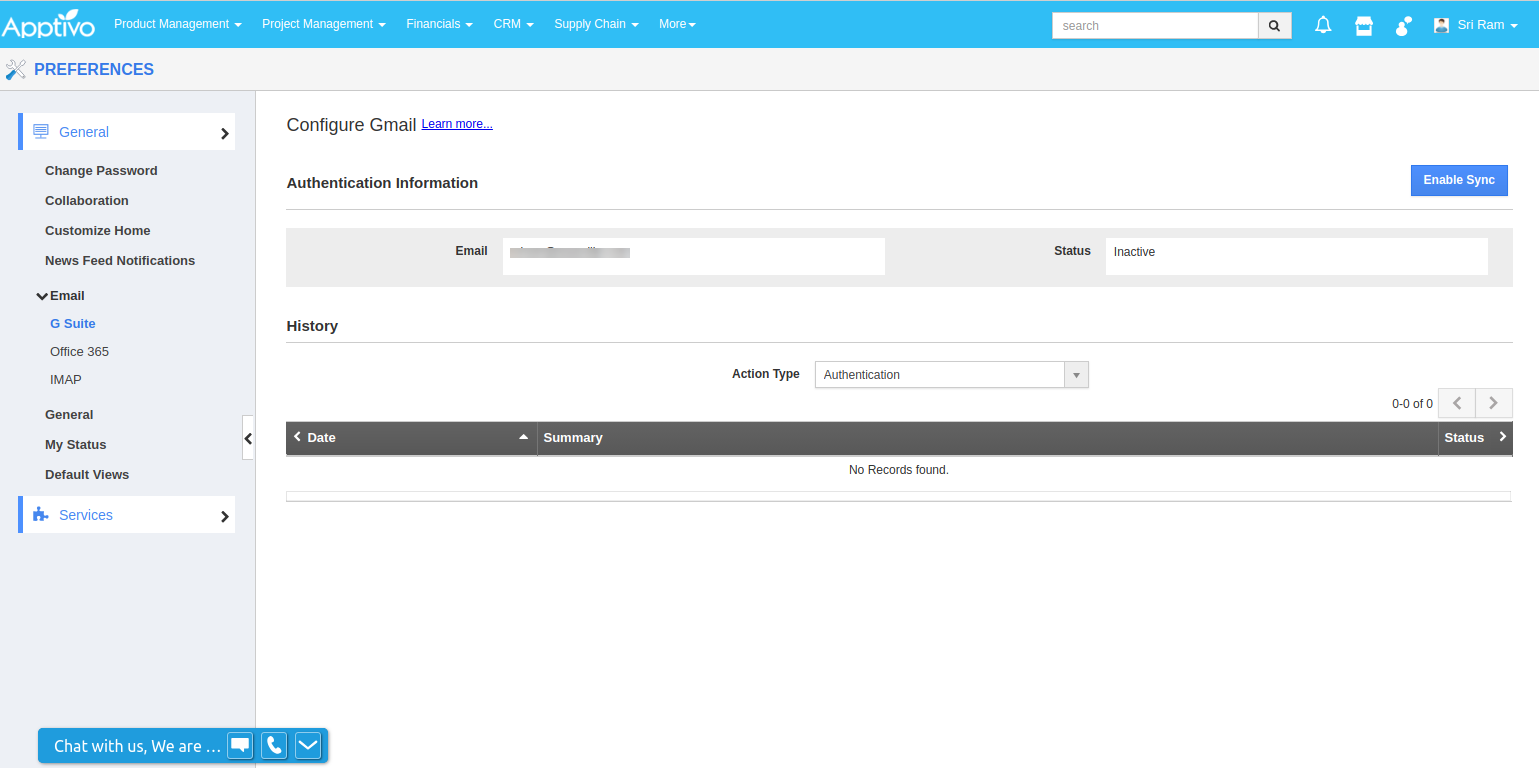
- In your Apptivo account, click on Preferences -> General -> Email -> G Suite. You will be directed to the “Configure G Suite” page. Here, the Email ID used in the G Suite account will be auto-populated.
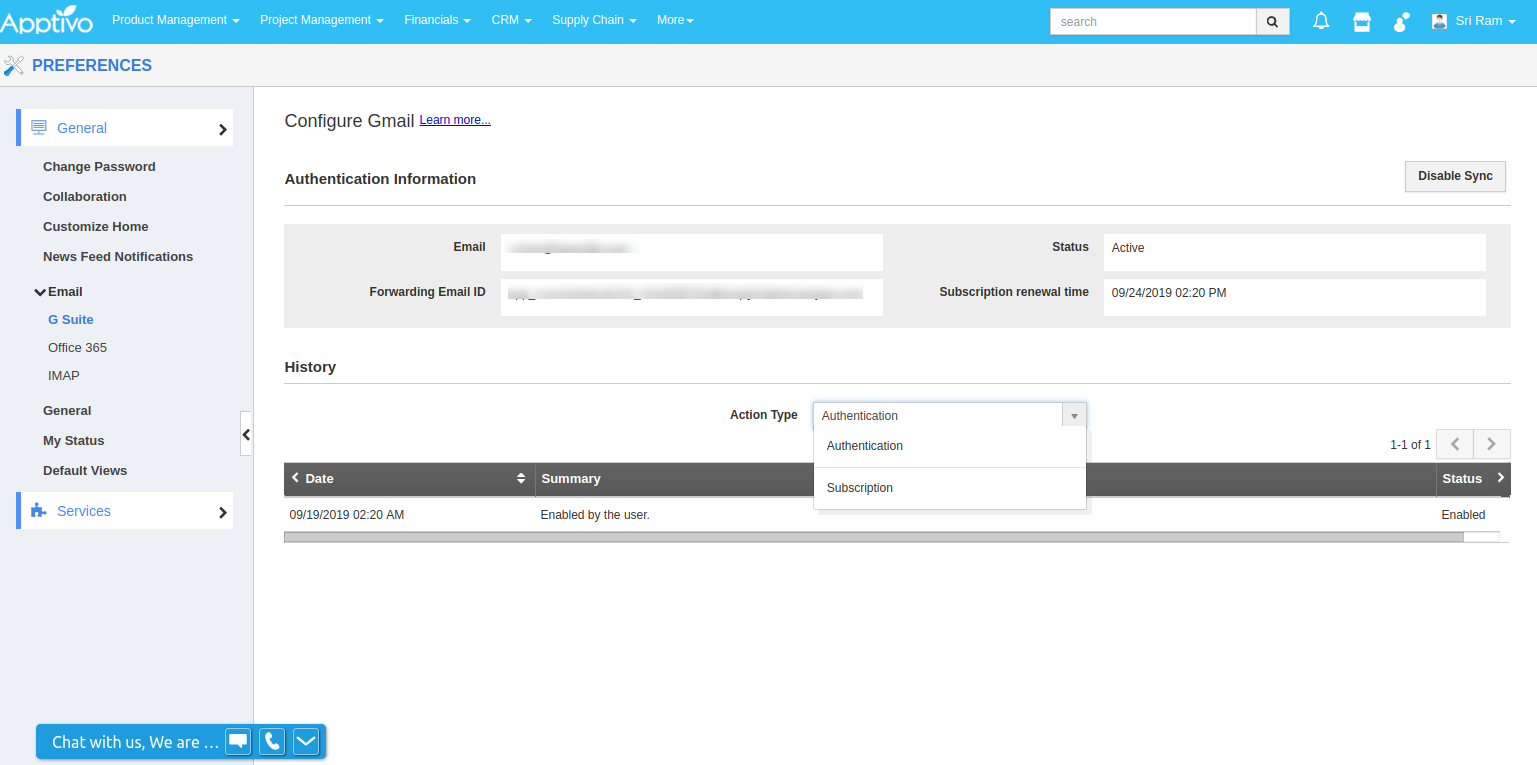
- You have the option to view the history of Authentication and Subscription. This can be viewed by selecting the preferred action from the “Action Type” dropdown.
- Now, click on “Enable Sync”.
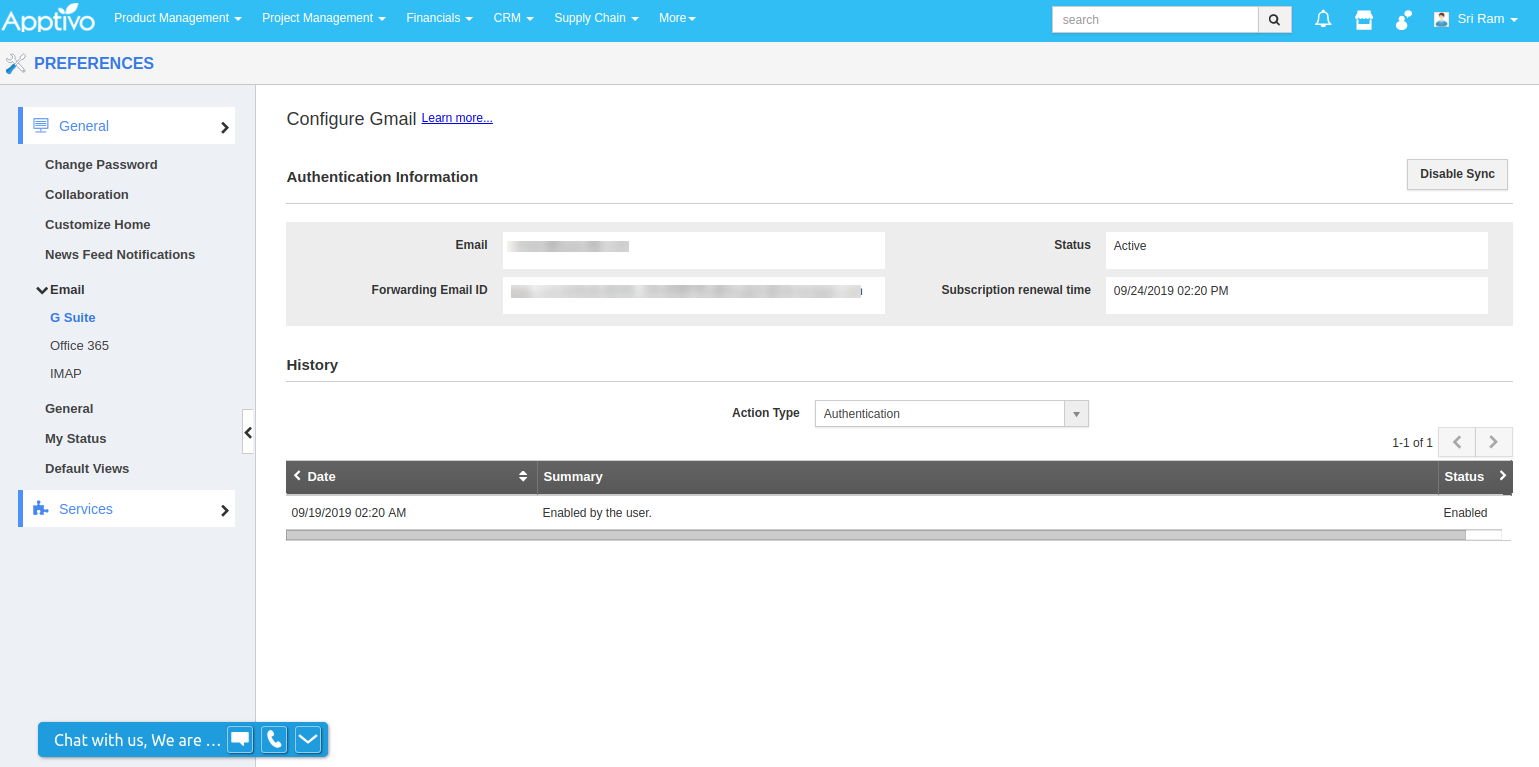
- The sync will be enabled. Forwarding the Email ID field will be visible once the sync is successfully enabled.
- Copy the Forwarding Email ID from your Apptivo account and paste it in the “Forwarding my Emails” to field in G Suite Forwarding settings. Now, the emails will get synced with Apptivo.
- You can view the last sync time from G Suite, Status of G Suite authentication(Active or Inactive) and history details of Authentication, and Subscription.
- Now, you have to set up Email Forwarding with this newly generated Id to sync all your incoming emails.
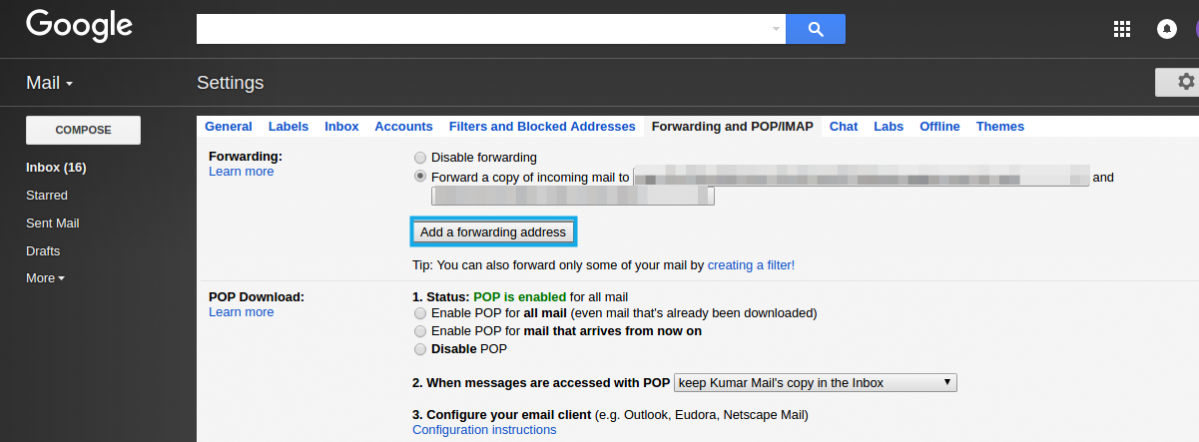
- To do so, navigate to your G Suite account and click on the "Settings" option. Select “Forwarding and POP/IMAP” tab and click on “Add a Forwarding Address”.
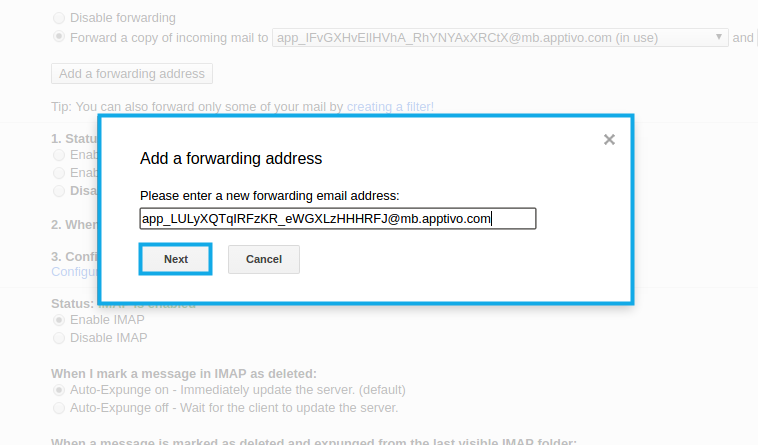
- Paste the "Forwarding email address" in the popup and click "Next".
- Now a pop-up window will appear, click on "Proceed" to receive an acknowledgment email with a confirmation code.
- You can now view the code in your "Apptivo Inbox" as shown in the following image:
- Copy and paste the code in the “Verify code” field of your Gmail account.
- Ensure to manually select the "Forward a copy of incoming mail to" option (By default "Disable forwarding" option will be enabled).
- Now all your emails received in your G Suite account will immediately get collected in your Apptivo account.
Note: With this procedure of Gsuite authentication using OAuth, you can configure only a single Email Id for email authentication and forwarding. If you are in need of many Gmail accounts to get authenticated to Apptivo, you can follow the process of Setup Email in Preferences Settings
