Browse by Solutions
Browse by Solutions
How do I View the Customer Contact association when Creating Invoice for a Property?
Updated on February 27, 2018 09:22PM by Admin
Invoices App helps you to view the Customer & Contact Association by selecting the option Property at the Invoices line level. It can be done when you create a Property with its Customer and Contact information, and those information gets reflected when you create an Invoice for a Property. Follow the steps below to view the Customer Contact Association.
Steps to View the Customer Contact Association
- Login and access to Properties App from the Universal Navigation menu bar.
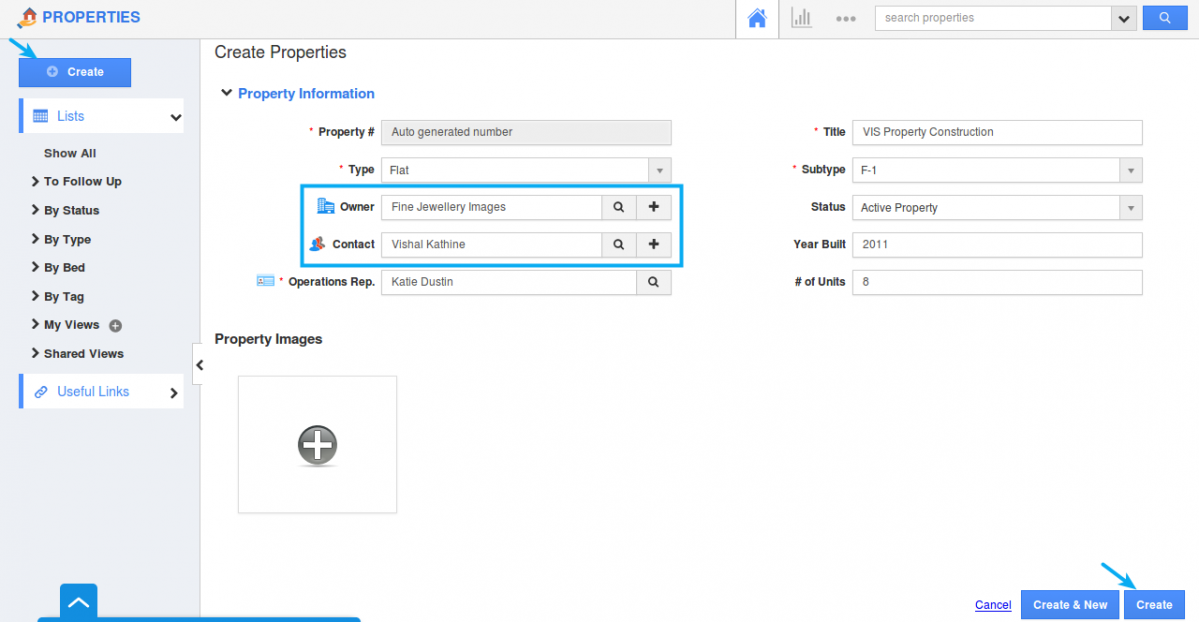
- Click on Create button to create a new Property.

- Provide your Property information. It is necessary to provide the Customer and Contact information as it gets reflected when creating Invoice.
- After creating a Property, move on to Invoices App.

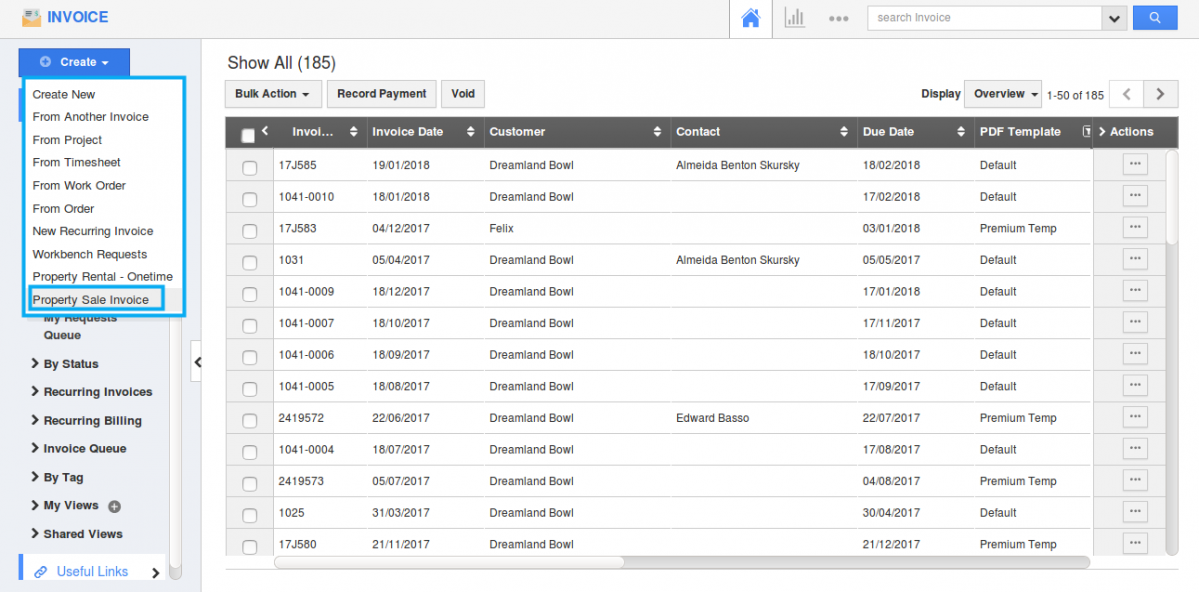
- Click “Create -> Property Sale Invoice” from the Left navigation panel.
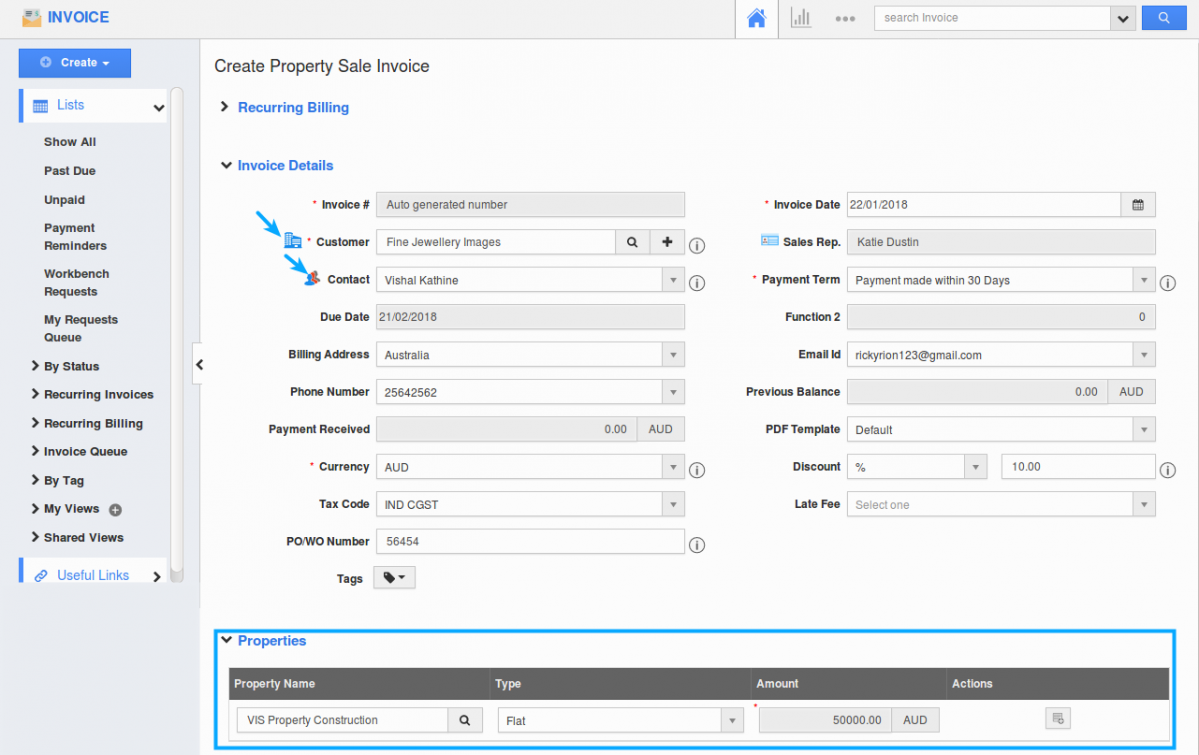
- “Create Property Sale Invoice” page opens where you can provide your invoice details.
- In Properties section, when you search and select for a property, Customer and its associated contact of the selected property gets auto-populated.

- Finish providing your details and click on “Save for Later” to use the invoice in future.
Related Links
Flag Question
Please explain why you are flagging this content (spam, duplicate question, inappropriate language, etc):

