Browse by Solutions
Browse by Solutions
How do I Validate Email Ids in Apptivo?
Updated on January 24, 2018 04:49AM by Admin
While creating your prospects, there are numerous chances for you to enter incorrect Email ids. Having created your prospect, you would progress up in the sales process of converting them to your customer. As a result of incorrect email ids, sending out email campaigns and follow ups to those prospects, will be a complete squander. What, if you are warned at the time of creation of your prospect? Yes! Apptivo offers you Email Validation for both the standard and custom email fields in all the apps.
Let us now go through the steps to enable email validation for the standard email field.
Steps to Enable Email Validation
- Consider the Leads App.
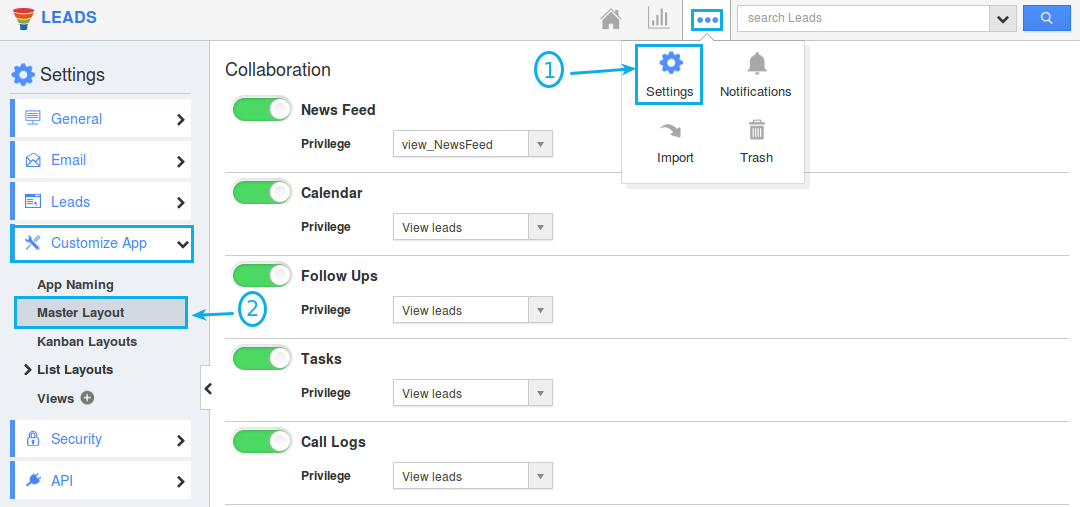
- Click on “More (...)” icon -> “Settings” -> “Customize App” -> “Master Layout”.

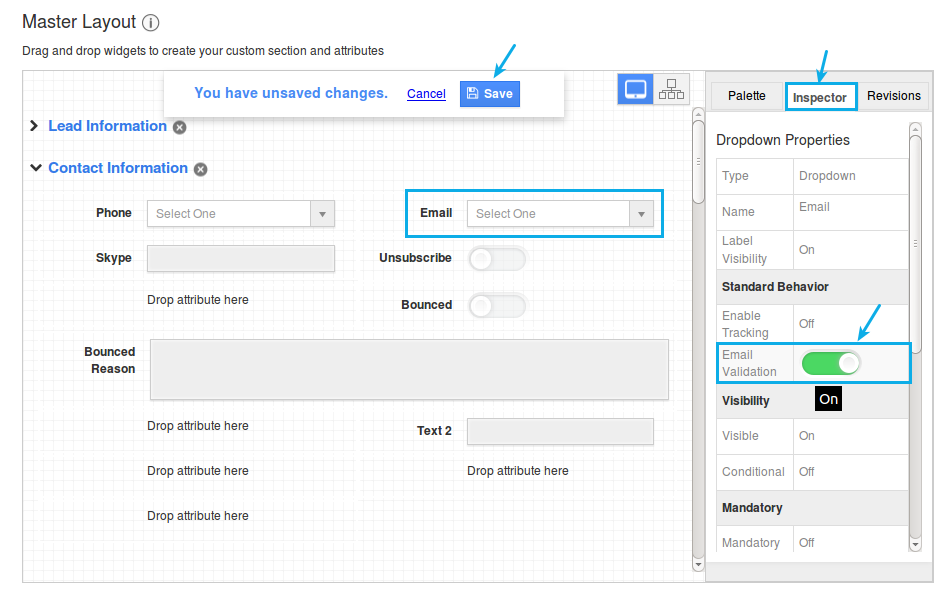
- Now, click on the “Email” field found in the master layout.
- Slide the toggle ON for the "Email Validation" from the "Inspector" Tab.

- Click on “Save”.
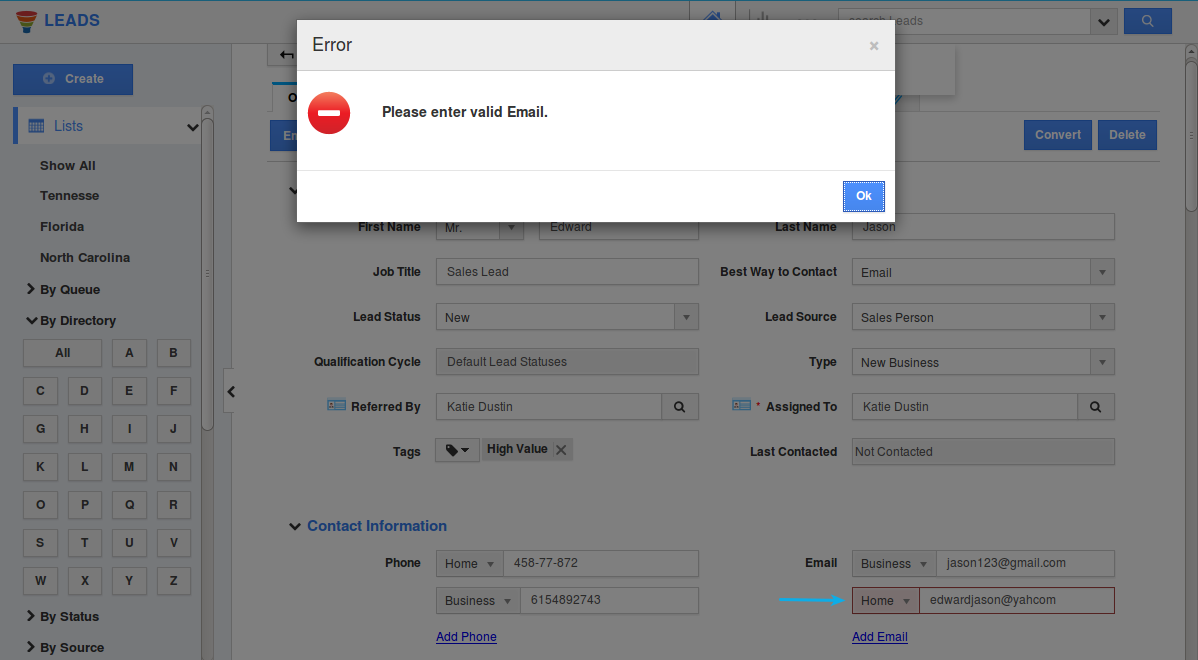
- Now, when you create lead or update a lead with an improper email id, you will be notified with an alert popup as shown in the image below:


