In the Apptivo Monthly Recurring Revenue (MRR) Dashboard, you can view both the Monthly and Yearly Revenue generated by the Business. All the configured attributes will be displayed on the Dashboard. To know how to create an MRR Report/Dashboard in Opportunities App, please follow the below steps.
Steps to Create Charts
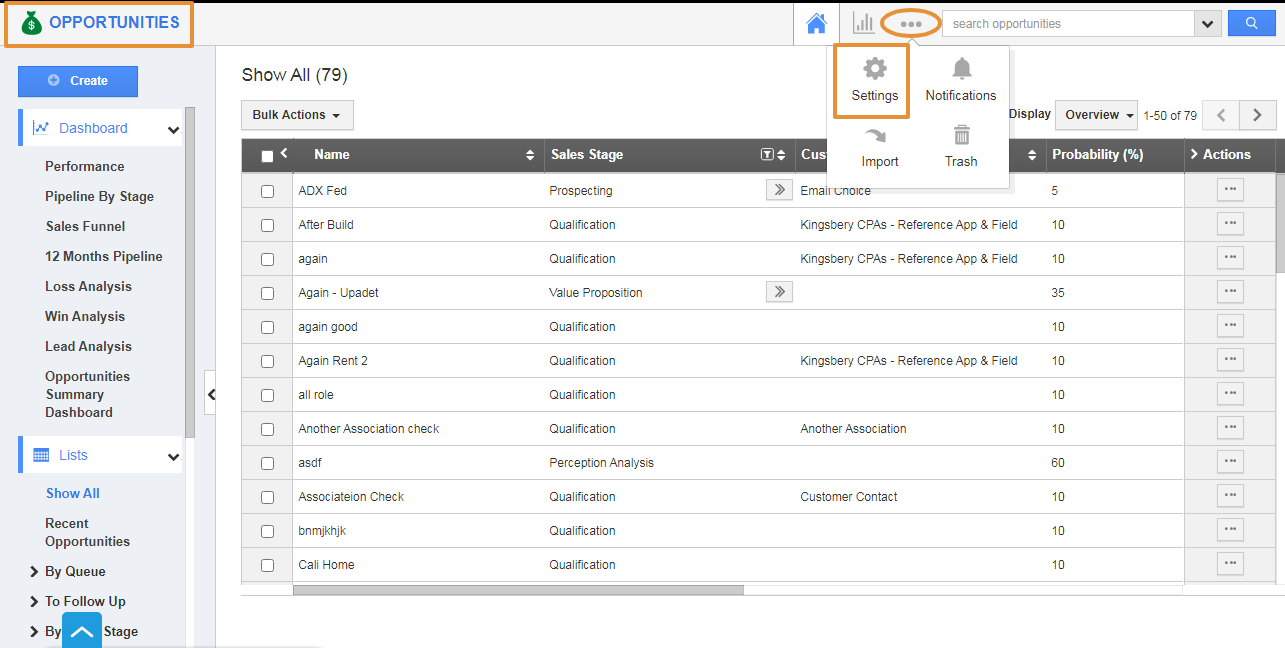
- Log in and access Opportunities App from your universal navigation menu.
- Click on the More(...) icon and select the Settings.
- In the Settings page, click on the Intelligence → Charts → App.
- Click Create Button and select Stacked Column from the drop-down.
- In the Create Column Chart page, enter the name of the column chart.
- Enable the toggle ON will make the chart available to create a dashboard.
- Privilege enables you to restrict access to the reports based on the privilege set. Based on the security privilege given, this report can be left open to all, or restricted to a specific user type.
- Then, customize the X-Axis and Y-Axis with the required business data.
- In the X-Axis tab, you can configure the following:
- X Label - The label name of the X-Axis.
- Data Type - This denotes the type range of the data.
- To enable MRR toggle this must be set to Time (Monthly).
- X Data Attribute - This denotes the opportunity attribute based on which the X-Axis will be populated. Select the required opportunity attribute from the drop-down. Here, the Closed Date attribute is selected.
- Enable the Toggle on for the MMR.
- The term denotes the contract length. Here, the Term attribute is selected.
- One-Time denotes the amount calculated on the start day of the contract. Here, the Amount attribute is selected.
- One Time Period denotes the amount calculated for the one time period. Here, the Close Date is selected.
- Recurring Revenue denotes the amount calculated from the start day of the month to contract length. Here, the Amount attribute is selected.
- Similarly, in the Y-Axis tab, you can configure the following:
- Aggregation Type - Select Sum from the drop-down.
- Y Label - The label name of the Y-axis.
- Y Attribute Type - Select the type as Attribute, which in turn displays the Y Attribute field below.
- Y Attribute - This denotes the opportunity attribute based on which the Y-axis will be populated. Select the required opportunity attribute from the drop-down.
- Then, click on the Create button.
- You can view the created chart on the list.
Steps to Create a Dashboard
- Go to Settings → Intelligence → Dashboard → App → click Create.
- In the Create App Dashboard page, enter the name and the description of the dashboard.
- Slide the toggle ON will make the dashboard visible.
- Privilege enables you to restrict access to the dashboard based on the privilege set. Based on the security privilege given, this dashboard can be left open to all, or restricted to a specific user type.
- In the Palette section, you can view the above-created charts/reports under the Charts dropdown. You can arrange them in a single, two or three-column layout.
- Drag and drop the required section from the Right side panel.
- Next, drag and drop the above-created chart in the added section.
- Change the Name of the Section in the Inspector Tab.
- Once done, click on the Create button.
- The Dashboard will get created and added on the List.
- Now go to View MRR Reporting Dashboard on the Opportunities home page.


