Browse by Solutions
Browse by Solutions
How to set the Approval flow in Estimates App?
Updated on January 16, 2020 06:38AM by Admin
You can send your Estimates for approval by creating an approval flow. Approval flow allows Managers to keep a track of the estimates and ensure that a particular estimate is moved to the next step only after getting an approval.
- Go to Settings in Estimates App → Work Flow → Approval Flows.
 |
- Click Create from the top right to create a new Approval flow. You can see the Create Approval flow page.
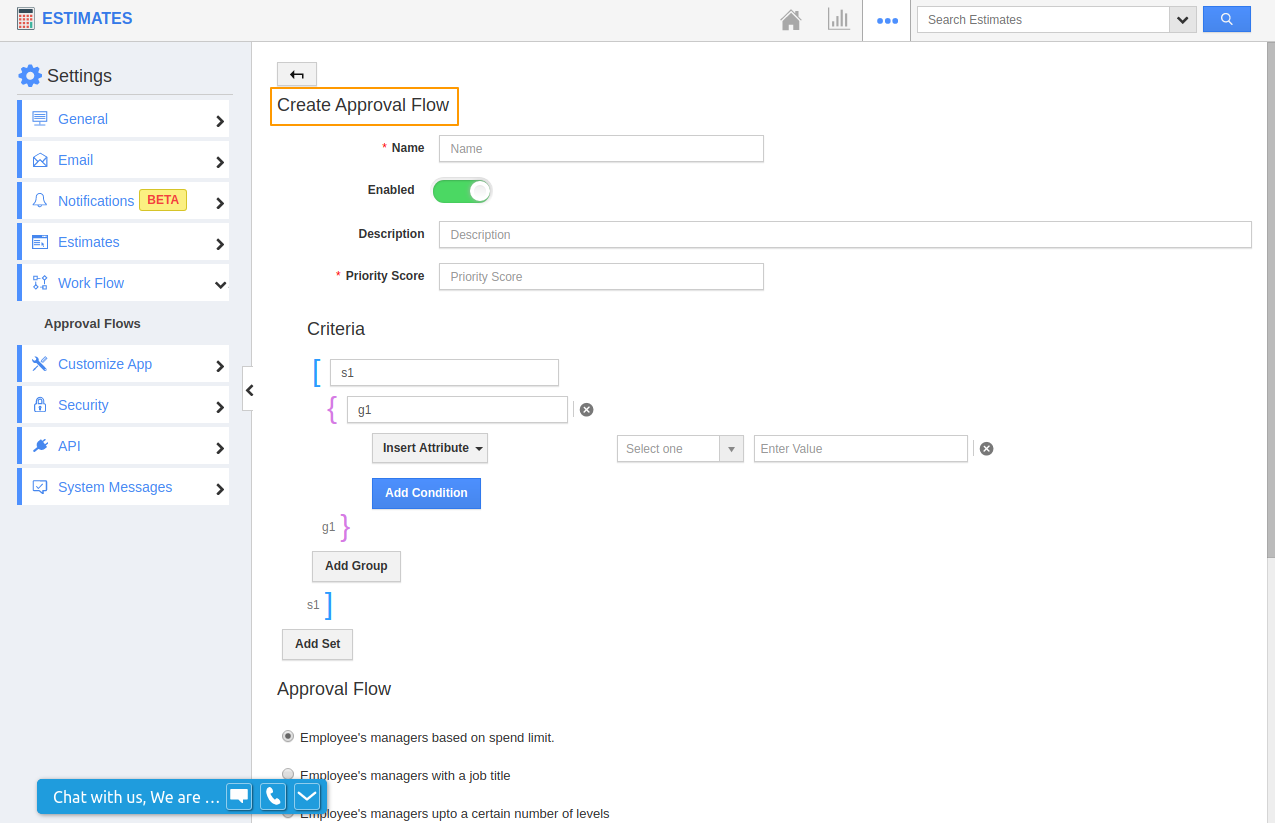 |
- Enter the information in the fields mentioned.
Name: Create a Name for the Approval flow.
Description: Give a description of the flow.
Priority Score: It is to determine how important the flow is.
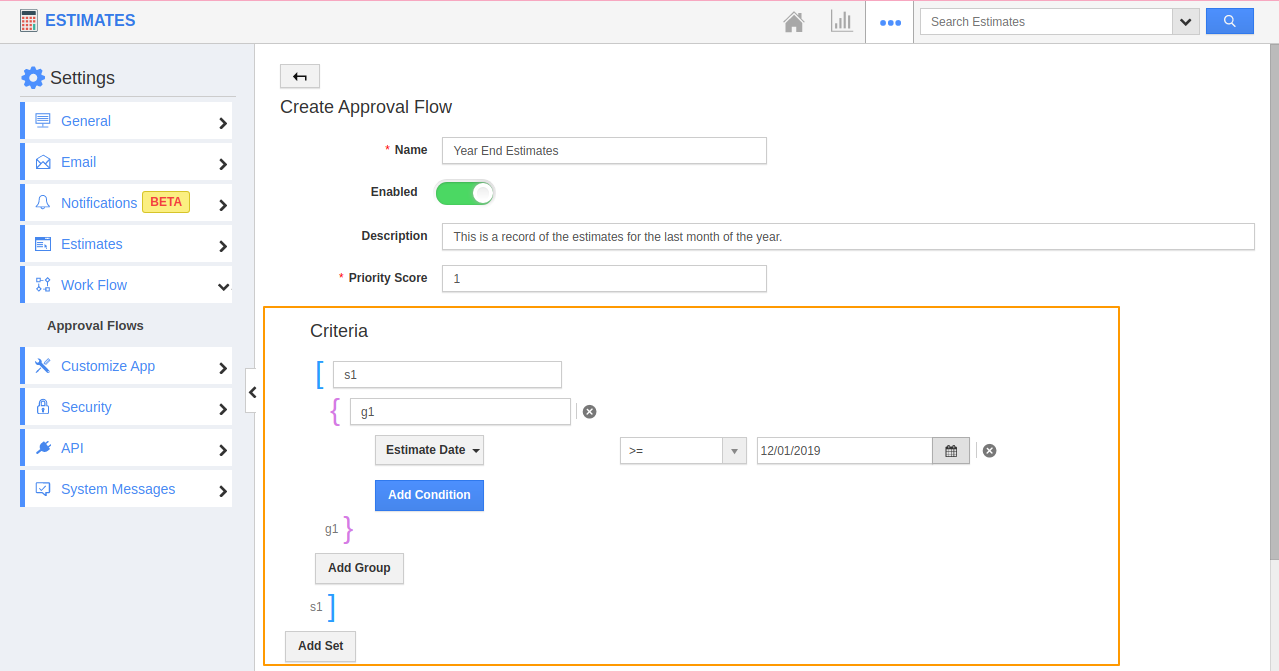
Criteria: In the condition field, add the instance during which the approval request has to be generated.
You can see that the condition here is to generate a request for approval flow if the Estimate date is greater than 12/01/2019.
 |
Approval Flow: In this field, choose who can approve the Estimates.
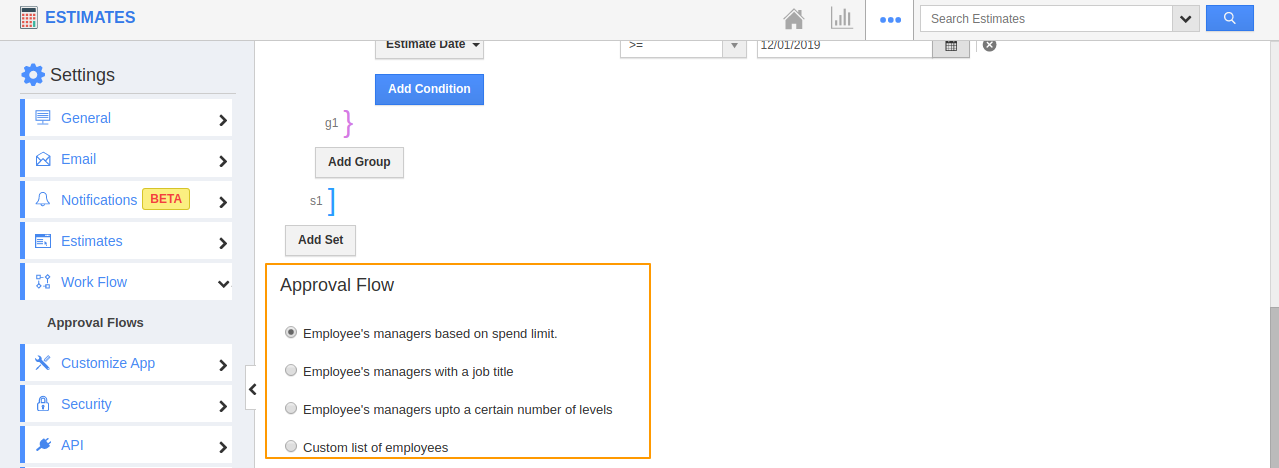 |
Estimates App offers four types of Approval flows:
Employee’s managers based on the spent limit
You can send the estimates for approval if the spent limit exceeds the given value.
Employee’s managers with a job title
You can send the estimates for approval only to the Managers with a selected job title.
Employee’s managers up to a certain number of levels
You can send the estimates for approval only to Managers with mentioned levels. Custom list of employees
You can create a list and send the estimates to the employees for approval. You can also create a sequential order for employees for approval.
Here, I have chosen the custom list of employees with a sequential order where the estimate will be sent to Employees in a sequence.
 |
Actions: Estimates App enables you to decide the action to be taken when an estimate is submitted, approved or declined. For each action, you can either send an email or update the attribute for the contact.
 |
Send an Email
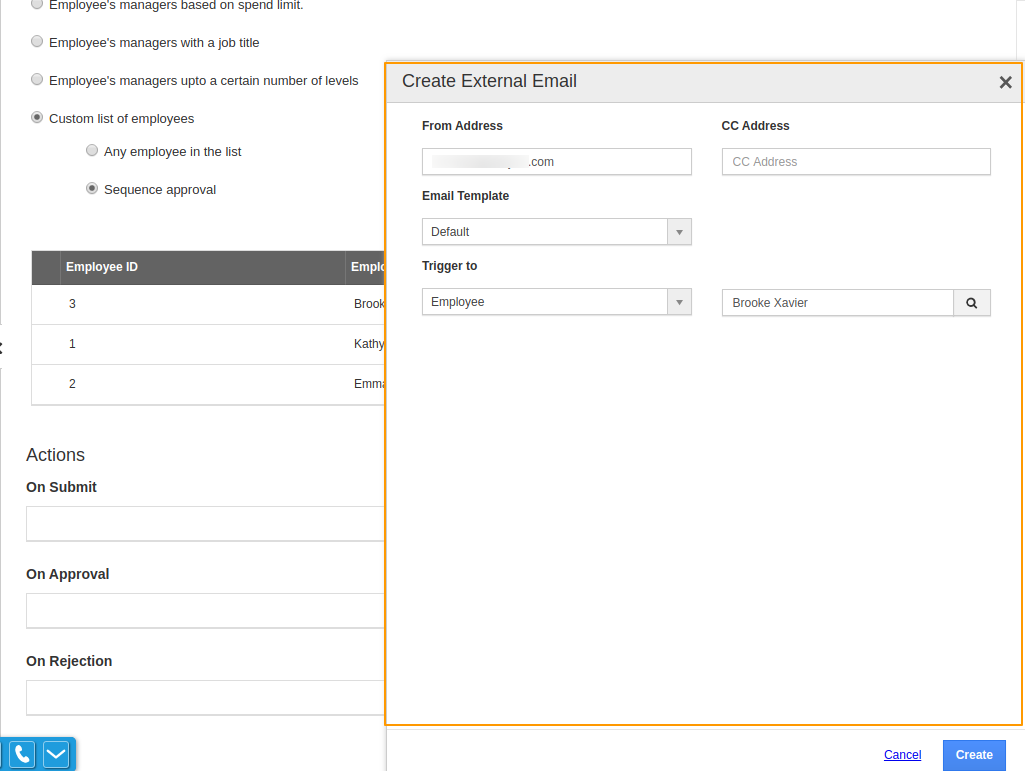
- On selecting send an email, you can see the create external email page where you can add the From and To address along with the template.
 |
- You can see the created email on Actions. Here, you can edit or delete the email.
 |
Update Attribute
- You can create criteria where an attribute changes on submission, acceptance or rejection of an estimate.
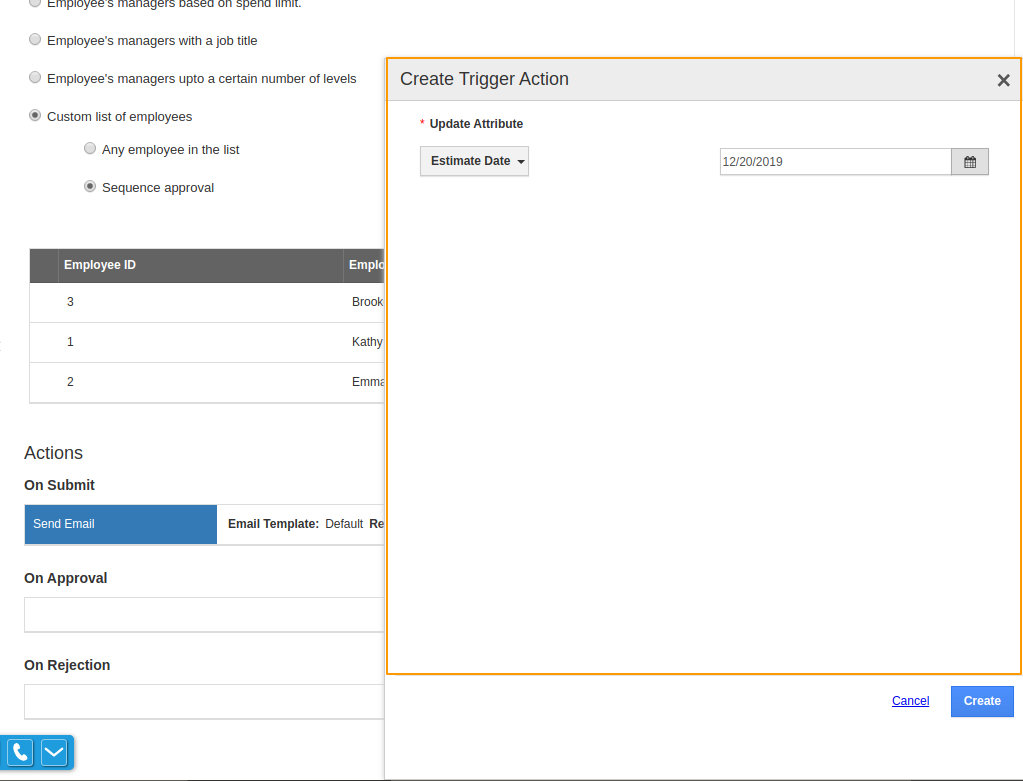 |
- Here, the attribute Estimate Date changes to 12/20/2019 on performing a particular action.
 |
- Similarly, an attribute is created for the rejection of an estimate.
 |
Create a New Estimate
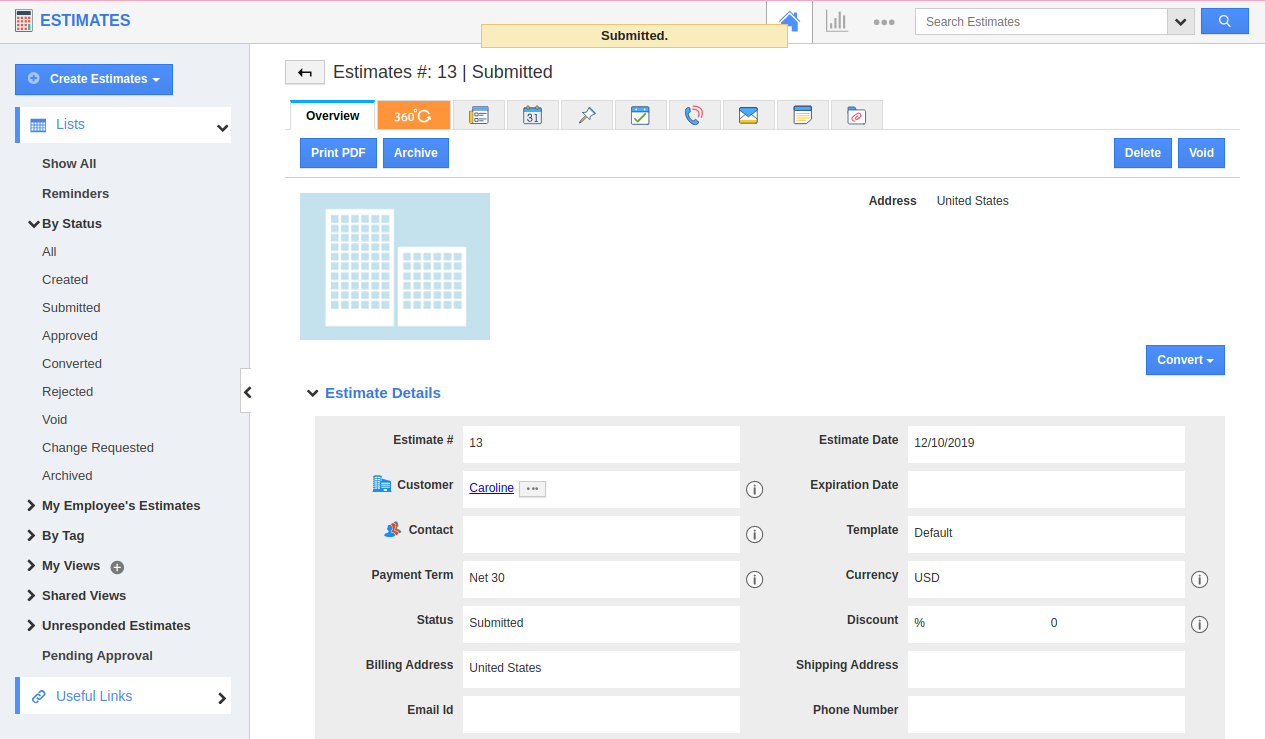
- Once the criteria are set, create a new estimate in Estimates App. Add the required information and submit it.
 |
- On submission, as per the flow, an email will be generated to the listed employees.
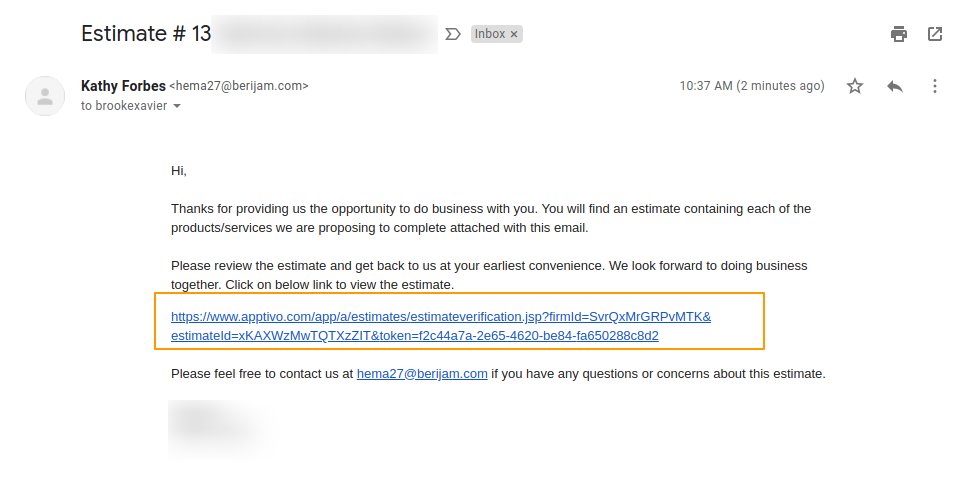 |
- You can click the link to view and approve the Estimate.
 |
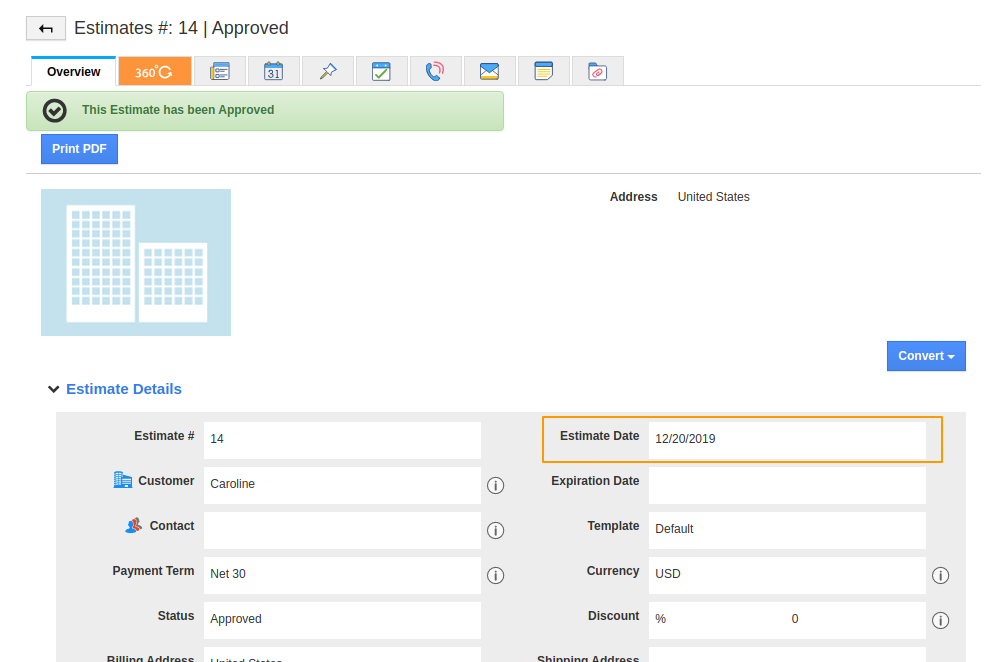
- Here, you can also reject, request change, and print PDF of the Estimate. On approval by all the listed Employees, you will receive a notification that the estimate has been approved.
- The Estimate date gets updated in the Estimate.
 |
- Similar changes will occur on the Rejection of an estimate.
Bad Practices
- In sequential order approval flow, the records proceed in the desired sequence. Hence, the signature cannot be overridden by the next Employee.
- You cannot edit an estimate once approved.

