Browse by Solutions
Browse by Solutions
How to send an email to ‘Assigned To’ as a Trigger in Tasks?
Updated on February 17, 2020 11:42PM by Admin
Keeping track of Tasks becomes simplified with the Tasks activity of Apptivo. Rather than going through each task to know about the changes, you can use the Trigger feature to get on-time updates. You can also send an email as a trigger to the Employee to whom the task is assigned.
Tasks Activity allows Event-Based and Time-Based triggers.
Event-Based Triggers: Event-based triggers perform an action when the criteria match. You can perform an action when a task is created, updated, or deleted.
Time-Based Triggers: You can make use of triggers to perform an action on the required time using Time-Based Triggers.
For Instance: Consider sending an event-based trigger to the ‘Assigned To’ person in the Tasks Activity.
- Go to Settings → Tasks → Triggers → Event-based. To create a new trigger, select create from the right pane.

- You will be re-directed to the Create Trigger page. Add a name for the trigger.
Step 1: Selecting an Event
- The trigger is enabled by default. You can create triggers during three events.
Task Created
On the creation of a task, you can perform an action when the criteria match.
Task Updated
On updating a task, you can perform an action when the criteria match.
Task Deleted
You can use this feature to perform an action when the task is deleted.
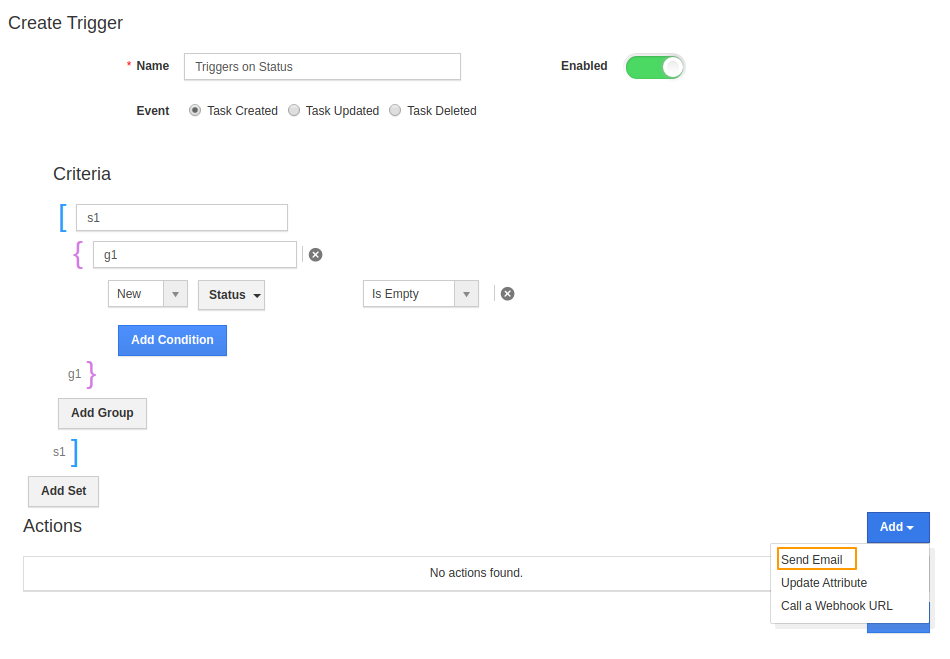
A trigger is to be created when a Task is created. Hence, you can see the event chosen is Task Created.
A trigger can be disabled when it is not needed.
Step 2: Setting the Criteria
Now, add the condition for the trigger.
The condition is set to perform an action when the status attribute is empty. You can also create multiple conditions for a single trigger by selecting Add Condition.
Step 3: Action to be taken
The criteria are set. Now, decide the course of action. Here, the action is to send an email to the Employee, Contact, or Team for whom the task is assigned.
- On clicking Add from the top right of Actions section, you can four kinds of actions are available. Select Send Email.
- Create External Email will popup as a side panel.
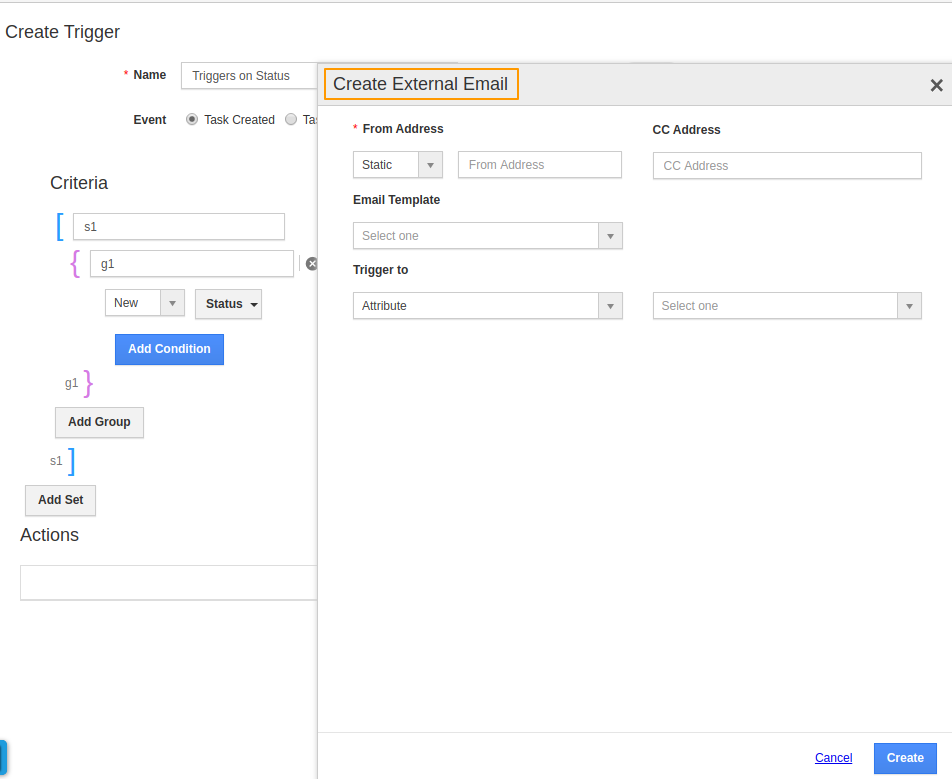
- In the From Address section, you can choose either static or dynamic email addresses.
Static Email: You can enter a default email address here.
Dynamic Email: You can choose the email address from the list of employees or teams or from an attribute.
Here, I have chosen a Dynamic Email address with the Employee’s email address as the Sender.
- You can also add the Email template for the trigger.
- Once the above-mentioned information is added, you can send an email to the person to whom the trigger is ‘Assigned To’.
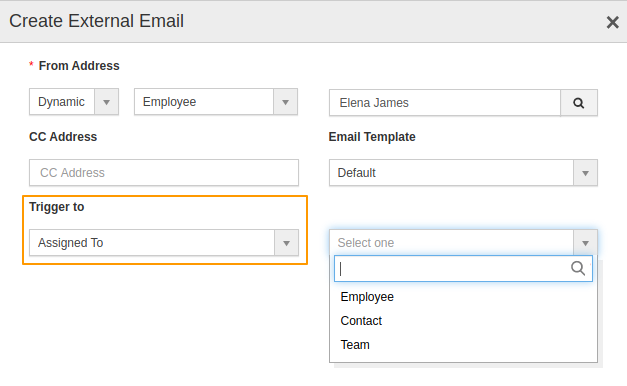
- Once ‘Assigned To’ is selected as Trigger, you can send an email to an Employee, Contact or Team.
Assigned to an Employee
- Consider configuring Assigned to → Employee in the Create External Email page.
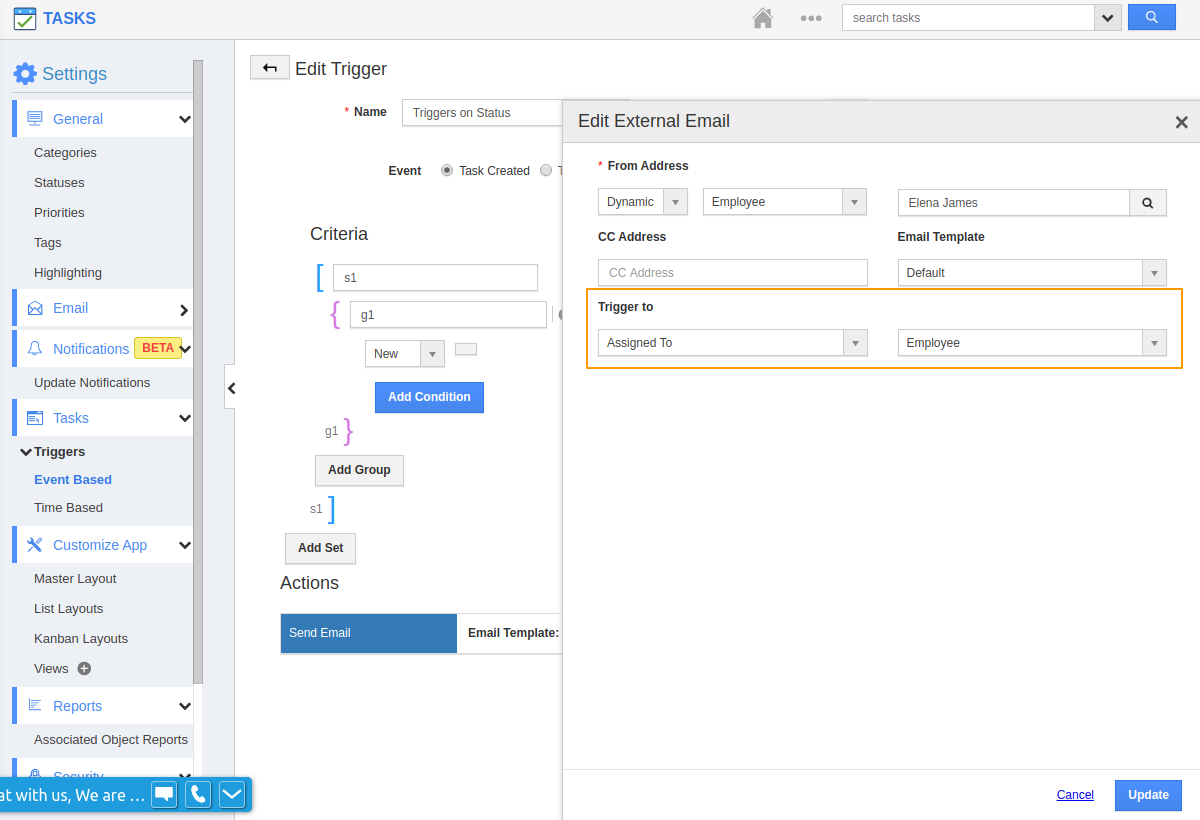
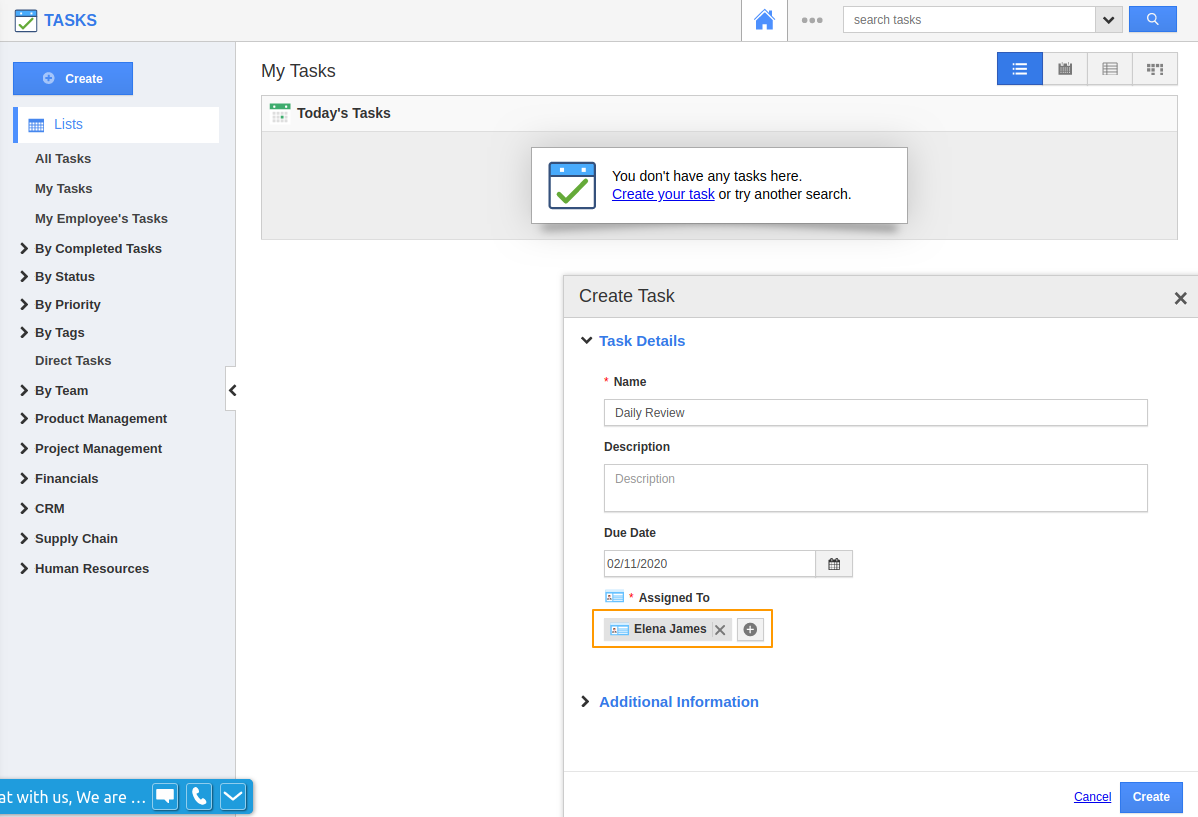
- Create a task using the Tasks activity where the Assigned To is set to an Employee.
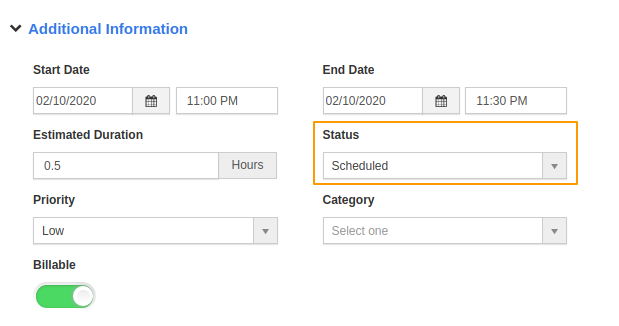
- Along with this, the status is set to Scheduled.
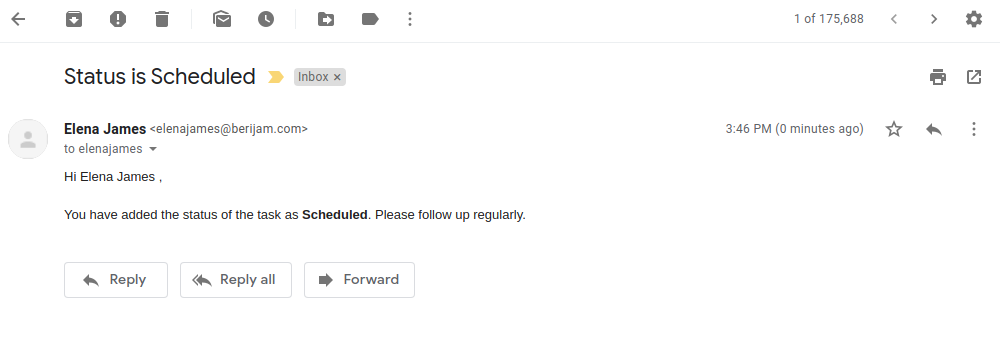
- Once the task is created, an email will be generated to the Employee as a trigger.
Assigned to a Contact
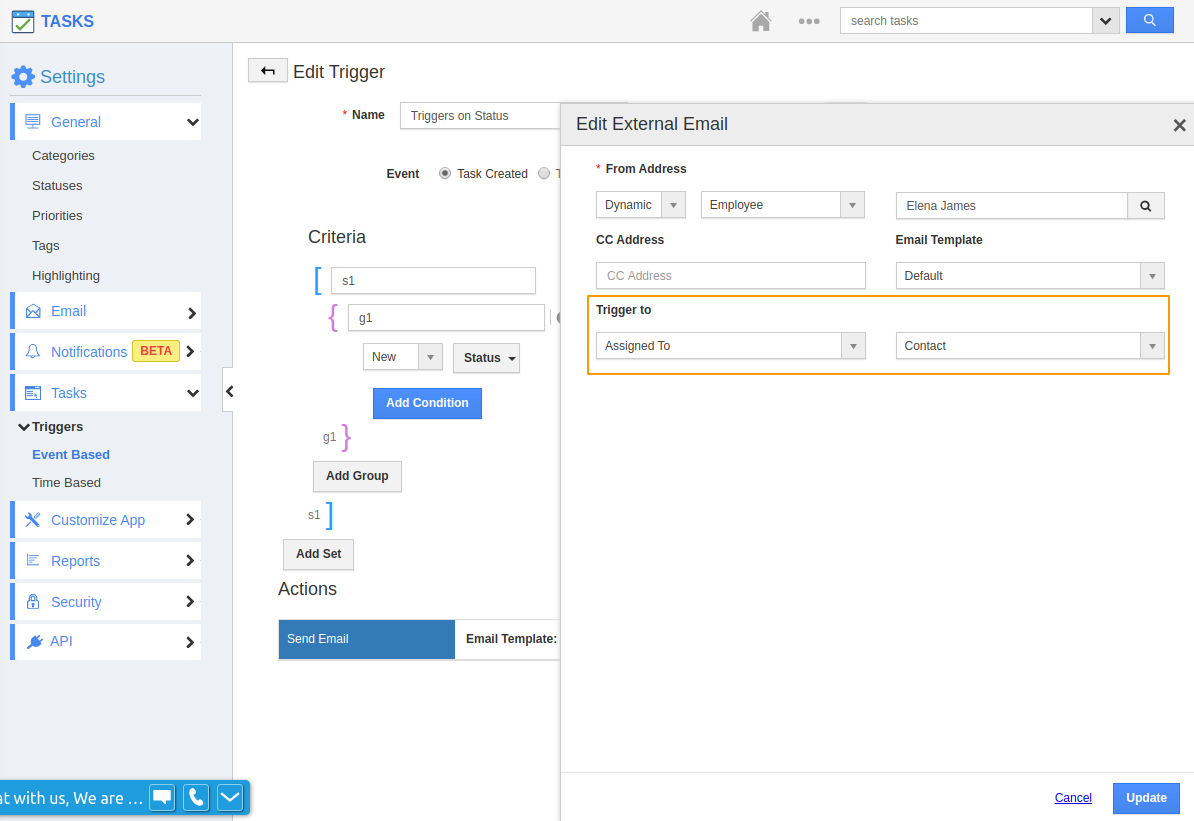
- Consider configuring Assigned to → Contact in the Create External Email page.
- Create a task using the Tasks activity where the Assigned To is set to a Contact.
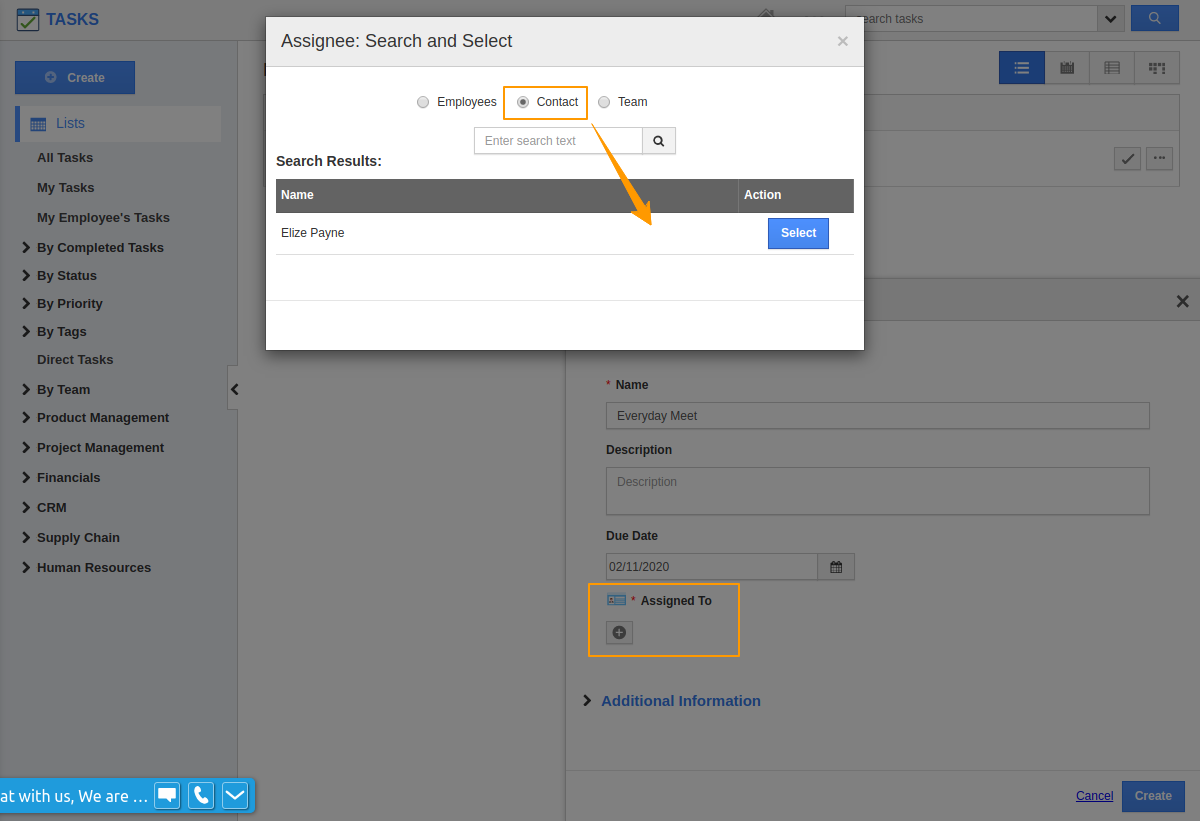
- Along with this, the status is set to Scheduled.
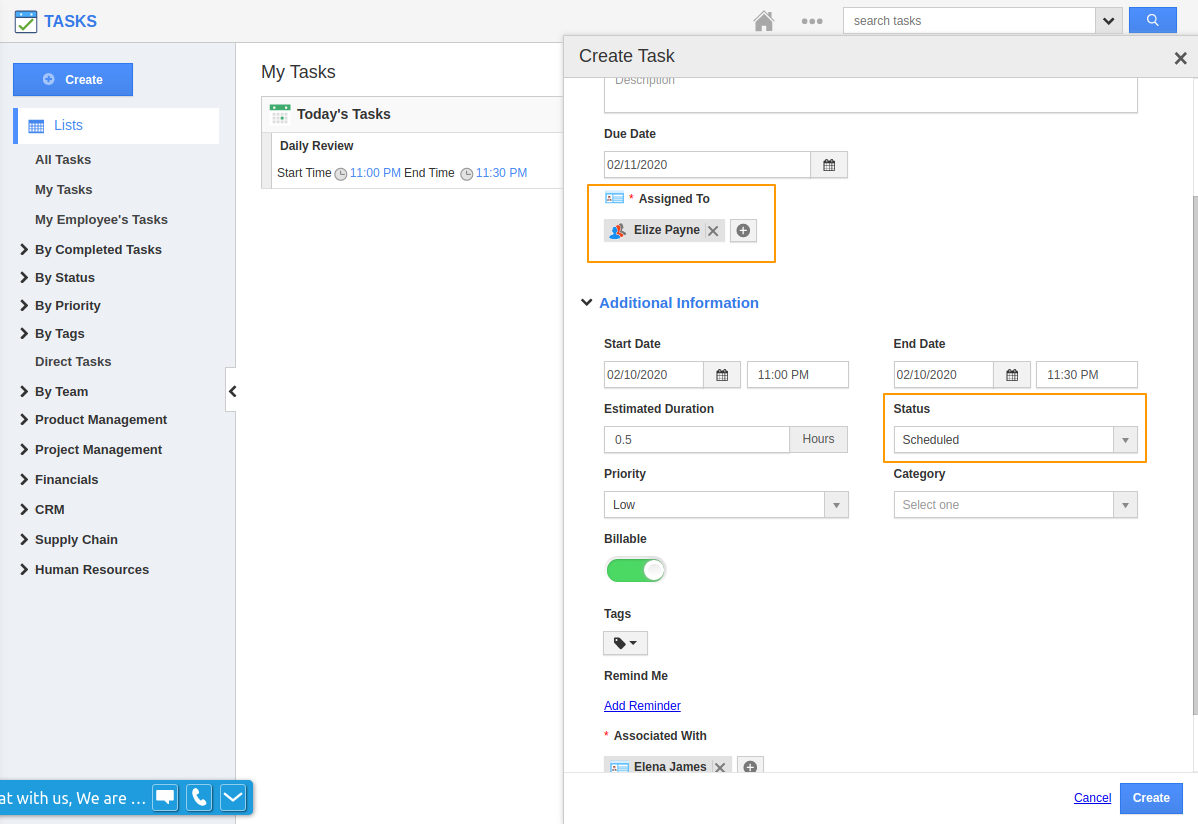
- Once the task is created, an email will be generated to the Contact as a trigger.

Assigned to a Team
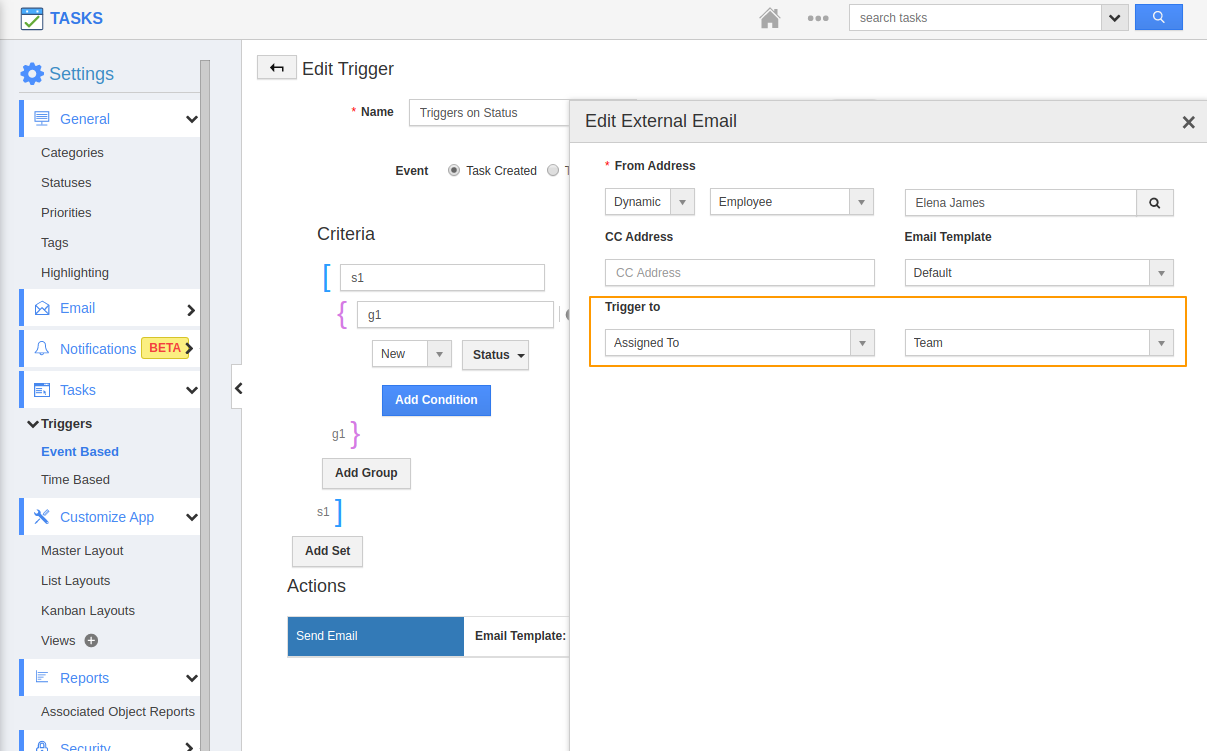
- Consider configuring Assigned to → Team in the Create External Email page.
- Create a task using the Tasks activity where the Assigned To is set to a Team. Along with this, the status is set to Scheduled.
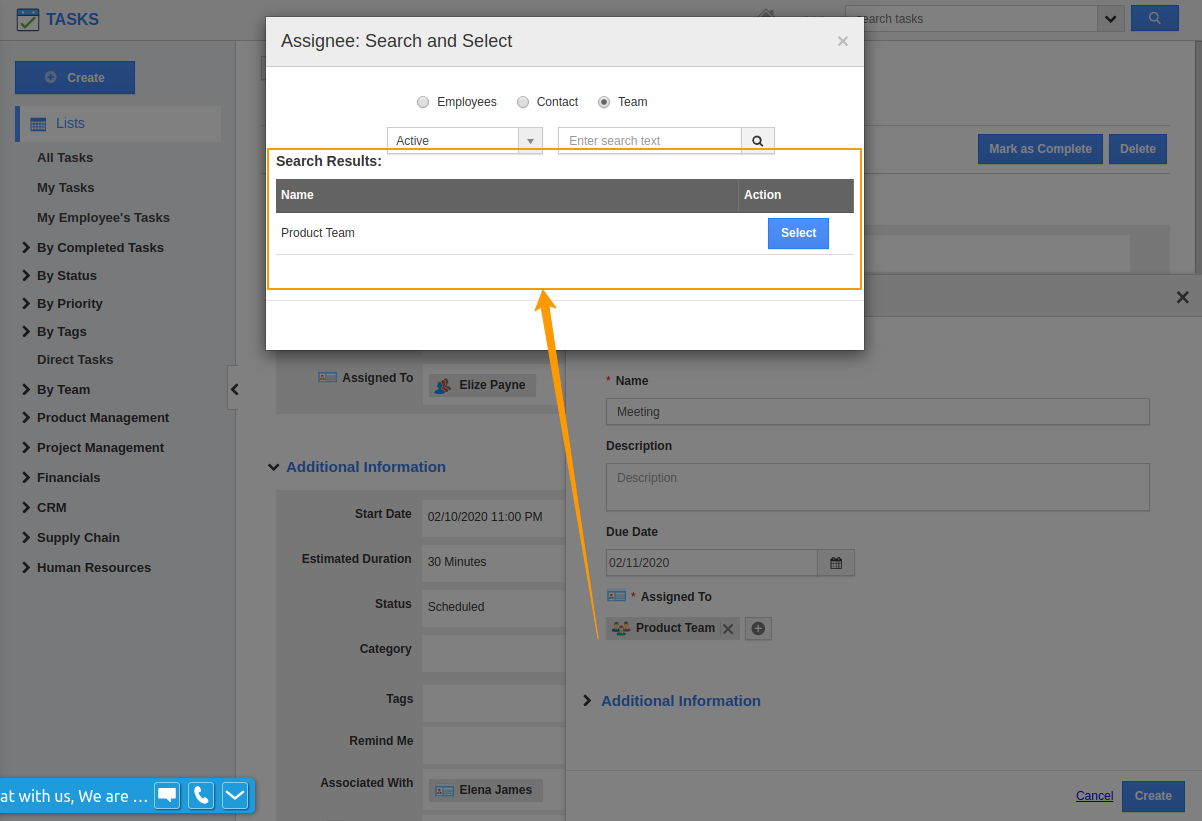
- Once the task is created, an email will be generated to the Team as a trigger.
 Similarly, you can create a Time-based trigger to the ‘Assigned To’ persons in the Tasks Activity.
