In addition to the Apps present in Apptivo, you can also create new Apps for your business purposes using the App Builder. For Cases App, you can create a Cases Extended App to meet the requirements of different customer groups. You can add this App as a Reference App and sort the attributes present.
Joy is a Customer Experience Manager. She uses the Cases App to address the concerns of the customers. However, the Organization offers both Software Solutions and Services. So, they have two groups of customers. To have proper division, she creates a Cases Extended App for Services and keeps the Cases App for Software Solution. If the customer belongs to both groups, there is a need for the association. She achieves it with Ref App Fields in the Cases App. She can easily sort out the Cases in the Extended App with sort filters.
Steps to sort the attributes
Step 1: Adding Reference App in Master Layout
Consider a Cases Extended App called Tickets is created.
- Go to Settings → Customize App → Master Layout in the Cases App.
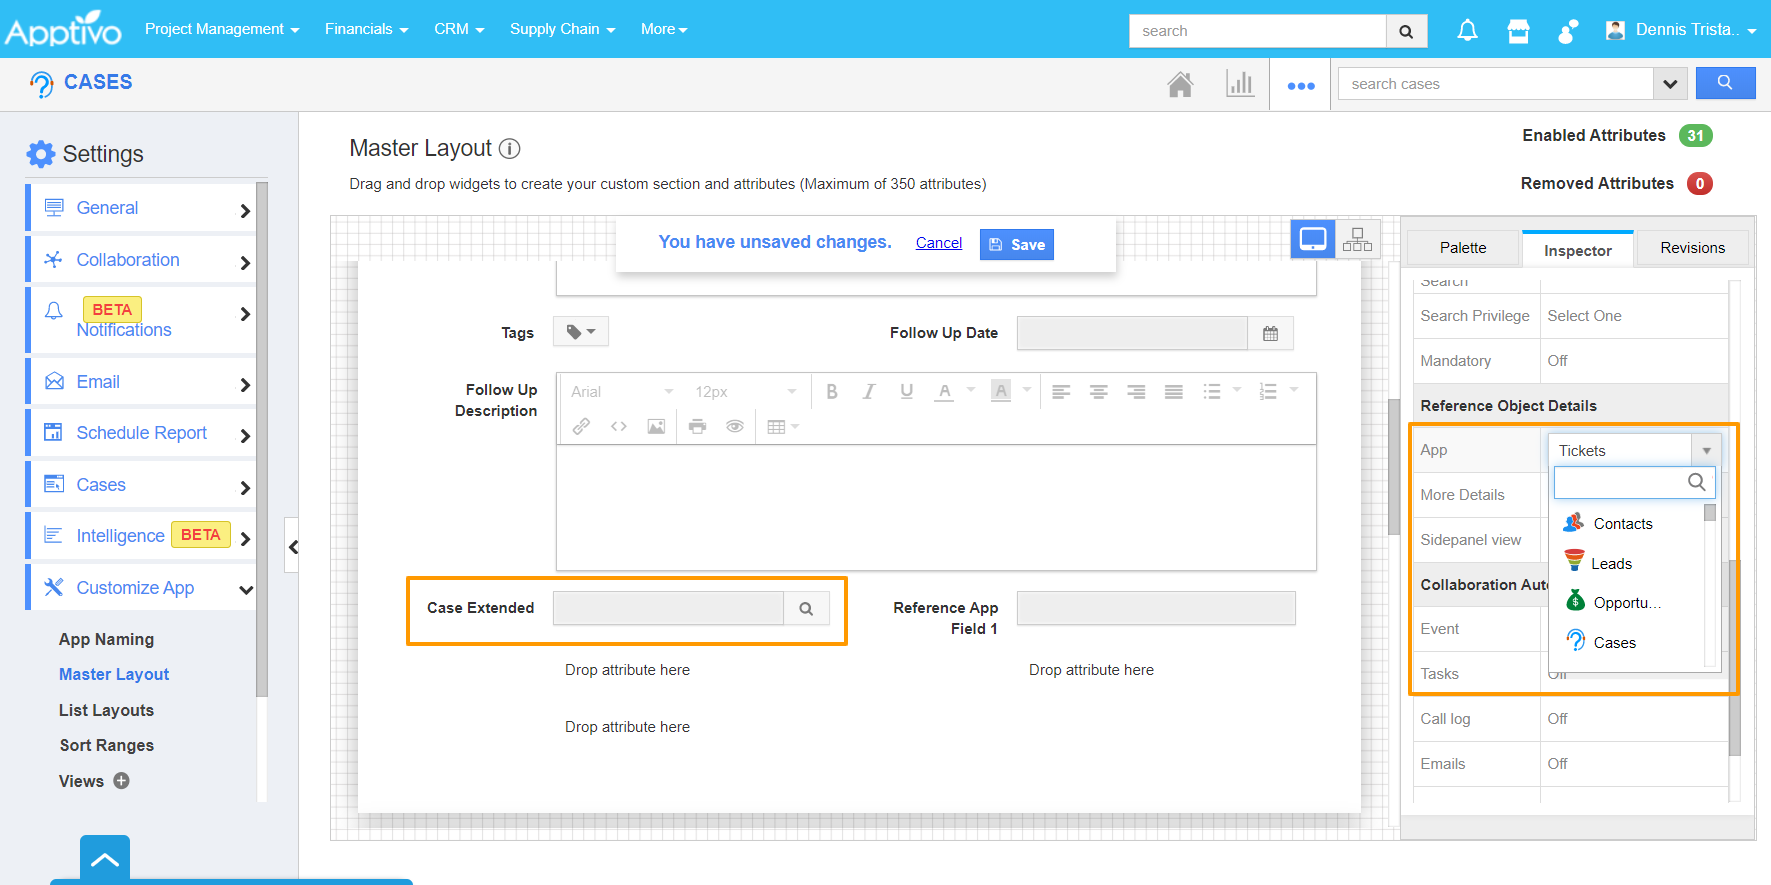
- Drag and drop the Ref App and Ref App Field attribute from the Palette to the Master Layout.
- Click on the Ref App in the Master Layout to rename the attribute in the Inspector tab.
- On scrolling down, you can choose the App to be associated as Tickets using the Associated Object Details section.
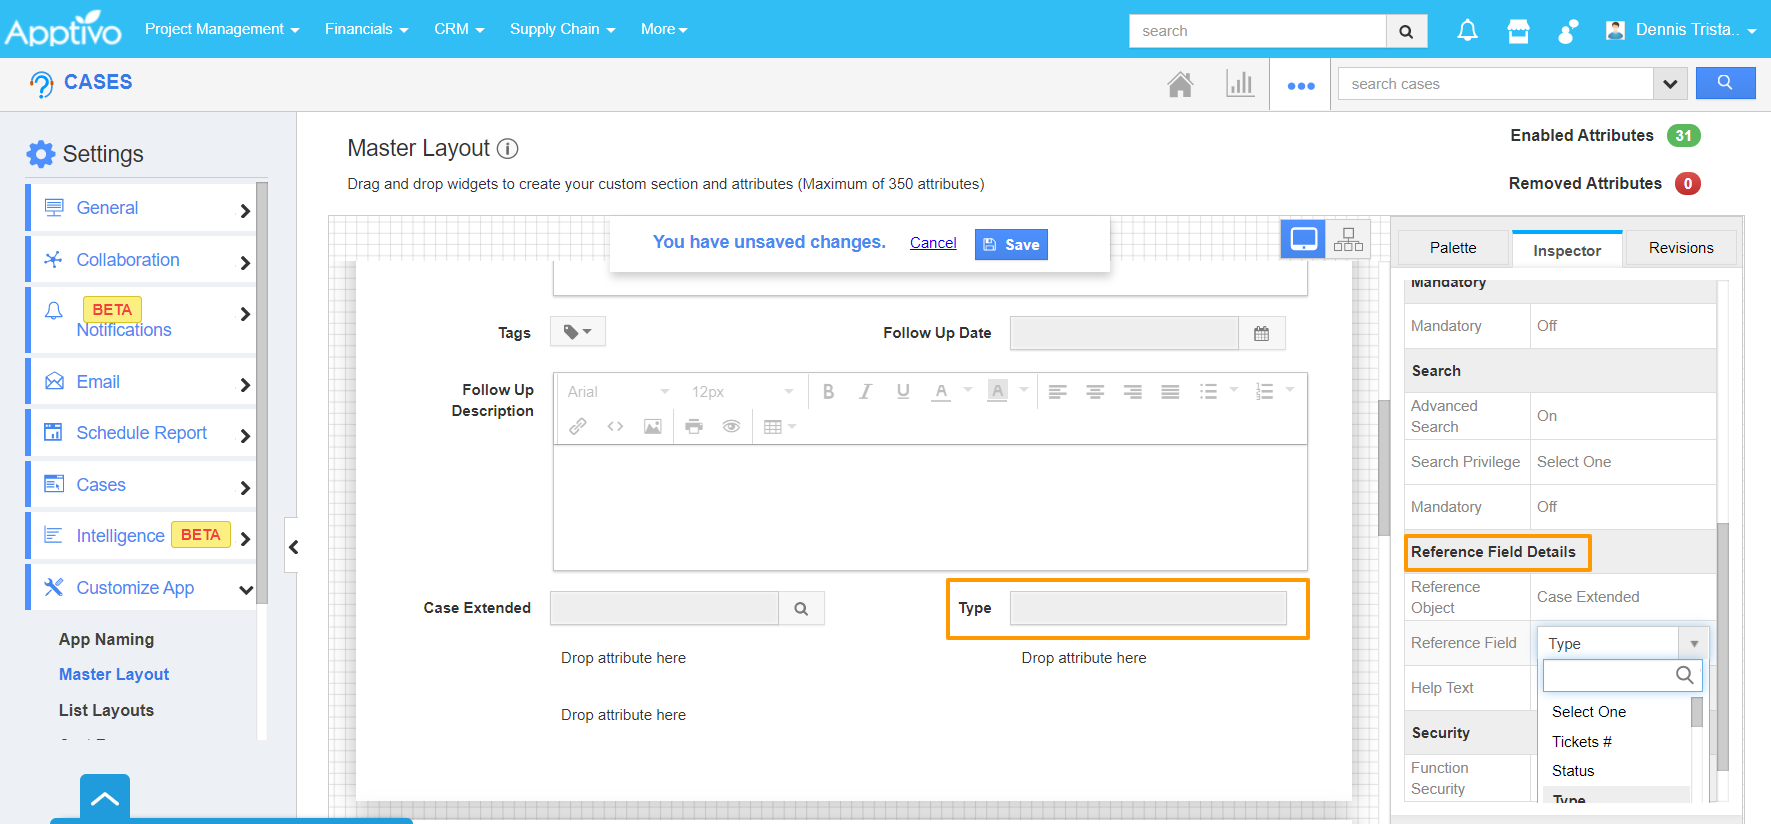
- Click on the Reference App Field in the Master Layout to view the Inspector tab.
- Here, you can rename the attribute. Here, it is renamed as Type.
- To associate the Ref App to this field, scroll down to Reference Field Details in the Inspector tab.
- Here, set the Reference Object as Cases Extended App (Name of the Ref App added) and choose a Reference Field of the Reference App. This will display the attributes available in the Ref App as a dropdown. Here, the Type attribute is selected.
- Once the changes are made, save the changes.
Step 2: Sorting the attributes of Cases Extended App
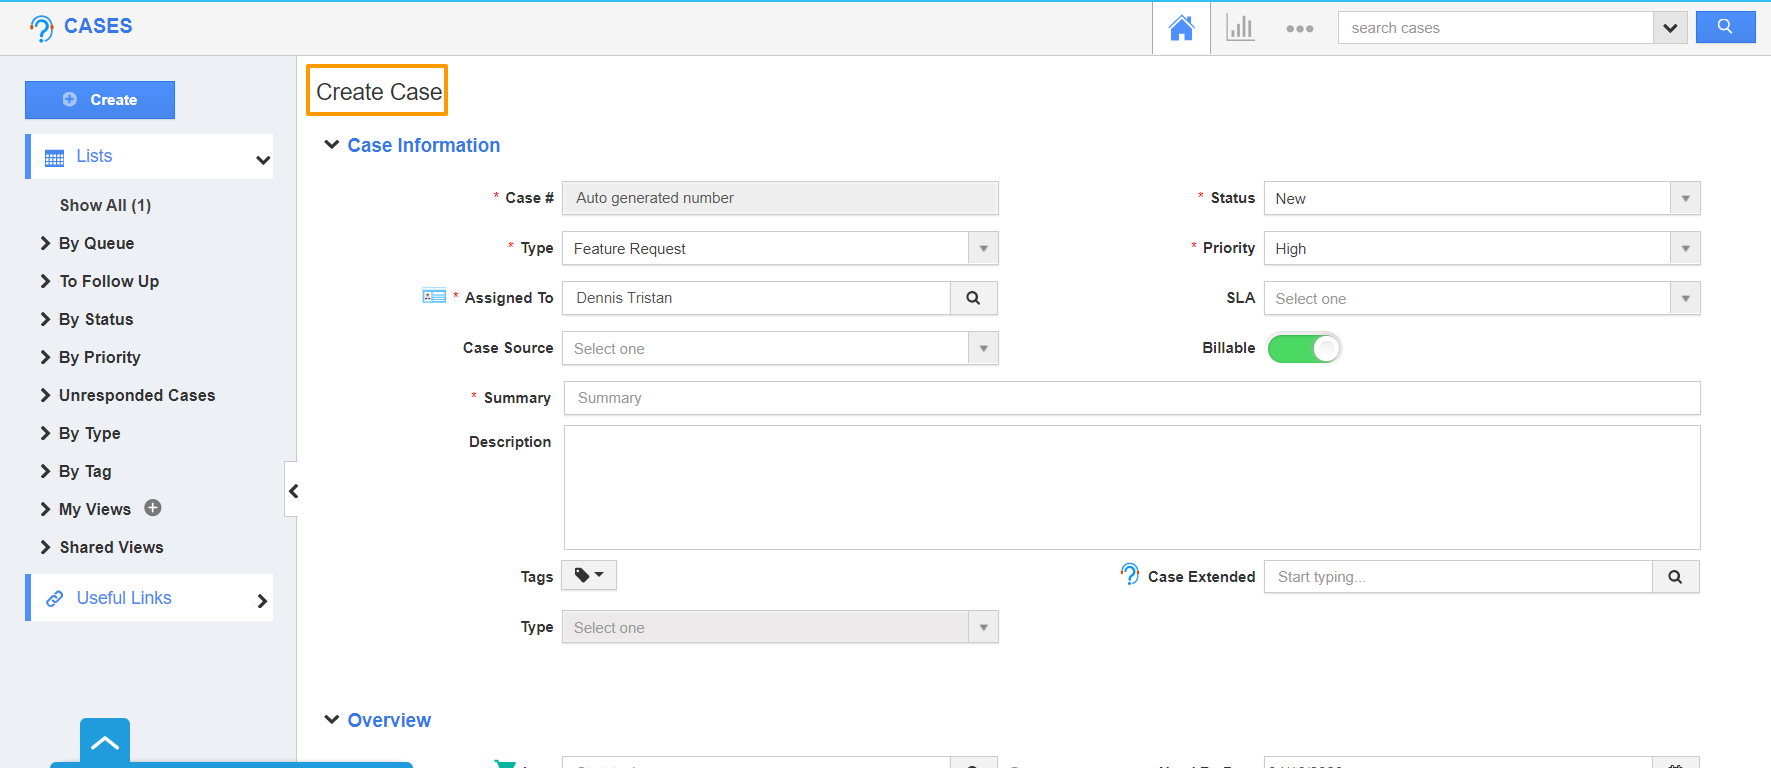
- Create a new case in the Cases App. In the Create Case page, you can the Ref App - Cases Extended and Ref App Field - Type is available.
- Click on the search icon in the Type field. The Tickets - Search and Select popup will appear. Here, you can select the Ticket easily by using the sort icon added for every attribute.


