Consider an invoice has been generated for a purchase initiated by the customer. Now, the customer wants to cancel the purchase. The canceled invoice can be recorded in the Sales Returns App.
- Login to your Apptivo account and select Sales Returns App from the Supply Chain category in the App Header.
- You will be redirected to the Sales Returns App. Select Create to create a new sales return.
- The Create Sales Return page is divided into three sections:
- Sales Returns Information
- Products/Items Returns
- Summary Section
Sales Returns Information
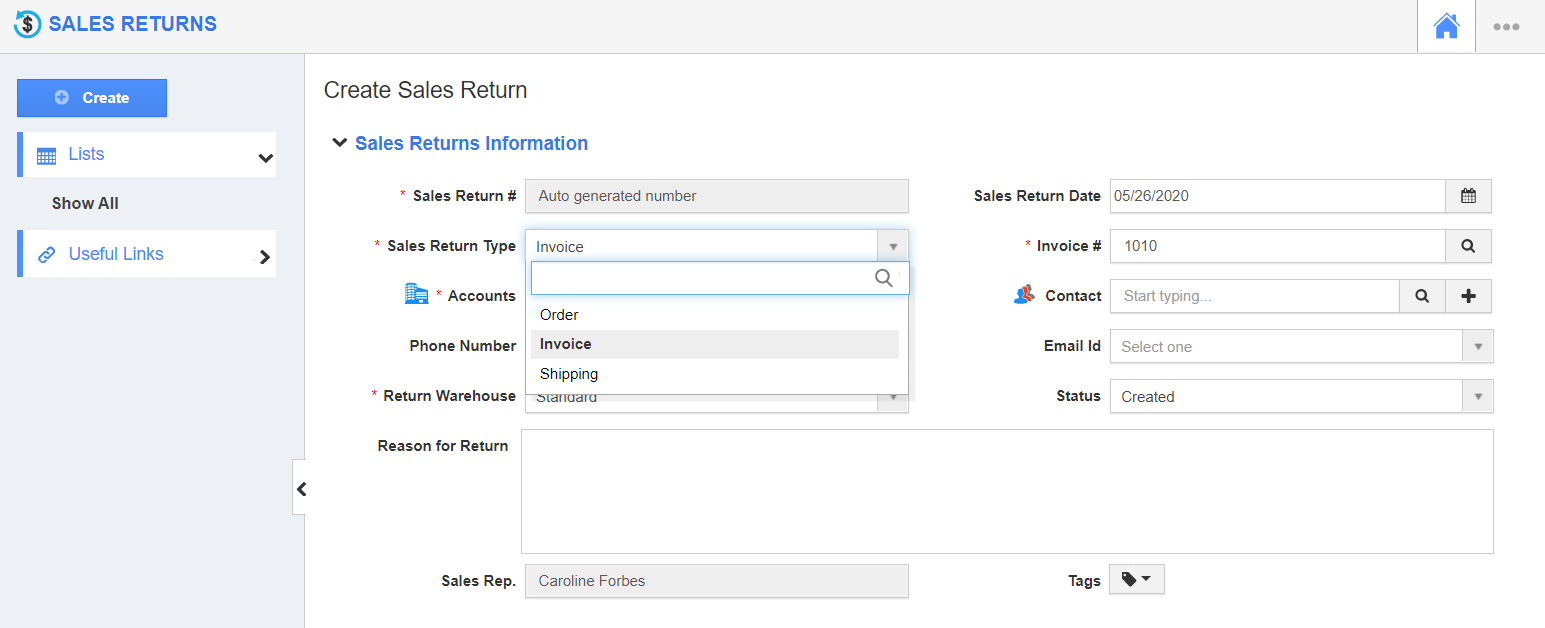
- In the Create Sales Return page, you can record the Sales Return Date and Sales Return Type.
- In the Sales Return Type, choose Invoice from the dropdown and the Invoice # of the Invoice whose purchase is canceled.
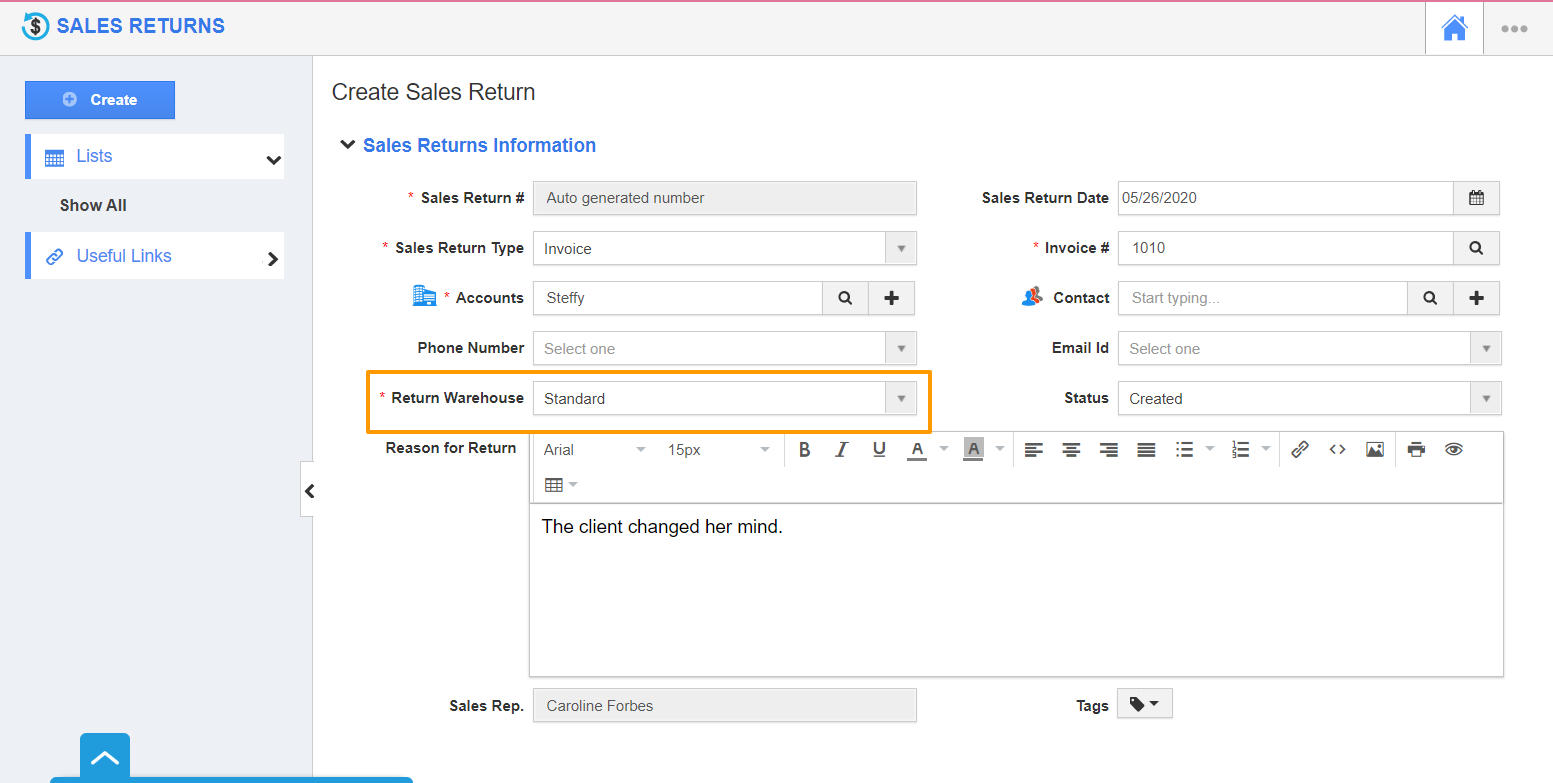
- It is also mandatory to choose to which warehouse the goods are to be returned.
- Apart from this, you can record other data related to the return like Reason for Return, customer name, contact name, and status.
Products/Items Returns
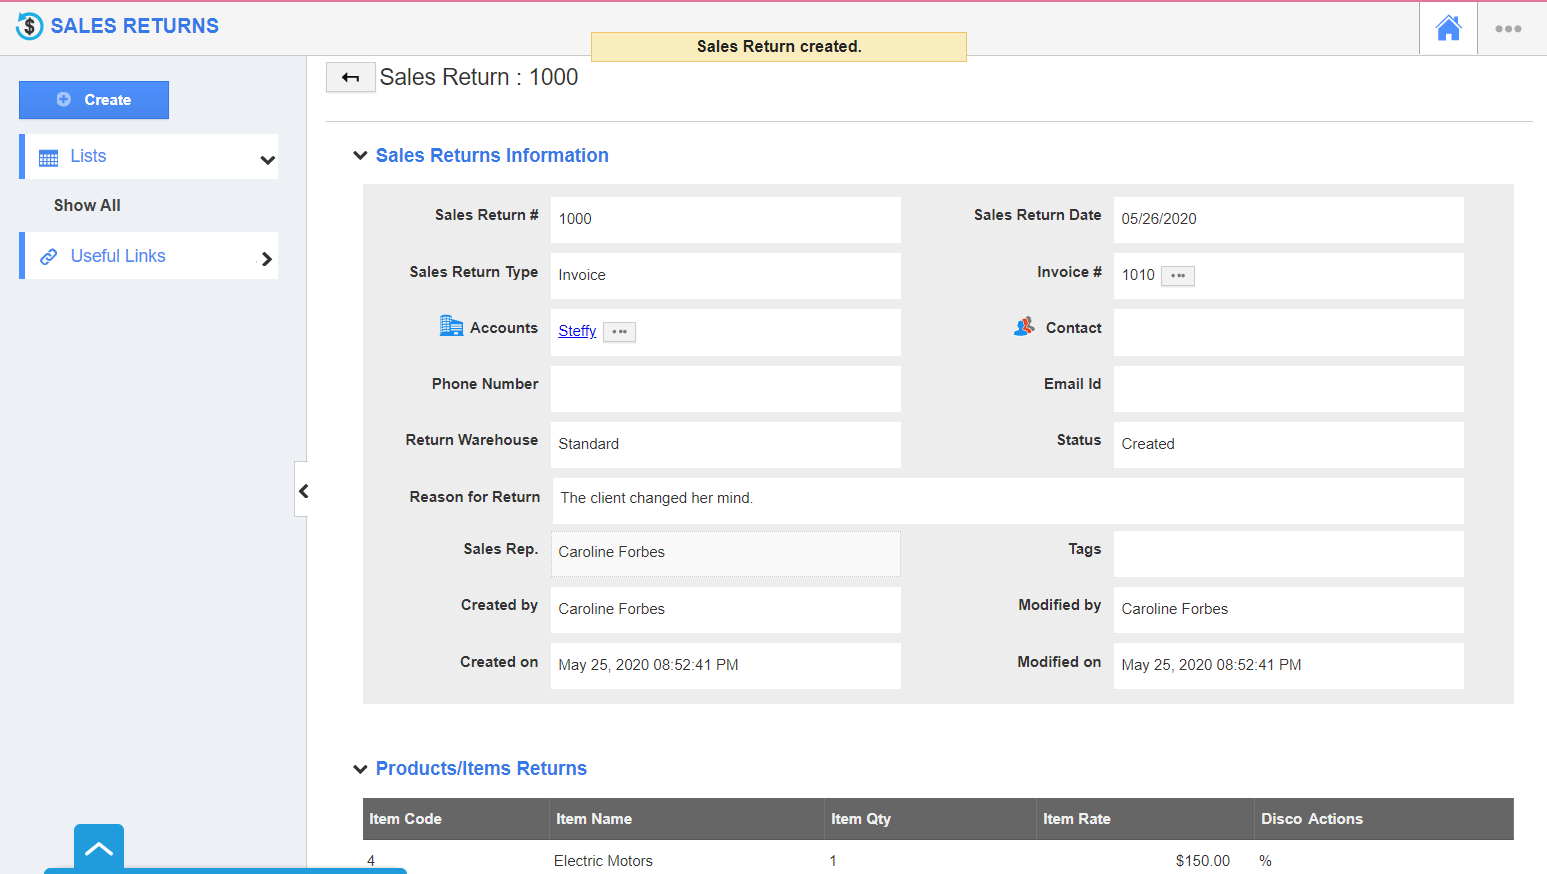
- The information related to the product invoiced will be populated automatically in the Products/Items table.
- You must also add the item quantity for the return. It can be either the complete items invoiced or a part of the total quantity.
- The price will be calculated automatically once the item quantity is added.
Summary Section
- In the Summary section, you can see the total price including the tax and discount rate.
- On selecting create, a new Sales Return is created.
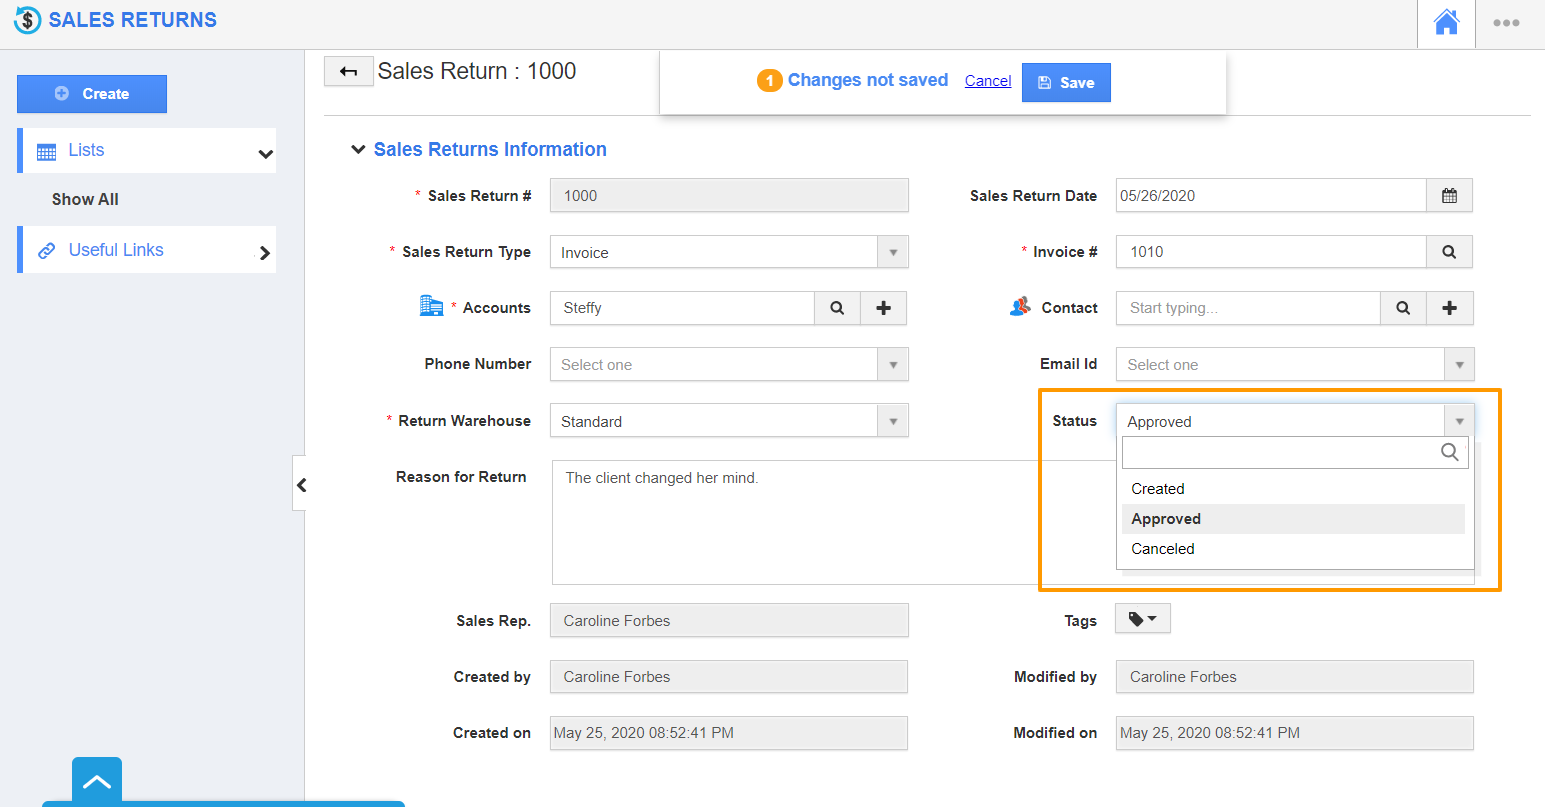
- You can approve a Sales Return by changing the status to Approved.


