By adding the Apptivo Add-in in your Outlook account, you can effortlessly associate emails from Outlook with Apptivo. The emails will be associated based on the email address. Not all emails will be associated automatically by adding an Apptivo Add-In. You can associate the desired emails alone with Apptivo.
Steps to associate emails
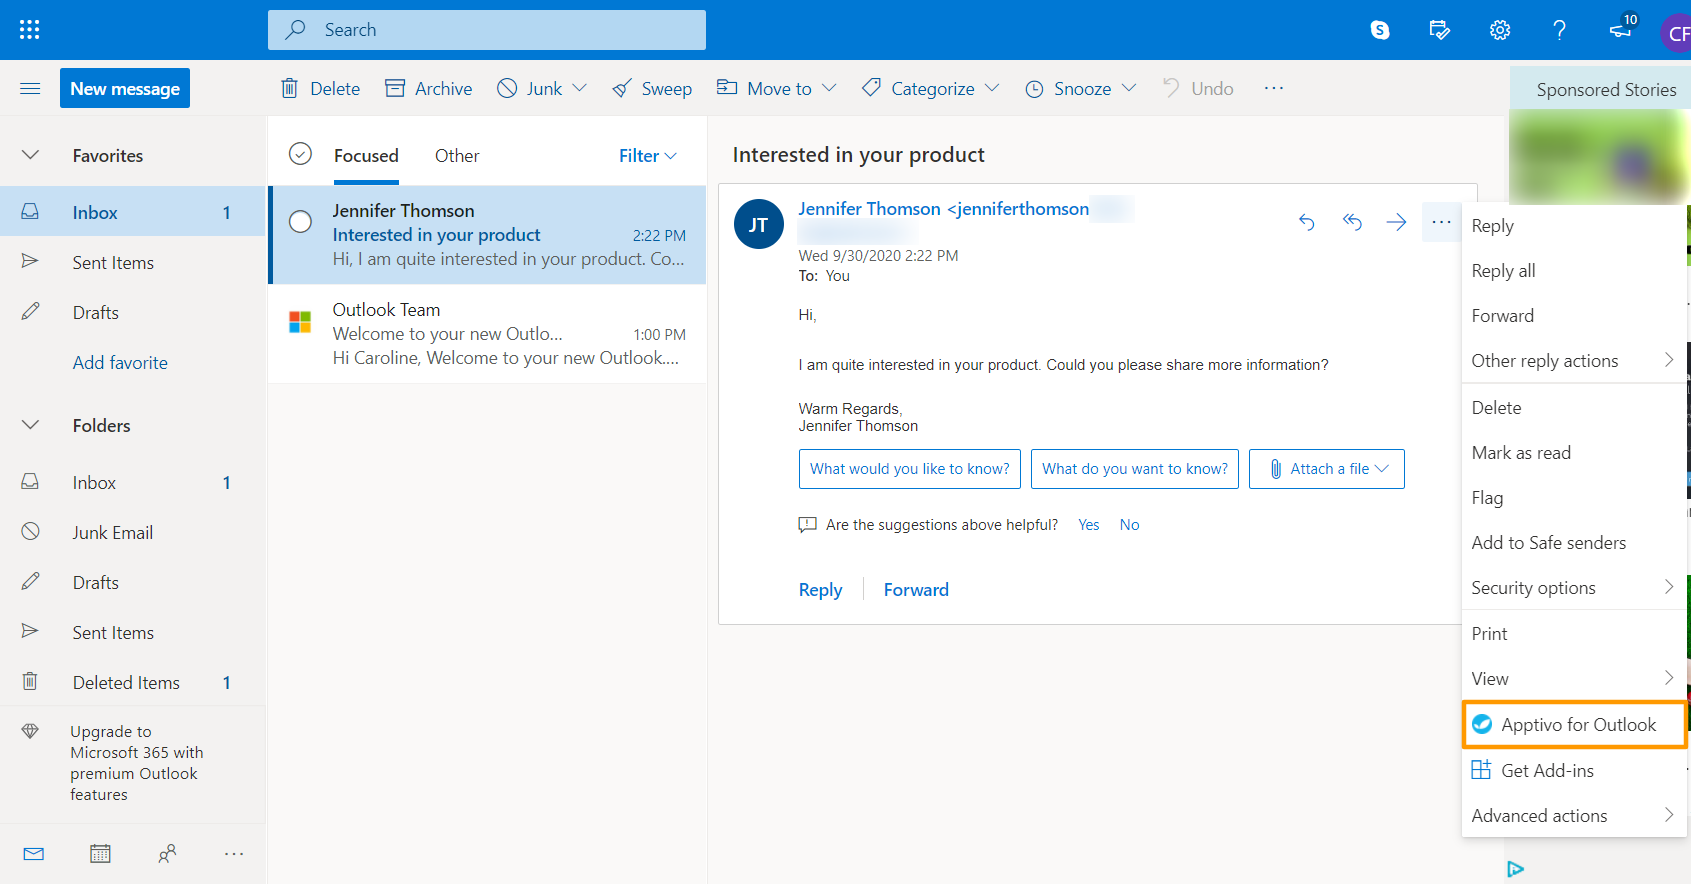
- In your Outlook account, select an email to view the email information. Here, select the More Actions icon.
- Select Apptivo for Outlook option in the More Actions dropdown.
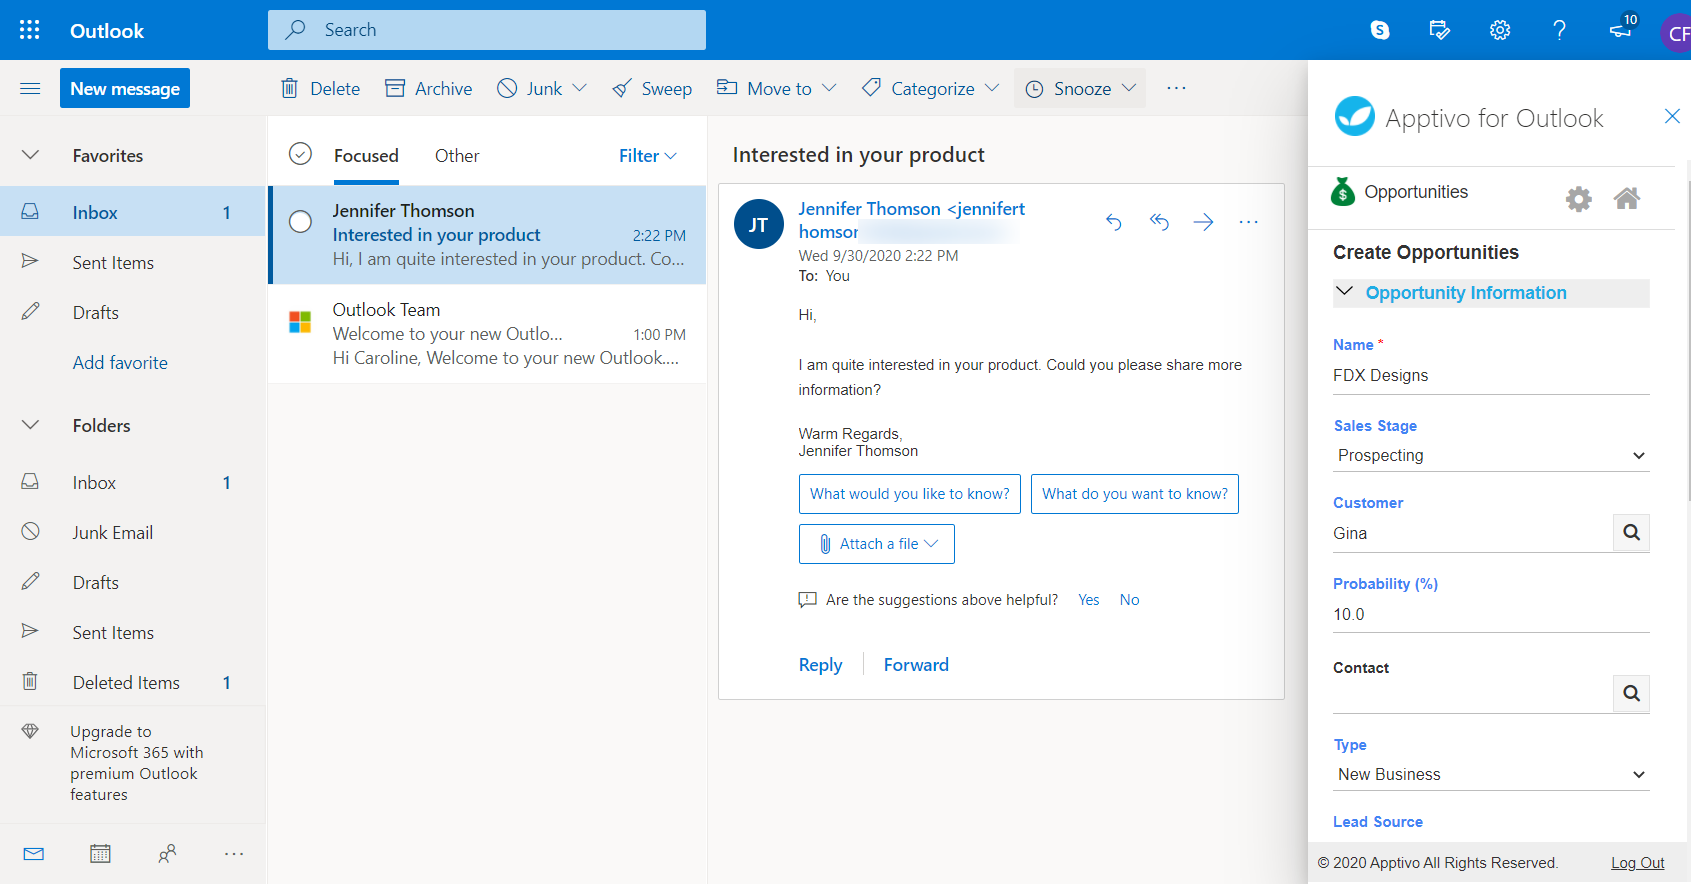
- The Apptivo for Outlook side panel comes into view.
- Here, log in with your Apptivo account’s credentials or create a new account.
- Once logged in, the selected email address will be scanned in the Apptivo system.
Note: For emails in the inbox, the From Address will be checked. For emails in the Sent Items list, the To Address will be checked. Here, if more than one email addresses are present in the To Address field, then the first address will be taken into account.
- If the email address does not exist, you will be redirected to the home page. Once you click the Associate Emails option, contact will be created automatically.
- If the email address already exists, you will be redirected to the email address’s profile in the Contacts App.
- Here, select the Associate Emails option.
- In the Associate Emails page, you can associate cases, opportunities, or leads. In addition, you can also create cases, opportunities, or leads and have them associated with the email. If there is already an association for this email, the past association will also be listed.
- For Instance: While associating an existing case, you can type the Case Summary and pick the case from the auto-suggestion.
- On clicking save, you will be notified that the case is associated successfully.
- You can click the Back button to redirect to the Associate Emails page. Here, you can see the case is associated.
- You can also create an opportunity, lead, or case.
- For Instance: On selecting Create Opportunities, you will be redirected to the Create Opportunity page. Add the required information and click the save button.
- A new opportunity is created and associated with the email.
- When you log into your Apptivo account, you can see the email has the selected records associated.
- The email will be available in the associated records’ email tab.


