Browse by Solutions
Browse by Solutions
How to customize Reports in the Insurance Tracker app?
Updated on February 3, 2021 02:30AM by Admin
The Insurance Tracker app allows you to customize the Reports according to your business requirements. This section enables you to configure the visibility. You can completely “Show” or “Hide” your Reports. The Privileges option helps to provide restricted access only to certain employees.
Steps to customize reports
- Log into your Apptivo account and navigate to the “Insurance Tracker” app from your universal navigation menu bar.
- Click on the “More(...)” icon and select “Settings”.
- Click on the “General” tab from the left navigation panel and then select “Reports”.
- In the Reports dashboard, you can view.
- Insurance Tracker List
- Insurance Tracker Activities
- Insurance Tracker by Insurance Type
- By default, the toggle button in the “Reports” dashboard is in “Enable” Status. To hide a particular report from the Reports page, hide the toggle associated with the report.
- You can also “Create Privilege” by selecting the dropdown as per your requirements.
 |
- Click on the “Reports” icon next to the “Home” icon in the App Header to view the Reports page and see the changes as per the configuration.
 |
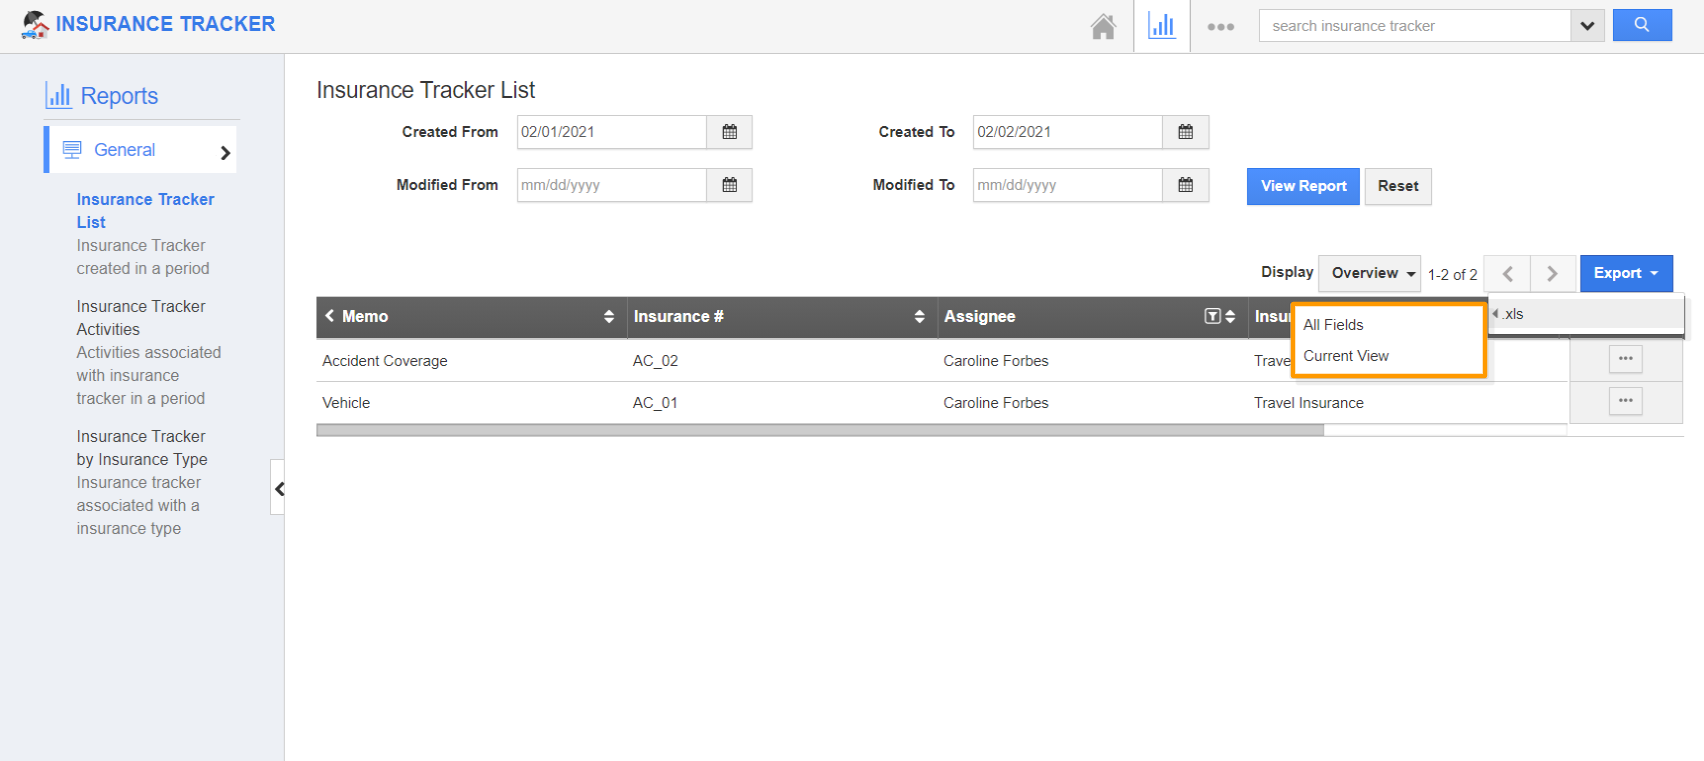
- You can click on any report. Here, Insurance Tracker List. Add the values in the required fields and click View Report.
- The generated report can be downloaded in XLS format.
- All Fields - The Report is downloaded only with the fields displayed on the Reports page.
- Current View - The Report is downloaded with all the fields available on the Overview page of the Insurance Tracker app.
 |
Flag Question
Please explain why you are flagging this content (spam, duplicate question, inappropriate language, etc):

