Customers App allows you to schedule the report to automate the reports based on your configuration. Through that, the report will be created automatically and delivered to your email based on your preferences.
Quickly going through the following steps will make it clearer.
Steps to Create Schedule Report
- Go to Customers app from the app header bar. Click on “More(...)” → “Settings”.
- Choose Schedule Report from the Reports dropdown in the left navigation panel.
- Click on the Create button to schedule the report.
- Enter the required details :
- Name: Name of the report to be delivered.
- Description: Details of the report.
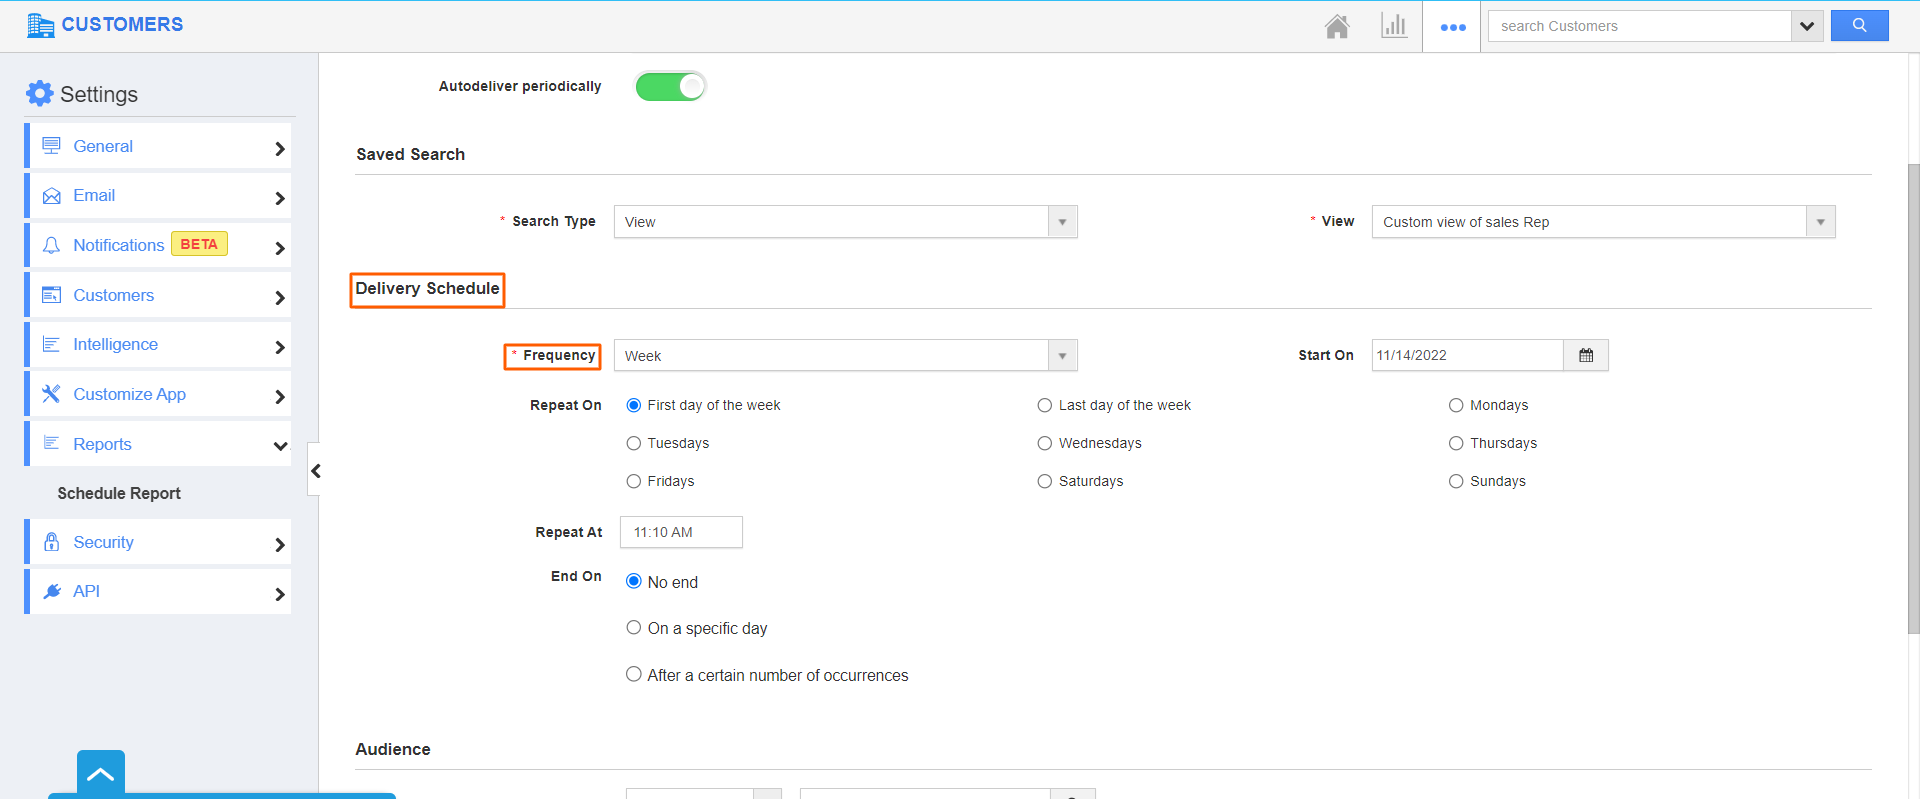
- Auto deliver periodically: Enabling this toggle will allow you to schedule the report periodically.
Saved Search :
- Search Type - Selecting this option from the drop-down will display the views created using “Advanced Search” or “Views” on the Home page of the Customer's App.
- View - This option will display the customized views created.
Delivery Schedule:
- Frequency: It allows you to select the frequency the report must be sent. You can select the Day, Week, Month, Quarter, or Year. Based on each selection, you can select the frequency on when the report will be generated and sent.
- Report On: By selecting the frequency, you will get an option to select on when you want your report to be repeated on. For example, if you want to schedule the report on every first day of the week, you have to select the Week on frequency and select the First Day of the Week in the Repeat On.
- Repeat At: Select the time on which time you want to repeat the report.
- Start On: Start date of receiving the report.
- End On: End date of receiving the report. It has options like:
- No end: On selecting No end, you will receive the reports forever. There is no time limit.
- On a specific day: This allows you to select a specific date to stop receiving the respective automated report.
- After a certain number of occurrences: This allows you to enter the total number of times you want to receive the report from the start date
 |
Audience: This allows you to select the person whom you want to send the report. Say, Employee, Teams or Customers. Here, it is the Sales Manager. You can also add the email address manually.
- From Address: Customize the from address of the email, whether it is Employee or Team. Based on that, select the from address for the schedule report email.
- CC Address: Add the CC email address if you want to add an email address to send a report.
- Trigger To: This allows you to select to whom you want to trigger the email for this report. You can trigger to employee, Team or the Contact.
- Email : You could add more mail addresses using this field. You could share these reports with users outside of your organization i.e., other than your employees, teams, or contact. Use “,”(comma) to separate the email address as shown below.
- Click on the Create button.
- The schedule report will get created and added to the list.
- The reports of the Customers with matched conditions will be sent to the respective email address as per your configuration.
- You can download and view the report from your email.


