The Tasks app of Apptivo enables you to create a custom view depending on certain criteria and view selective tasks. By this, you can easily filter out particular tasks and only view the tasks that fall within your prerequisites.
Steps to create a custom view in the Tasks
- Log into your Apptivo account and navigate to the Tasks activity.
- In the Tasks page, select More from the App Header and select the Settings option to redirect to the Settings page.
- Here, select Customize App → Views from the left navigation panel.
- To create a new view, click the Create button from the Views page.
- The Create View window comes into view. You can add a Title and Description for the view in the Create View side panel.
- Now, select the List Layout which has to appear while displaying the custom view. Here, you can see the Overview is selected.
- To make the View available in the left panel, make sure the Display toggle is enabled.
- In the Criteria section, you have the ability to set the criteria upon which the tasks are to be filtered.
- Here, the condition is set to display the tasks only if their Due Date is within the past 1 month. You can also make use of the Add Condition feature to add more than one attribute.
- On selecting Create, a new view is added.
- Navigate to the Home page of Tasks. The created view is available in the left panel. Click on it to view the records that match the criteria.
HOW TO DELETE CUSTOM VIEWS IN TASKS?
- To delete the view, click on More→ Settings from the App Header Bar.
- The User will be directed to the Settings Page. Click on “Customize App → Views” from the Left Navigation Panel.
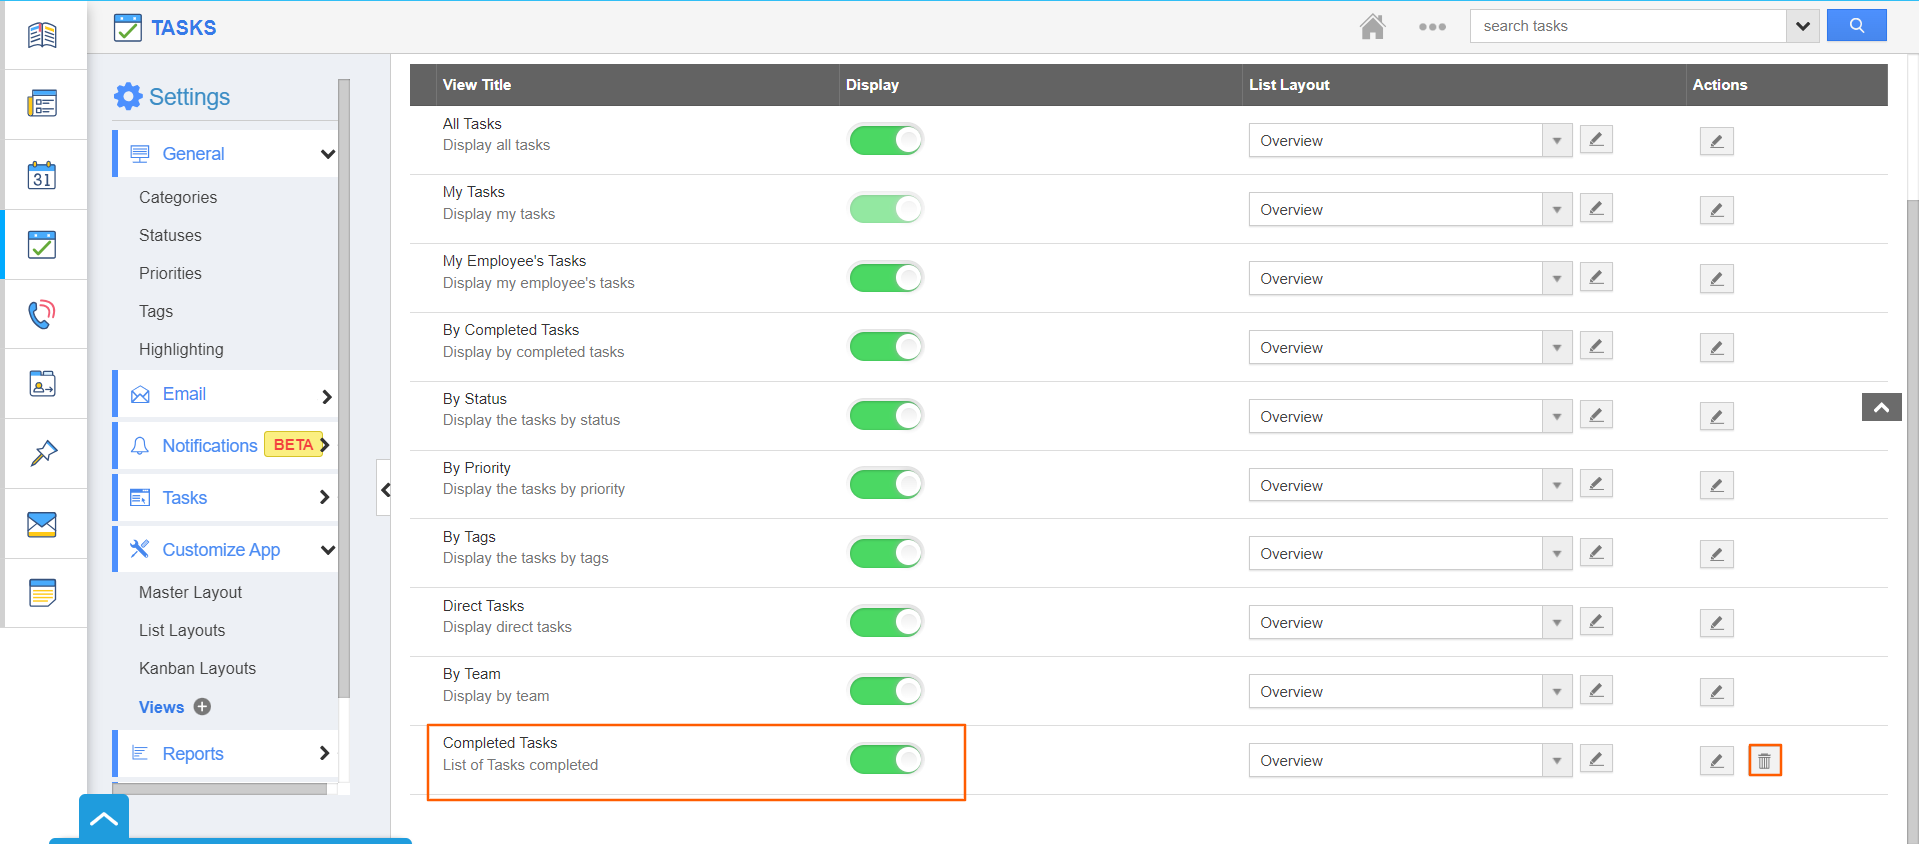
- One can see the list of custom views along with the delete icon on the action column.
- The user can click on the “Delete” icon to delete the custom view which is no longer needed.

- Upon successful deletion, a confirmation alert will be displayed.

Note:
- If the custom view is deleted, it will be removed for all the users.
- If the view is associated with the Scheduled report or default view or both, the user needs to remove the association in order to proceed with the deletion of that corresponding view.


