We, at Apptivo, are very happy with the update of the Android Unified App (Apptivo Base) which have been deployed on January 24, 2018, with various updations which are much useful for Mobile devices. Now, let us go through a brief note about each feature included in this Unified App.
ANDROID UPDATES
CRM
- Homepage for Calendar
- Homepage for My Follow Ups
- Homepage for Call logs
- Homepage for Notes
- Highlight Opportunities
- Contacts based on Status
- Record the Loss Reason for Opportunities
Supply Chain
- Customize Pricing position in Orders App
- Backorder Management
Financials
- Customize Pricing position in Estimates App
- Customize Pricing position in Invoice App
Project Management
- View & Redirect to Tasks and Milestones right from Gantt Chart
ANDROID UPDATES
CRM
- Homepage for Calendar – In Android (Mobile) Apptivo CRM provides you with a separate homepage for Calendar. On selecting Calendar from Activities menu, you will be opened with the Calendar homepage.
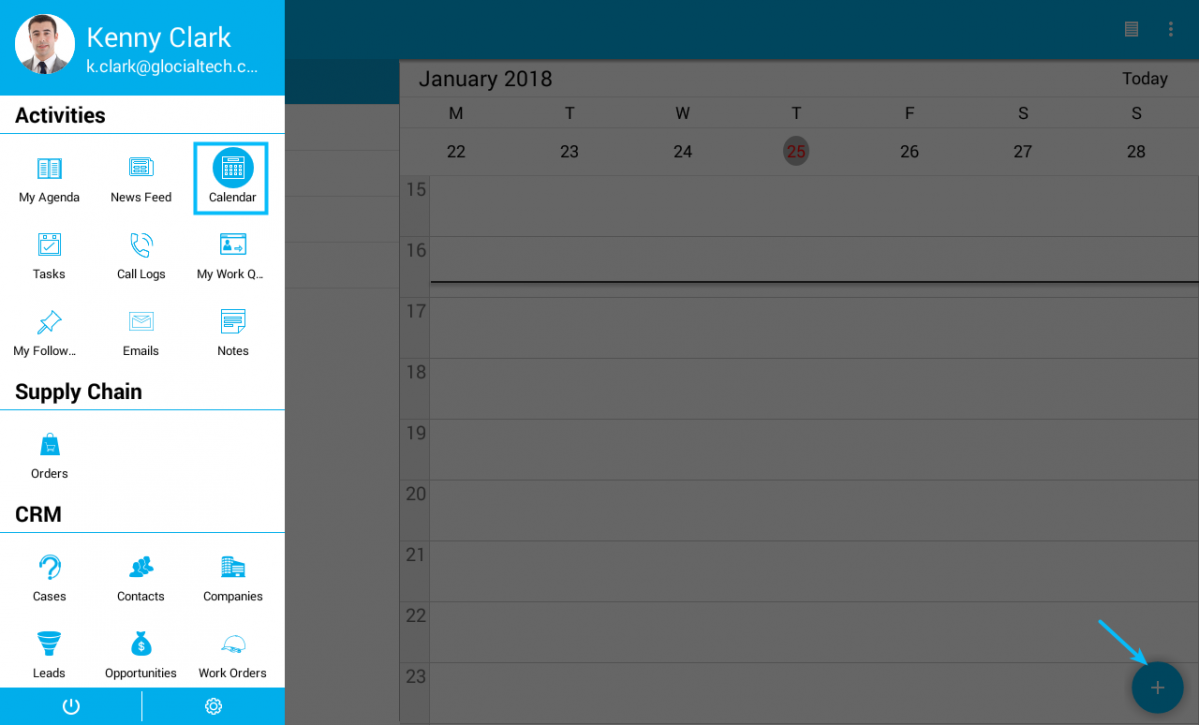
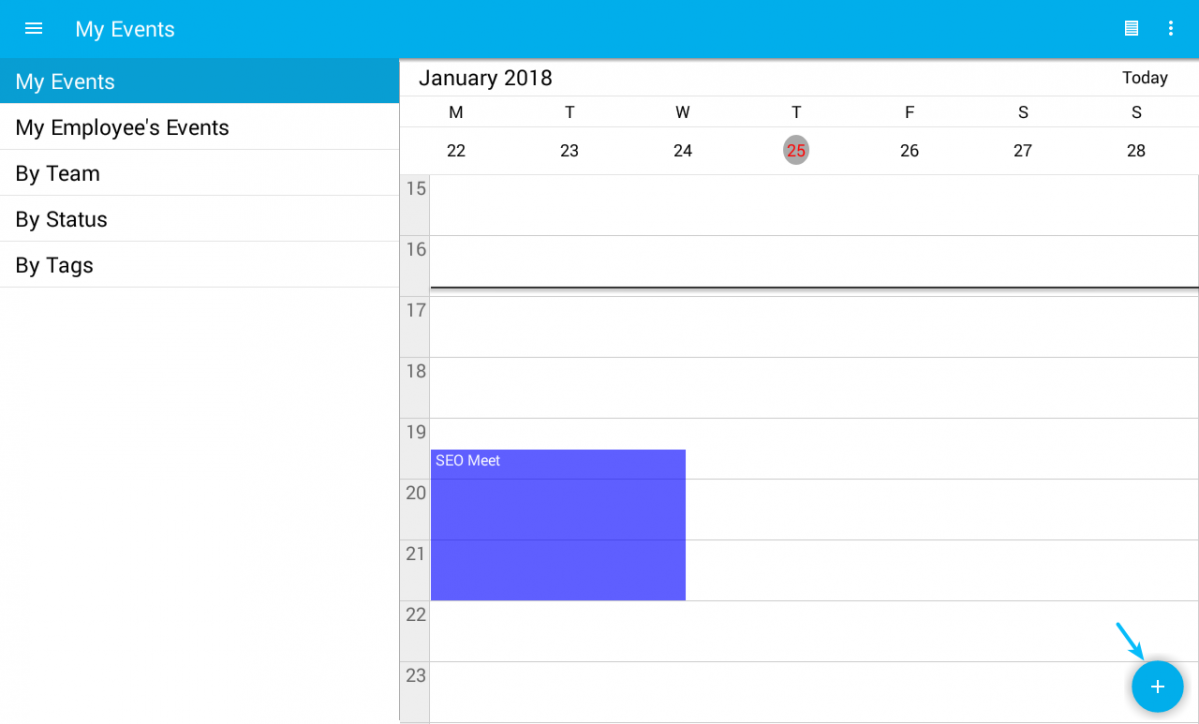
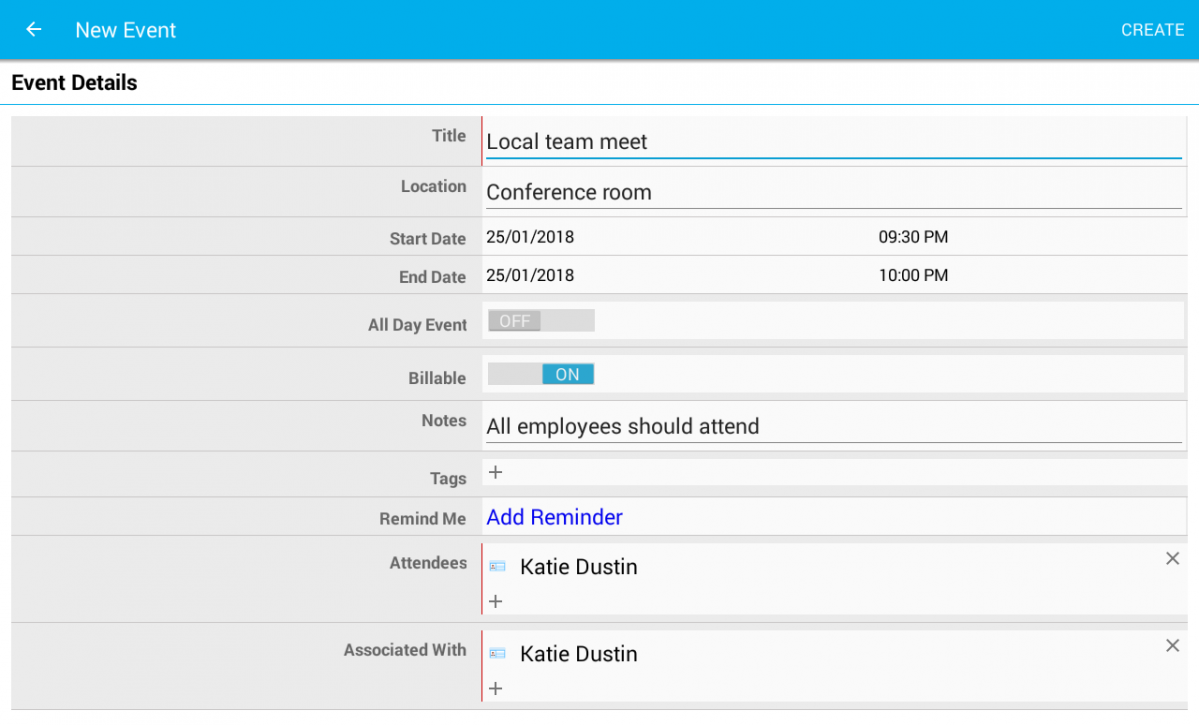
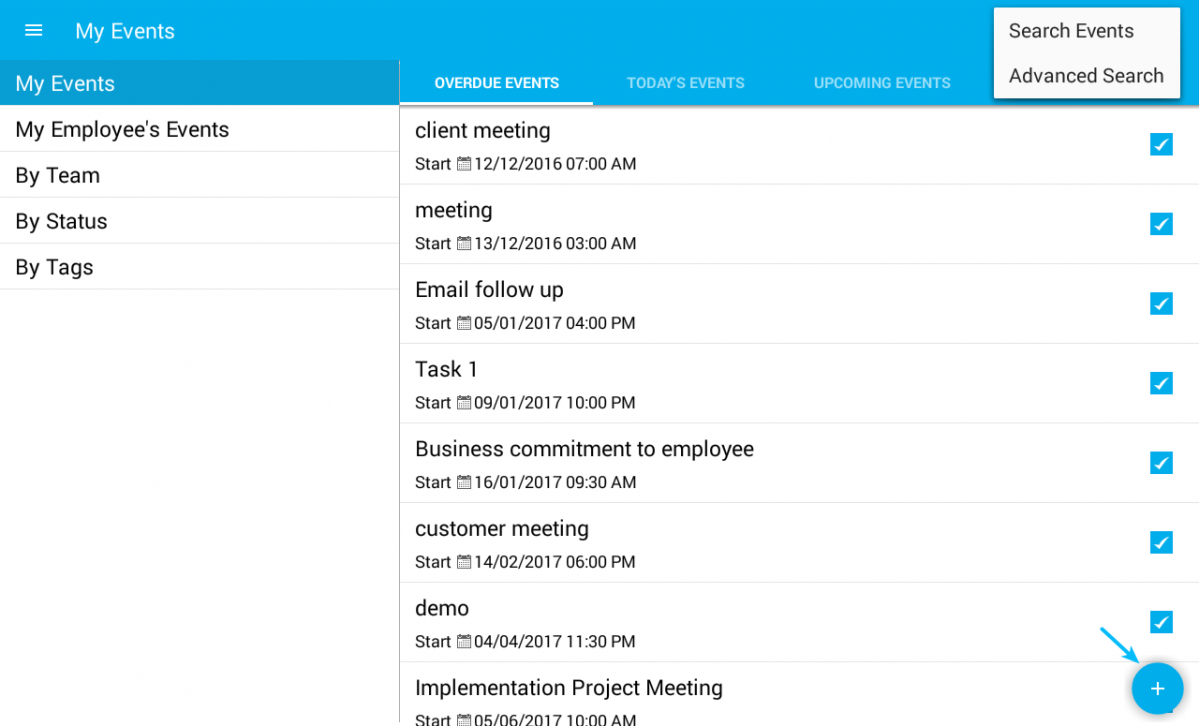
Calendar homepage consists of “My Events”, “My Employee Events”, “By Team”, “By Status” and “By Tags”. On selecting any of the fields, you will be viewing its page listing out its events. Clicking on the “+” icon helps you to create a new event.
You can provide with the event details and click on Create button. Searching for events is done by both simple and advanced search. Advanced Search allows you to search for events using multiple fields whereas Simple search allows you to search for a single field.
- Homepage for My Follow Ups – On choosing “My Follow Ups” from the Activities menu, you will be directed to Follow ups homepage. You will be in “My Follow Ups” page by default.

You can also view “My Employee Follow-ups”, “Recently completed Follow Ups” and “By Apps”. It is also possible to create new follow up by clicking on “+” icon.
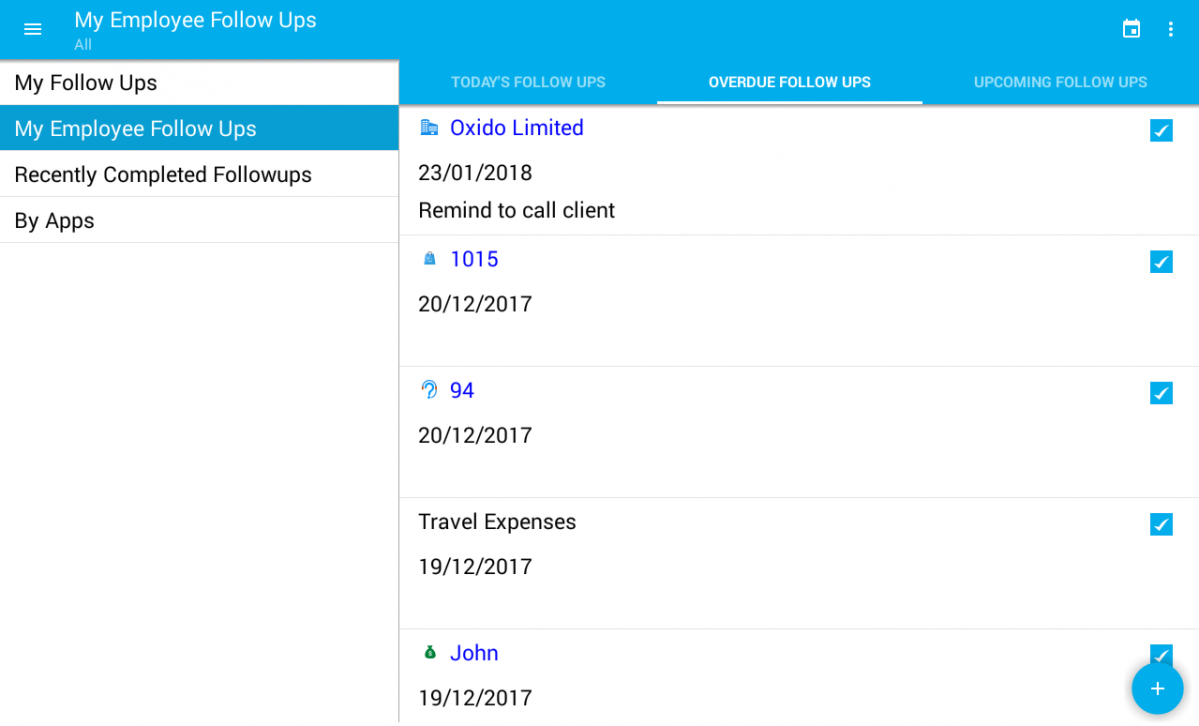
You can view your created follow-ups in ”My Follow Ups” and your Employee’s follow-ups in “My Employee Follow-ups”. Both can be viewed in Calendar layout and in a List layout.

Recently completed Follow Ups helps you to view the follow-ups which got completed recently. You can also filter for both Apps and People and view their follow-ups by selecting “Filter” option from “More” icon.
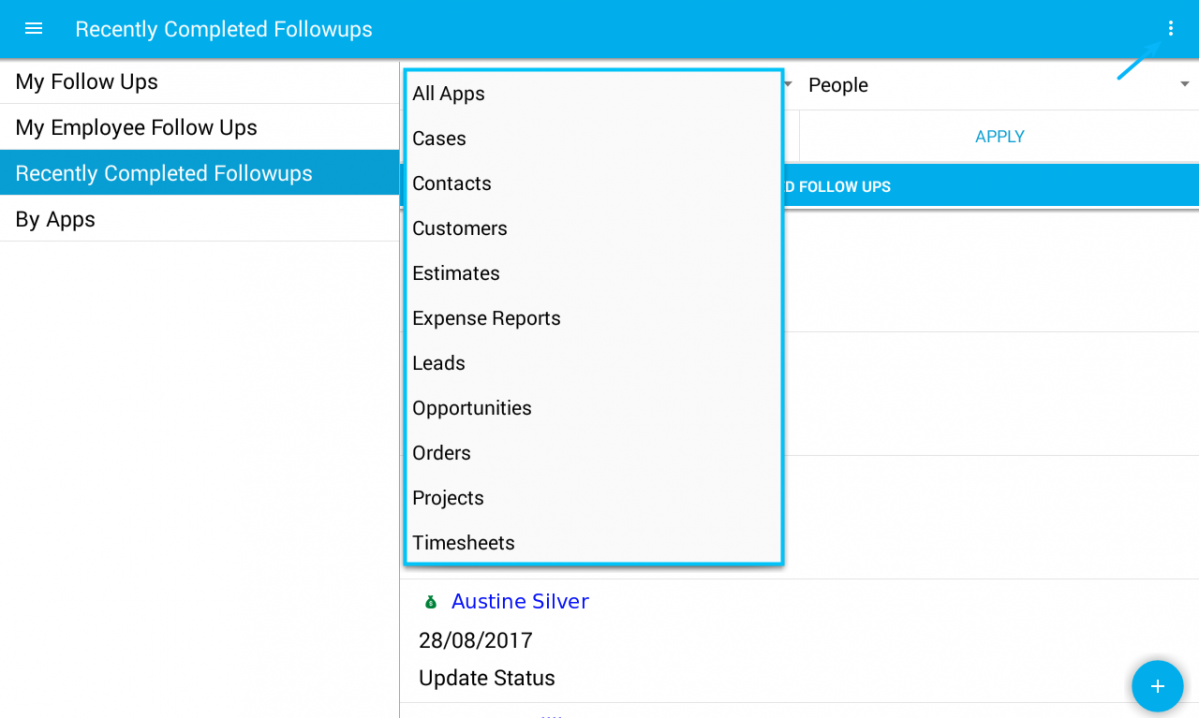
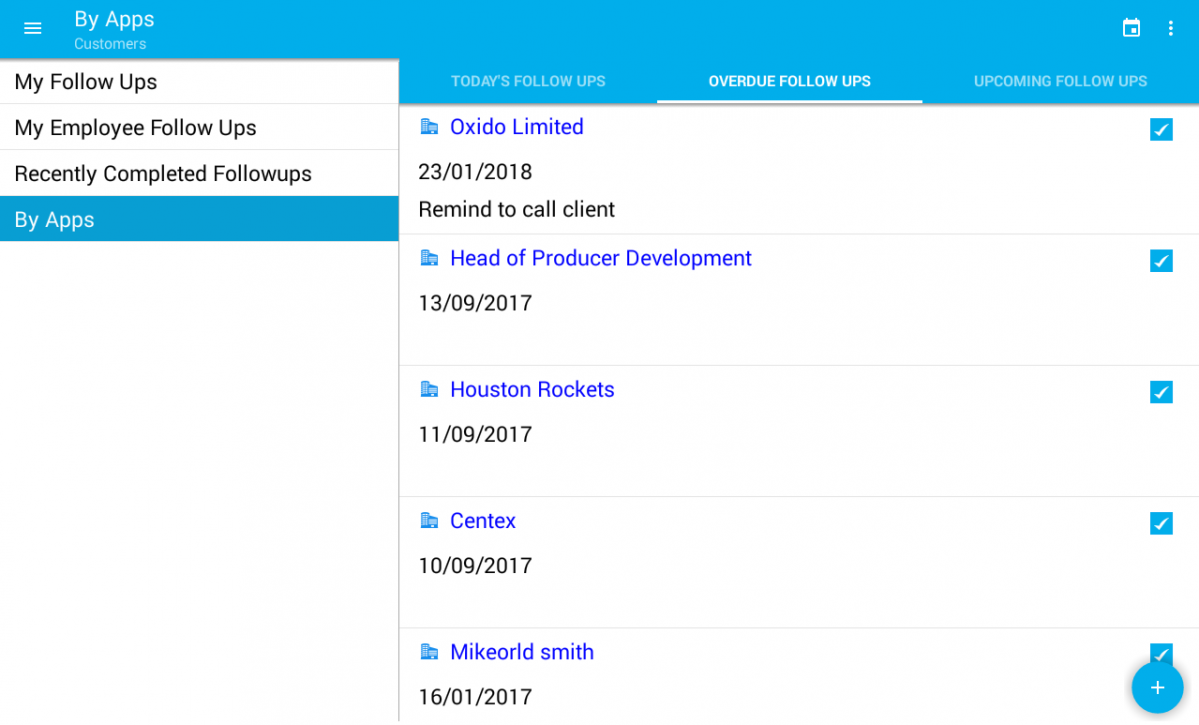
On clicking on “By Apps” will display you with a pop up showing the Apps. You can select any Apps, for instance – Customers App.
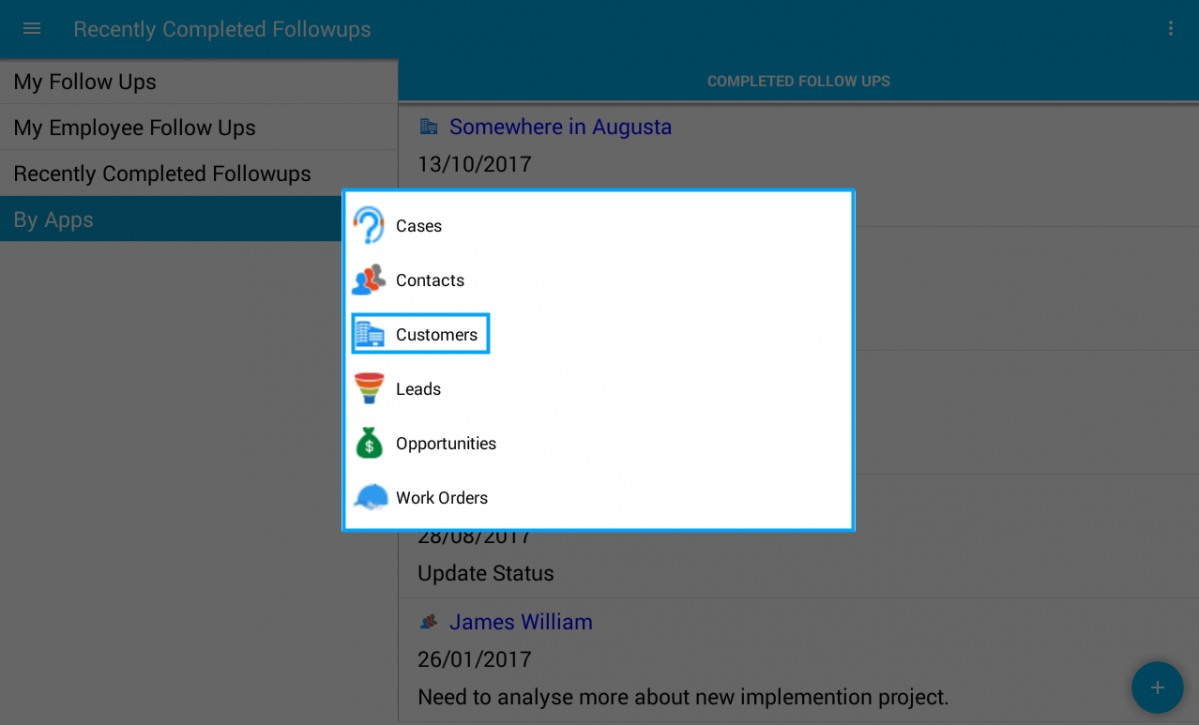
You can now view the Customer’s Follow-ups in Calendar and List view. Filtering is also possible. Addition of new followup can also be done.
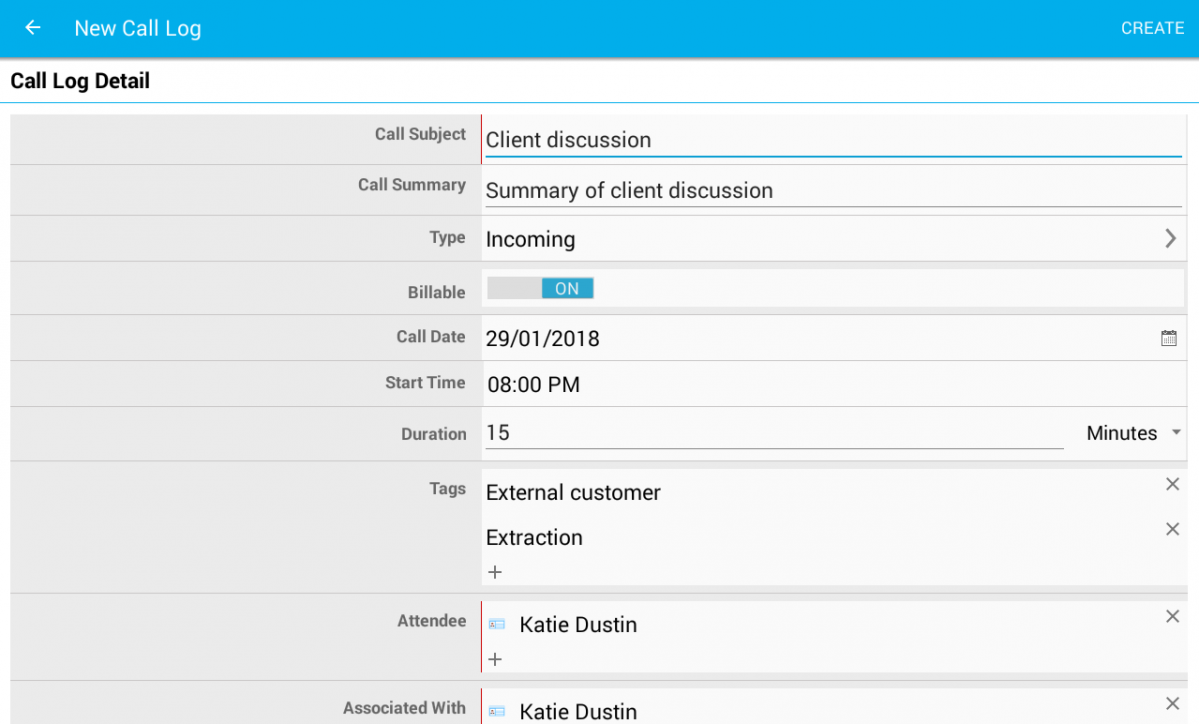
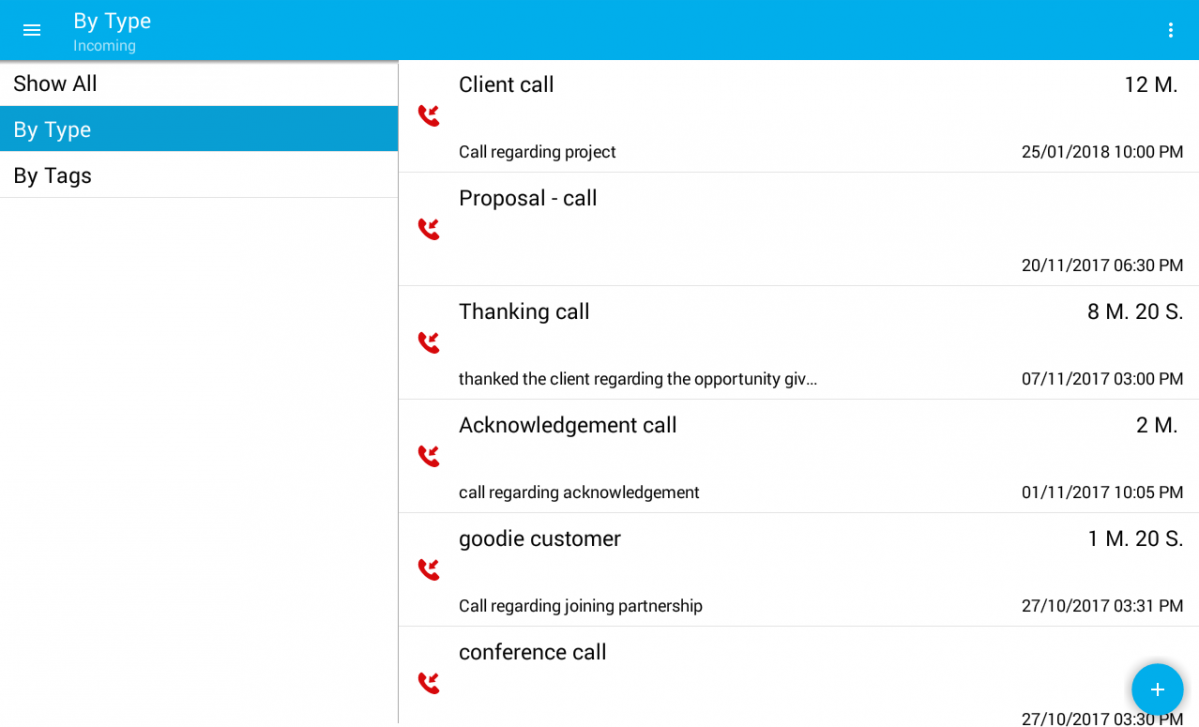
- Homepage for Call logs – Call log home page will display you with “Show All”, “By Type” and “By Tags” fields. You can create your call log by clicking on “+” icon. “New Call log” page will be opened where you can provide your call log details and then click on “Create” button.
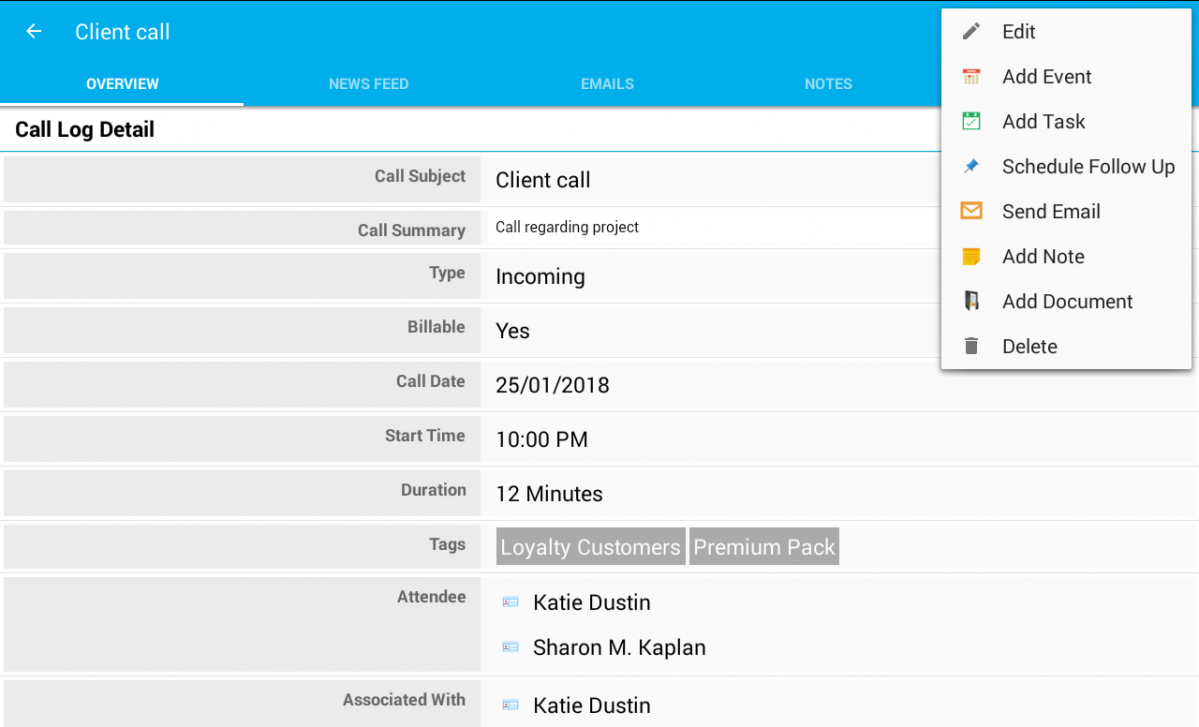
On selecting “Show All”, you will be opened to all your call logs. Select a particular call log to view its details. You can also move to view the activities like Newsfeed, Email, Notes and Documents. More icon provides you with the option of Editing the Call log, to add Notes, Documents, Events and Tasks, to Schedule Follow up, to Send Mail. The delete option is available to delete the unessential call log created.
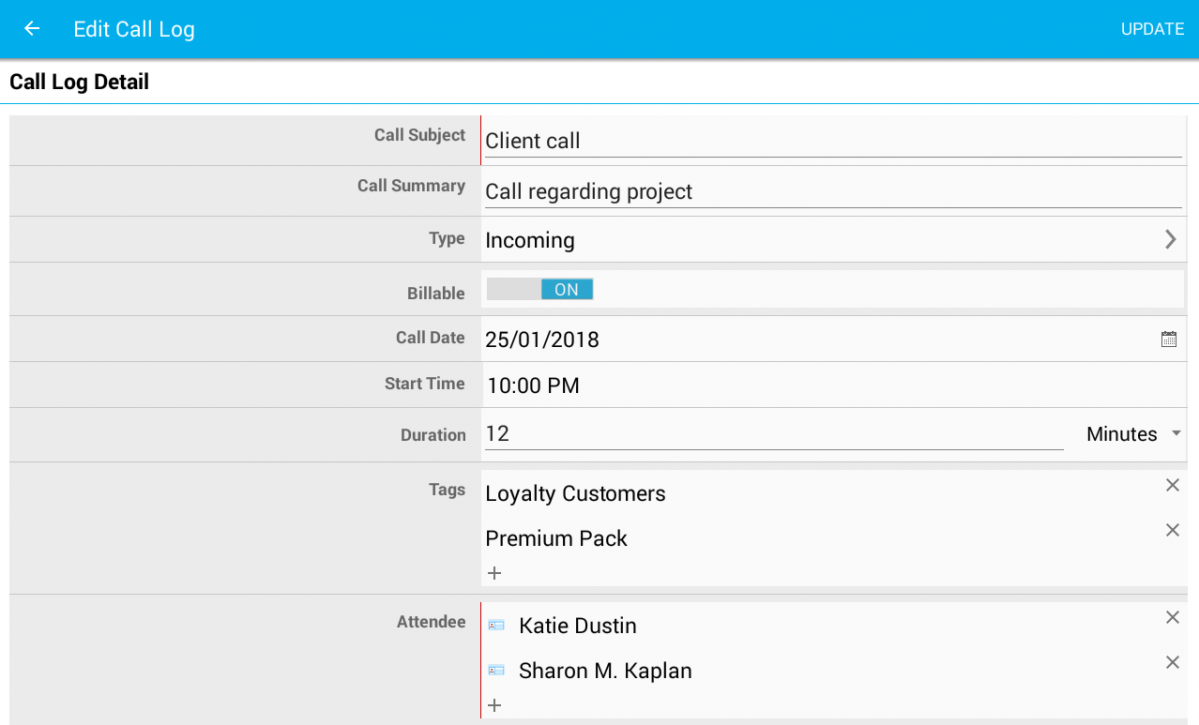
For instance: Edit icon
You can view Call logs based on “By Type” and “By Tags”. On clicking “By Type”, you will be opened with a pop up showing Incoming and Outgoing. For instance: Clicking on Incoming will display you the incoming call logs.
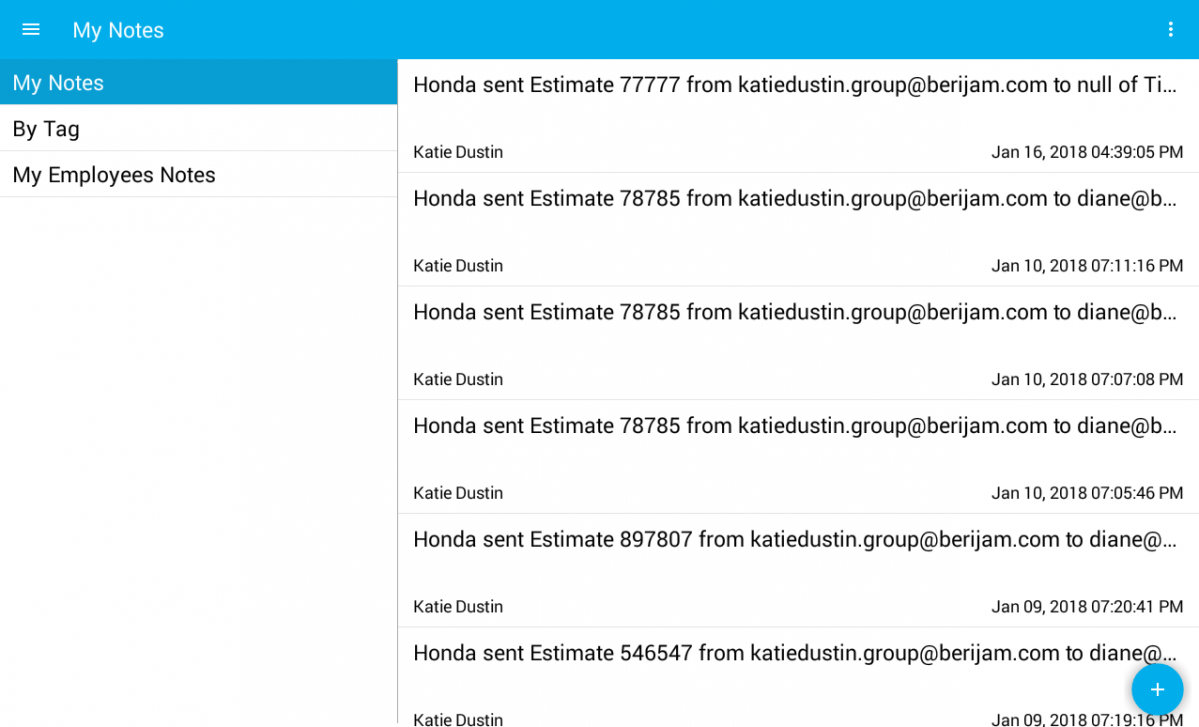
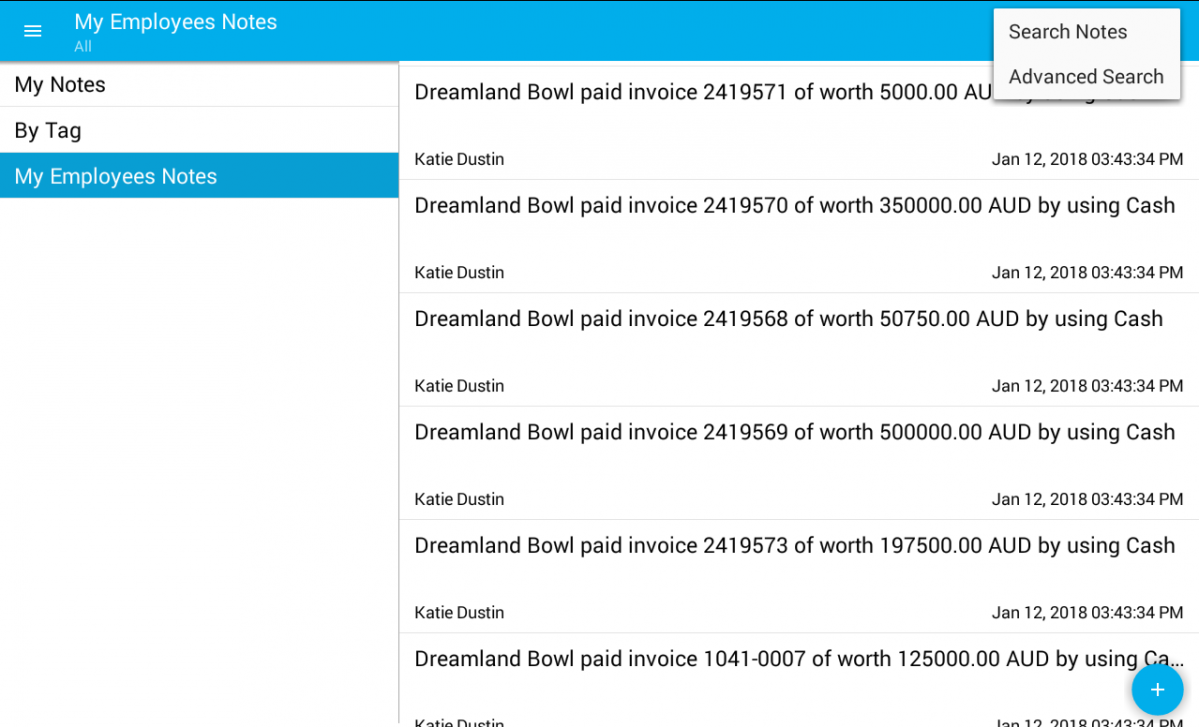
- Homepage for Notes – This is also same as Call logs where you can look for “My Notes”, “By Tag” and “My Employee Notes”. Selecting “My Notes” will list you with all your notes. Searching for notes by the Simple and Advanced search is possible.
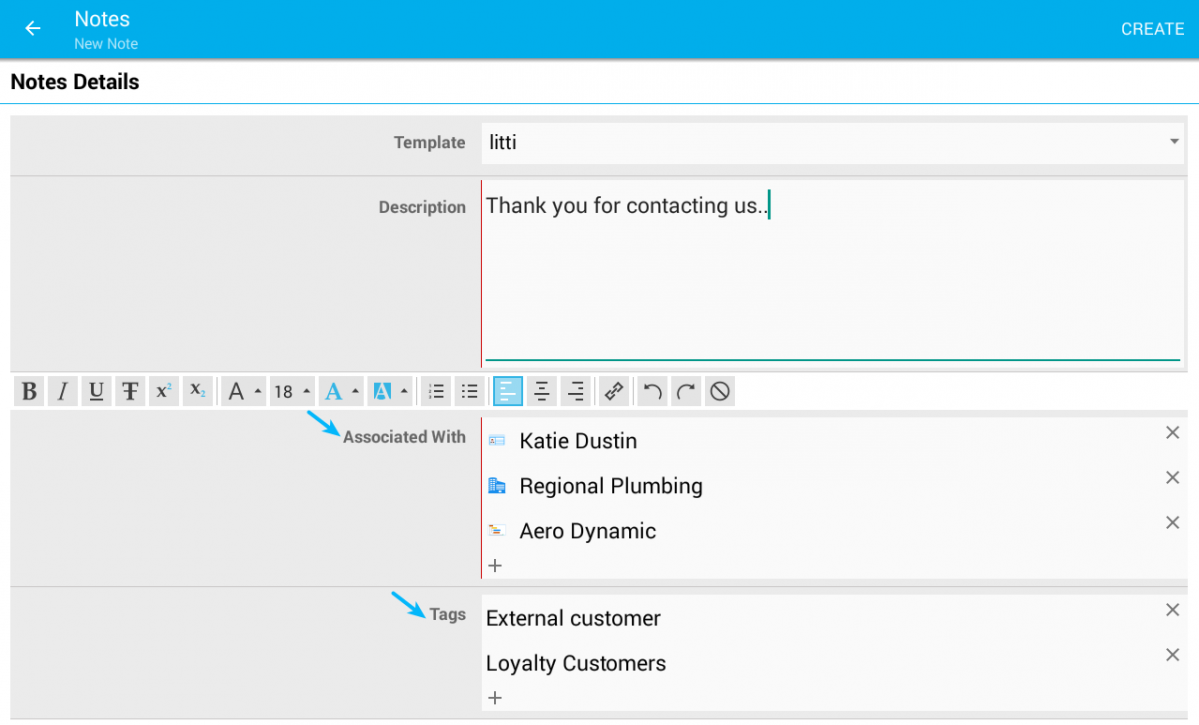
Clicking on “+” icon enables you to create a new note. You can even associate your notes with any apps and add tags. Finally, click on “Create” button to complete your note creation.
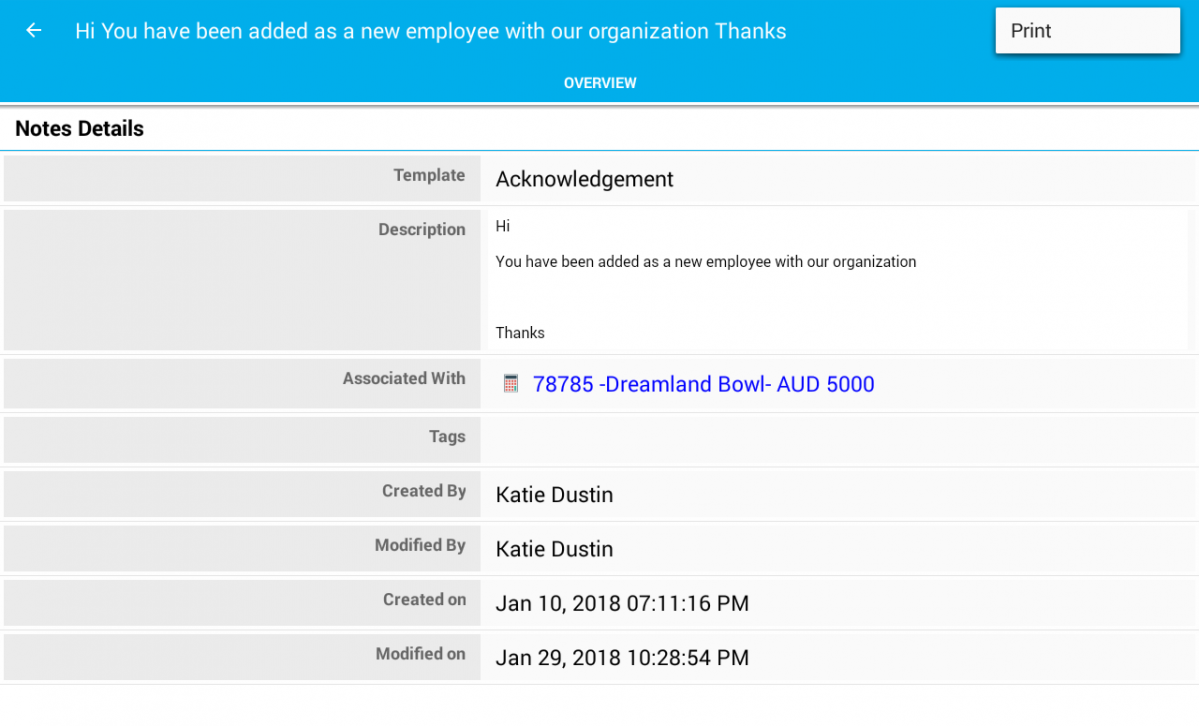
Select a particular Note from “Show All” option to view its full details. You can Edit or Delete the Notes. We have a new option of printing your notes by selecting “Print” option from More icon.
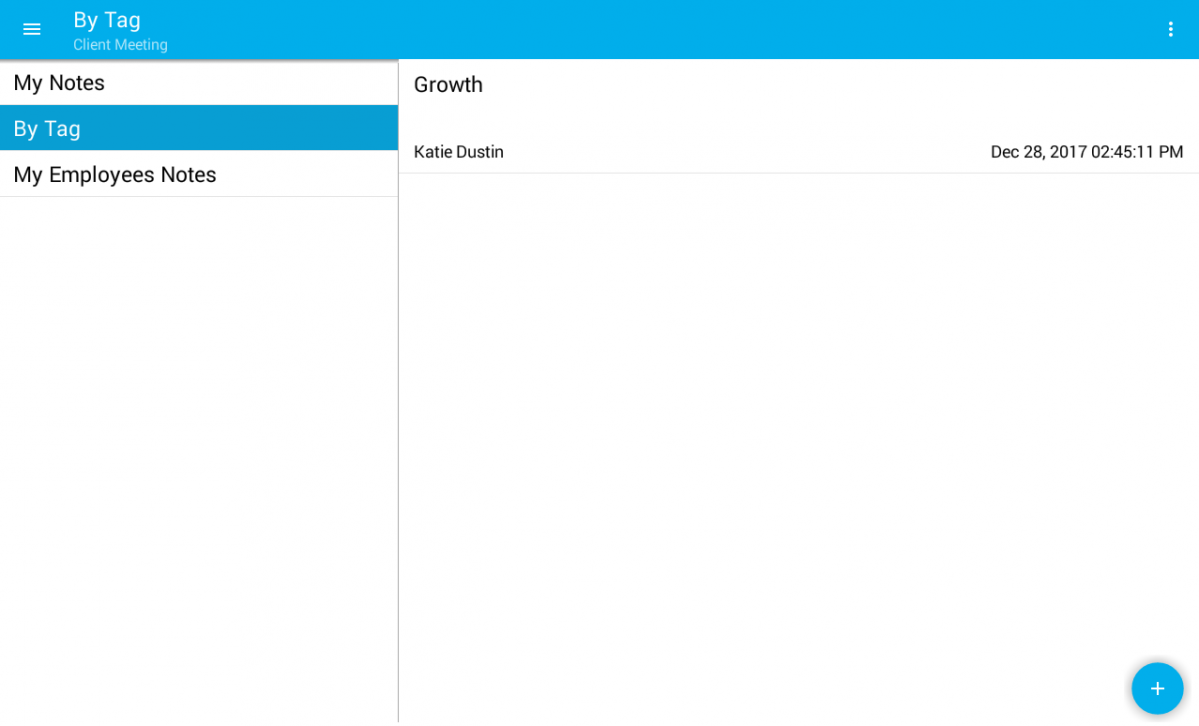
“By Tag” option allows you to view the notes associated with the selected particular tags. You can Edit the note and Delete if not needed.
“My Employee Notes” displays you the notes of various Employees. You can either select “All” to view all the Employee’s Notes or a particular Employee to view his/her notes. Edit and Delete are possible from the Overview page. Search and advanced search of notes is possible.
- Highlight Opportunities
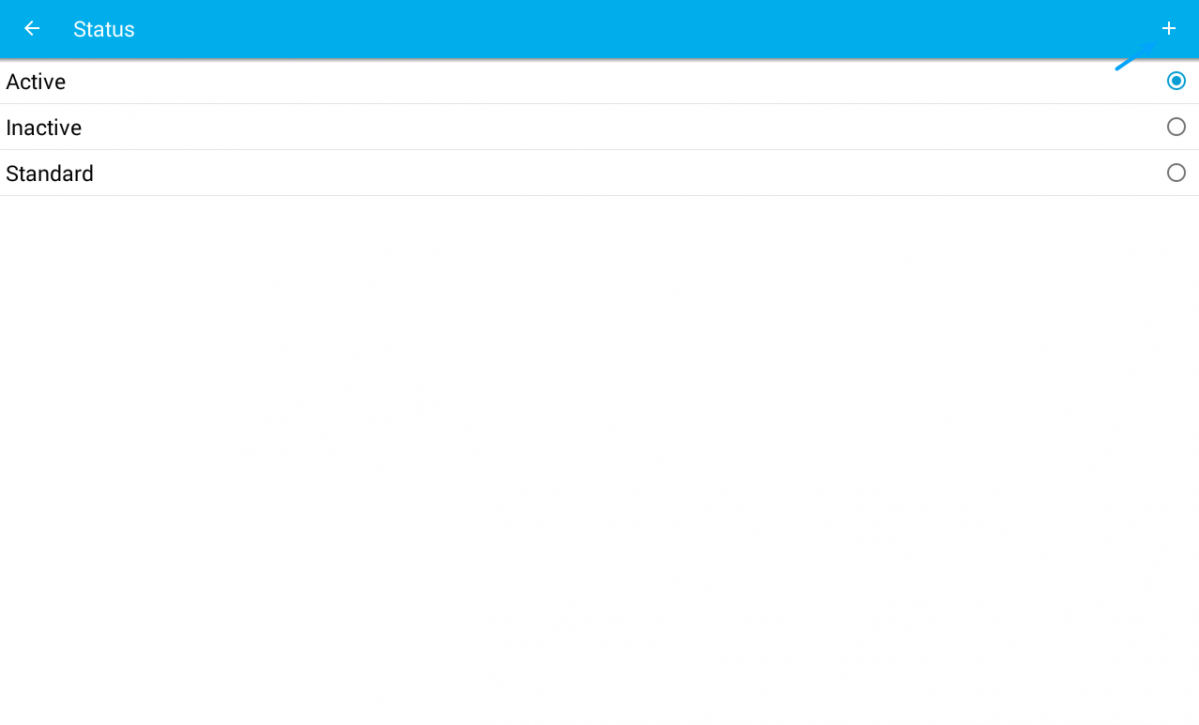
- Contacts based on their Status – We have updated the Contacts App in this release, i.e we have incorporated the “Contact Status” field under Contact Details section. This field empowers you to separate the contacts based on their status. It is accessible in Creation page, Overview page and Duplication page. Users can search for projects using “Status” field in the Advanced Search option.
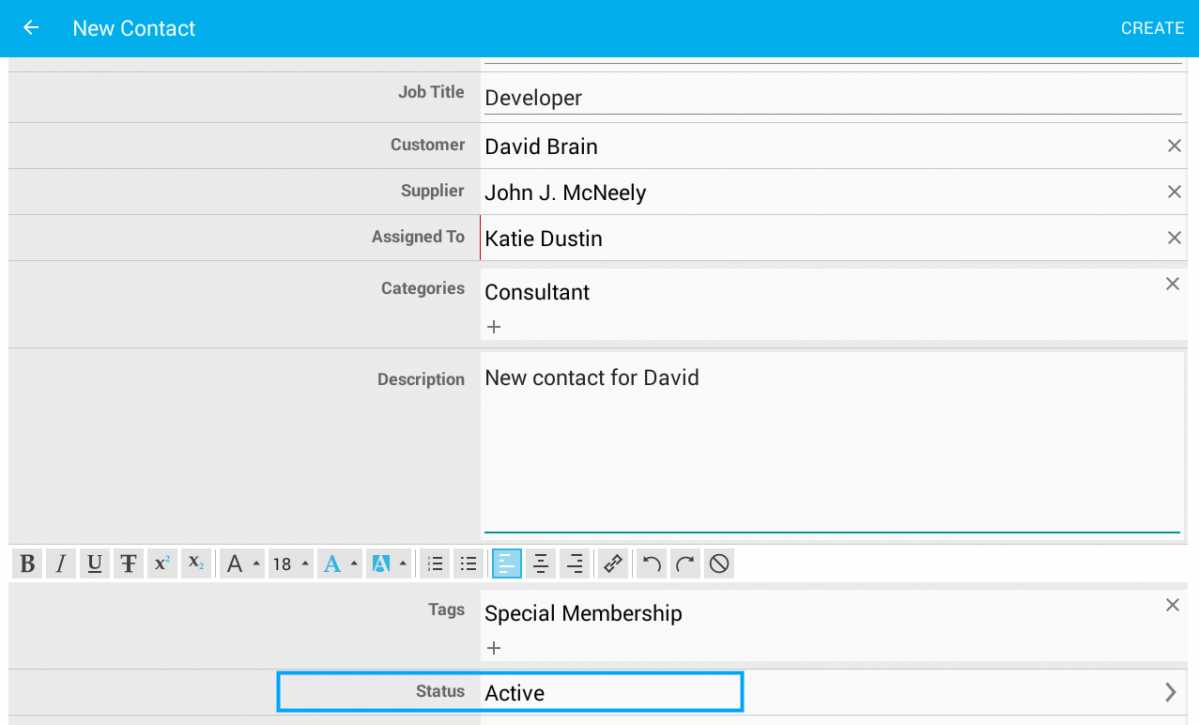
It is also possible for users to create their own status for their contacts. It is done by clicking on the side drop arrow(>) and you will be directed to the Status page where you can view various statuses. Tap on the “+” icon near the Status field to create a new status.
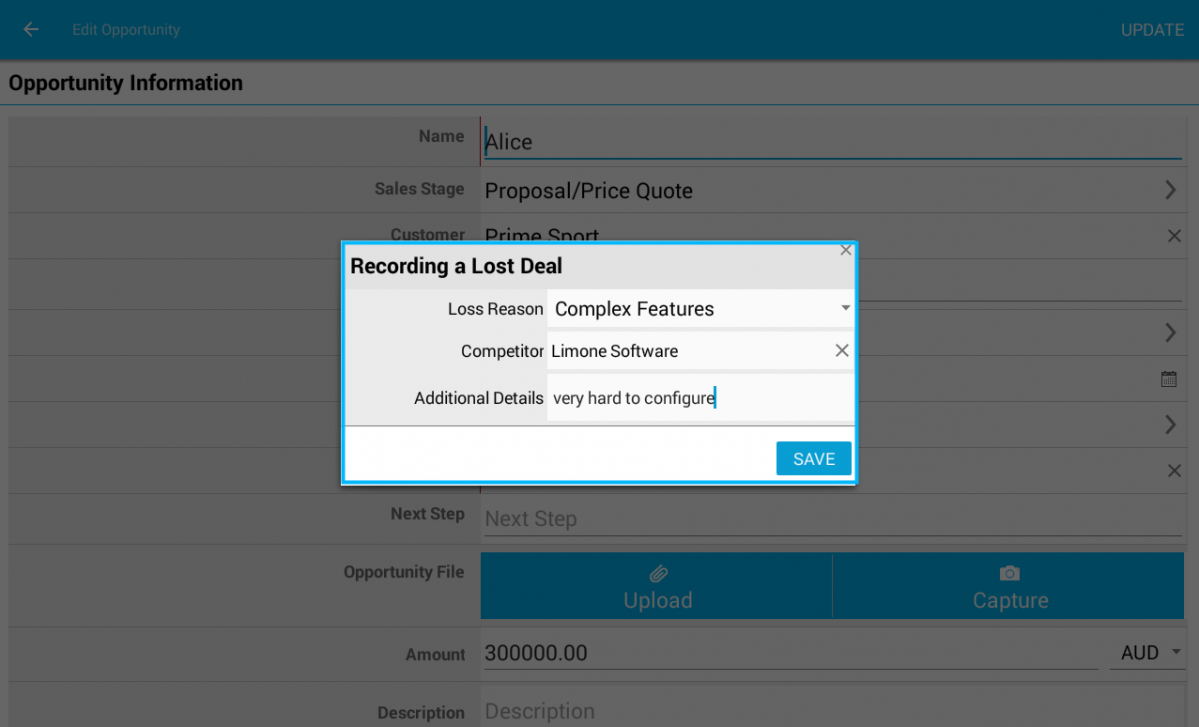
- Record the Loss reason for Opportunities – We, in this release of Android, have added a new feature of recording the purpose behind losing an opportunity. You can create your own loss reasons in the web by clicking on “More -> Settings -> Opportunities -> Loss Reasons. Click on “Create” button to create your own loss reason. You can also view some default loss reasons.
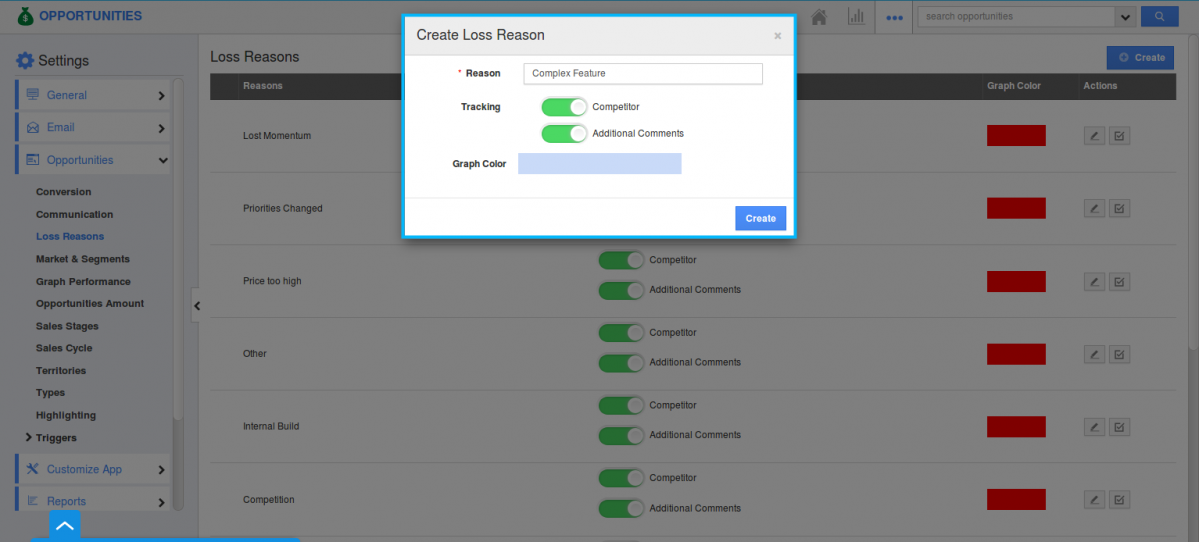
And now in the Mobile device, when an Opportunity moves to “Closed Lost” sales stage, “Recording a Lost deal” pop up appears where you can select your loss reasons from the drop down and furnish with the competitor and additional details. Click on Save button helps you in recording your customer’s loss reason.
|
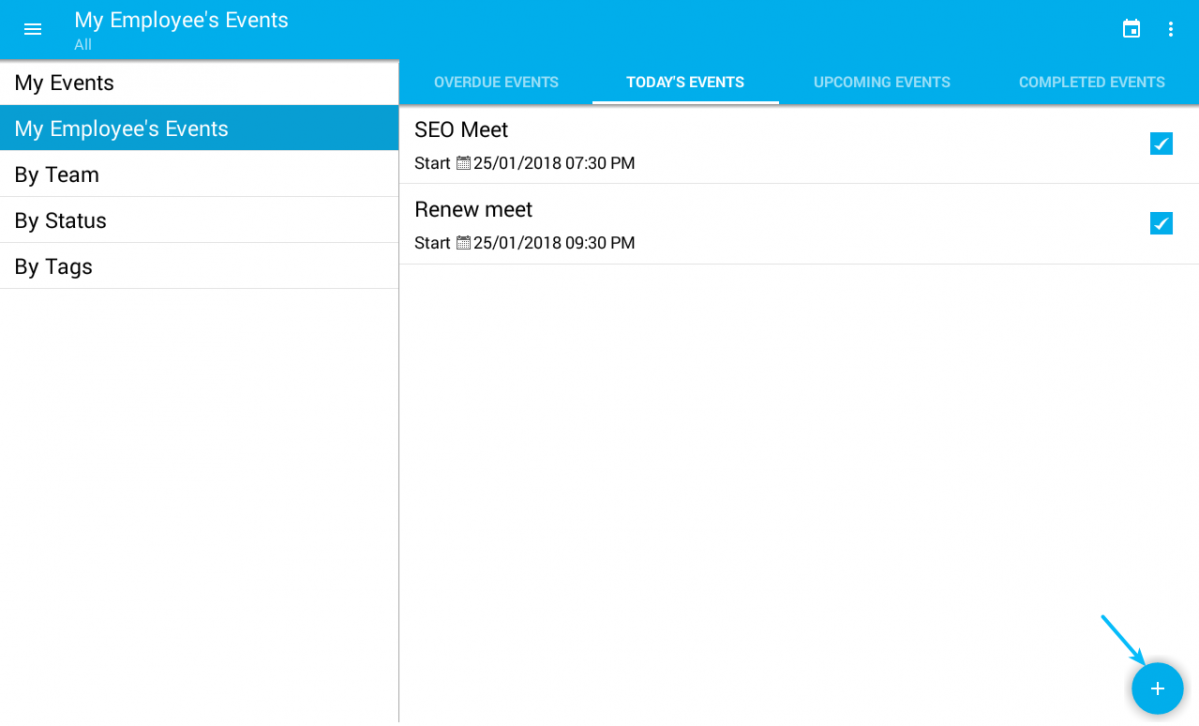
My Events – You can view “My Events” in both Calendar view and in List view. Creation of new events(My Event) is possible from this page too by clicking on the “+” icon. In list view, you can view Overdue events, Today’s event, Upcoming event and Completed event. Searching for events can also be done by clicking on “More -> Search Event” icon for simple search and “More -> Advanced Search” for searching through various fields. The Search page will be opened where you can provide your known details.
|
My Employee’s events – On selecting this, you will be opened with a pop up of various Employees where you can select the required employees whose event has to be seen.
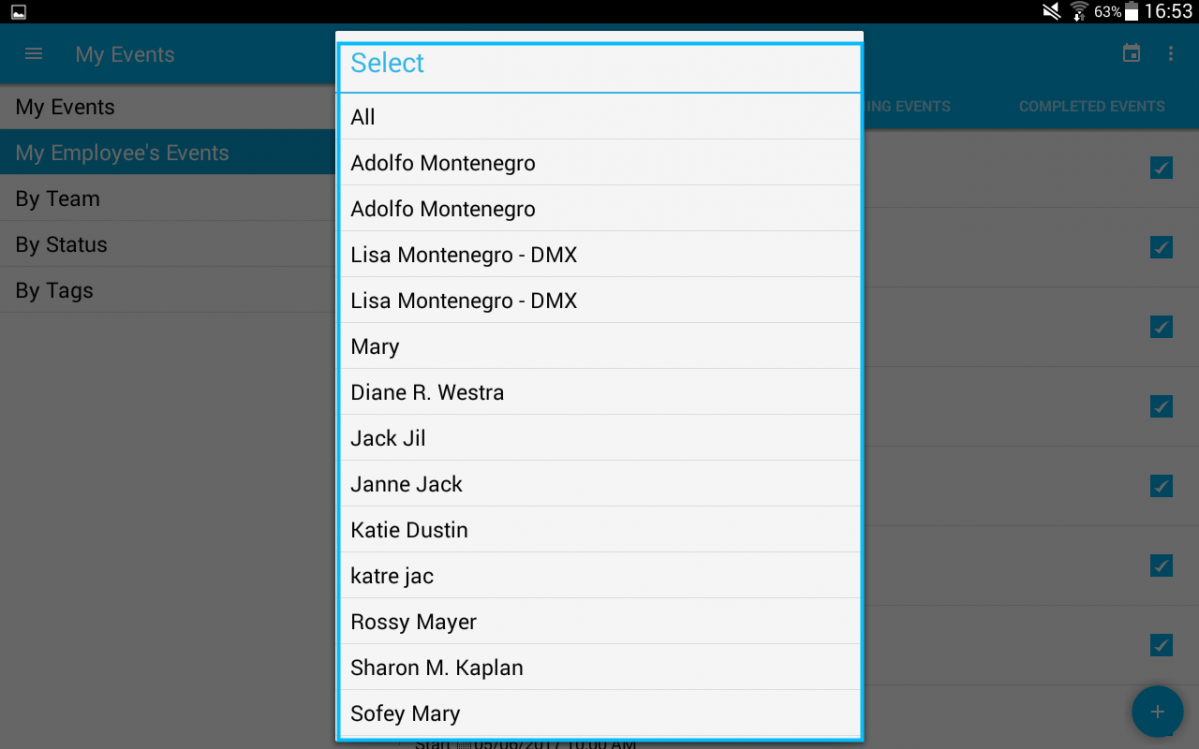
|
For instance: On selecting “All”, you can view all the Employees event in both Calendar view and List view. Creating new events is possible.
|
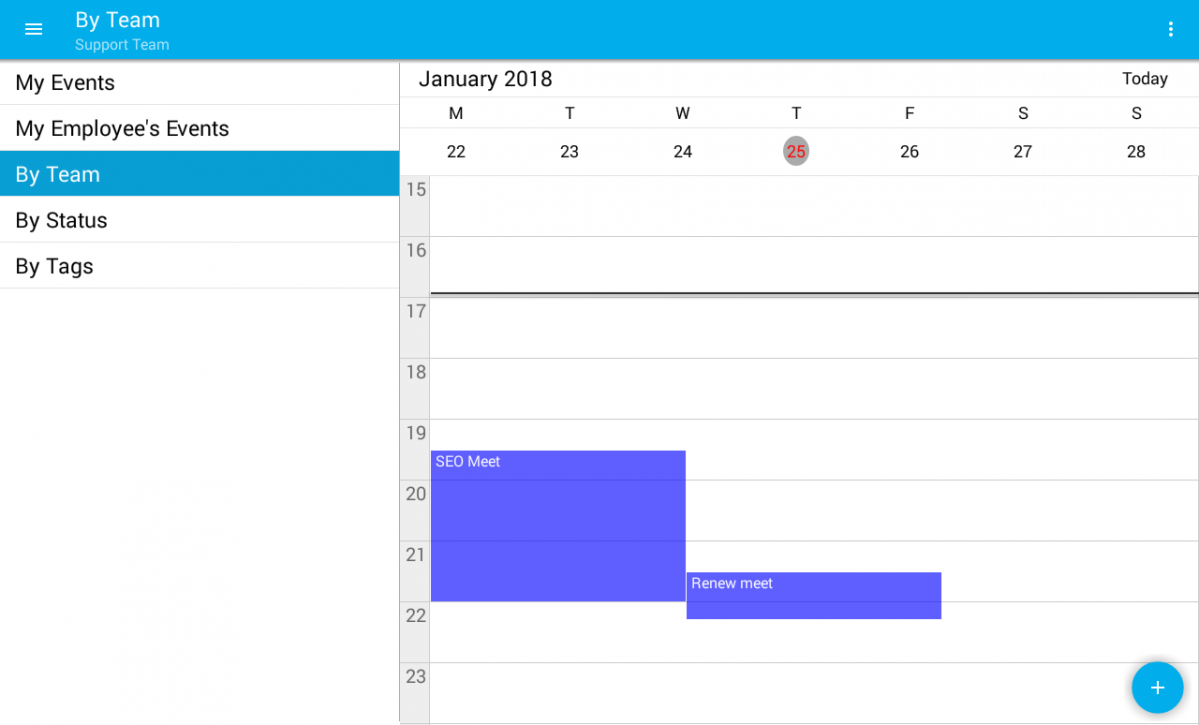
By Team – You will see all your Teams as a pop-up and on selecting a single team helps you to view your team’s event created in the Calendar view. You can initiate a new event from this page.
|
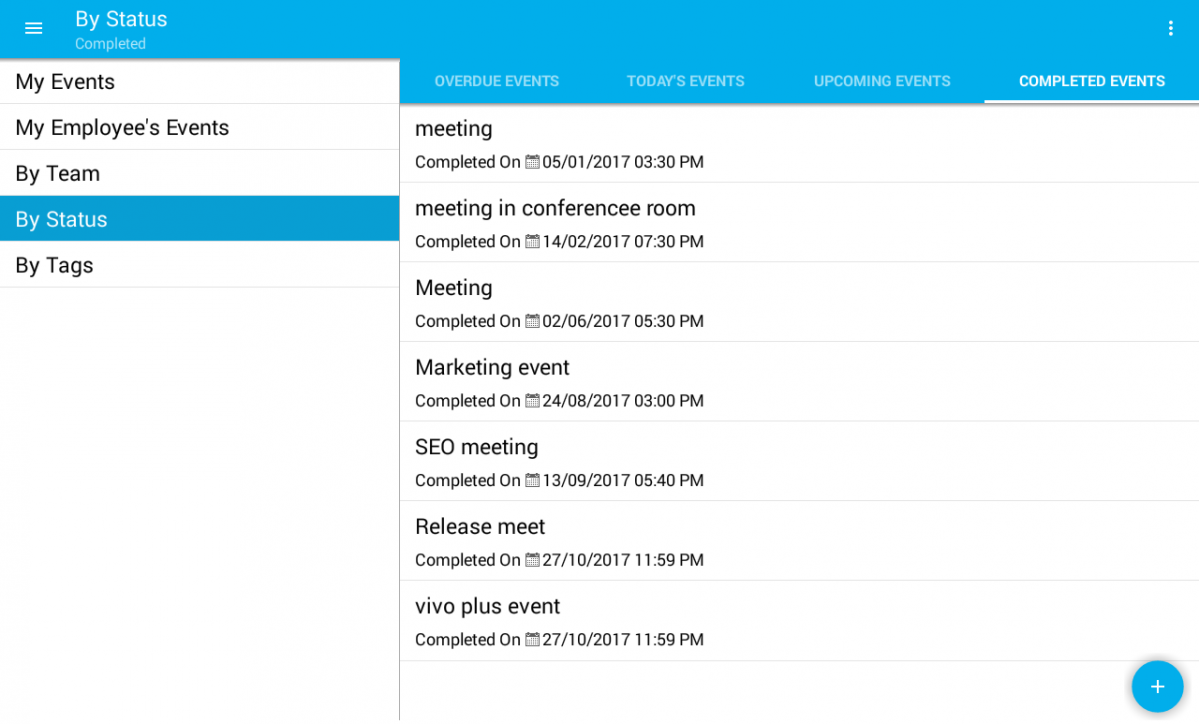
By Status – All the status will be listed and on choosing any status will lead to a listview. You can view overdue events, Today’s event, Upcoming events and Completed events. New events can be created.

|
For instance: By Status – Completed events
|
By Tags – Your created tags will be listed and on selecting any tag helps you to view the events created with the selected tags associated. Overdue events, Today’s event, Upcoming events and Completed events can be seen.

|
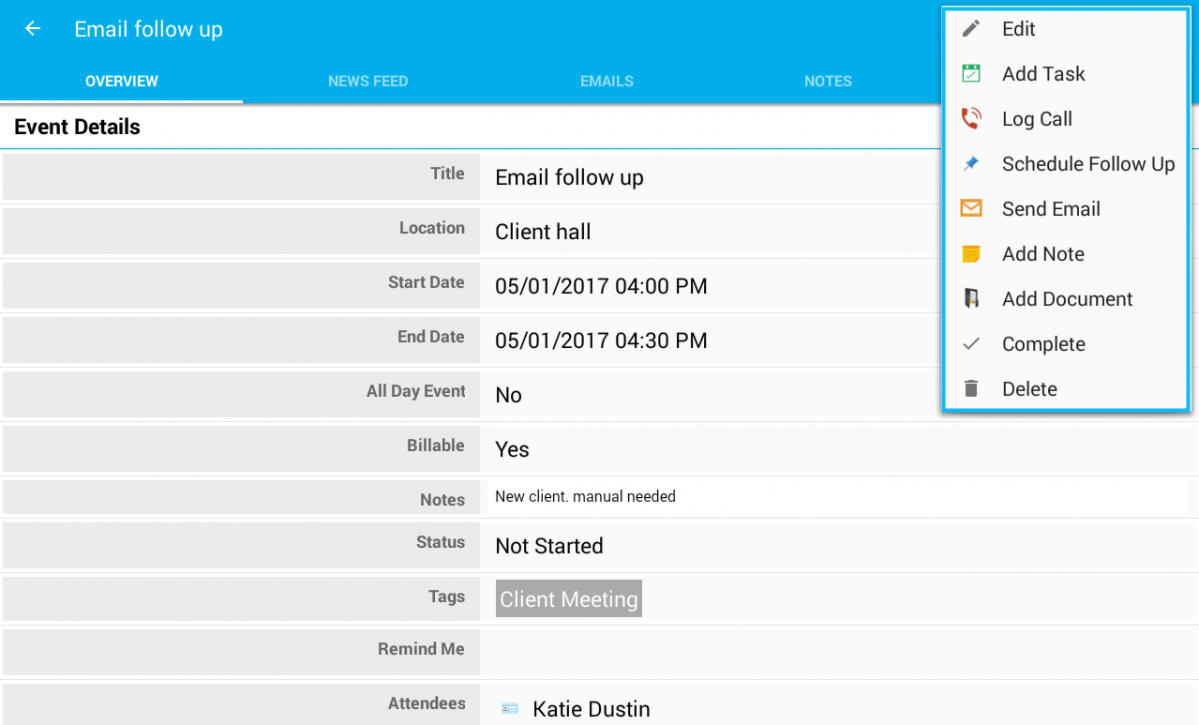
On clicking on any Event, you will be opened with Overview page. You can move on to News Feed tab, Email, Notes and Documents tab.
|
By selecting “More” icon, you can Edit, Add Task, Notes and Document, Send Email, Schedule Follow-ups and Log call by clicking on the More icon. You can also Delete if not needed. Complete it when the event is over.
|
|
|
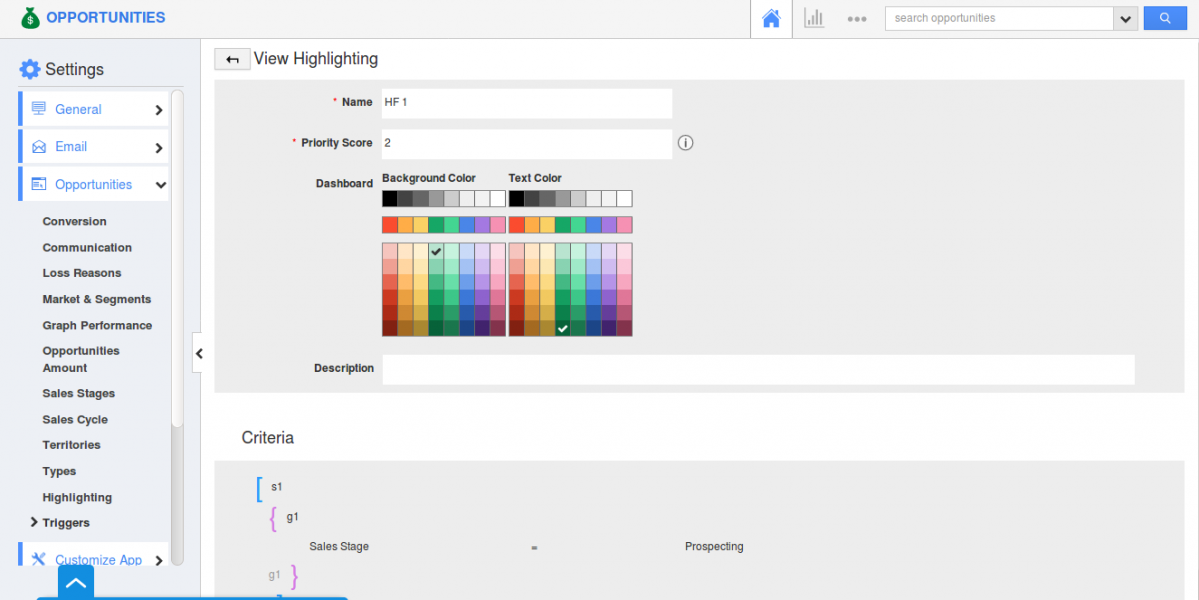
– In this release, we have added the highlighting feature in Opportunities App of Mobile Android CRM. This highlighting feature allows you to easily track the opportunities based on the highlighting condition.
You can configure highlighting rules in the web which gets reflected in Mobile Android app.
In the web, Go to Opportunities App. Click on “More -> Settings -> Opportunities -> Highlights”. Click on Create button to create new highlights with the prior condition. Here, we have given the criteria as Sales stage = Prospecting, so, whenever the Opportunity is in prospecting stage, it will be highlighted.
|
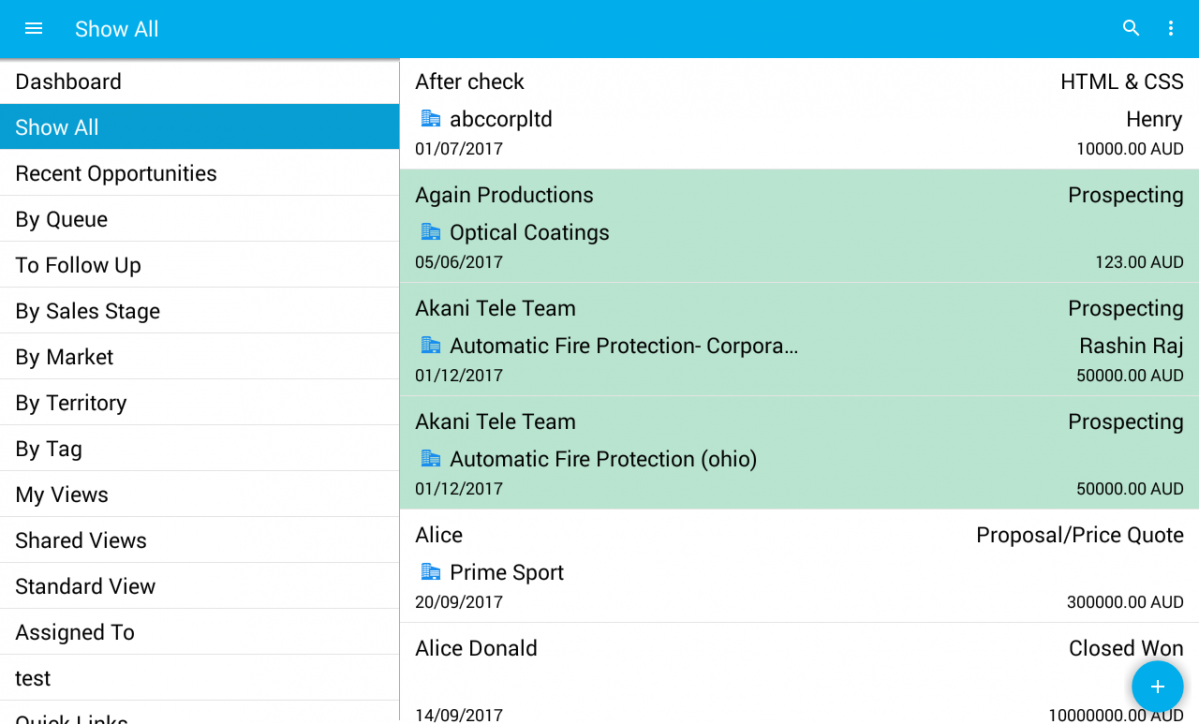
Once updated in mobile, you can check for highlighted features in Opportunities App.
|
|
|
Supply Chain
- Pricing feature in Orders App – Other than having the Price List associated with the customer category, we have now included this feature as an individual field, which can be incorporated into both the Header level and Line level of the Orders.
The Pricing can be configured in the Master layout of the web. To view this Pricing field, Move to More -> Settings -> Orders -> Pricing. You can create your Price list in Pricing App.
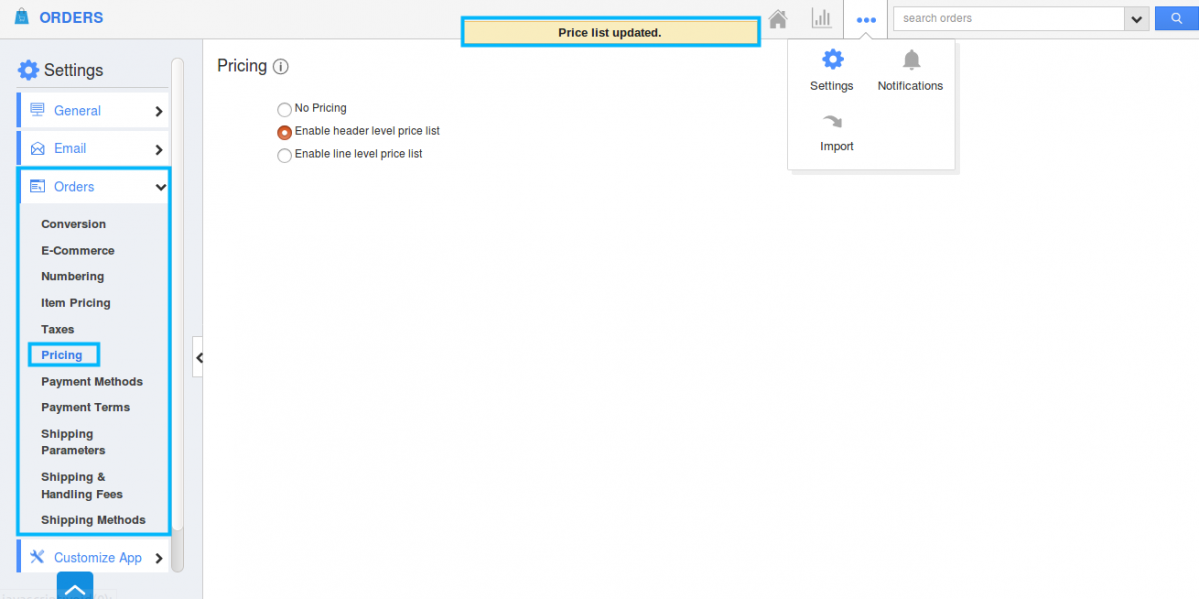
Here, we have selected “Enable Header level Price List”
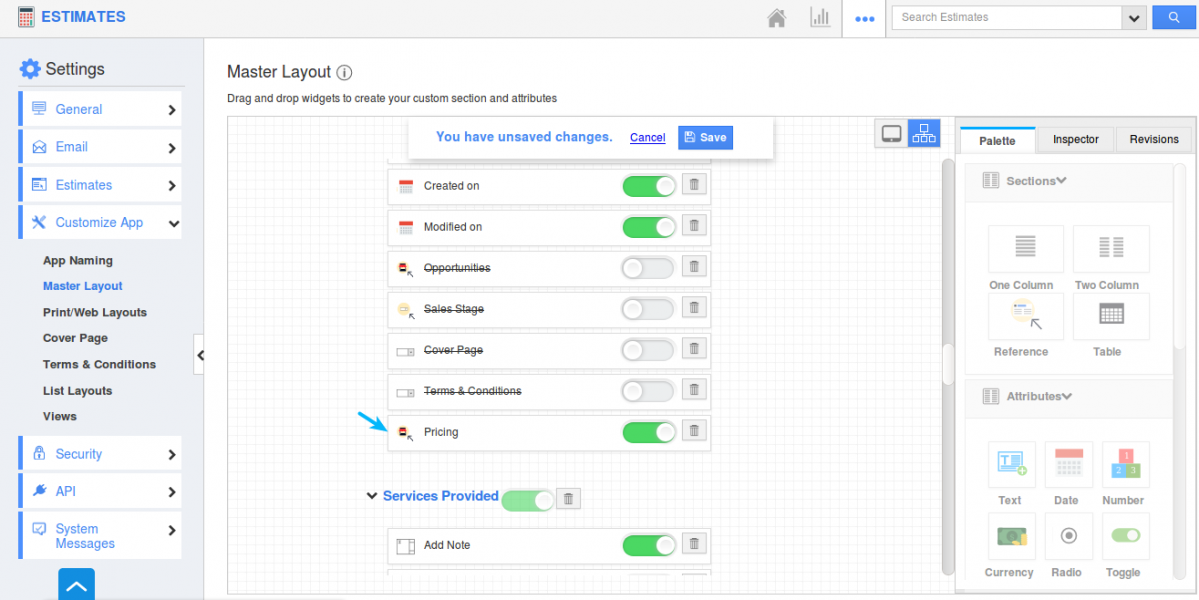
Note: Enable the Pricing toggle in line level and Header level in Hierarchical view in the master layout.
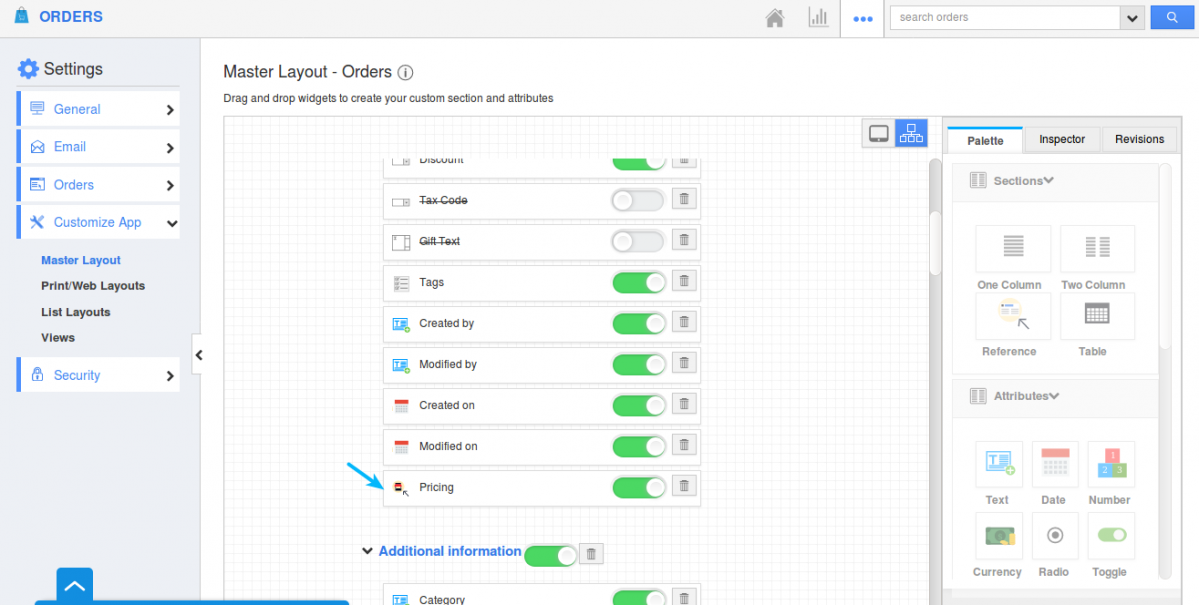
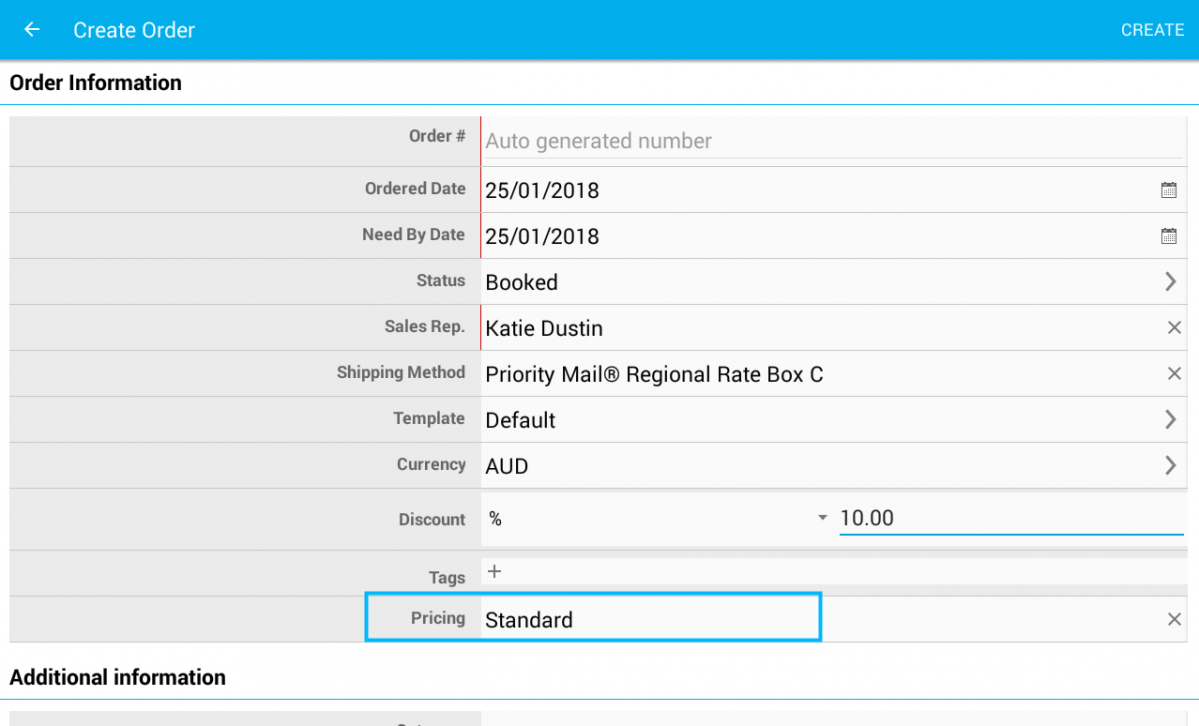
Once configured, in mobile devices, when you move on to Orders creation page, you can view the “Pricing” field in “Order Information” section.
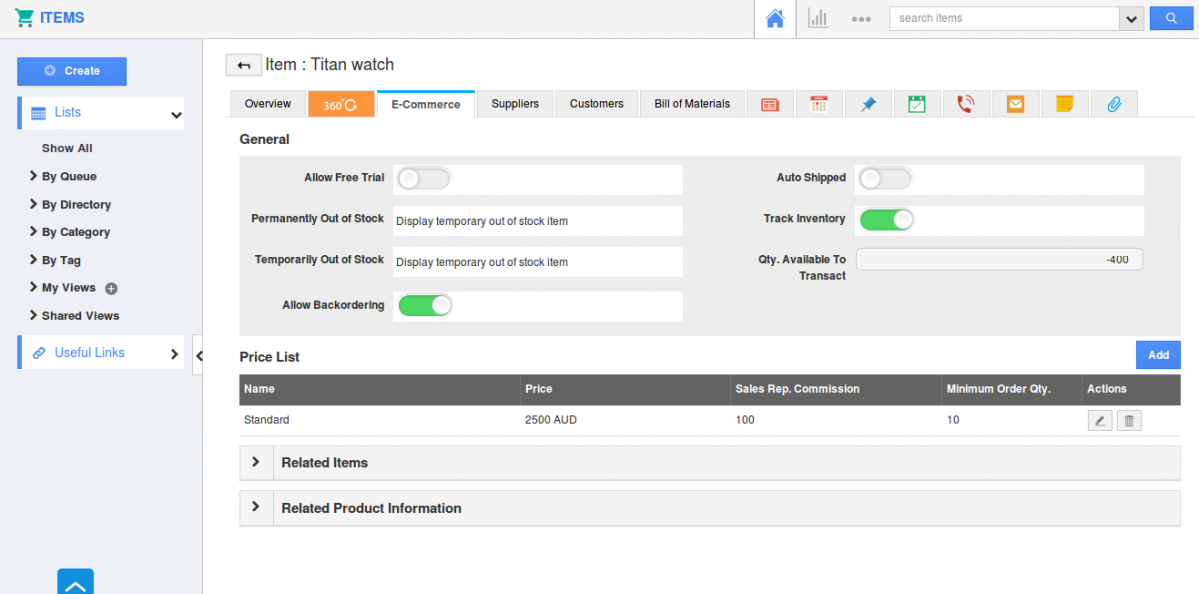
- Backorder Management – One of the most awaited feature in Mobile which has been suggested by various customers is the Backorder Management which is now in the hot pan. Backordering gives you the ability to create orders for a product which is temporarily out of stock.(i.e The ordered quantity greater than available quantity).
When on placing an order, you can view both the Available quantity(displays the available inventory quantity of the selected item ) and the backorder quantity(displays the number of items which are out of stock).

Once a Backorder is created, the order status will be set to “Backorder” on the overview page.
You can view all the back orders from the left navigation panel, under “By Status -> Back Order”.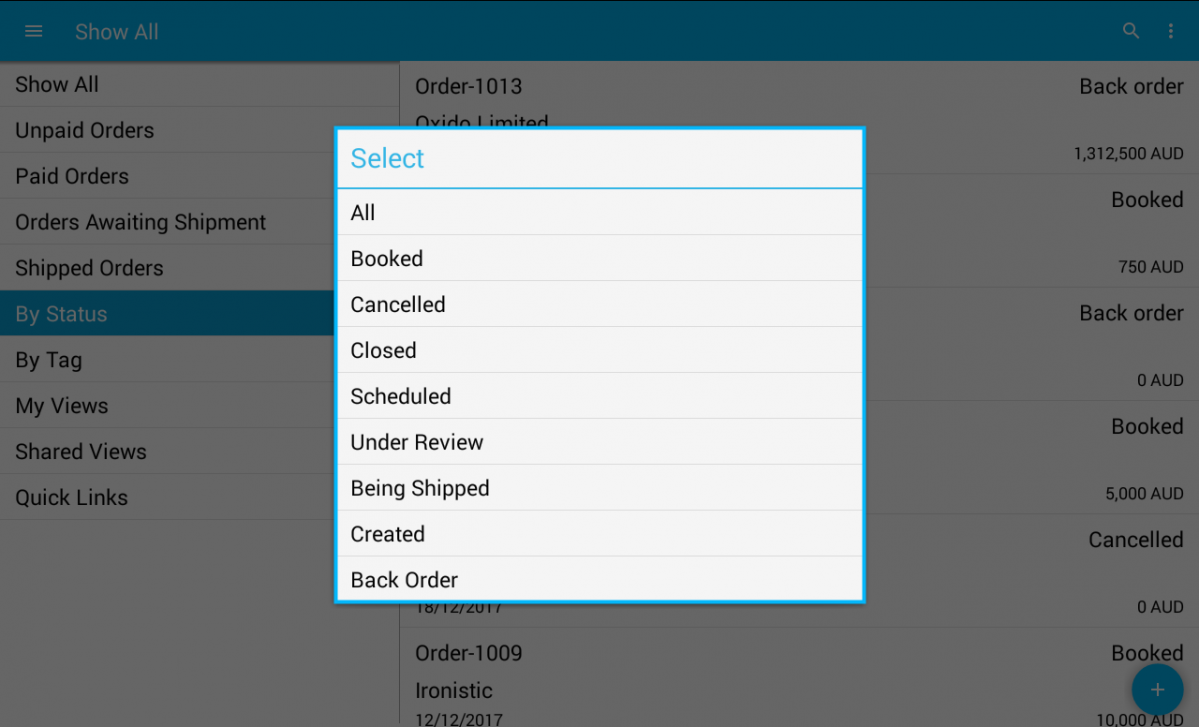
Note: In order to create backorders, you are required to enable the toggle ON from the Items App -> E-Commerce tab -> Allow Backordering in web layout.
|
|
Financials
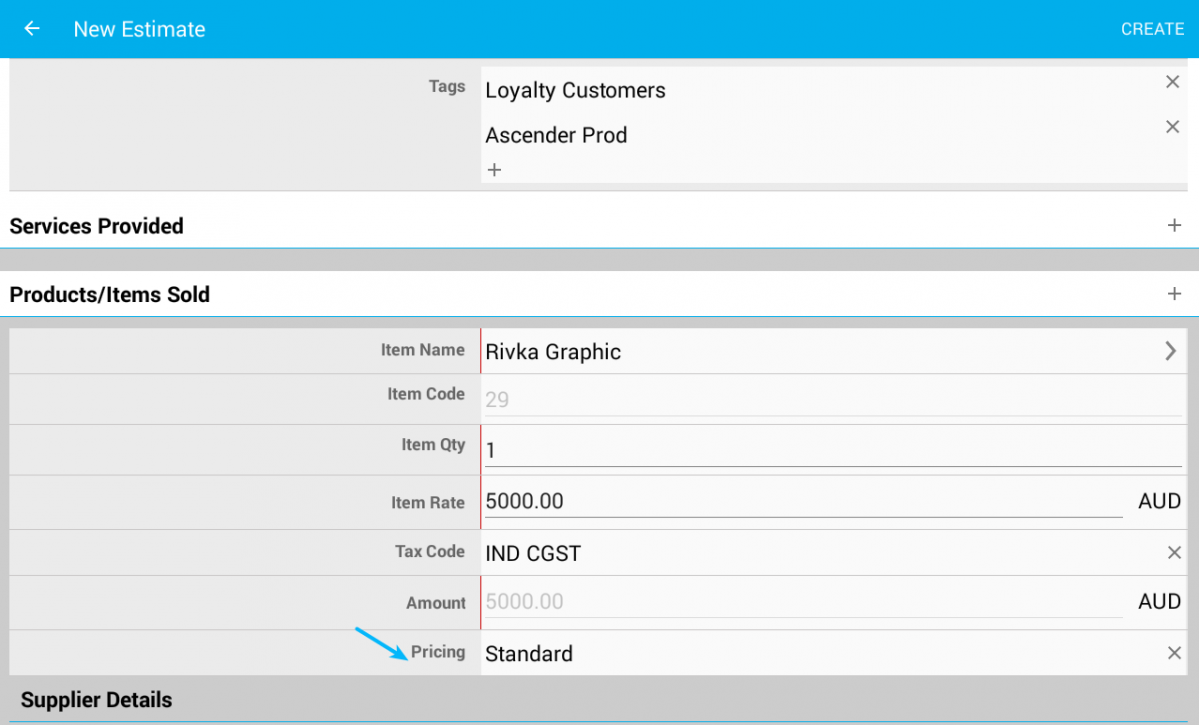
- Customize Pricing position in Estimates App – Other than having the Price List associated with the Customer category, we have now included this feature as an individual field, which can be incorporated into both the Header level and Line level of the Estimates App.
The Pricing can be configured in the Master layout of the web. To view this Pricing field, Move to More -> Settings -> Estimates -> Pricing. You can create your Price list in Pricing App.
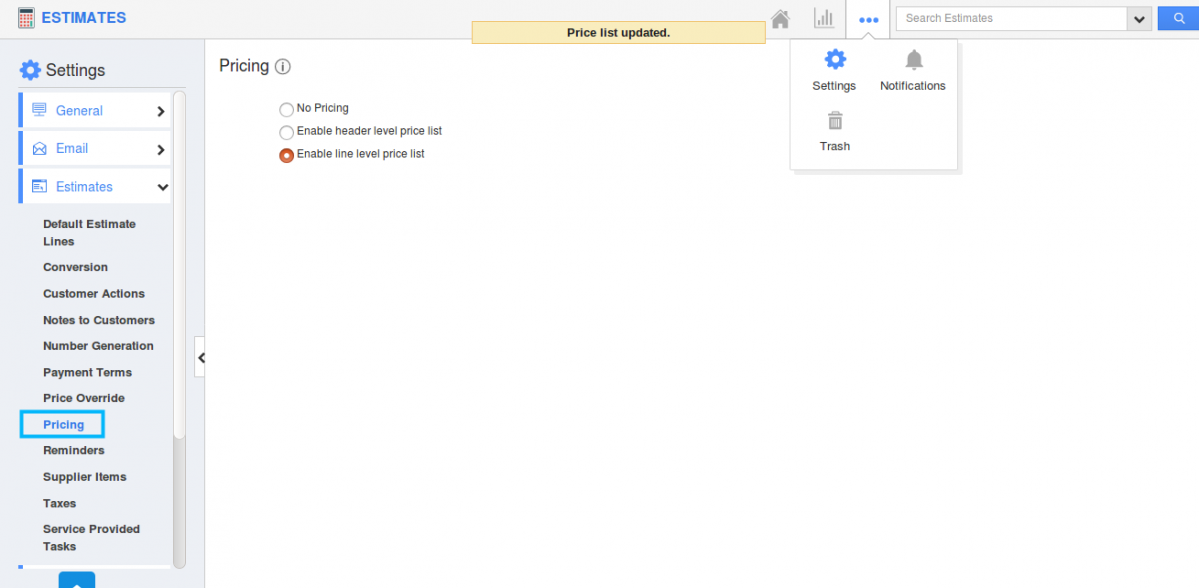
Here, we have selected “Enable Line level Price List”
Note: For existing users, enable the Pricing toggle in line level and Header level in Hierarchical view in Master layout.
Once configured, In mobile devices, when you move on to Estimate creation page, you can view the “Pricing” field in “Products/Items sold” section.
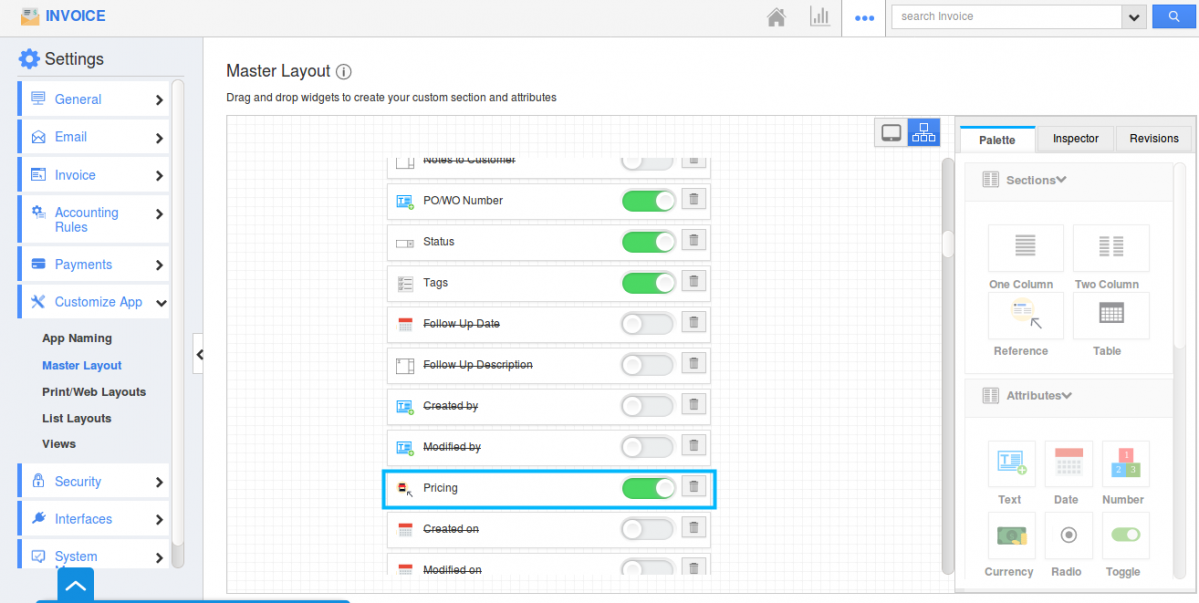
- Customize Pricing position in Invoice App – Besides having the Price List associated with the customer category, we have now included this feature as an individual field, which can be incorporated into both the Header level and Line level of the Invoice App.
The Pricing can be configured in the Master layout of the web. To view this Pricing field, Move to More -> Settings -> Invoice -> Pricing. You can create your price list in Pricing App.
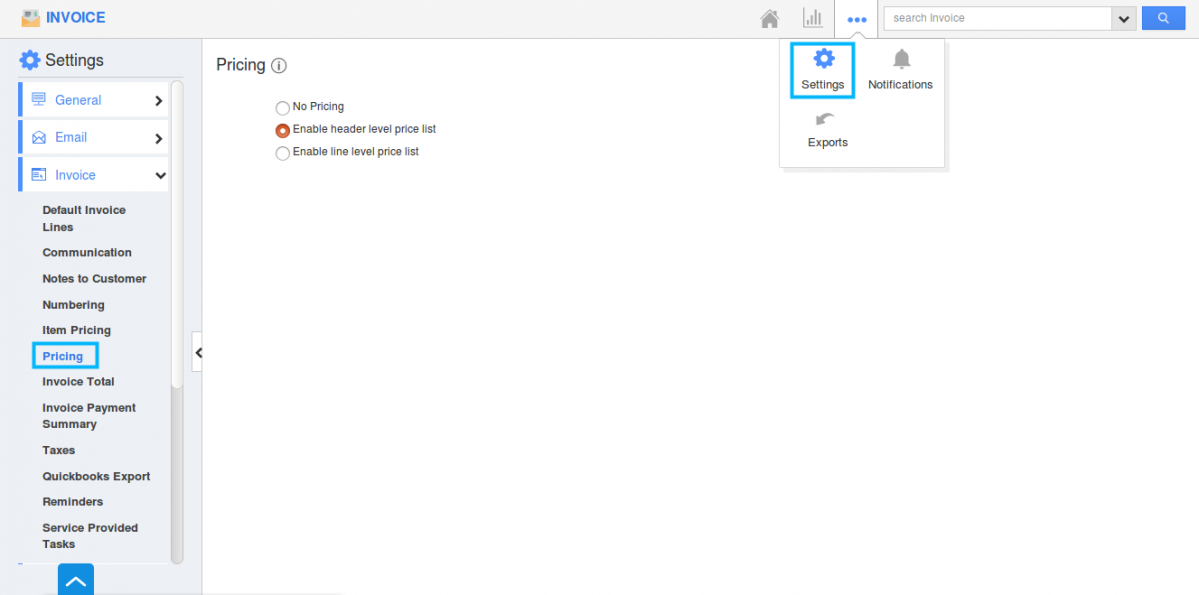
Here, we have selected “Enable Header level Price List”
Note: Enable the Pricing toggle in line level and Header level in Hierarchical view in Master layout.
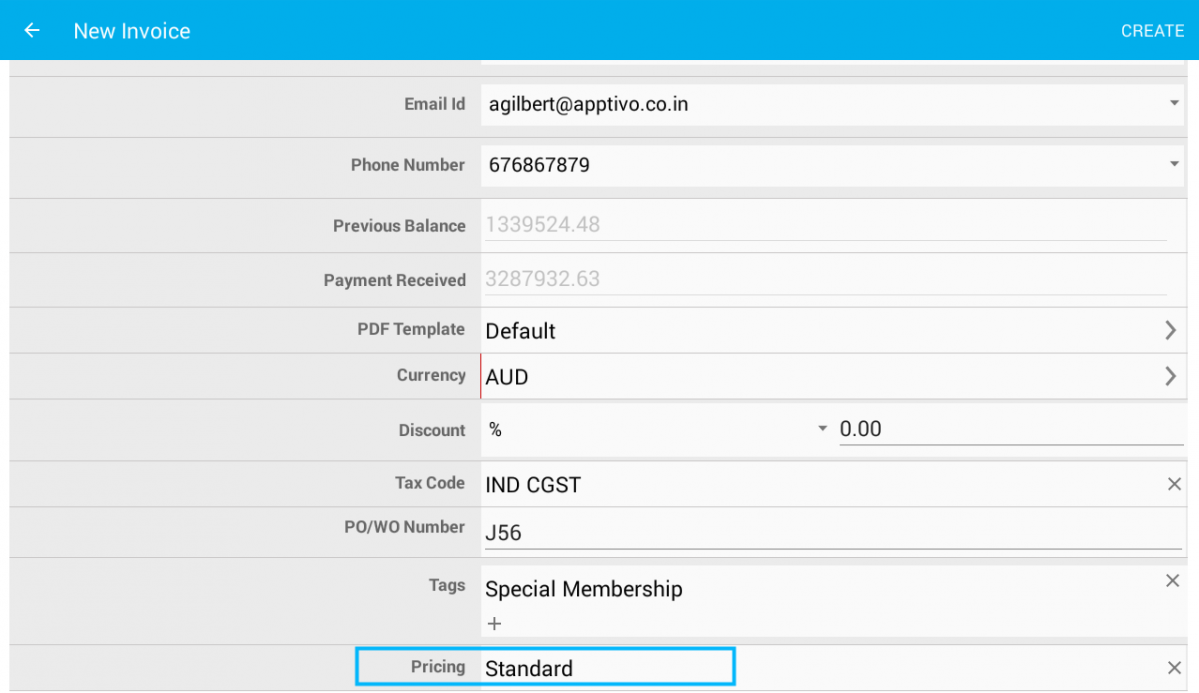
Once configured, In mobile devices, when you move on to Invoice creation page, you can view the “Pricing” field in “Invoice Details” section.
|
|
Project Management
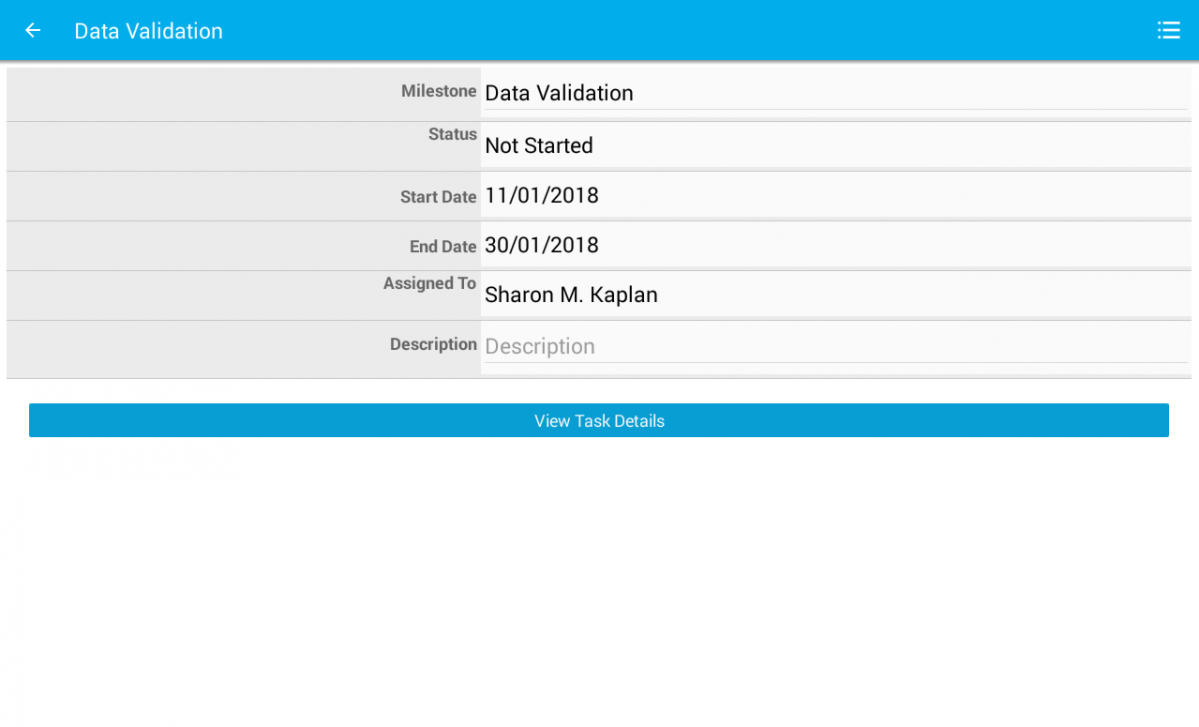
- View & Redirect to Tasks and Milestones right from Gantt Chart – Gantt Chart in Android helps you to view the tasks, subprojects and milestones in a graphical manner. You would have known about the Gantt chart which has been a part of November 28 release. Now we have updated it.i.e when you are viewing the Tasks and milestones in Gantt Chart of a particular project, it redirects to the particular task or milestone name when selecting a particular object.
Move on to “Project Management -> Projects” App. Select any existing project and you will be viewing the Overview page. Select “Gantt Chart” and you will be moved to “Gantt chart” page.
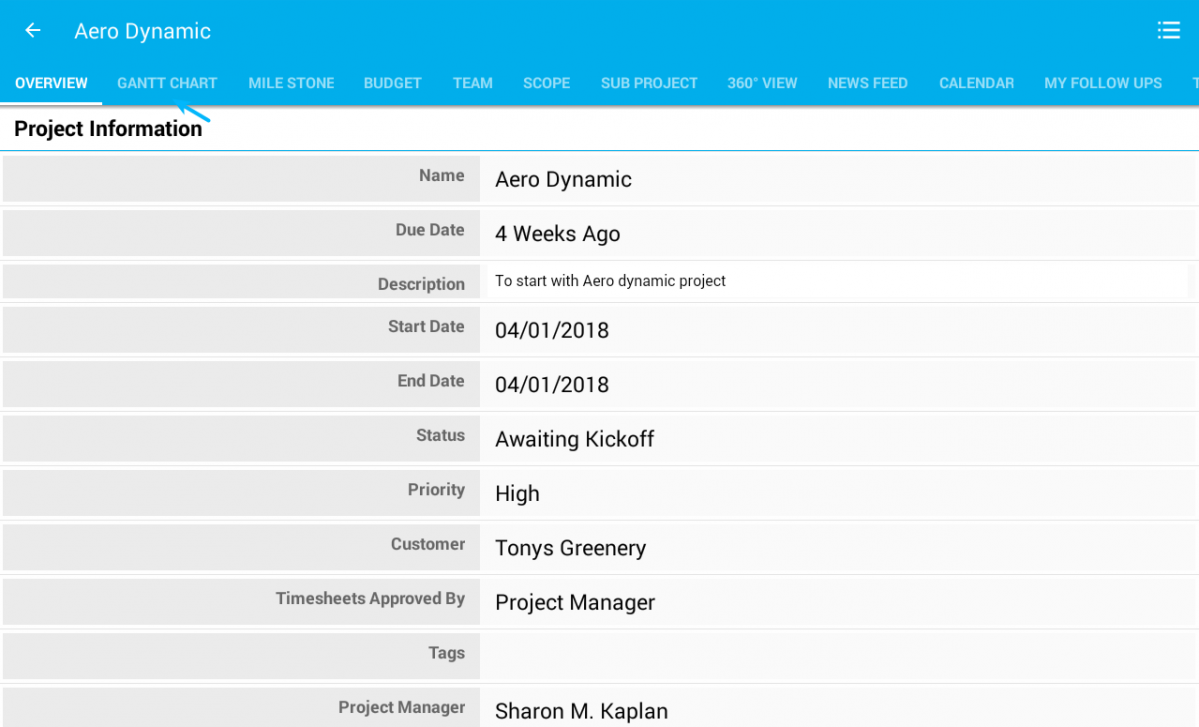
Here you can view the Tasks, Subprojects and Milestones of the selected Project in a graphical representation.
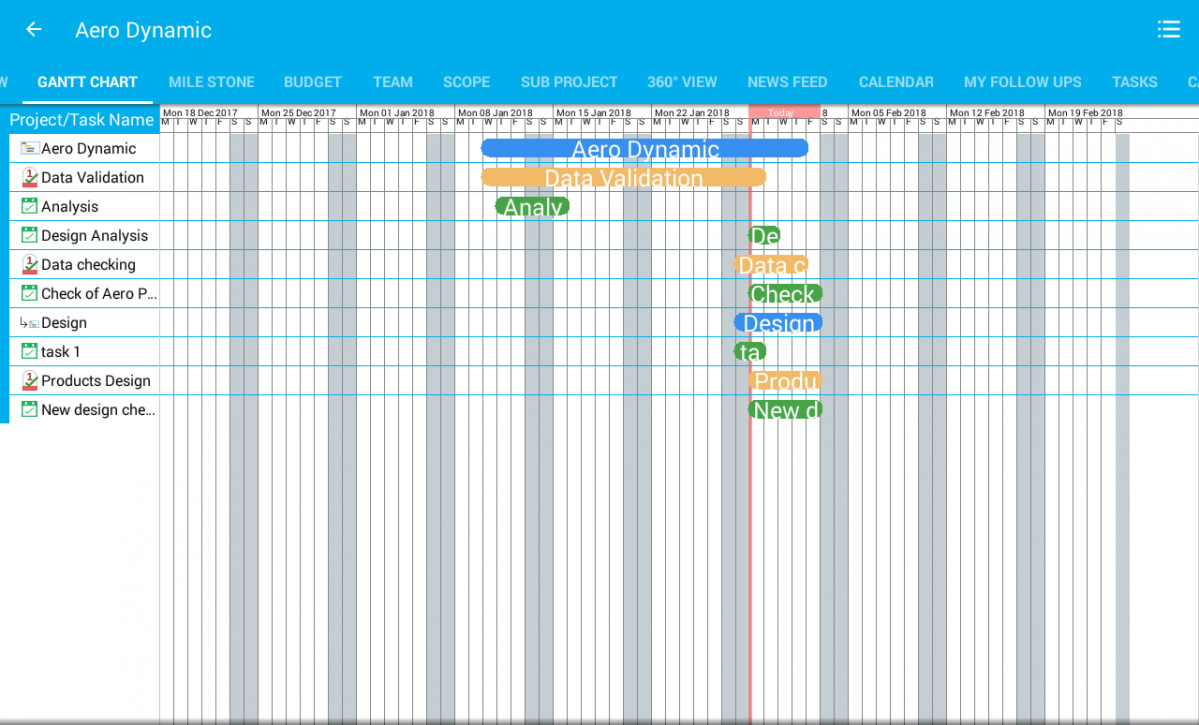
Now on tapping on any object, you will be opened with a popup. You can view its details(quick) and by clicking “View” button, you can redirect to the particular object page.
|
Latest Blogs

Role Of CRM In Travel And Tourism Industry
Travel and tourism have been a significant part of everyone’s life since the ancient period. When we skim through the pages of history, It should be noted that humans were initially nomads before they became settled in one place. They...
Read more →
WHAT IS CRM TECHNOLOGY?
Introduction CRM is a technology that helps manage the entire customer information and interactions in order to build and maintain superior customer relationships. The CRM solution replaces spreadsheets and other different applications, which makes it easy for the businesses to...
Read more →
Everything you need to know about the Annual Maintenance Contract!
1. What is an Annual Maintenance Contract? 2. Benefits of Maintenance Contracts 3. How can Apptivo CRM help you manage maintenance agreements and vendors? 4. Summary Think about getting the confidence that the machinery is well-maintained and performing optimally, without...
Read more →
