Browse by Solutions
Browse by Solutions
How do I create custom attributes in sales receipts app?
Updated on August 21, 2017 05:45AM by Admin
The Sales Receipts app, although simple, is very useful for providing customer satisfaction and peace of mind. Best of all, it takes little to no effort from you to create customer receipts.
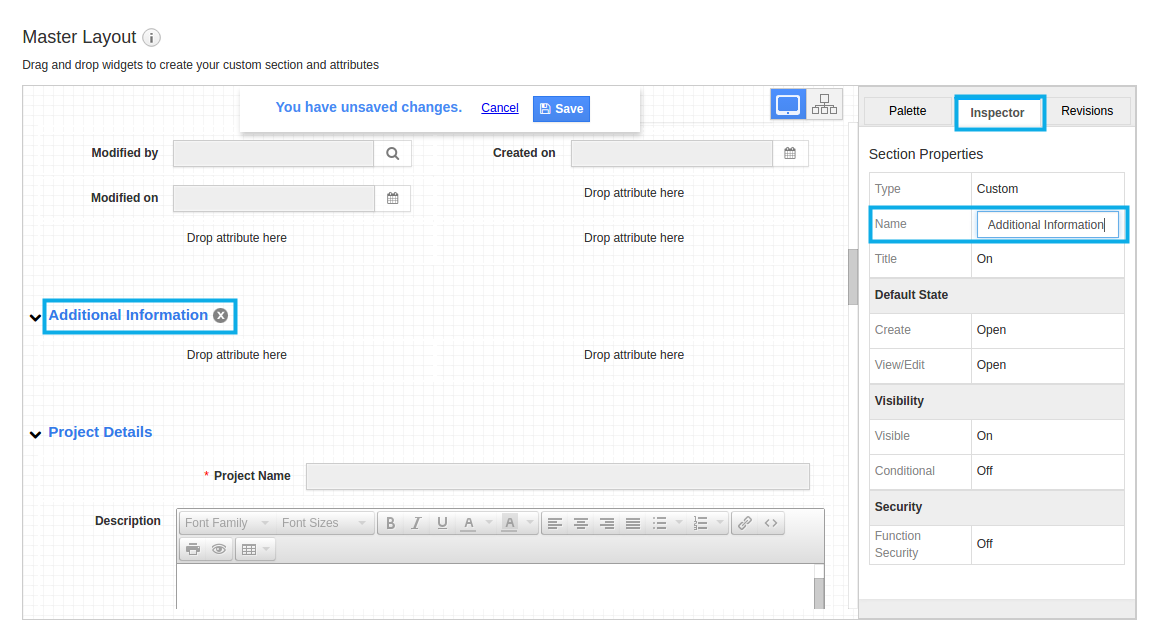
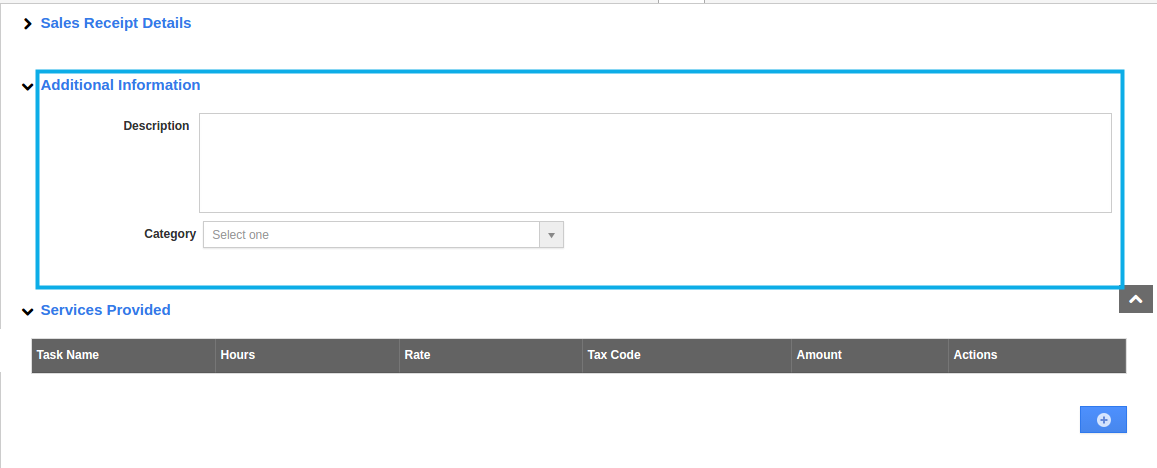
For instance: Consider an employee (Katie Dustin), who wants to add a custom section “Additional Information” with the custom fields “Description” and “Category”. In that case, he can add these additional attributes by customizing the master layout.
Steps to Create Master layout
- Log in and access Sales Receipts App from your Universal Navigation menu bar.
- Click on “More(...) -> Settings” icon located at the App header bar.

- Click on “Customize App -> Master layout” from the Left navigation panel.
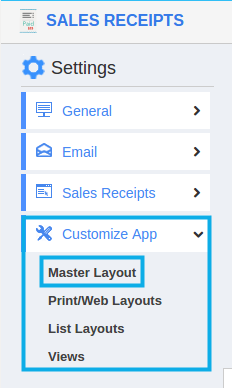
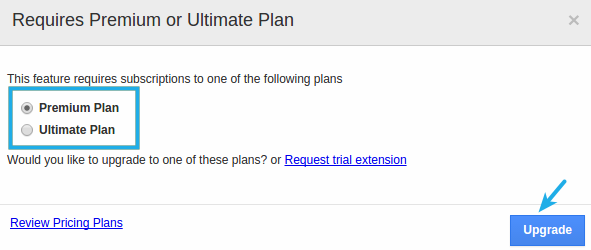
- If you are standard plan user, then you need to upgrade your account to use this feature. It would be notified as below:
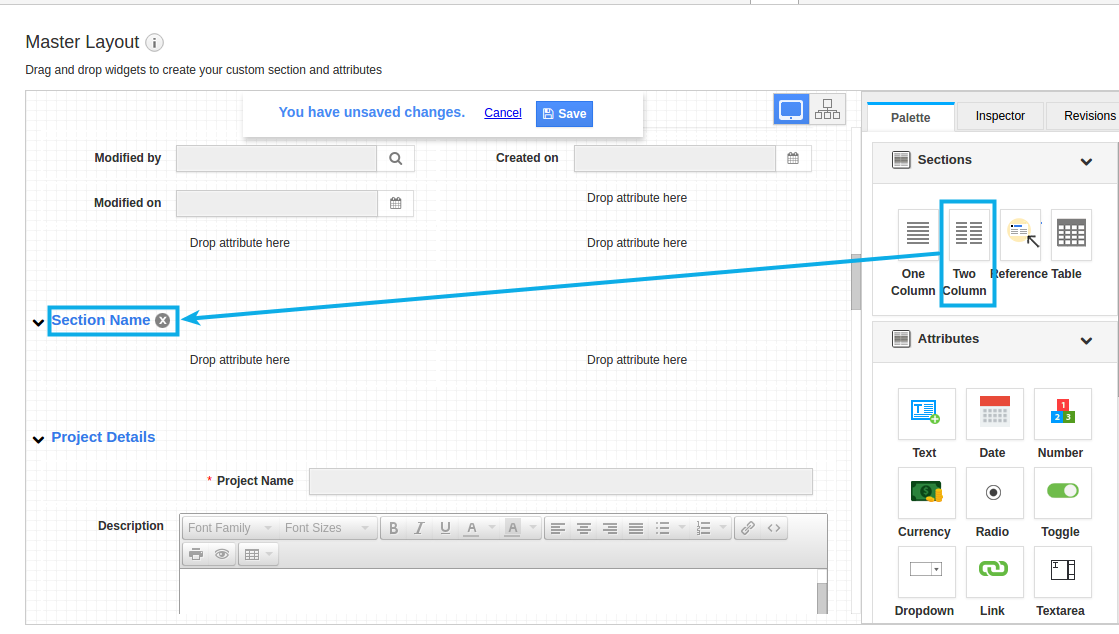
- Drag “Two Column” section from the “Palette” and drop it on the specified location.
- Click on the section name and rename it as “Additional Information” in the “Inspector” tab.
- Now, to insert attributes, drag and drop the attributes from the “Attributes” section under “Palette”.
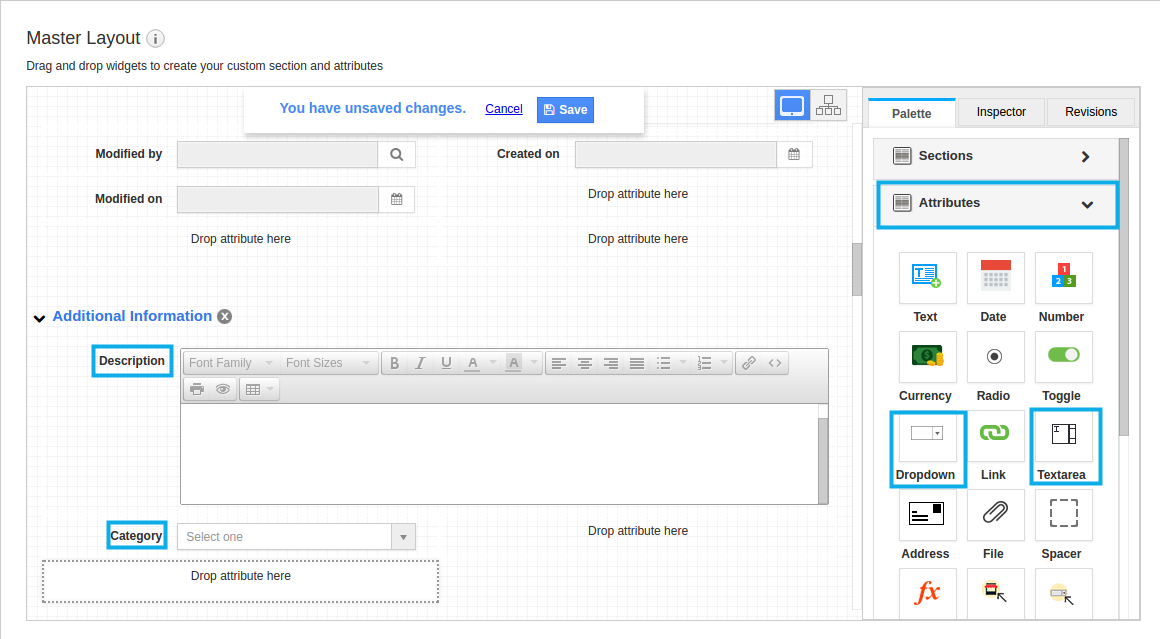
- Click on “Save” to save the changes made.
- Thus, you have created Master Layout in Sales Receipt App.
Related Links
Read more about:
Flag Question
Please explain why you are flagging this content (spam, duplicate question, inappropriate language, etc):

