Apptivo CRM allows its user to create Tags across its objects and modules. Tags are nothing but labels that are associated with Leads App to help you organize the leads in a personalized way. It allows you to create multiple tags from the creation page and also update the existing ones.
There are two types of tags available:
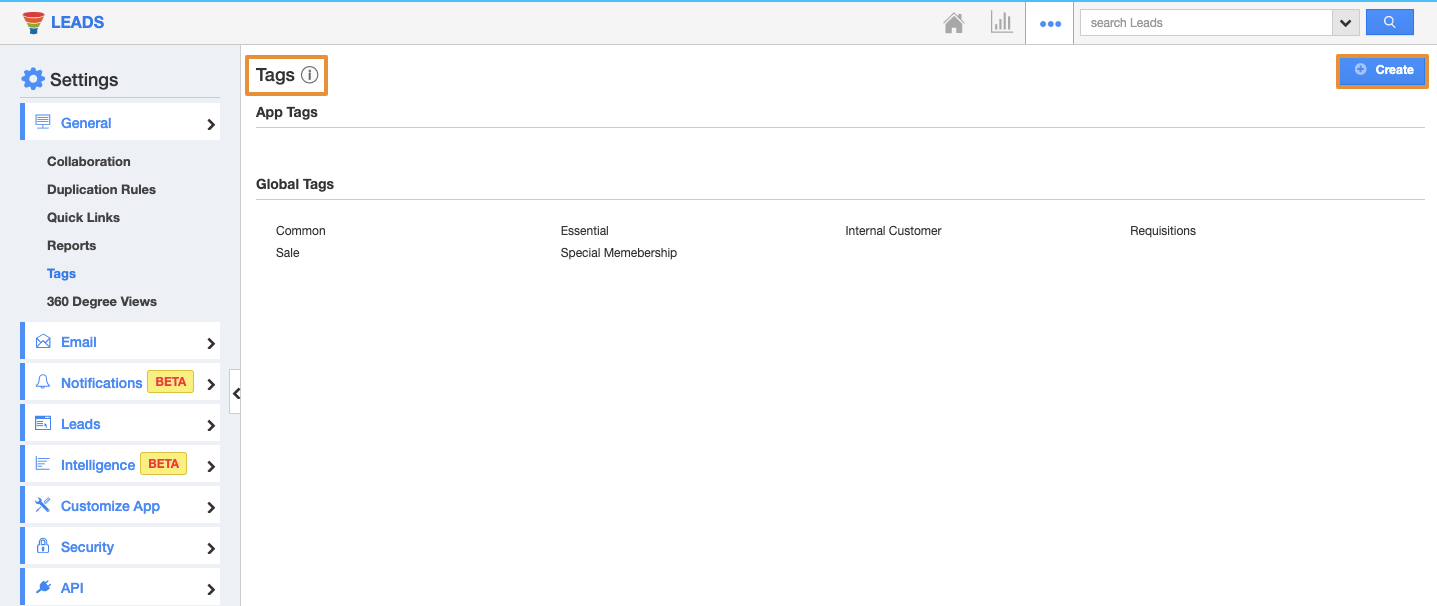
- App Tags - These tags are app-specific. They can be accessed only within the Leads App.
- Global Tags - These tags can be accessed throughout the apps in Apptivo.
For instance: If you want to view those Leads under "Premium Customer", then that can be created as a tag. Now, on clicking the Premium Customer under "By Tag", the leads that are associated with that tag will be displayed.
Steps to Create Tags in the Leads
- Go to the Leads App.
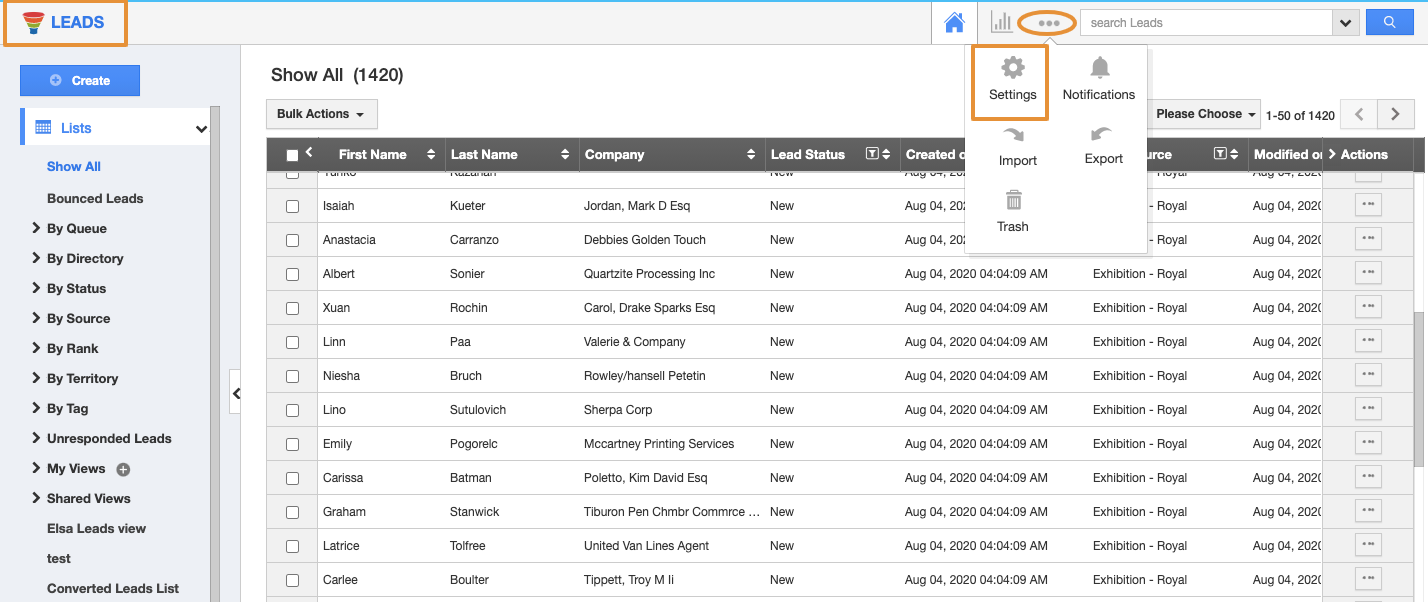
- Click on the“More (...)” icon and select “Settings”.
- On the Settings page, click on the “General” and select “Tags”.
- Click on the “Create” button.
- In the create tag popup and specify the Tag Name.
- Select App Tag.
- Click on “Create” to complete.
- You can view the created tag on the list. Mouse over the created tag. You can edit or delete the tag name using "Edit" or "Delete" icons, whenever required.
Now that the tag has been created, follow the below steps to apply the tags.
Steps to Apply Tags to your Leads
While creating leads, you can apply labels from the creation page. Furthermore, you can upgrade the labels for existing too, allowing you to add multiple tags.
- Go to Leads App and click on "Create" from the left navigation panel.
- Now, select the created tag (Premium Customer) from the "Tags" field as shown.
- You can add multiple tags for a single lead.
- By clicking on the "By Tags" option, you can easily view the leads which are grouped by the tag created.


