Browse by Solutions
Browse by Solutions
How can I create custom views in Calendars?
Updated on July 24, 2023 10:47PM by Admin
The views have been added to the calendar which acts as a filter so that a user can separate out types of appointments that have been indicated by a custom field.
For Instance: Let us consider that the user wanted to view all the events in the last week.
To create a custom view in the Apptivo Calendar.
- Login to Apptivo App and access the Calendars from the activities floating bar.
- Navigate to Calendar → Settings → Customize App → Views.
 |
- Create a view by providing View Title and Description.
- Set the criteria by inserting the attribute value.
 |
- The Custom View would be created in the left panel view of the Calendar Overview page.
- The records satisfying the condition will be displayed in the left panel view of the Calendar.
 |
Note: The user can accordingly select the Starts on and Ends on attributes based on the date attribute.
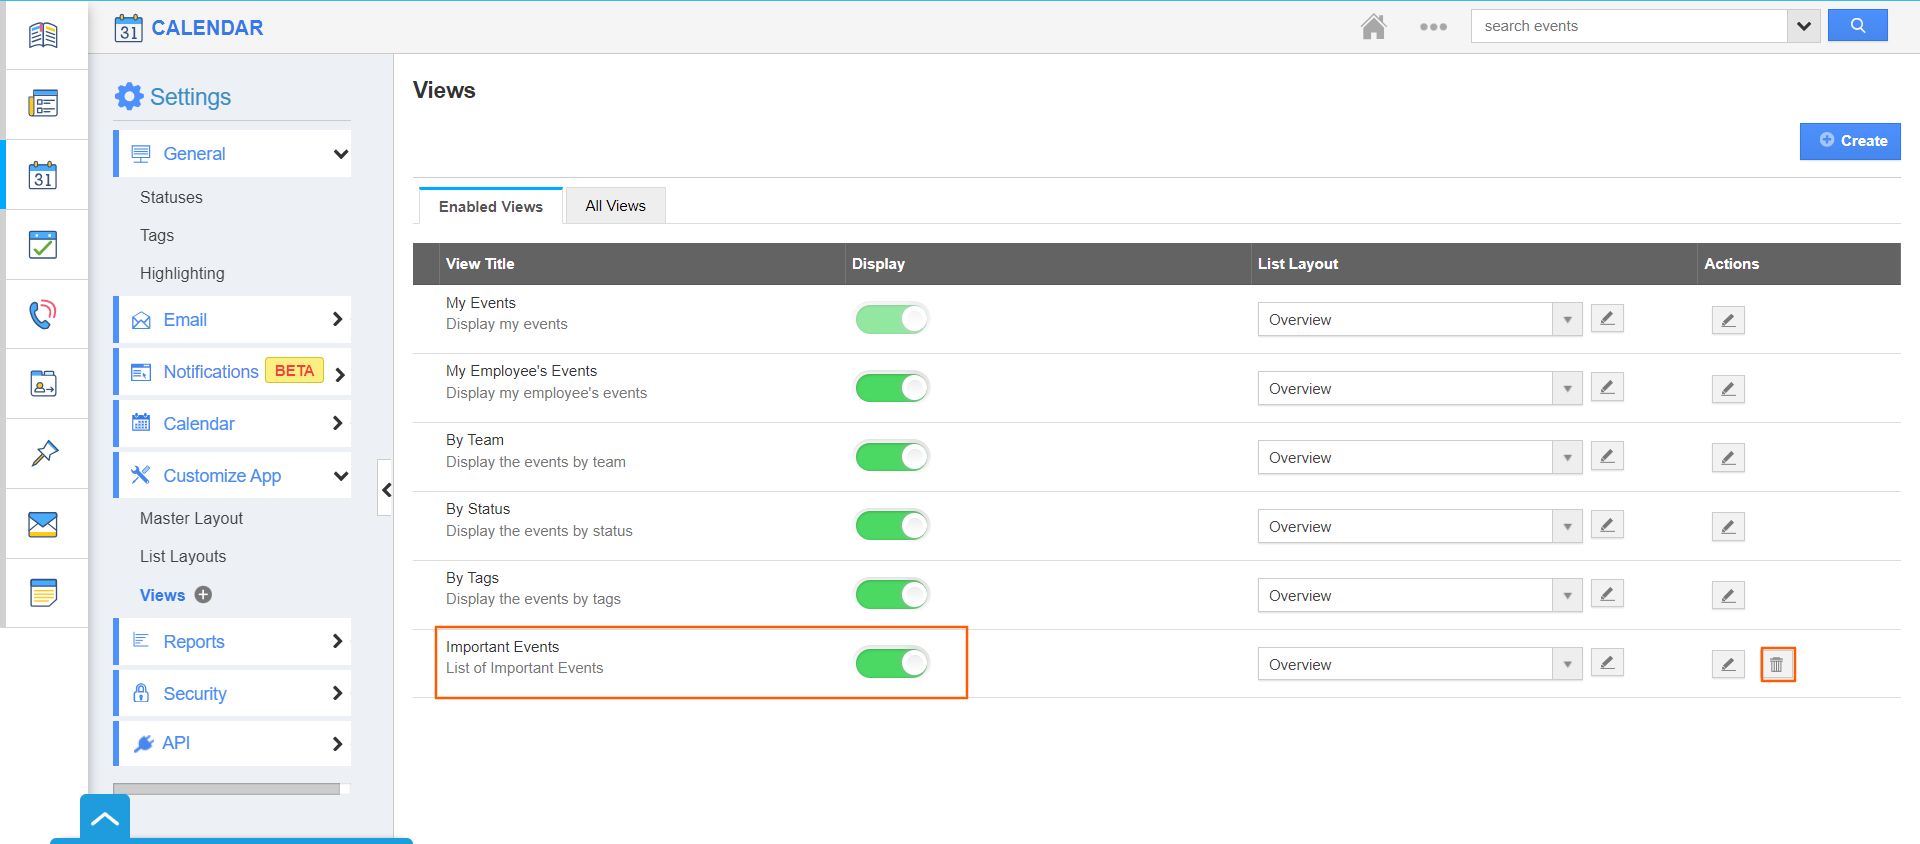
HOW TO DELETE CUSTOM VIEWS IN APPTIVO CALENDAR?
- To delete the view, click on More→ Settings from the App Header Bar.
- The User will be directed to the Settings Page. Click on “Customize App → Views” from the Left Navigation Panel.
- One can see the list of custom views along with the delete icon on the action column.
- The user can click on the “Delete” icon to delete the custom view which is no longer needed.
.png "Home-Apptivo (1).png")
- Upon successful deletion, a confirmation alert will be displayed.

Flag Question
Please explain why you are flagging this content (spam, duplicate question, inappropriate language, etc):

