Browse by Solutions
Browse by Solutions
How do I create a Time sheet on the Windows App?
Updated on February 19, 2020 09:23PM by Admin
In the Product management app, now you can create timesheet inside the app. Timesheet is the most efficient app that helps to track the task working hours. In addition, you can submit for approval. Please follow the steps to create a Timesheet in the Project Management category.
Steps to Follow
- Log in to the windows app and access the Project management, select Timesheet.

- Click on the + icon in the bottom right corner and select the Create New Timesheets.

- Here, you can create a Task Name and fill the working hours in the allotted columns by date in the Task & Hours. Then, click on the “Tick” icon in the bottom right corner.

- In case, if you are updating the task for the customer, select the customer in the customer section, then the approver will automatically be changed to the particular customer. Then, click on the “Tick” button to create the Timesheet

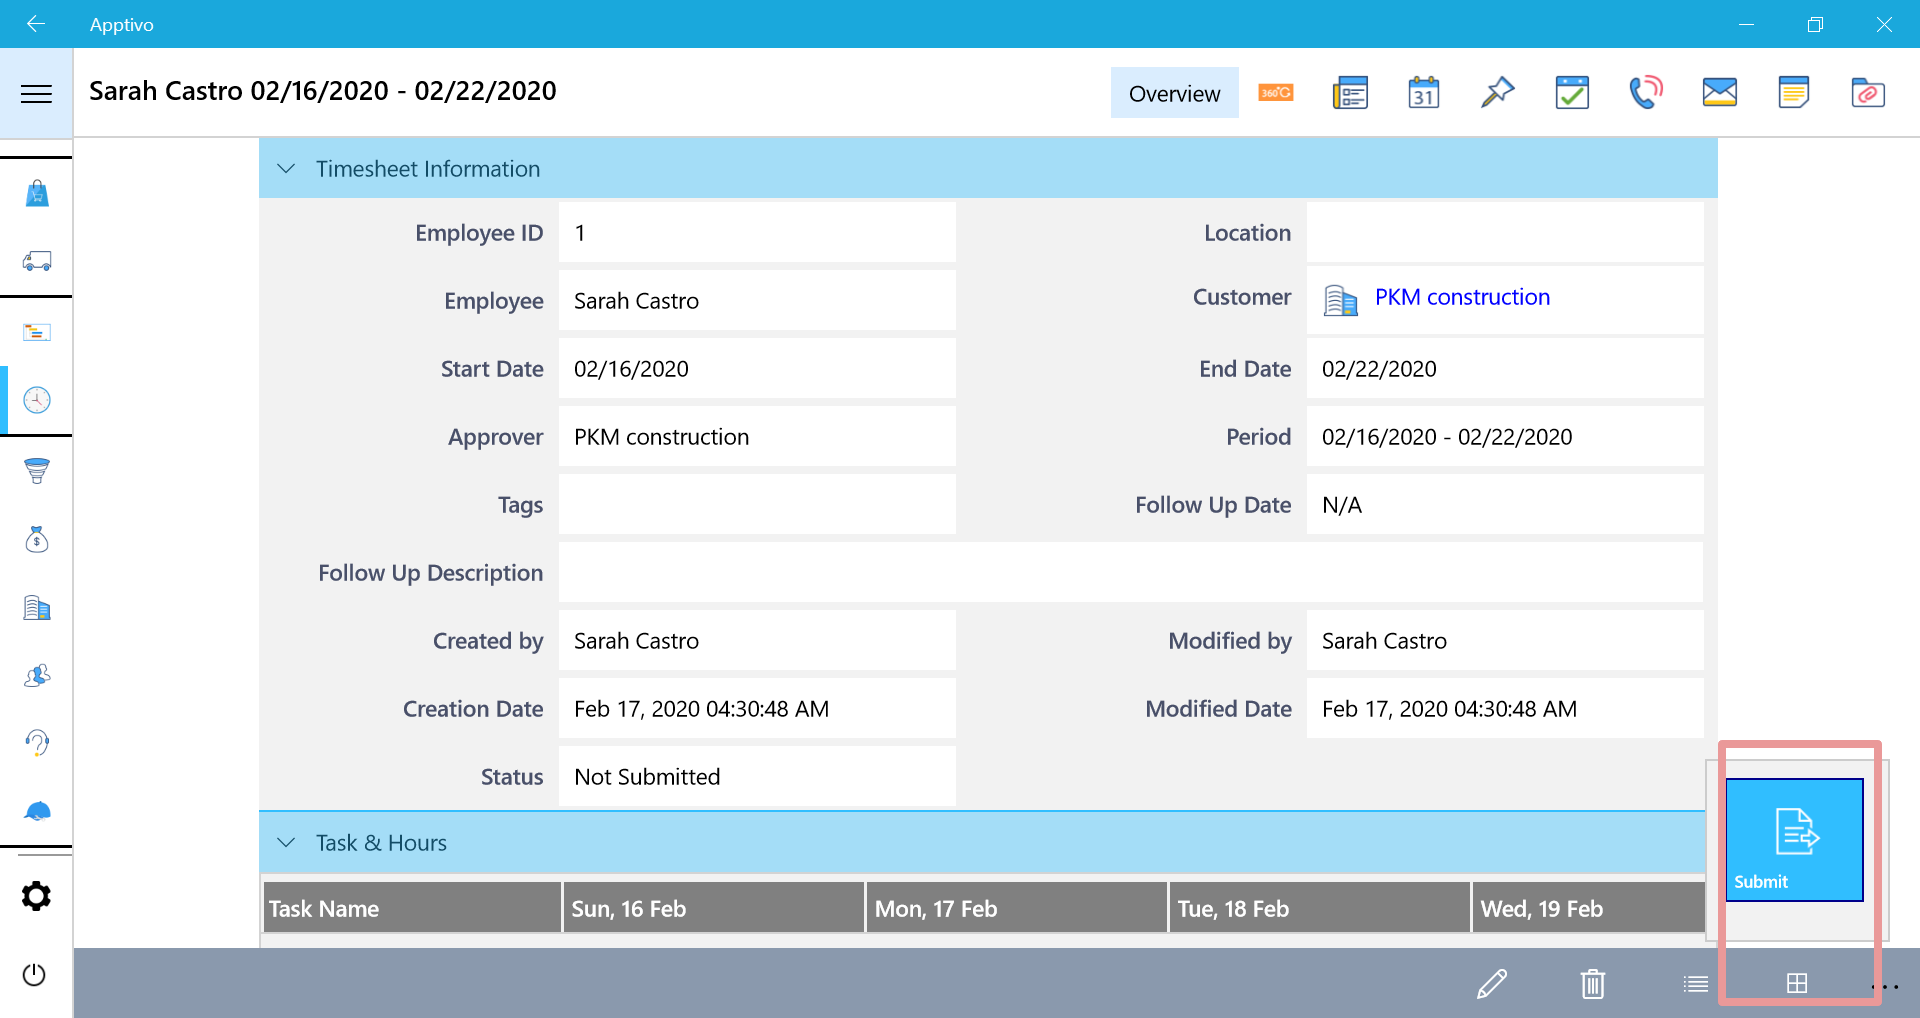
- You will be notified as “Timesheets Created”.Then, click on the submit button in the bottom right corner that will send an email to the selected customer for Approval.
- Once it got approved, you can convert the Timesheets directly to the invoice.

Flag Question
Please explain why you are flagging this content (spam, duplicate question, inappropriate language, etc):

