Apptivo's Contacts app is one of the important apps in the CRM. It helps you to manage all the business contacts. Default settings help to reduce the effort of updating the values in the respective fields. With the default value, you can set the predefined value for the attribute so that added value will get reflected as the default value.
Let's consider, the salesperson Miss. Sarah Castro wants to get the custom default value for the status attributes apart from Active or Inactive. So that it will be helpful for her while adding the new contact in the system. For that, she decided to add the new status as Lead so that it will be easy for her while adding the contact and helps her to sort the data with the status of the contact with the default value. She can create a new status and set that as the default value. Please follow the steps to set the default value for the lead status.
Steps to create New status
- Login and access the Contacts App from the Universal Menu.
- Click on the Create contact.
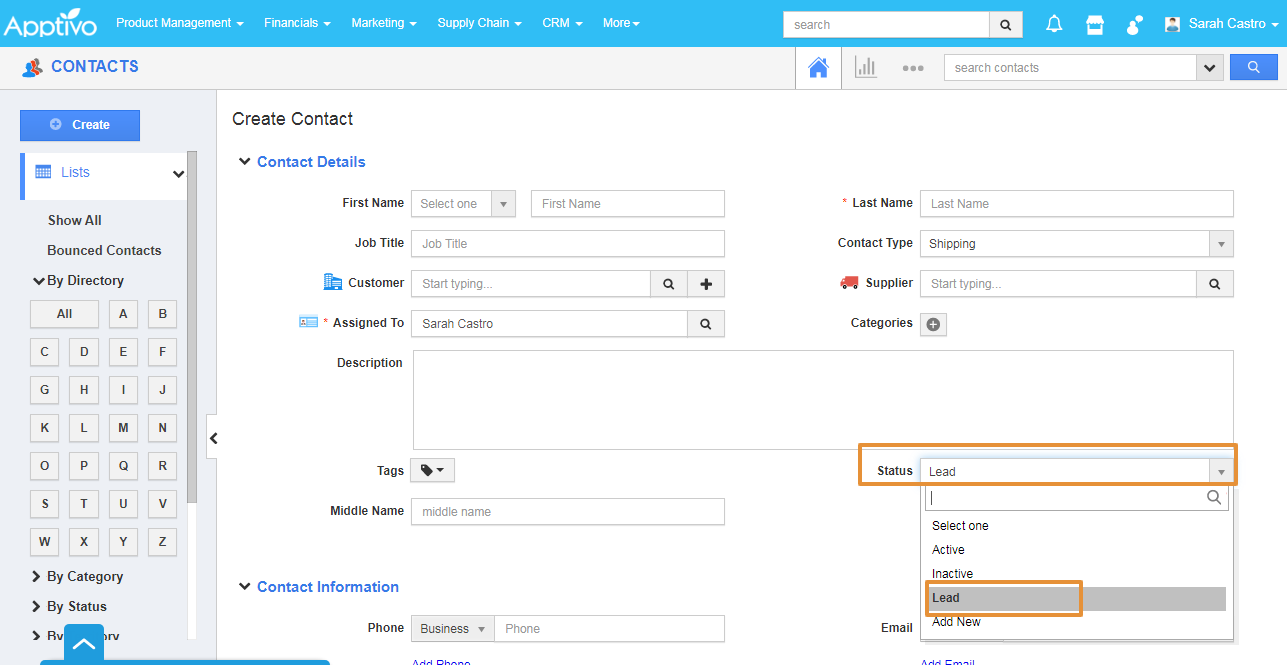
- In the Create Contact Page, click on the status you can view the Add new in the dropdown.
- In the Create Status Popup, add the Name and the Description.
- Then click on the Create button.
- You can view the created status in the dropdown list.
Steps to set the Default value
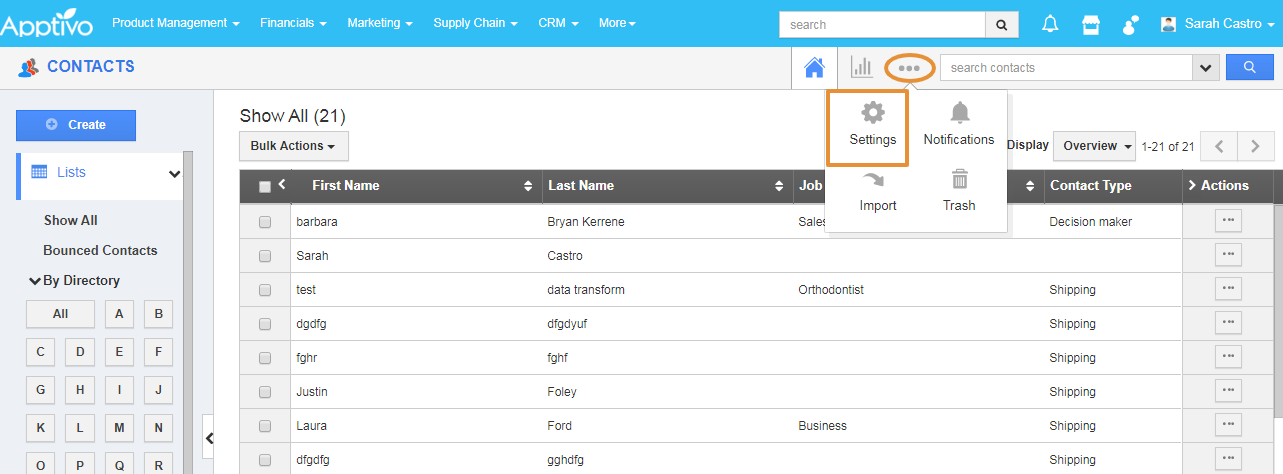
- Click on the More(...) and select settings.
- Click on the Customize app from the left panel and select the Master Layout.
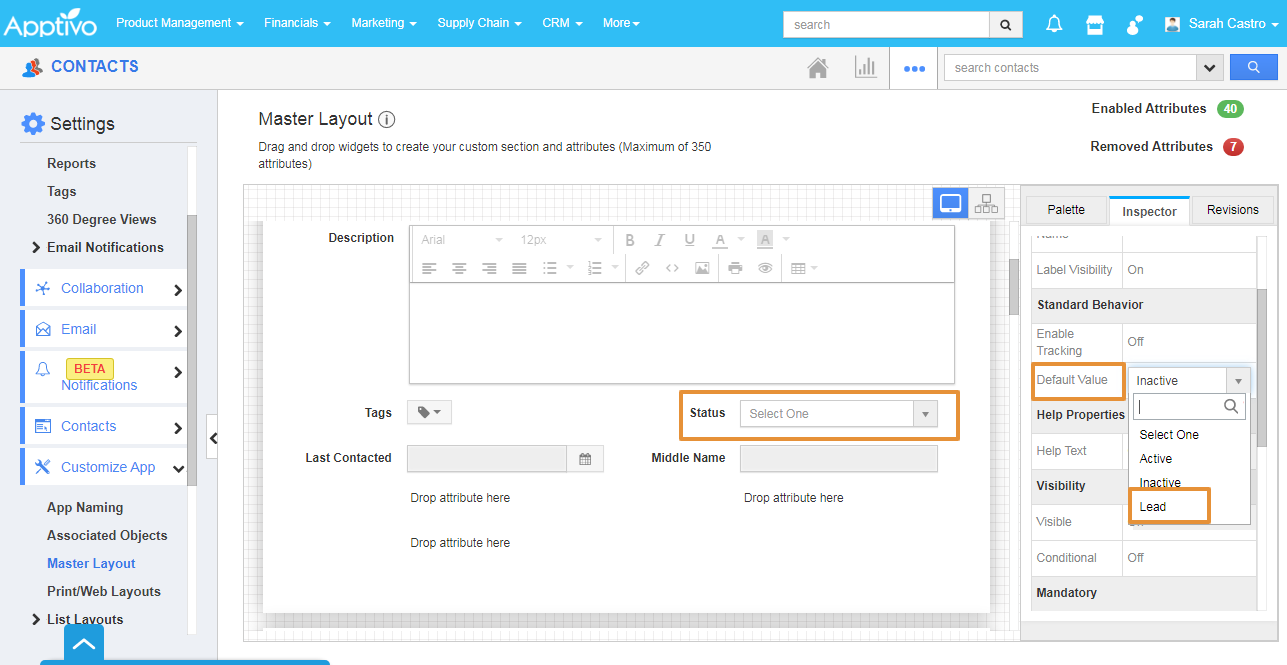
- In the Master Layout, click on the Status Attribute you will be navigated to the Inspector Tab on the Right side Palette.
- In the Inspector Tab under the Standard Behaviour, you can view the Default value.
- Click on the Default Value, you can view Select one, Active, Inactive and the created status. Here it is “Lead”.
- By Selecting the Select One, you can give an option to select the status from the list.
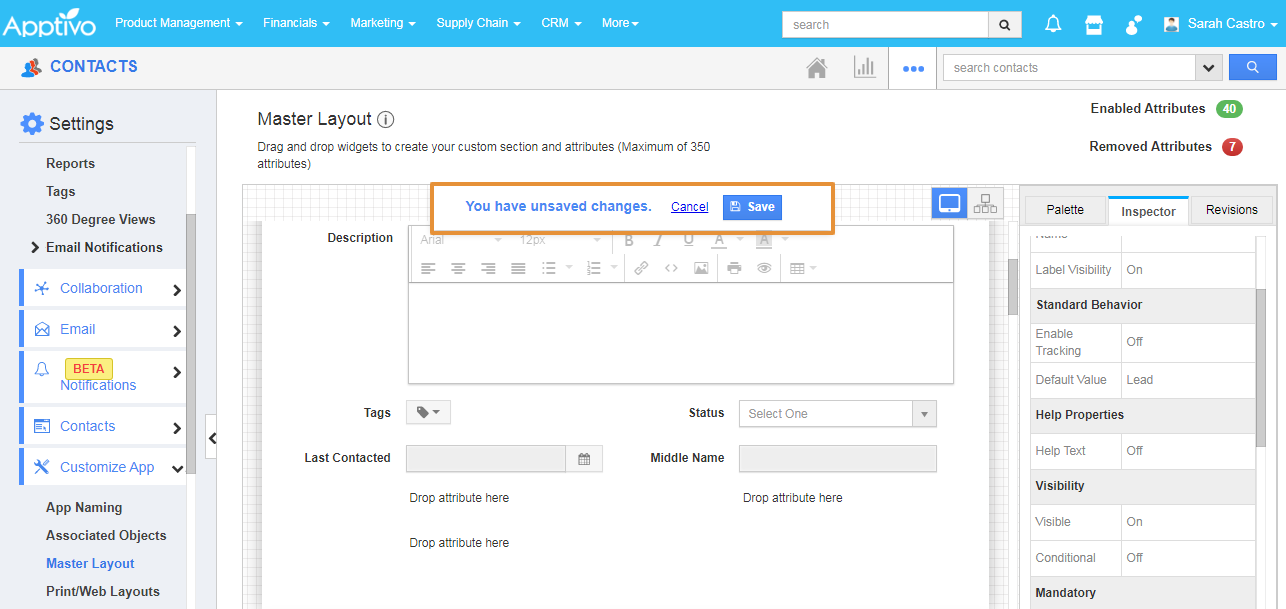
- Select the created status.
- Now, in the create contact page status will show the selected Default value.
- And, once the new contact is created, the status will be the default value.


