Browse by Solutions
Browse by Solutions
How do I Set Event Based Triggers in Contacts App?
Updated on April 17, 2017 03:32AM by Admin
The Event Based Triggers in the Contacts App are utilized, when we have to execute an action after the occurrence of a certain event. Here, the trigger can be set for the events like Contact Creation, Contact Updation and Contact Deletion.
Once a trigger criteria are set, there are three automatic actions that can be triggered:
- Send Email - An email can be triggered to the Referred By, Assigned To, Customer, Employee or a Team.
- Update Attribute - Updates a particular attribute value.
- Update Associated Object Attributes - Updates the attribute values of its associated objects.
Note: More than one action can be added for a trigger.
For instance: Consider an employee (Sharon M. Kaplan), who wants to get notified, by triggering an email to herself, whenever a contact assigned to her is deleted.
Steps to Create an Event Based Trigger
- Go to Contacts App.
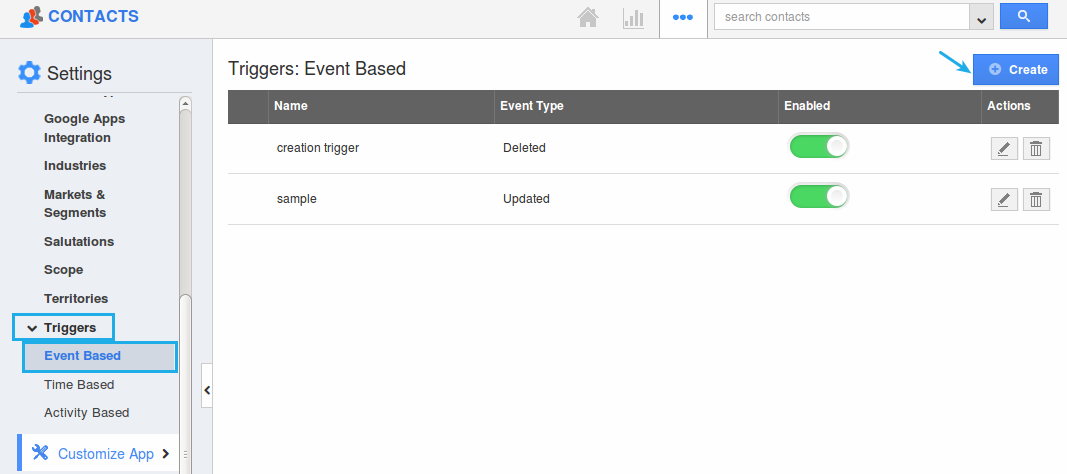
- Click on “More (...)” icon -> “Settings” -> “Contacts” -> “Triggers”.
- Select “Event Based” triggers option. Click on “Create”.

- In the creation page, define the following:
- Name - Enter the name of the event based trigger.
- Enabled - Slide the toggle ON, to keep this trigger working.
- Event - Select “Contact Deleted” by checking on the respective radio button.

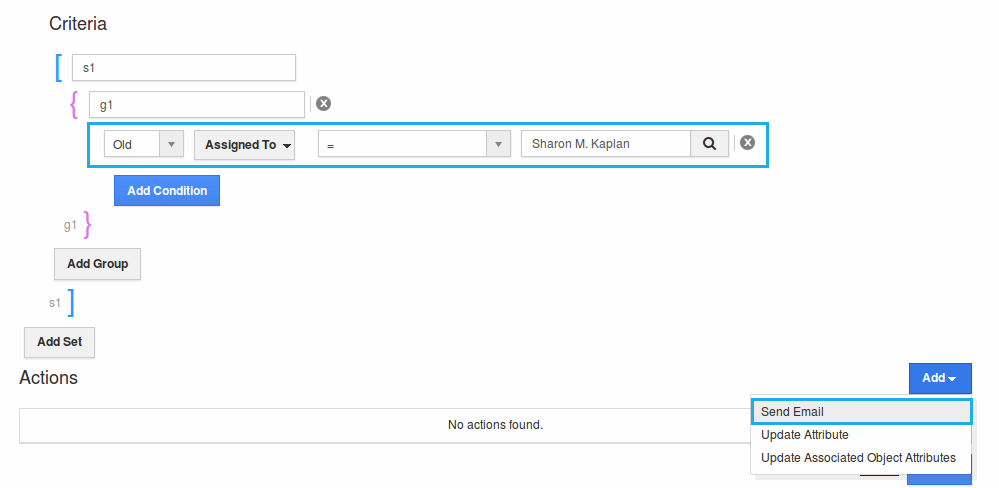
- In the “Criteria” section, define the criteria as “Assigned To = Sharon M. Kaplan”, by selecting the required attributes from the drop down.
- In the “Action” section, select “Send Email”.

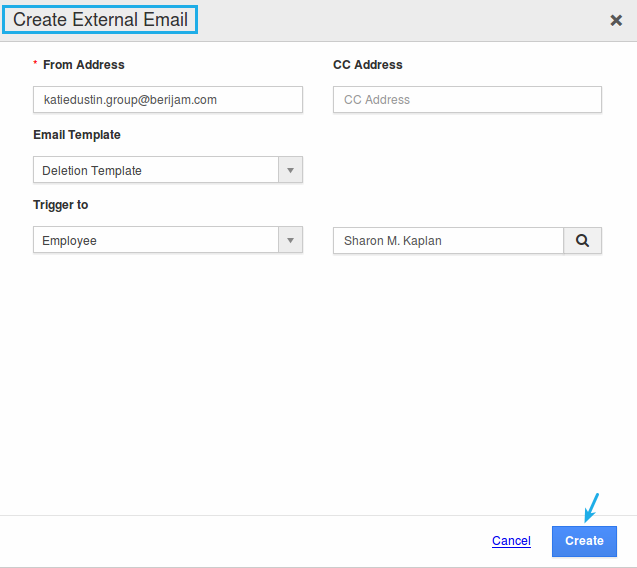
- The Create External Email popup will be displayed. Select “Trigger To” as “Employee = Sharon M. Kaplan”.
- Click on “Create”.

- Finally, click on “Create” to complete.

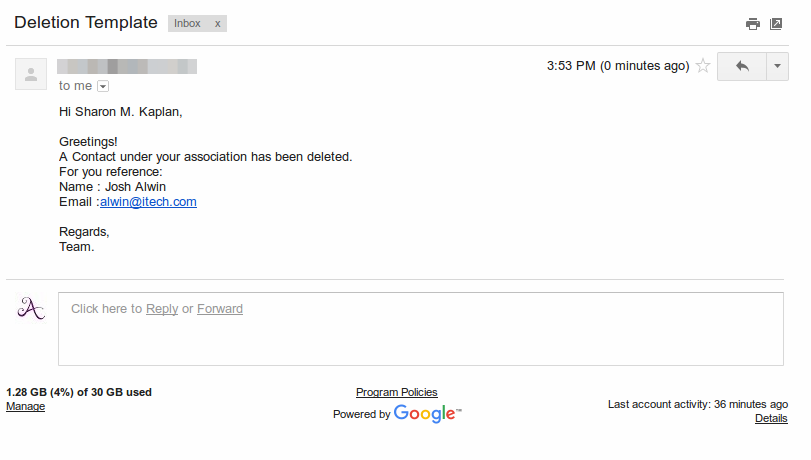
- So, now whenever a contact is deleted with "Assigned To = Sharon M. Kaplan", an email will be triggered.

Flag Question
Please explain why you are flagging this content (spam, duplicate question, inappropriate language, etc):

