With the Apptivo Add-on for Gmail, you can view and create Contact, Customer, Lead, Supplier, Case, and Opportunity. You can also Associate emails to Apptivo. Each time you open an email, your Gmail add-on will appear on the right. After installing the add-on, click the Apptivo icon to view Apptivo records and options. Google is improving the way Gmail works with apps, so we strongly recommend using the Add-on instead of the Sidebar or the Gadget.
Install the Apptivo Add-on for Gmail
Your company’s G Suite administrators can place restrictions on add-on installations or install add-ons for everyone on your domain. If you receive a message preventing installation, please contact your G Suite administrator.
Steps to install the Apptivo Add-on for Gmail on an individual account
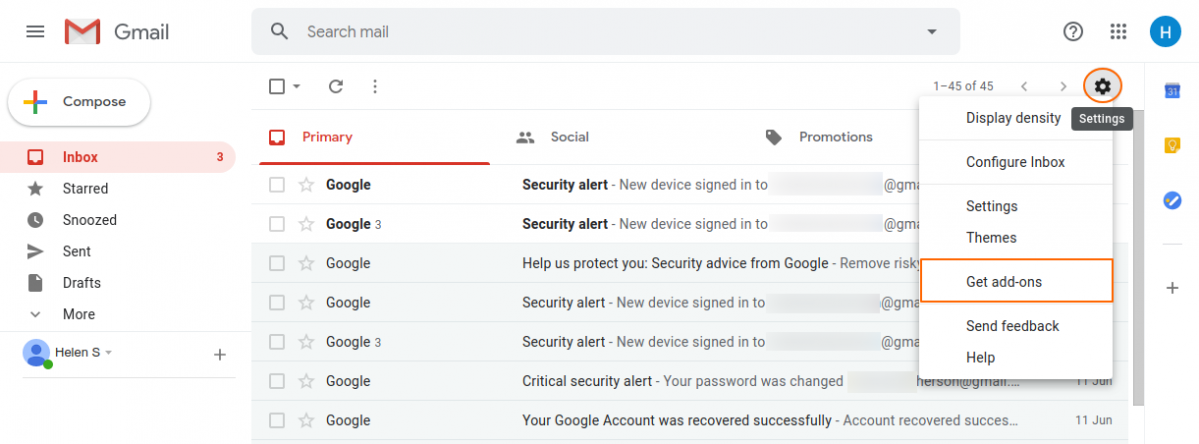
- Click your Gmail settings/gear icon and select “Get Add-ons”.
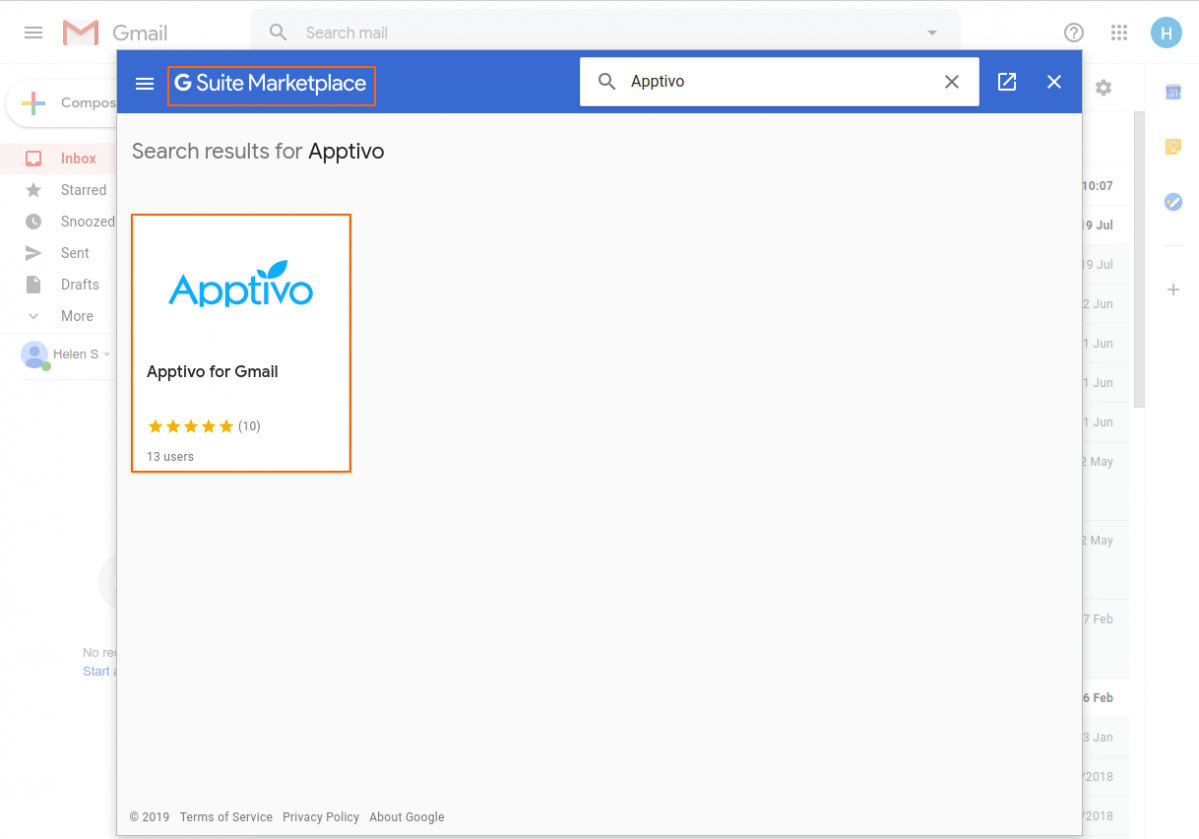
- In the G Suite Marketplace, search and select “Apptivo for Gmail”.
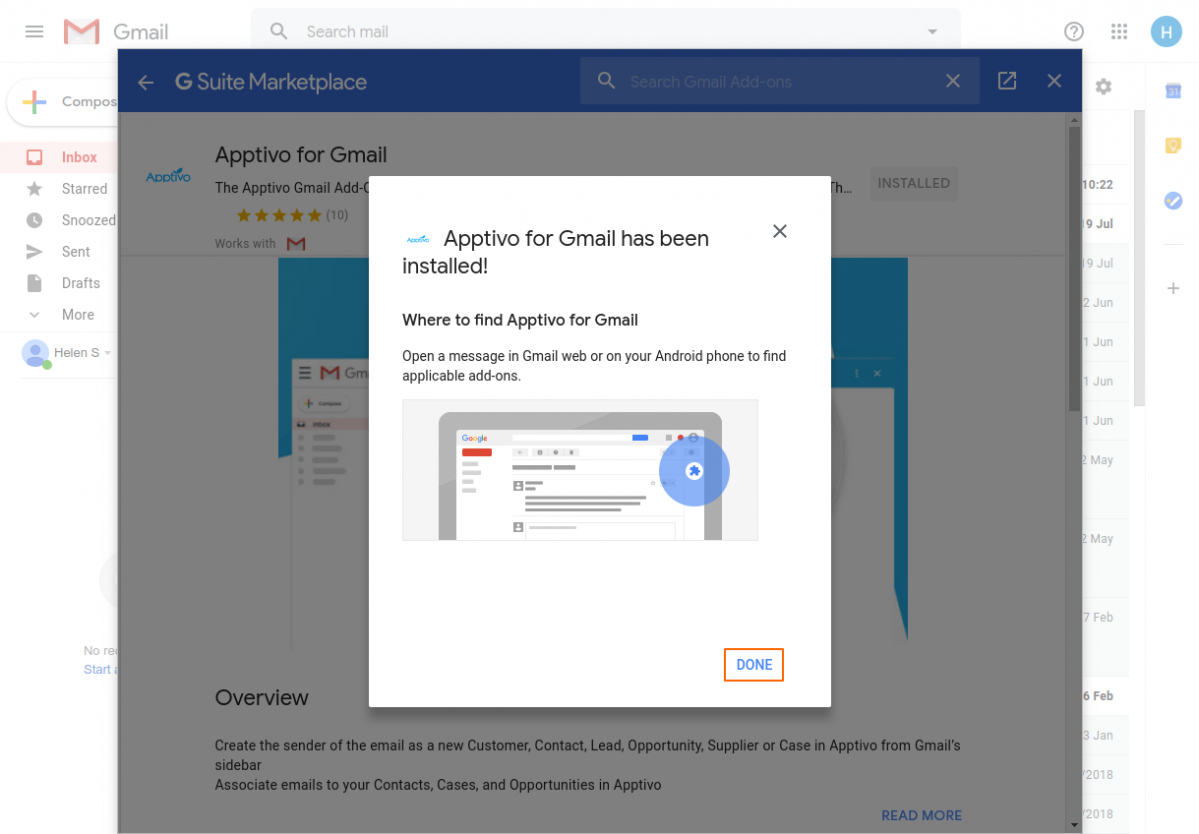
- Click “Install” and grant the necessary permissions.
- The Apptivo Add-on for Gmail will now appear in your add-ons sidebar.
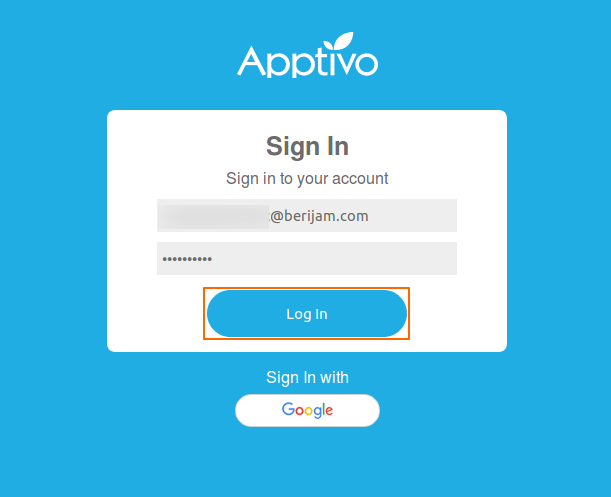
Sign in to the Apptivo Add-on for Gmail
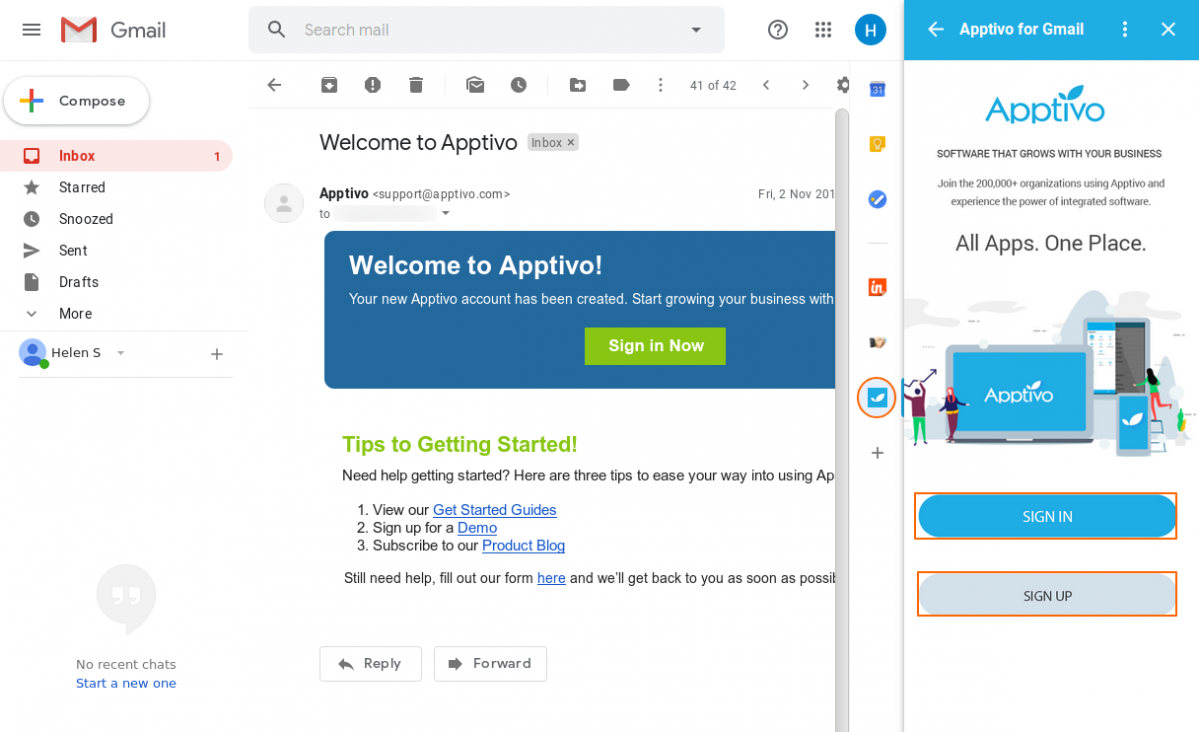
The first time you open the Apptivo Add-on for Gmail, you will need to sign in to your Apptivo account.
Steps to sign in from the Apptivo Add-on
- Click the Apptivo icon to the right of your inbox and Click “Sign In”.
- If you don’t have an Apptivo account, click “Sign up” a new account.
- Enter your credentials and click “Log in”.
- You will now be able to view Apptivo records from any email in your inbox.
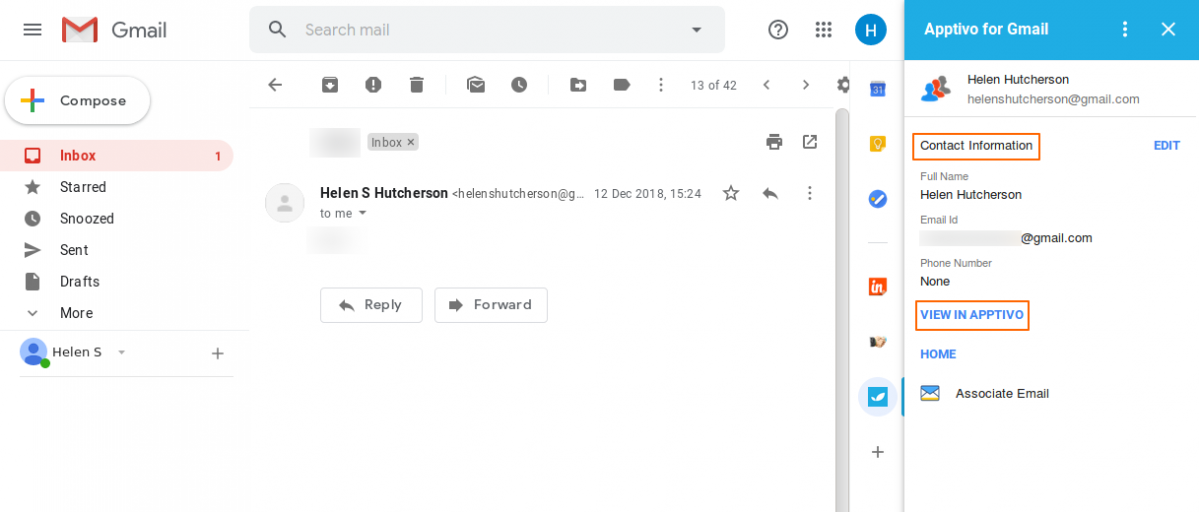
View and find records in the Apptivo Add-on for Gmail
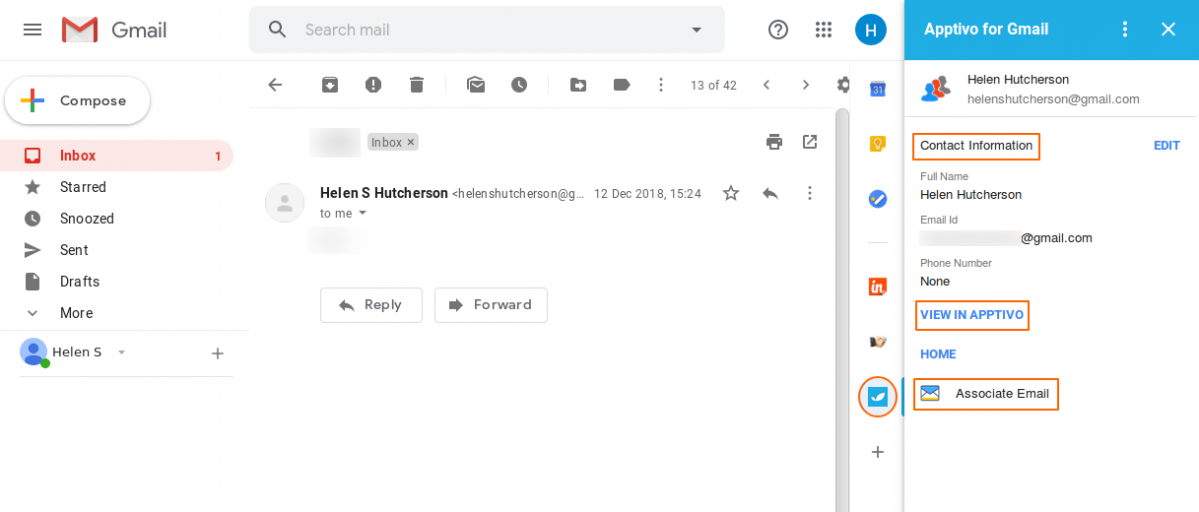
Viewing records related to an email is automatic in the Apptivo Add-on. When you open an email, information of records matching your Apptivo records will be displayed. To open a new tab and view the full record in Apptivo, click “View in Apptivo” to open in Web.
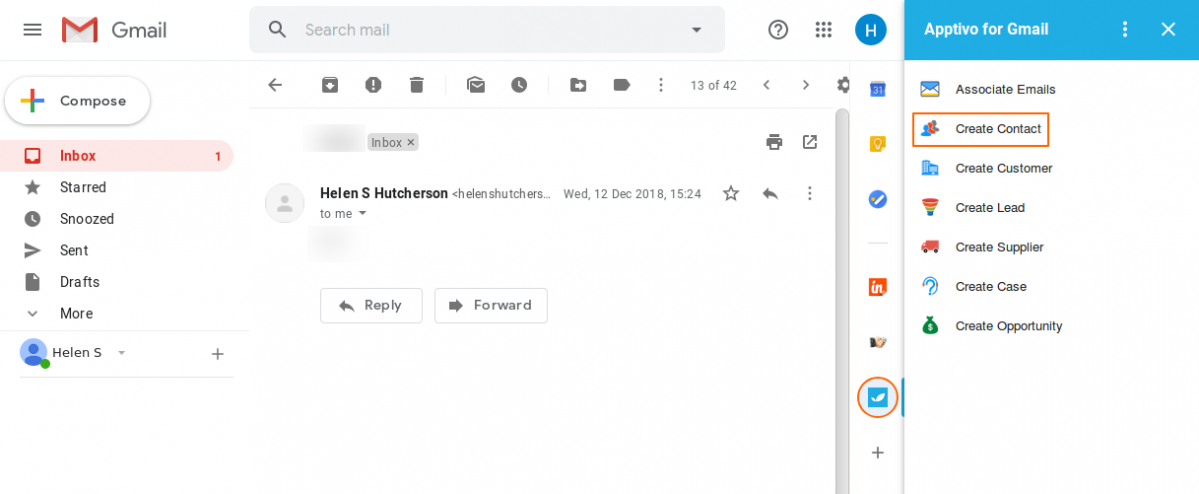
Creating and saving an Email as a record from the Apptivo Add-on for Gmail
The Apptivo Add-on for Gmail will automatically display the contact information of the email you’re viewing. When a person doesn’t have a matching Apptivo record, you can choose to add them as a Contact, Customer, Lead, Supplier, Case, and Opportunity.
For instance: Let us consider creating a contact in the Apptivo Add-on for Gmail
Steps to add the records from the add-on
- Click on the Apptivo Add-on icon. (on the right side of the Gmail screen).
- Open an email message.
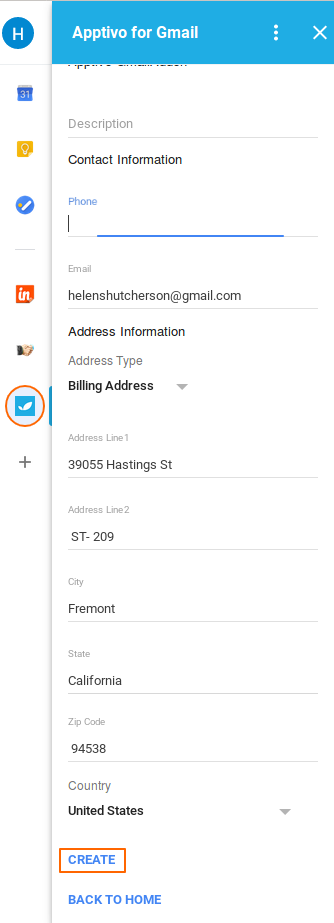
- If the information is not available in Apptivo, then you can Create a New Entity form by clicking “Create Contact”. Here, enter the person’s basic details in Add-on to create as a record in Apptivo.
- Once you’ve completed filling the information, click “Create” to add the record to Apptivo.
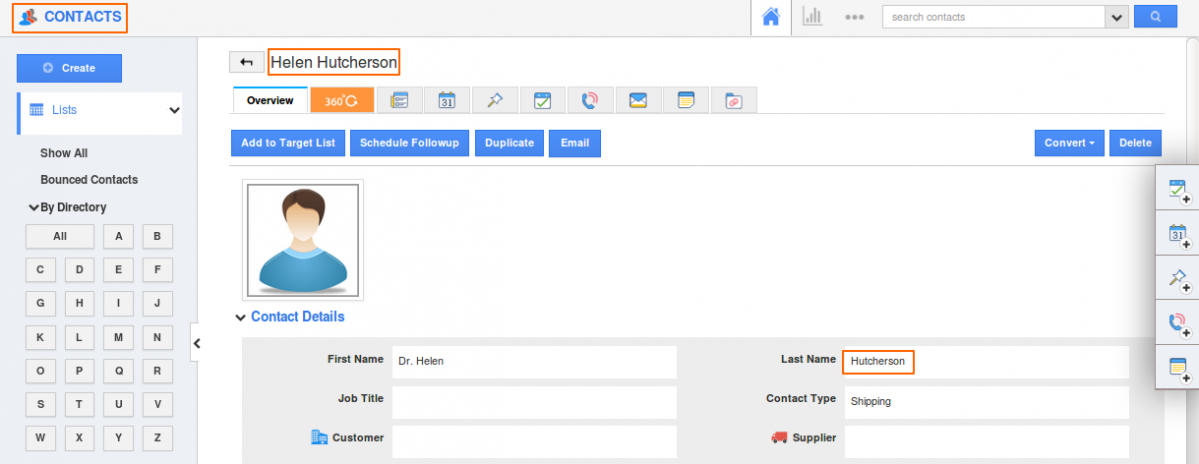
- The created Contact will be reflected in the Apptivo “Contacts” App.
Associate Emails with Apptivo Add-on for Gmail
You can Associate Emails from your inbox or sent folder straight to Apptivo with the Add-on for Gmail. There are multiple ways to do this. You do not need to have a G Suite account connected to Apptivo to use the Add-on. It will function with any Gmail account.
Steps to associate Email
- Open an email message.
- Click on the Apptivo Add-on icon (on the right side of the Gmail screen).
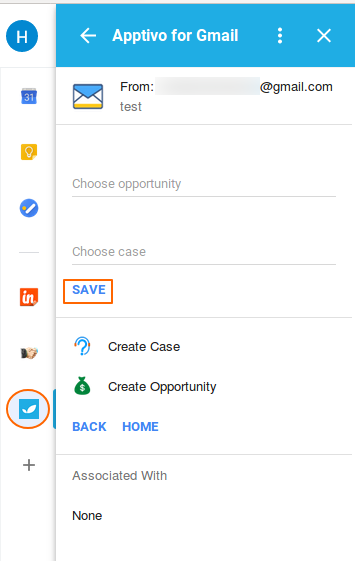
- Click “Associate Email” in the add-on.
- You can either associate the Email with the existing Case or Opportunity. Also, you can create a new Case or Opportunity and associate the Email.
- Click on “Save” button.
- You will see a message confirming the email has been saved.
![Role Of CRM In Travel And Tourism Industry]()
Role Of CRM In Travel And Tourism Industry
Travel and tourism have been a significant part of everyone’s life since the ancient period. When we skim through the pages of history, It should be noted that humans were initially nomads before they became settled in one place. They...
Read more →
![WHAT IS CRM TECHNOLOGY?]()
WHAT IS CRM TECHNOLOGY?
Introduction CRM is a technology that helps manage the entire customer information and interactions in order to build and maintain superior customer relationships. The CRM solution replaces spreadsheets and other different applications, which makes it easy for the businesses to...
Read more →
![Everything you need to know about the Annual Maintenance Contract!]()
Everything you need to know about the Annual Maintenance Contract!
1. What is an Annual Maintenance Contract? 2. Benefits of Maintenance Contracts 3. How can Apptivo CRM help you manage maintenance agreements and vendors? 4. Summary Think about getting the confidence that the machinery is well-maintained and performing optimally, without...
Read more →