Pleased to meet you all after this auspicious occasion! When you are busy with all new commitments in this New Year, we are ready to give you a couple of enhancements to lessen your daily routines! We are happy to give away the new Windows Apptivo All-in-One App build v6.3.0.0.
Download the latest version of the Apptivo Windows App.
Turnarounds in this Release
- Implementation of Suppliers App
- Sectional Visibility Condition
- Attribute Conditional dependencies
- Highlighting Leads
- App Conversions
Implementation of Suppliers App
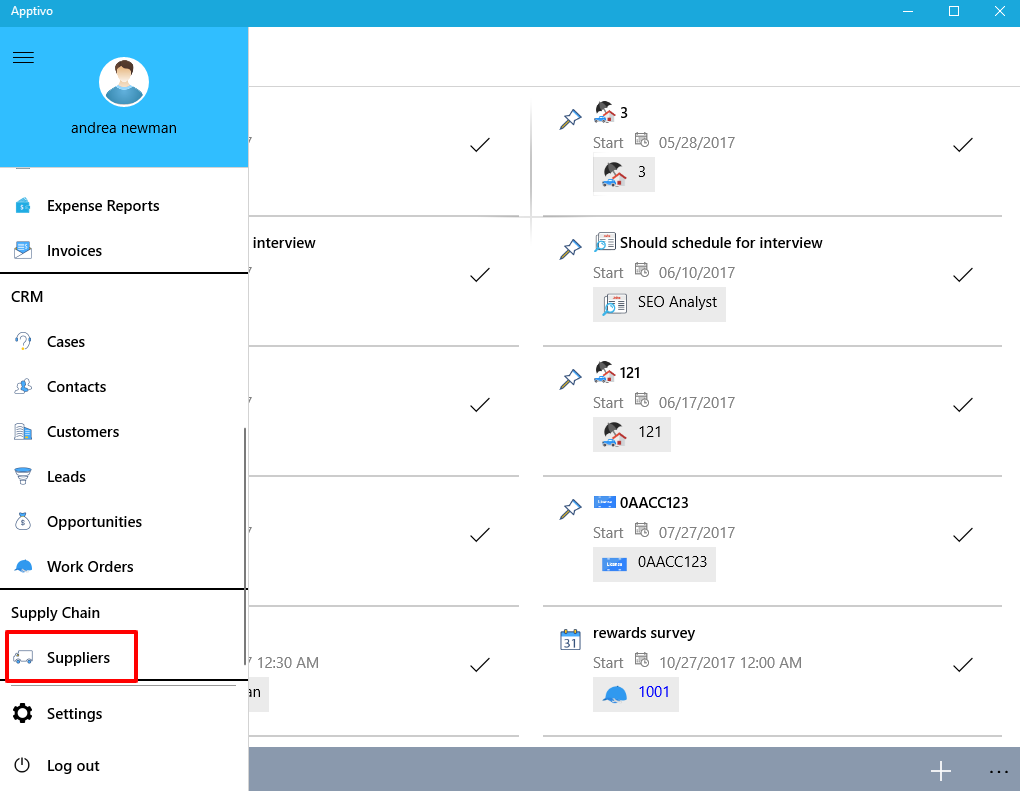
We have enhanced the usage of the Apptivo App in Windows platform by implementing the Suppliers App. The Suppliers are individuals, companies, organizations or countries that provide goods and services. You can now manage your Suppliers easily and keep a track of the information of your Suppliers including all the contact information and the list of the products.
|
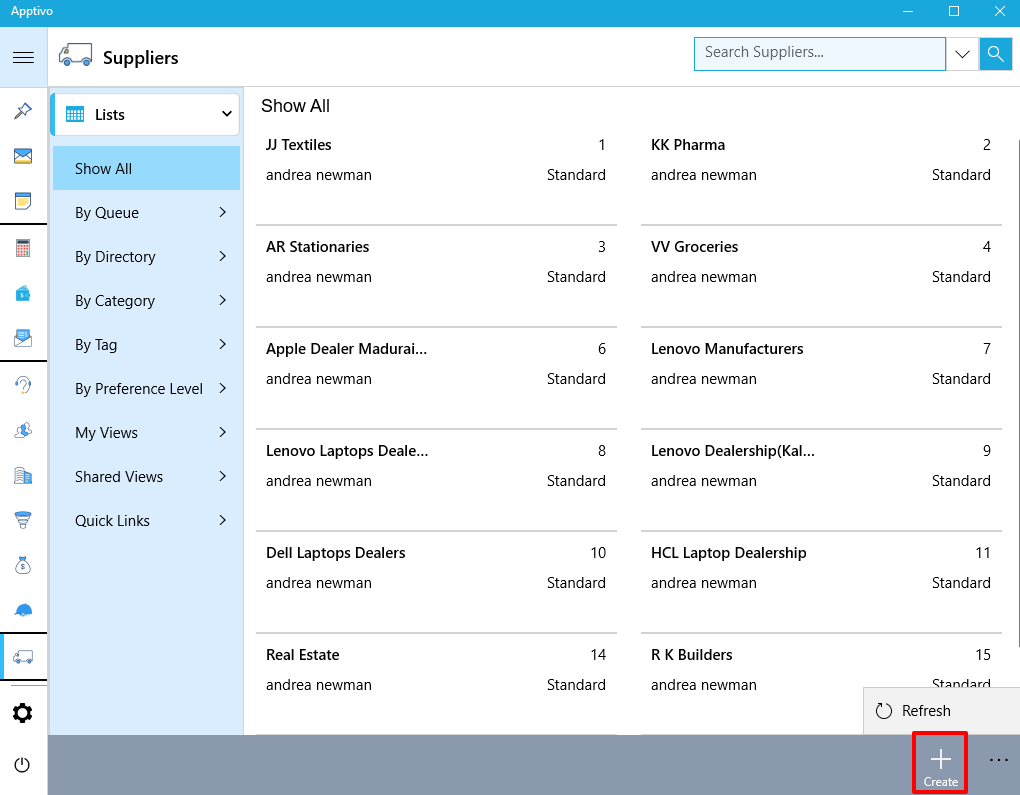
Consider the Suppliers App. Clicking on it you can view the supplier’s records created in the web version, edit, and search for the supplier’s records. And you can also create new suppliers by clicking on the “+” icon, which will also get reflected in the web.
|
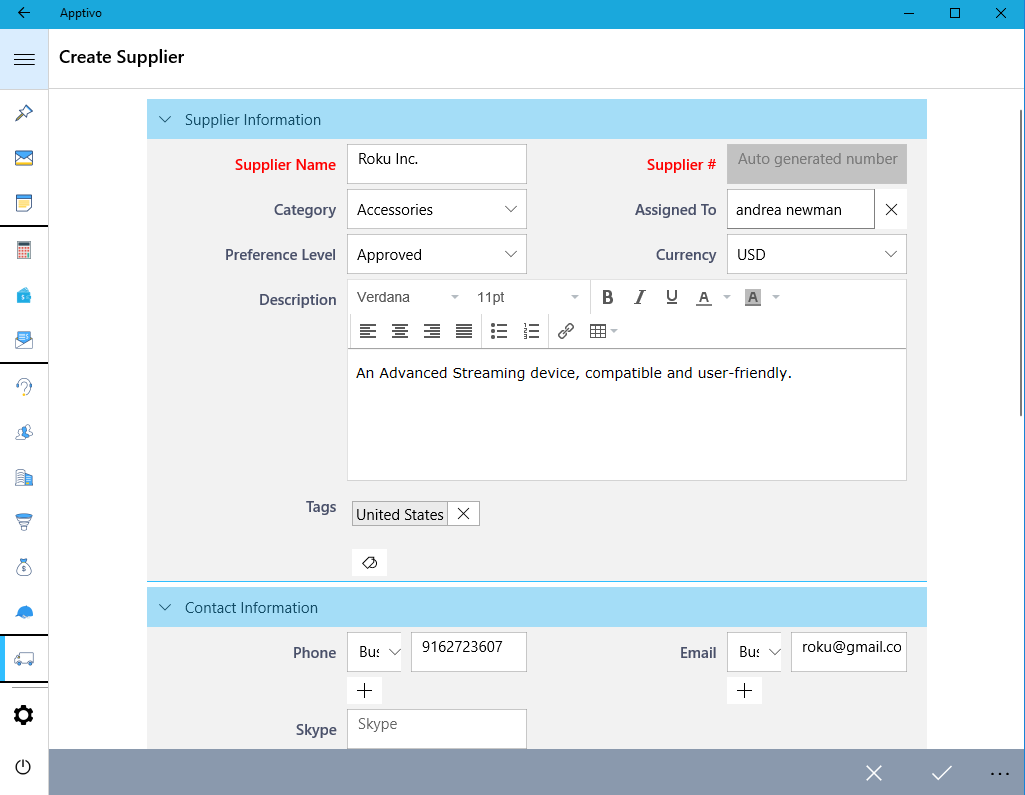
Once you click on the “+” button, you will get the screen as shown in the below image, complete creating the supplier to add them to the records.
|
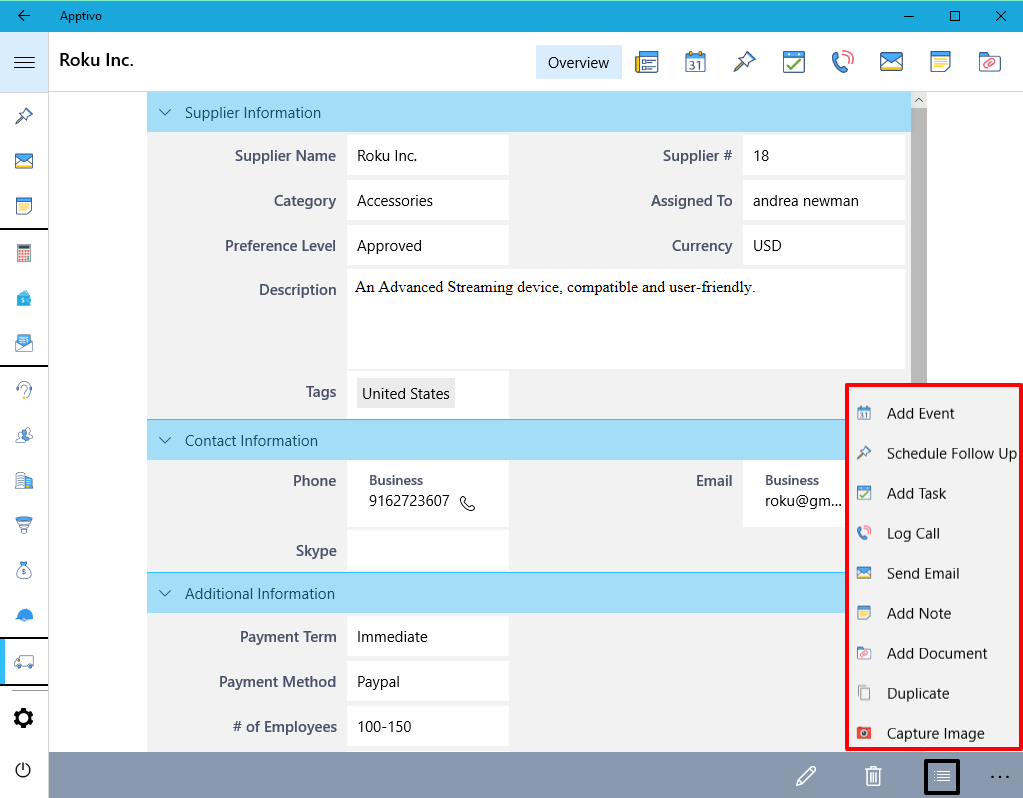
Besides creating a supplier, you can perform various actions like collaborating the activities to the Suppliers App, Duplicate the supplier and take a picture of your supplier instantly.
|
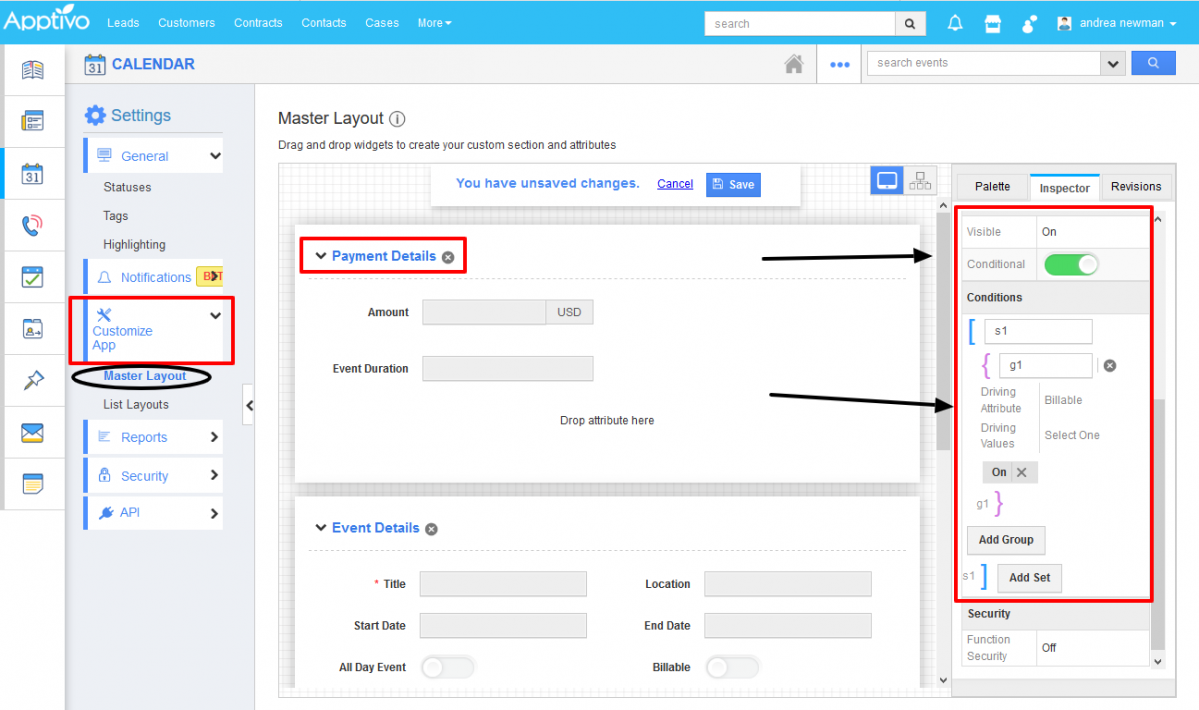
Sectional Visibility Condition
We have implemented the Sectional Visibility Dependency for Activities like Events, Call Logs, Tasks, and Follow-Ups. With the Section Condition Dependency feature for visibility on hand, you can customize the sections that have to be visible based on any criteria.
Note: You need to configure this setting from the Web version which will be reflected instantly in your Windows device on refreshing.
For instance: In the web version, go to the Events Settings -> Customize App -> Master Layout. Click on Payment Details section -> enable the Conditional toggle ON under the Visibility section and define the condition as “Billable = ON”. This depicts that, when Billable is enabled, the section Payment Details will be visible.
|
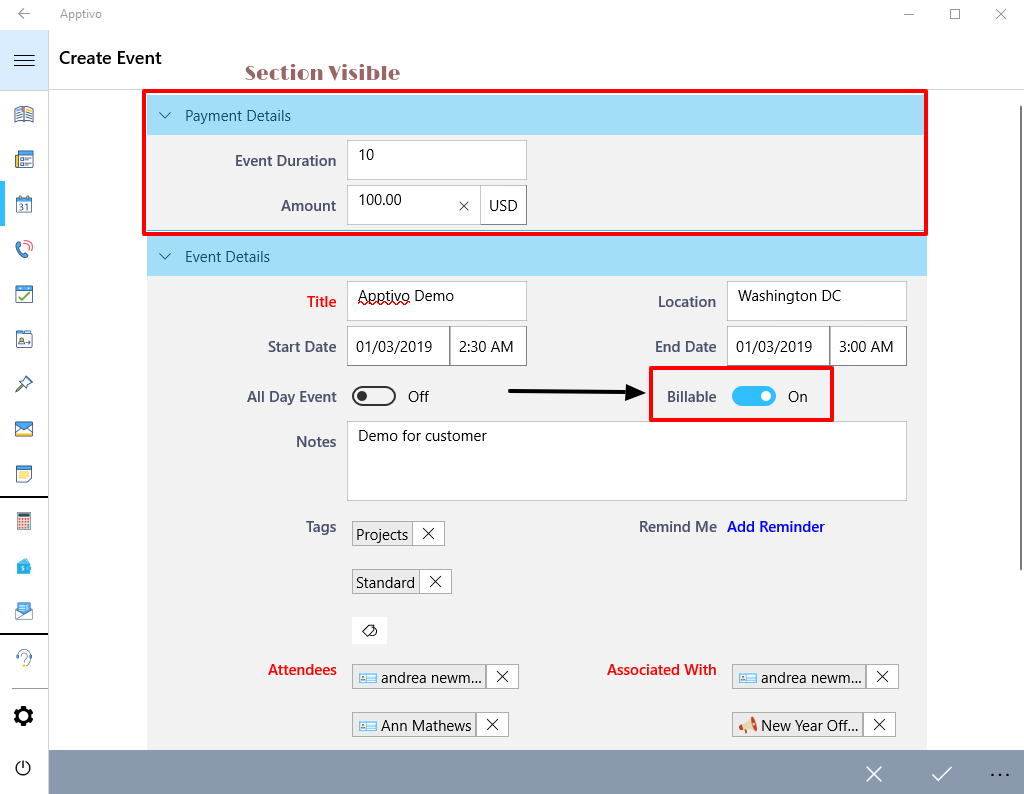
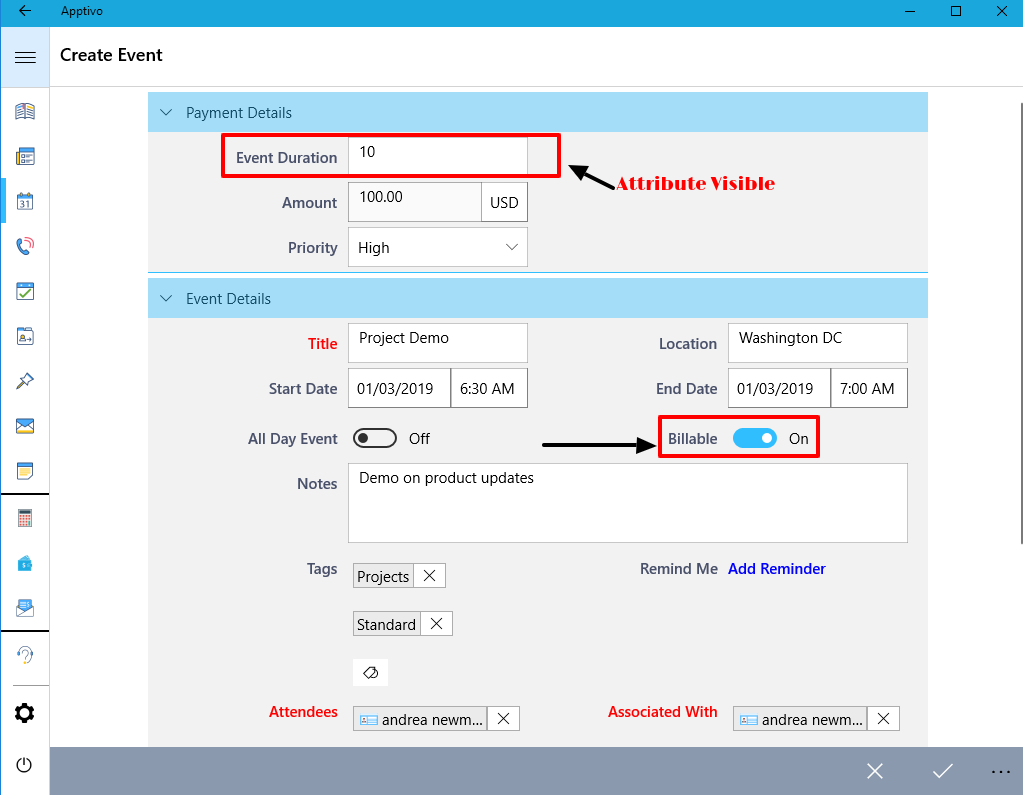
And now in your Windows device, on enabling the Billable field, you can view the Payment Details section as shown in the image below:
|
When Billable field is disabled, the section will be hidden:

|
Attribute Conditional Dependencies
The Conditional Dependencies is now implemented in the Activities like Events, Call Logs, Tasks, and Follow-Ups. You can now grant access at the entity levels for both the standard and custom fields. The Attribute level Conditional Dependencies can be implemented in three different ways.
Note: All these customizations should be done in your web version which will get reflected
Conditional Visibility Dependency
With this feature, you can make a certain field visible when a criterion or condition is met. You can provide a condition that has to be satisfied to make the field visible on the creation page.
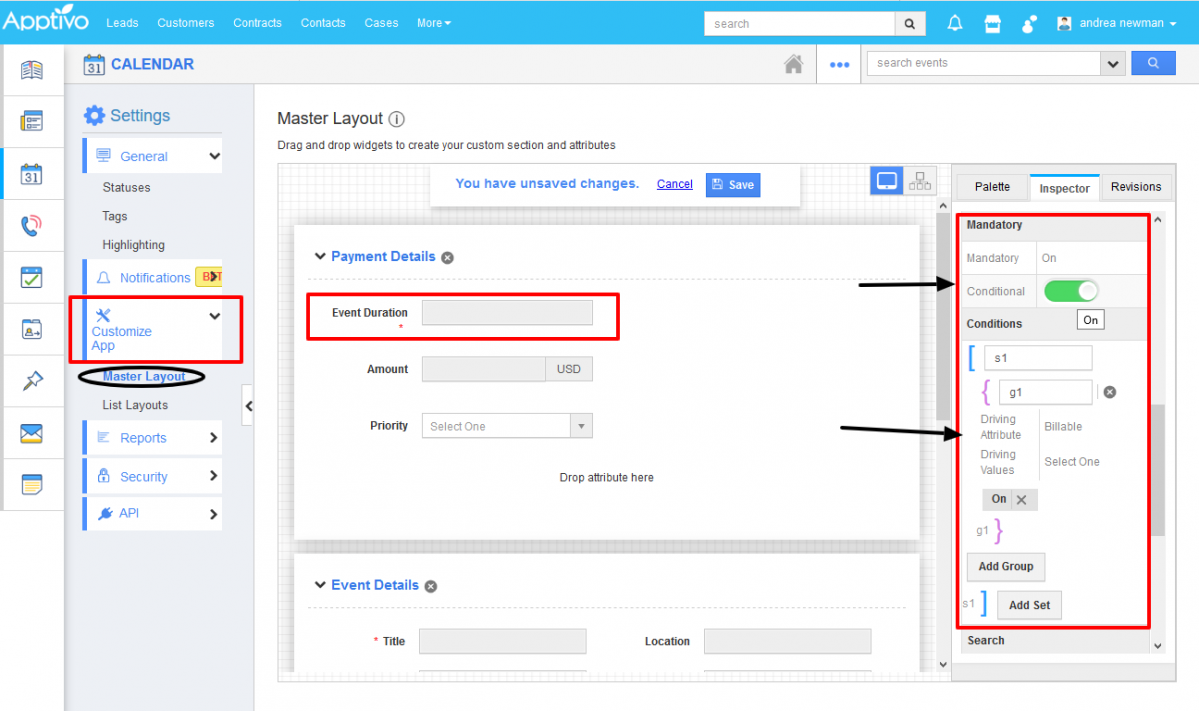
For instance: Consider the Events. Go to Settings -> Customize App -> Master Layout -> Click on Event Duration and enable the Conditional toggle ON under Visibility section from the Inspector tab and specify the condition.
|
This depicts that the field Event Duration should be made visible when the Billable toggle is enabled. So now when creating an Event from your Windows device, the Event Duration field will initially not be visible in the Creation page.
|
The Event Duration will be made visible when Billable toggle is enabled, as shown in the below image:
|
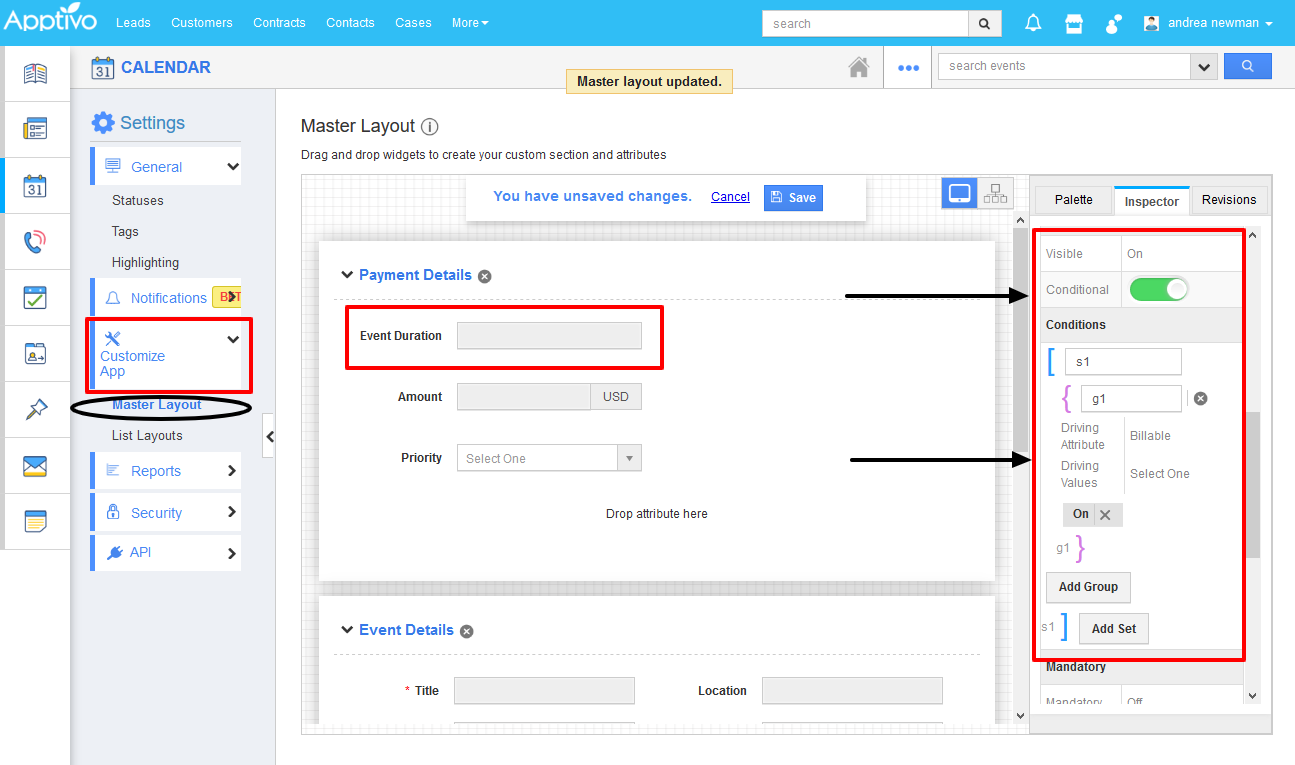
Conditional Mandatory Dependency
With this feature, you can customize an attribute to be mandatory when a certain criterion or condition is met. You can provide a condition that has to be satisfied to make the field mandatory on the creation page of activities.
For instance: Consider the Events. Go to Settings -> Customize App -> Master Layout. Click on Event Duration field and enable the Conditional toggle ON under Mandatory section from the Inspector tab and specify the condition.
|
This depicts that, the field Event Duration should be made mandatory when the Billable toggle is enabled. So now when creating an Event from your Windows device, the Event Duration field will initially be a non-mandatory one in the Creation page.
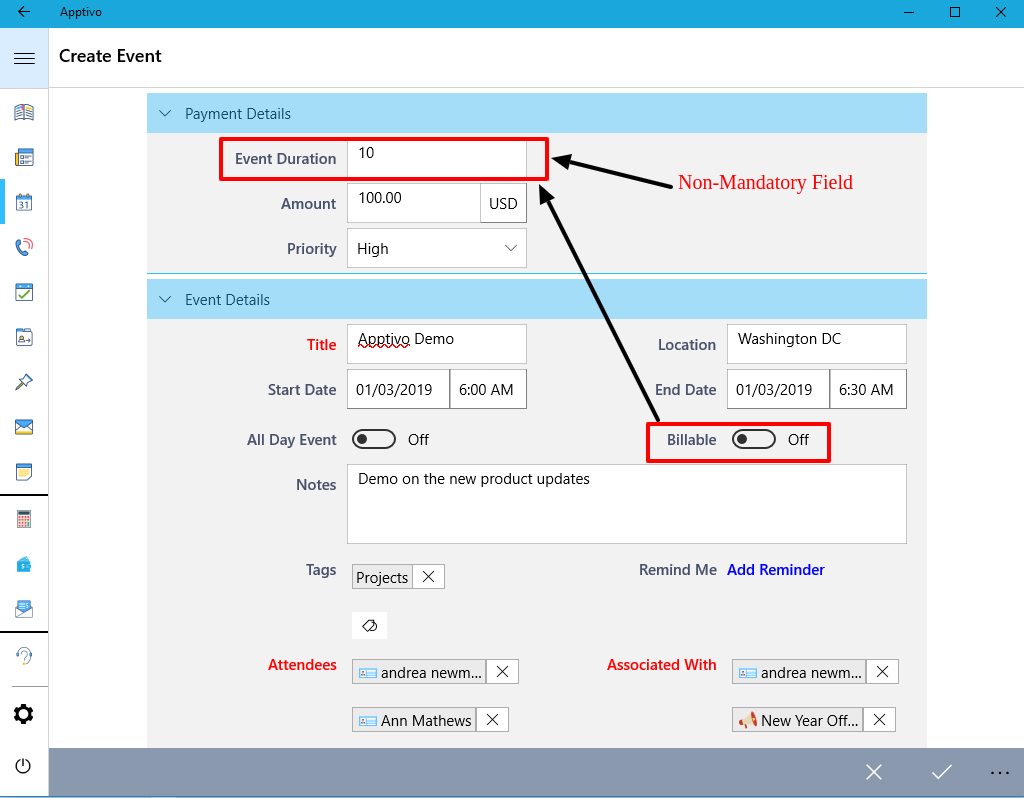
|
The Event Duration field will be made mandatory once the Billable is enabled, as shown in the below image:
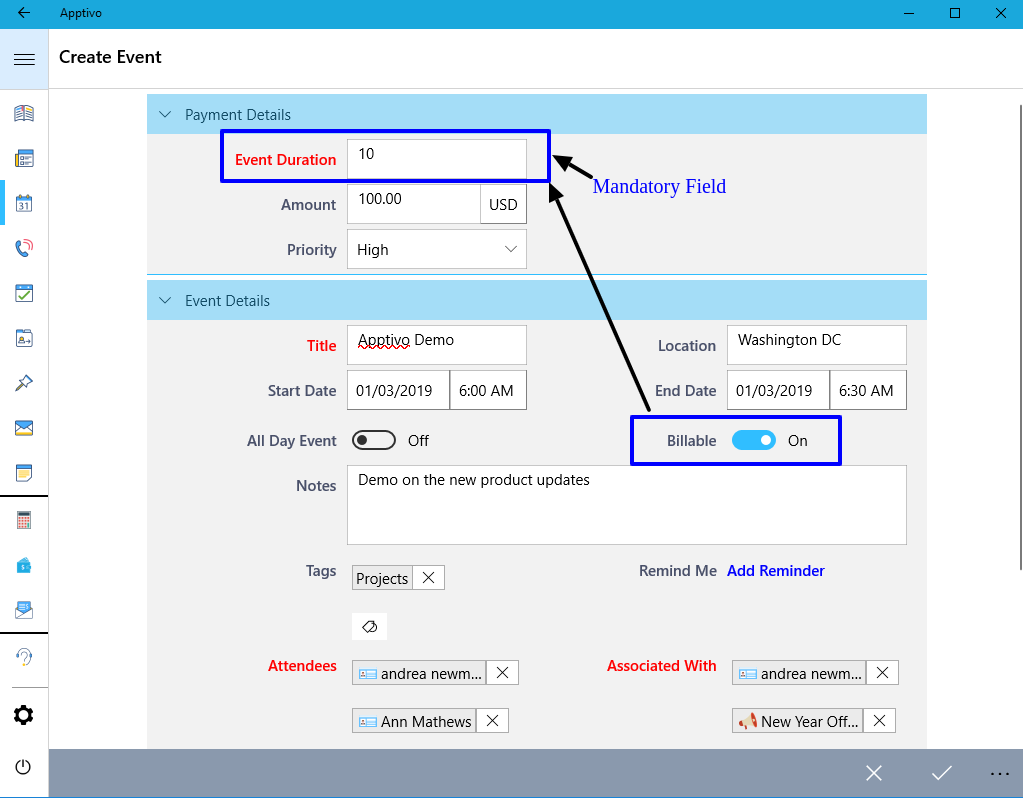
|
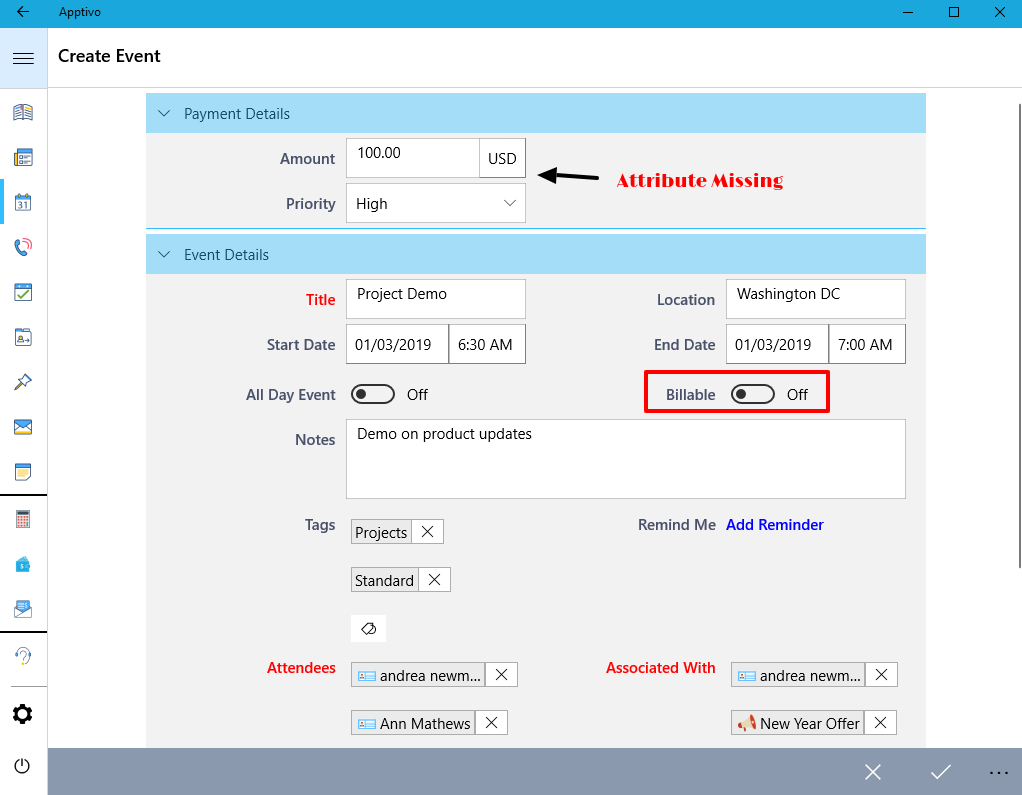
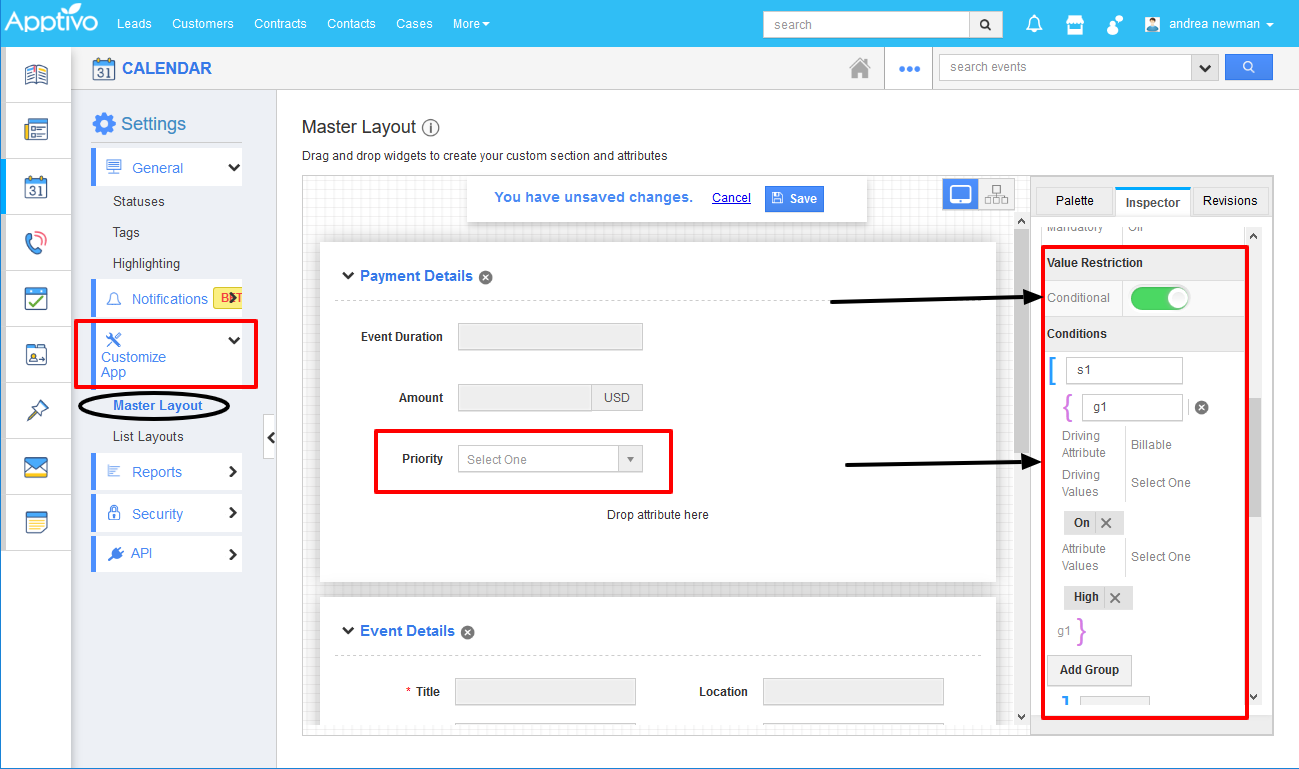
Conditional Value Dependency
This feature allows you to define a criteria/condition based on which an attribute value can be restricted to a specific one when the defined condition is met. You can provide a condition that has to be satisfied to make the field’s value to show/hide on the creation page as activities.
For instance: Consider the Events. Go to Settings -> Customize App -> Master Layout. Click on Priority field and enable the Conditional toggle ON under Value Restriction section from the Inspector tab and specify the condition.
|
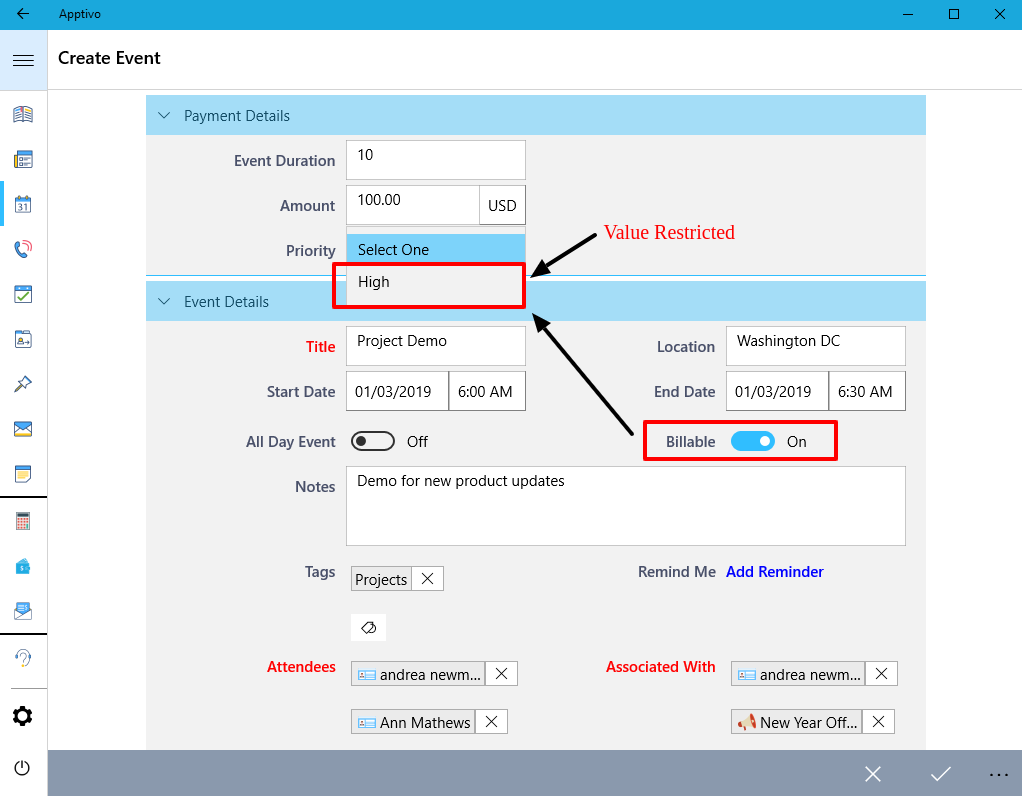
This depicts that, the field Priority should automatically be set to High when the Billable is enabled. So now when creating an Event from your Windows device, the Priority field will be set to High when Billable toggle is enabled.
|
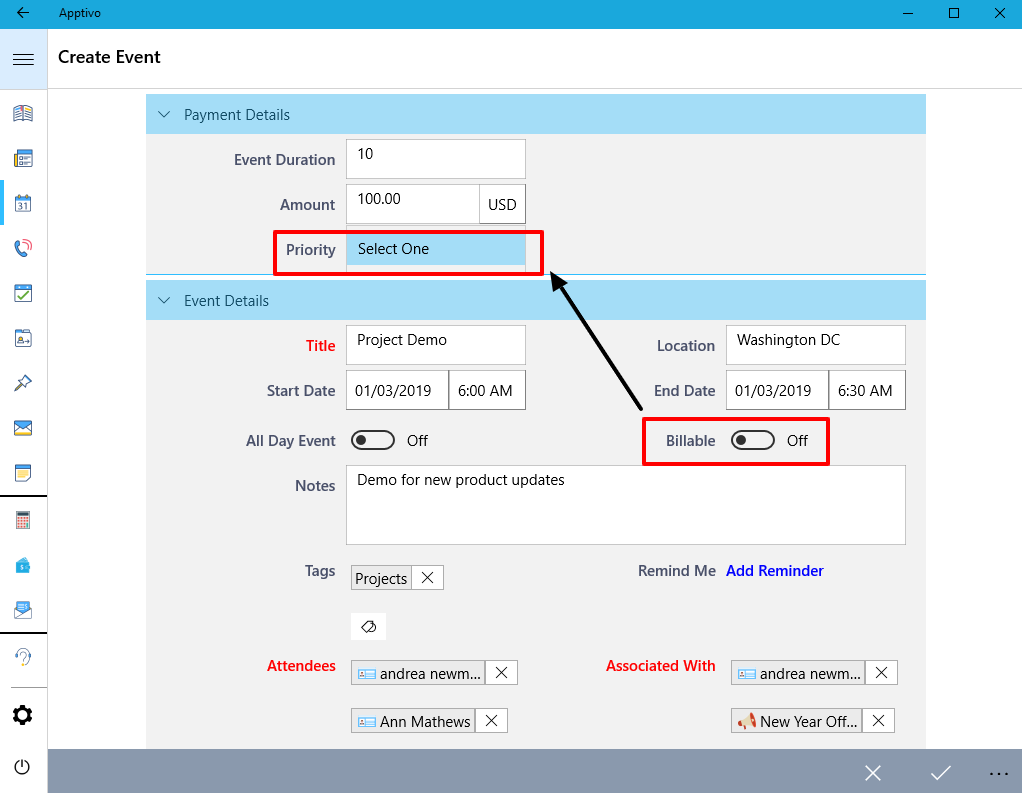
The Priority field will not have any values in the drop-down if the Billable field is disabled.
|
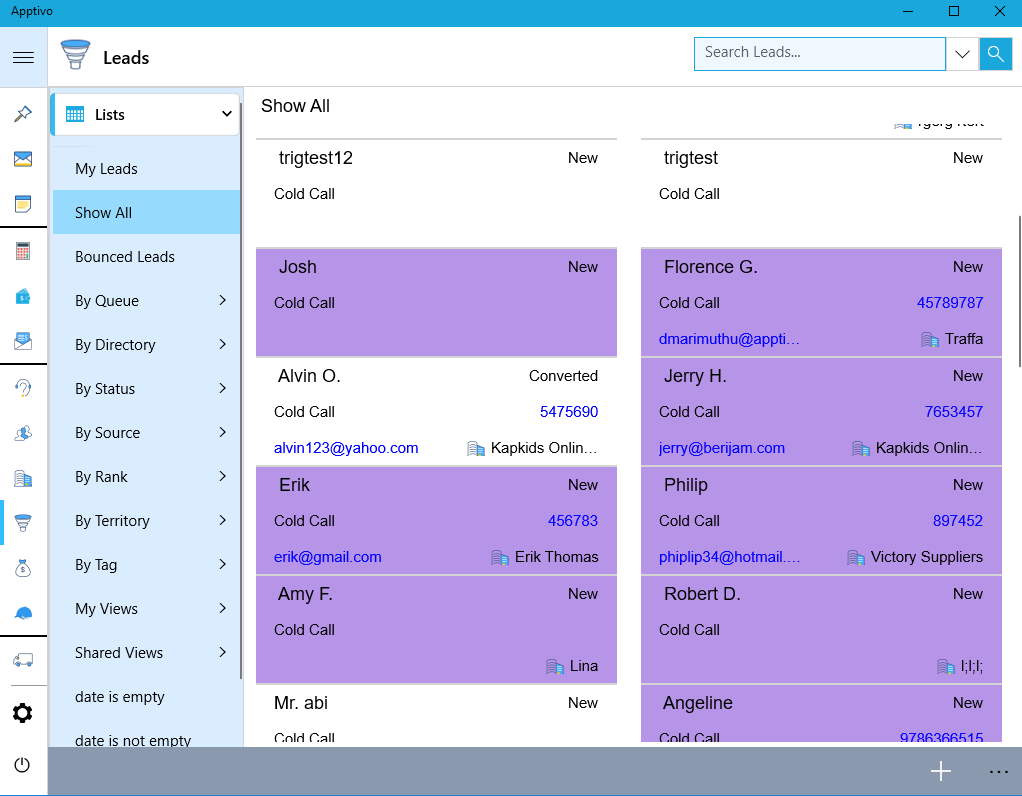
Highlighting Leads
We have added the highlighting feature in Leads App for Windows in this release. This highlighting feature allows you to easily track the Leads based on the highlighting condition.
Note: You need to configure highlighting rules in the web which gets reflected in Windows App.
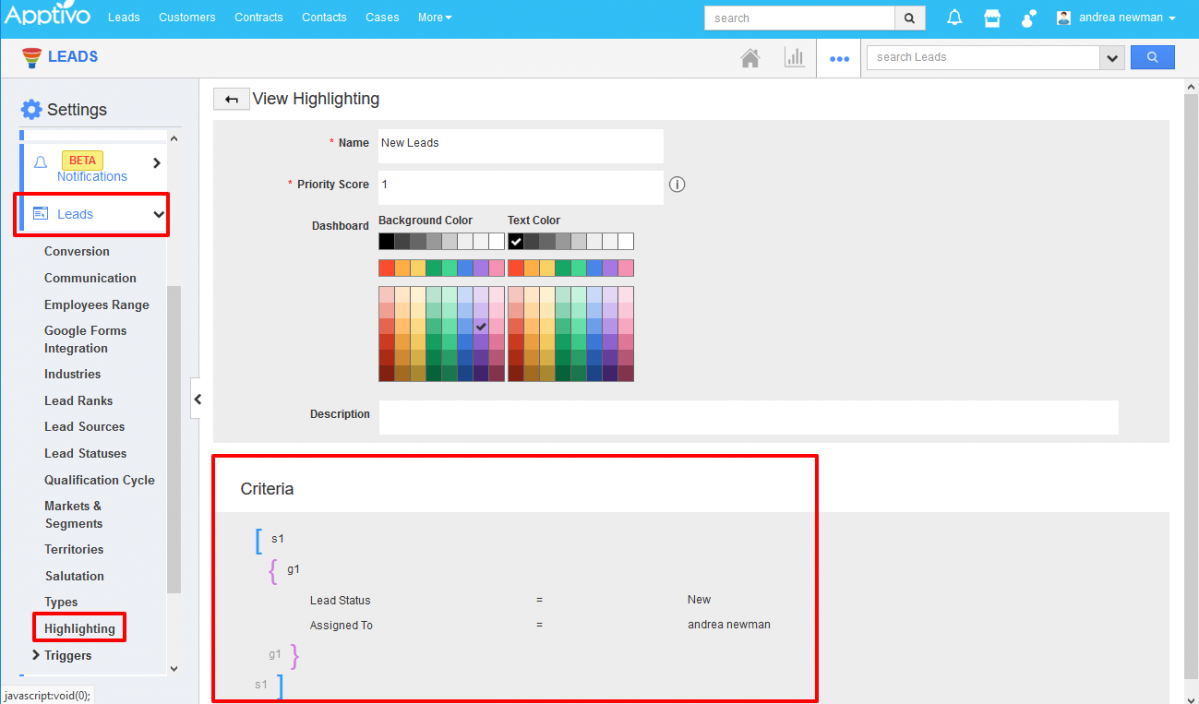
For Instance: In the Web, Go to Leads App. Click on “More -> Settings -> Leads-> Highlighting”. Click on Create button to create new highlights for leads with the prior condition. Here, we have given “Lead Status= New and Assigned to = Andrea Newman”. So, whenever the Lead is created with “Lead Status= New and Assigned to = Andrea Newman”, it will be highlighted.
|
Once updated in Web, you can check for highlighted Leads in Leads App.
|
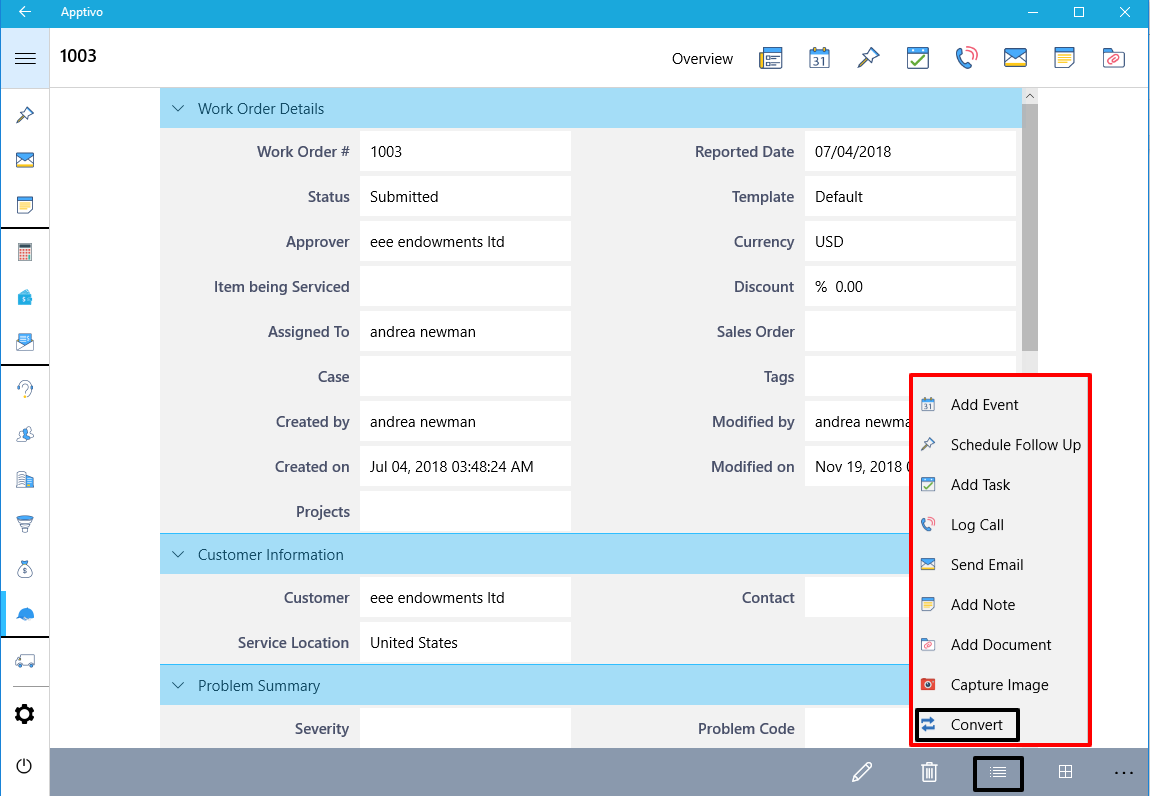
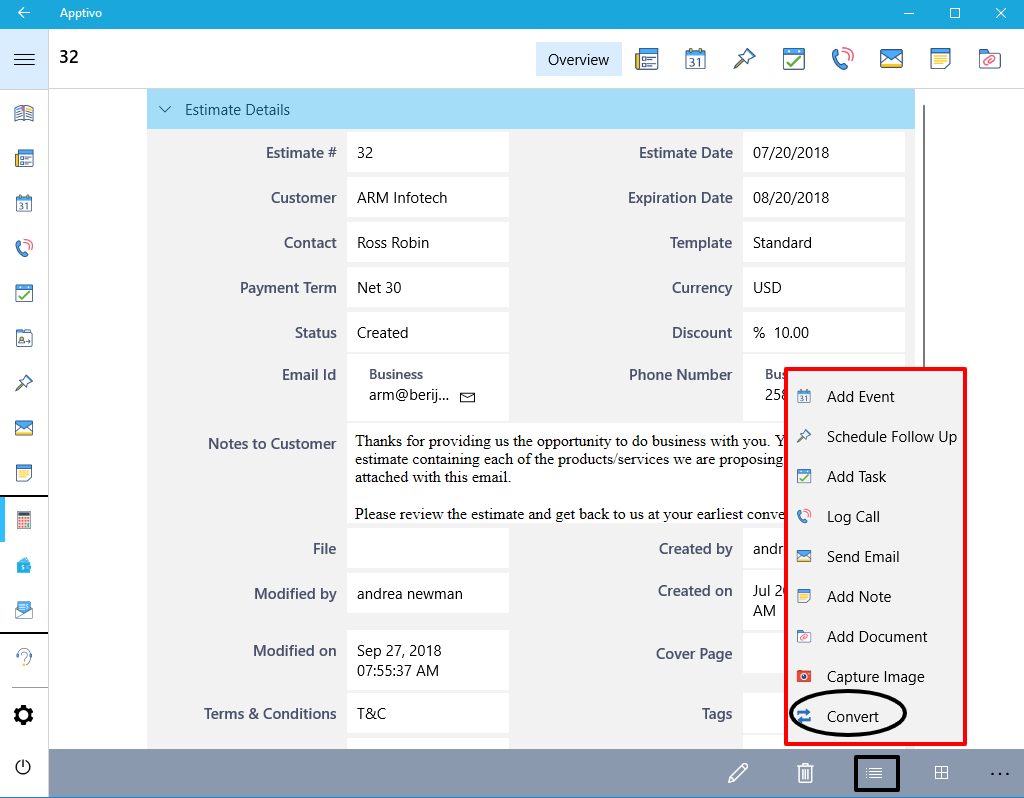
App Conversions
A notable feature in this release is the Conversion of apps like Work Orders and Estimates to Invoice, and Customer to Contact in your Windows devices if the Conversion settings in the web are set to Standard.
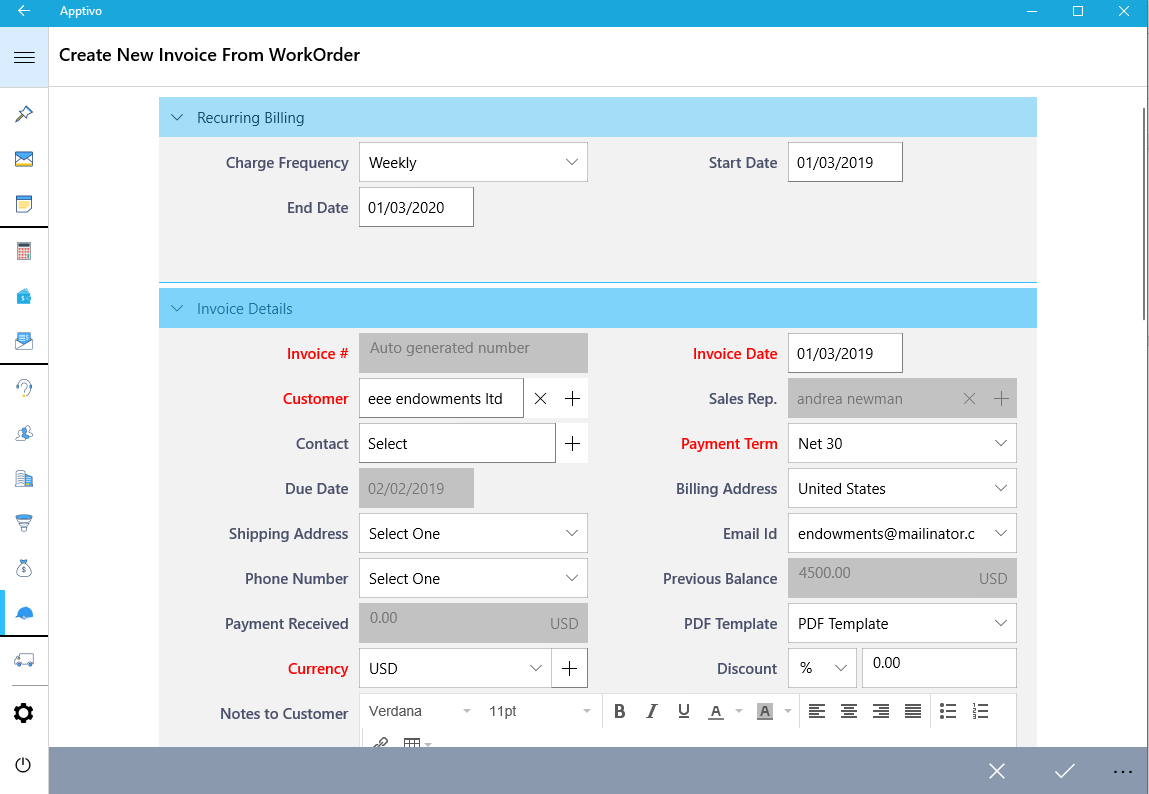
Work Orders to Invoice: Let us consider the conversion of Work Orders to Invoices. Your Work Orders can now be converted to a Invoices. To convert, click on the More drop-down found in the Work Orders Overview page -> Convert option.
|
You can find the Work Order converted as Invoice with the objects from the Work Order auto-populated as shown in the below image:
|
Estimates to Invoice: Let us consider the conversion of Estimates to Invoices. Your Estimates can now be converted to a Invoices. To convert, click on the More drop-down found in the Work Orders Overview page -> Convert option.
|
You can find the Estimate converted as an Invoice with the objects from the Estimate auto-populated as shown in the below image:
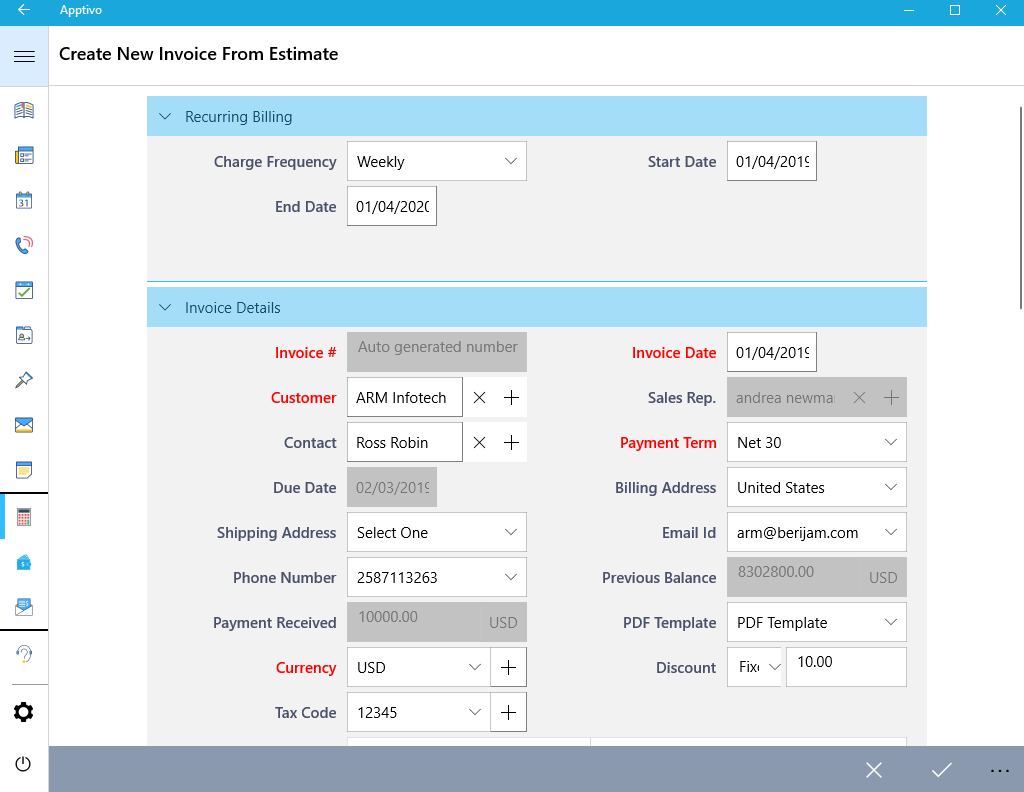
|
Customer to Contacts: Let us consider the conversion of Customers to Contacts. Your Customers can now be converted to Contacts. To convert, click on the More drop-down found in the Customers Overview page -> Convert option.
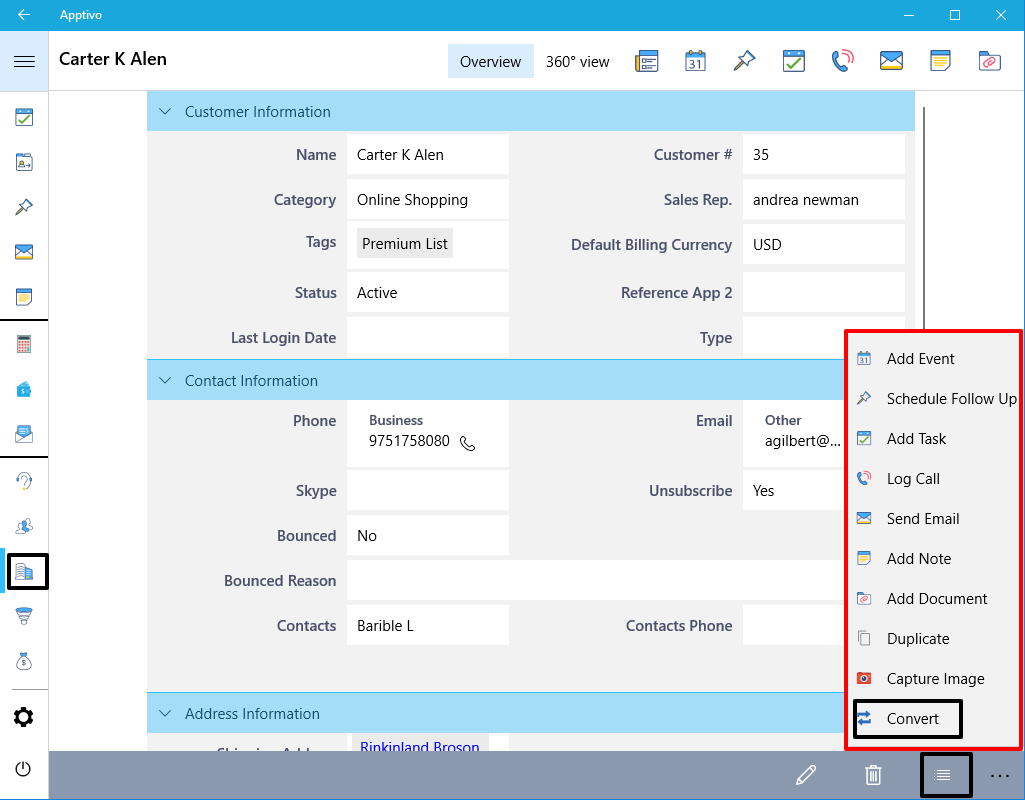
|
You can find the Customer converted as Contact with the objects from the Customer auto-populated as shown in the below image:
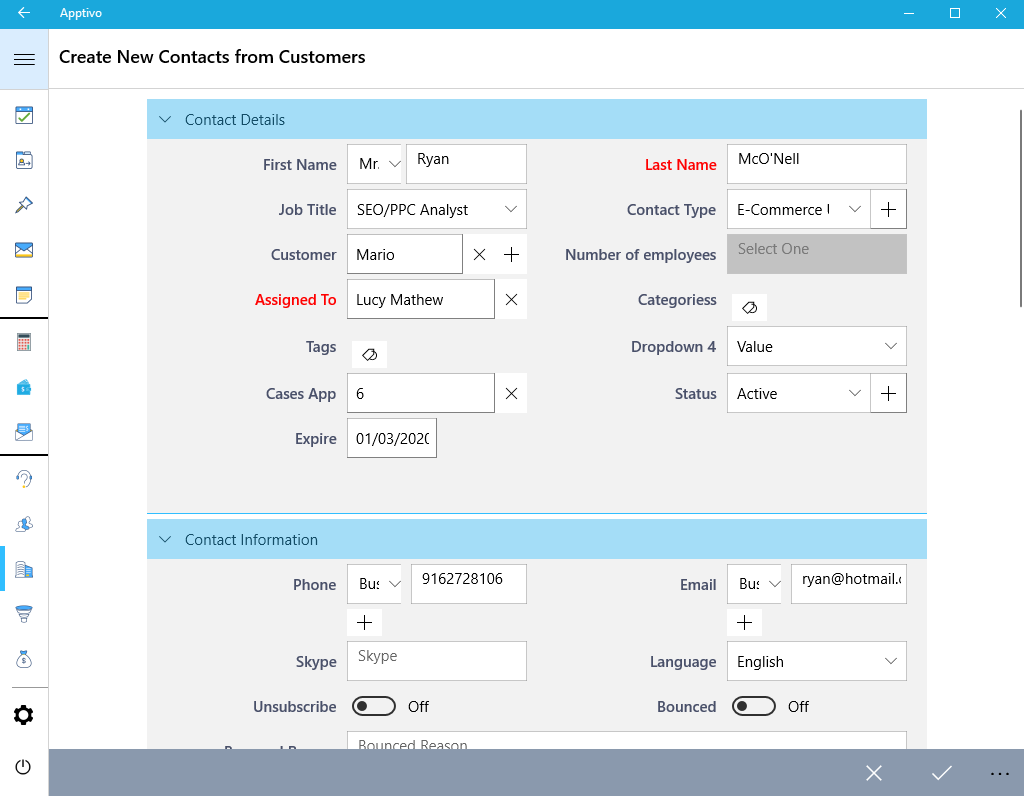
|
Stay Tuned with all updates in Apptivo by clicking here!!!
Have a positive-vibed year ahead!!
Cheers,
Grace
Latest Blogs

Role Of CRM In Travel And Tourism Industry
Travel and tourism have been a significant part of everyone’s life since the ancient period. When we skim through the pages of history, It should be noted that humans were initially nomads before they became settled in one place. They...
Read more →
WHAT IS CRM TECHNOLOGY?
Introduction CRM is a technology that helps manage the entire customer information and interactions in order to build and maintain superior customer relationships. The CRM solution replaces spreadsheets and other different applications, which makes it easy for the businesses to...
Read more →
Everything you need to know about the Annual Maintenance Contract!
1. What is an Annual Maintenance Contract? 2. Benefits of Maintenance Contracts 3. How can Apptivo CRM help you manage maintenance agreements and vendors? 4. Summary Think about getting the confidence that the machinery is well-maintained and performing optimally, without...
Read more →
