We extend our warm greetings on this New Year. As you are busy on this New Year, we are ready to present you the new version of the Apptivo iOS to start this New Year. We feel extremely happy in giving out a bunch of updates on the iOS All-in-one Mobile App V6.0.9 as of December 17, 2018.
iOS Apptivo All-In-One App Updates – V6.0.9
- Section conditional dependency for visibility
- Conditional Feature in Apps
- Custom Calculations using Functional Attributes (Numeric, Date, String)
- Calendar View in Activities
- Highlighting Activities
- Prevent Duplication
- Filter and View Unresponded Objects
- Nearby Customers
- Email Hashtag
- Probability Override notes in Opportunities App
- App Duplication
- Conversion
- Custom Conversion
Section conditional dependency for visibility
This New Year, we have implemented the Sectional Visibility Dependency for Invoices, Estimates, Expense Reports, Projects, and Orders in addition to the Activities and CRM Apps. With the Section Condition Dependency feature on hand, you can customize the sections that have to be visible based on any criteria.
Note: You need to configure this setting from the Web version which will be reflected instantly in your iOS device on refreshing.
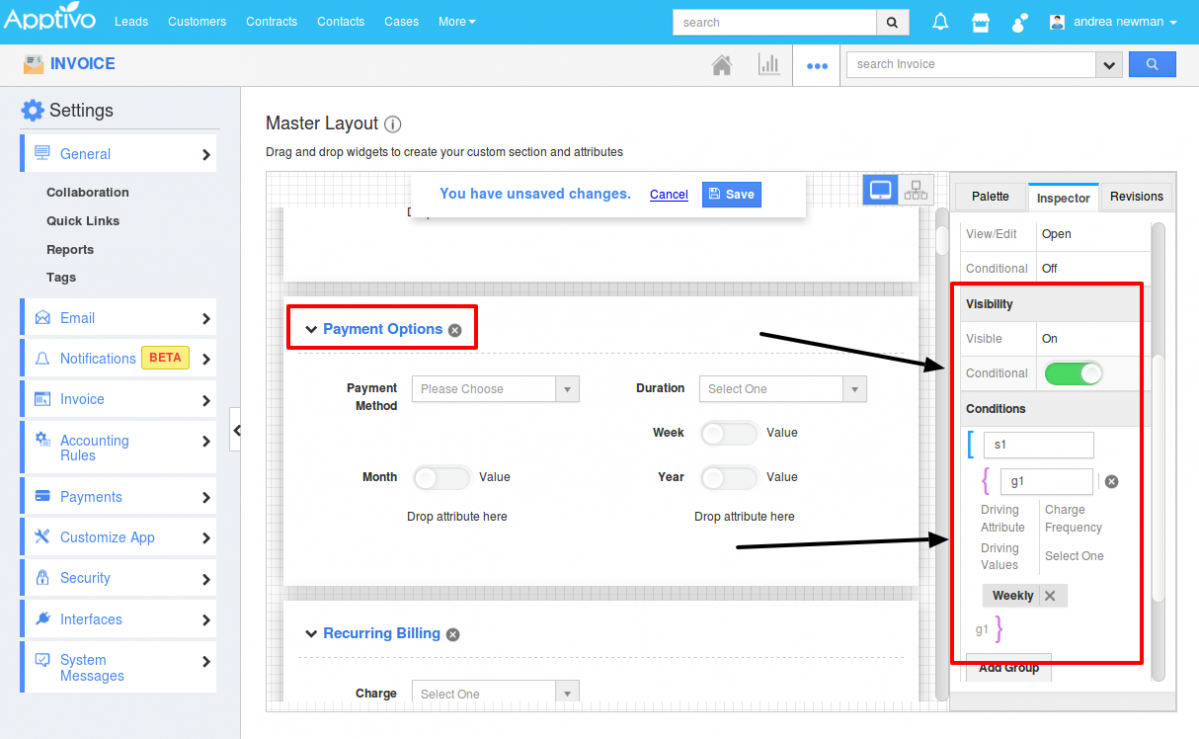
For instance: In the web version, go to the Invoices App Settings -> Customize App -> Master Layout. Click on Order Details section -> enable the Conditional toggle ON under the Visibility section and define the condition as “Charge Frequency = Weekly”. This depicts that, when Charge frequency is selected as Weekly, the section Payment Options will be visible.
|
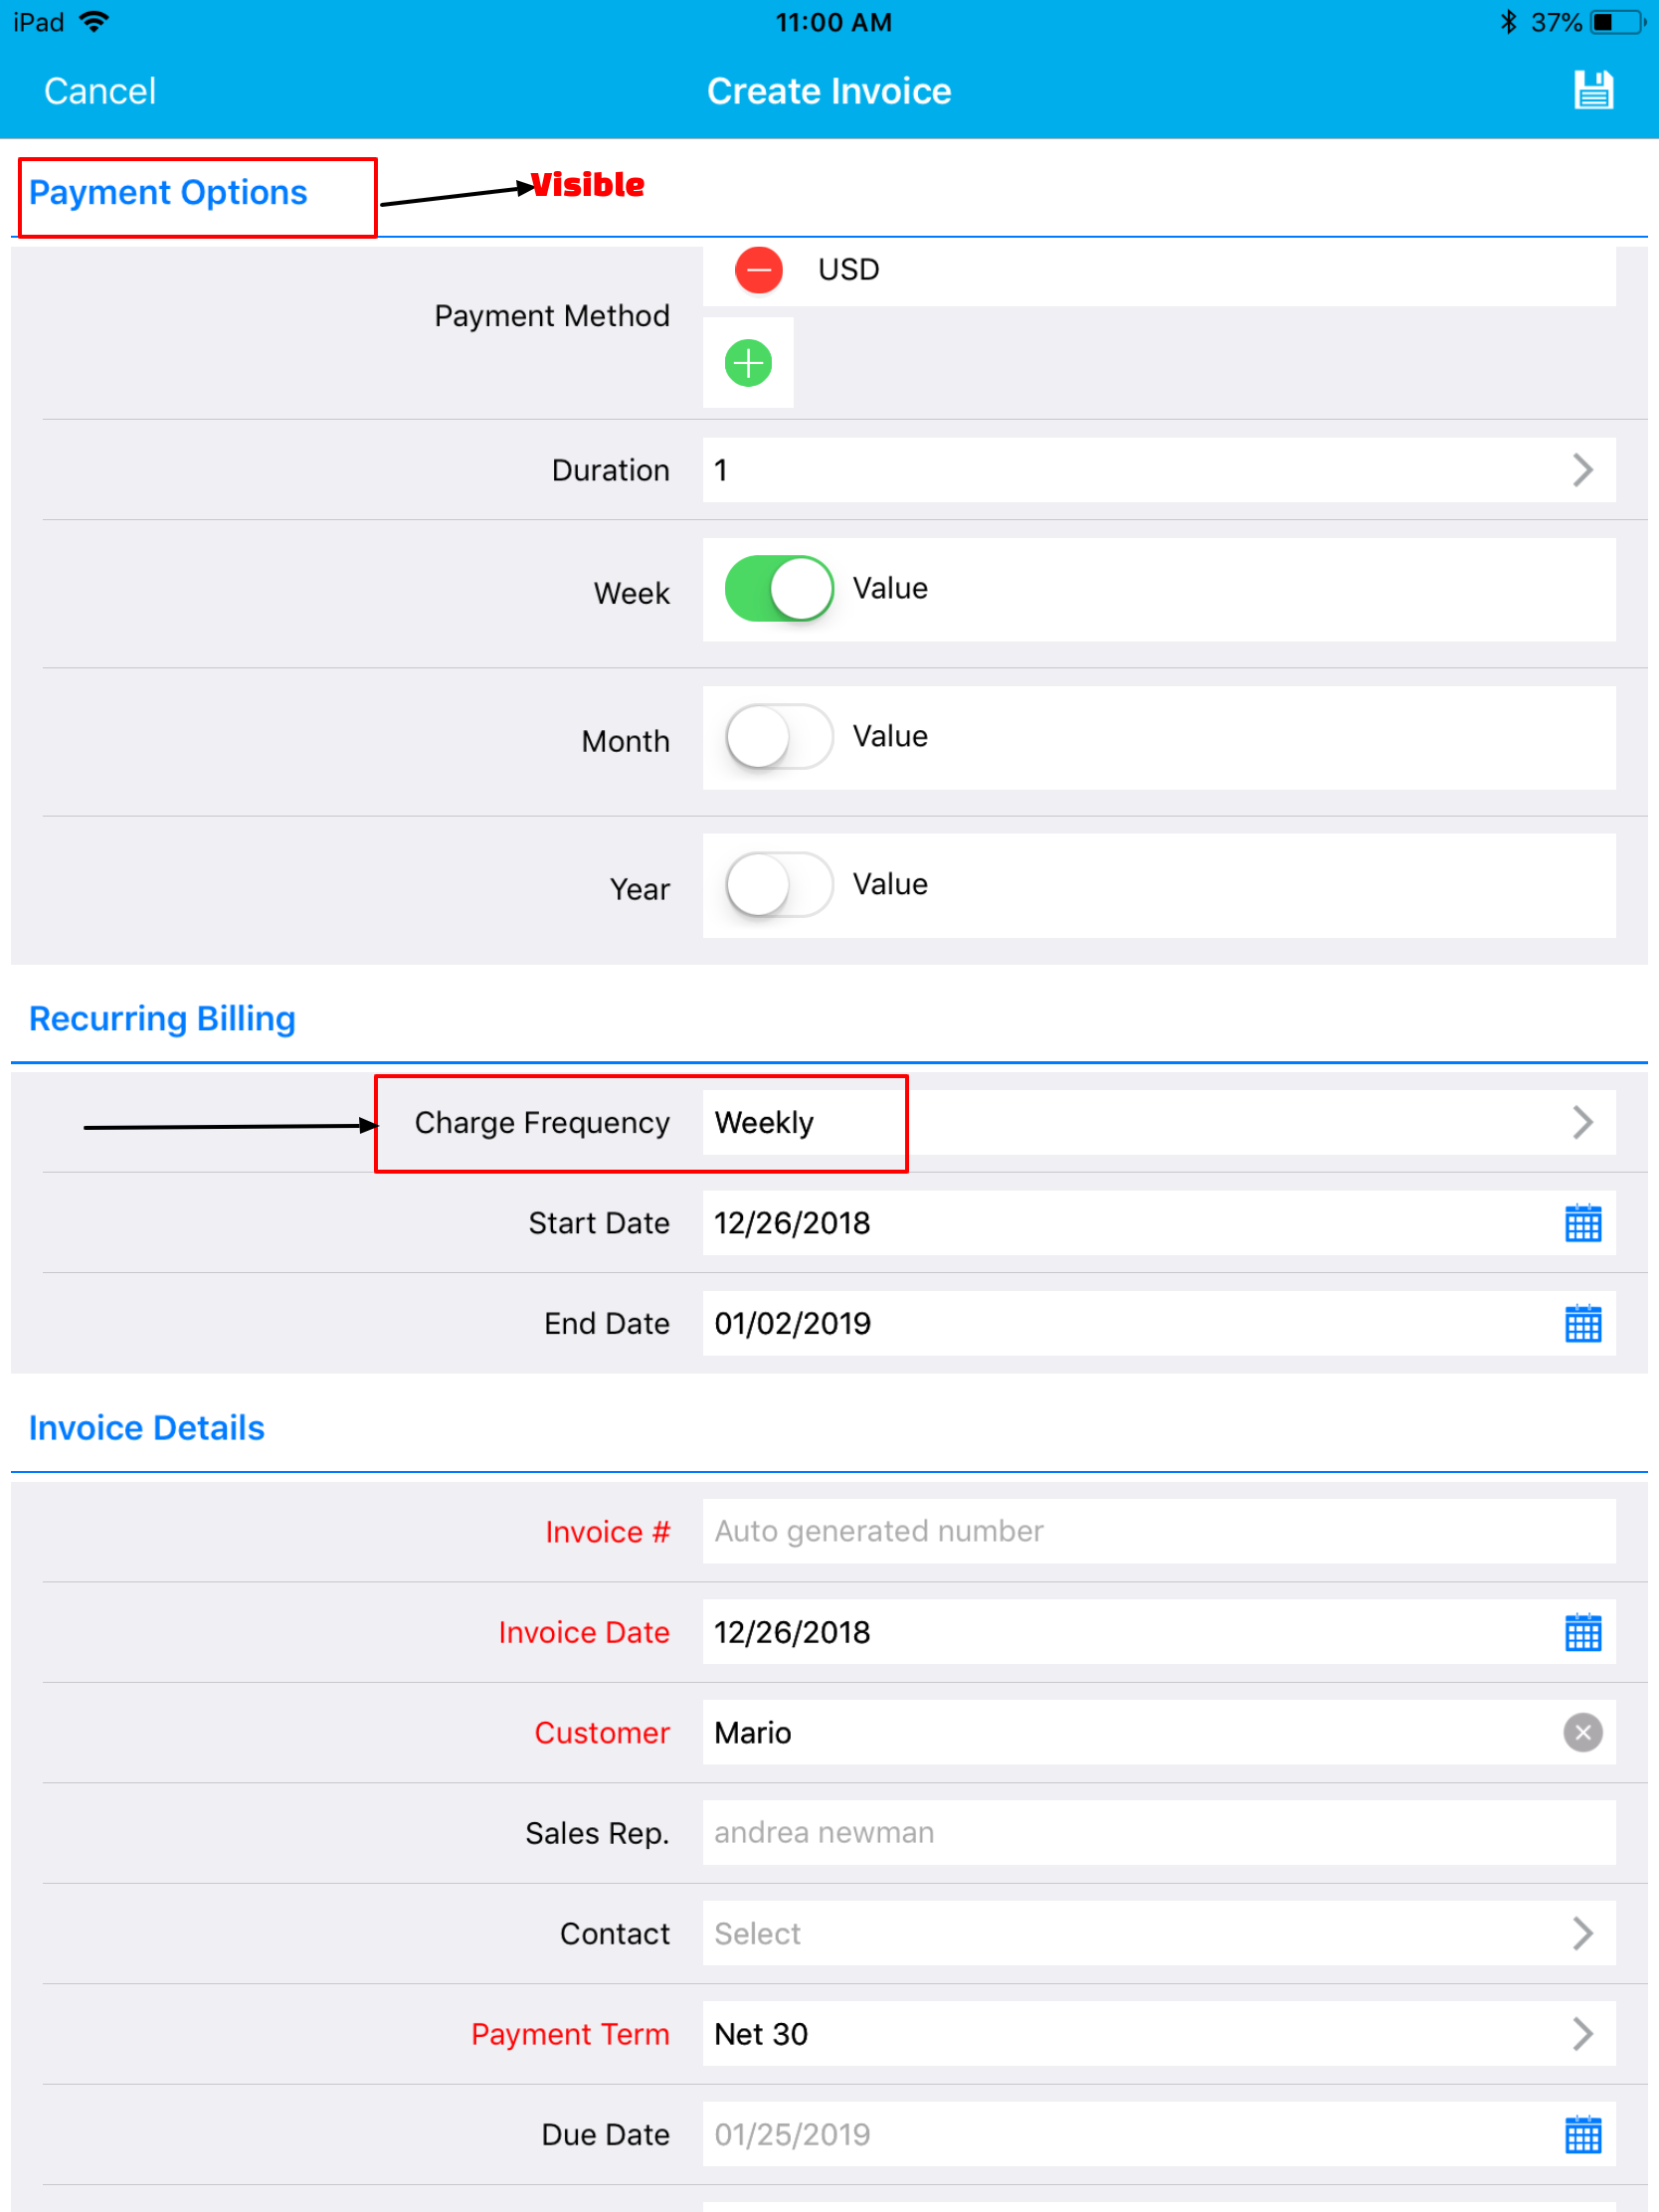
And now in your iOS device, on selecting Charge Frequency = Weekly, you can view the Payment Options section as shown in the image below:
|
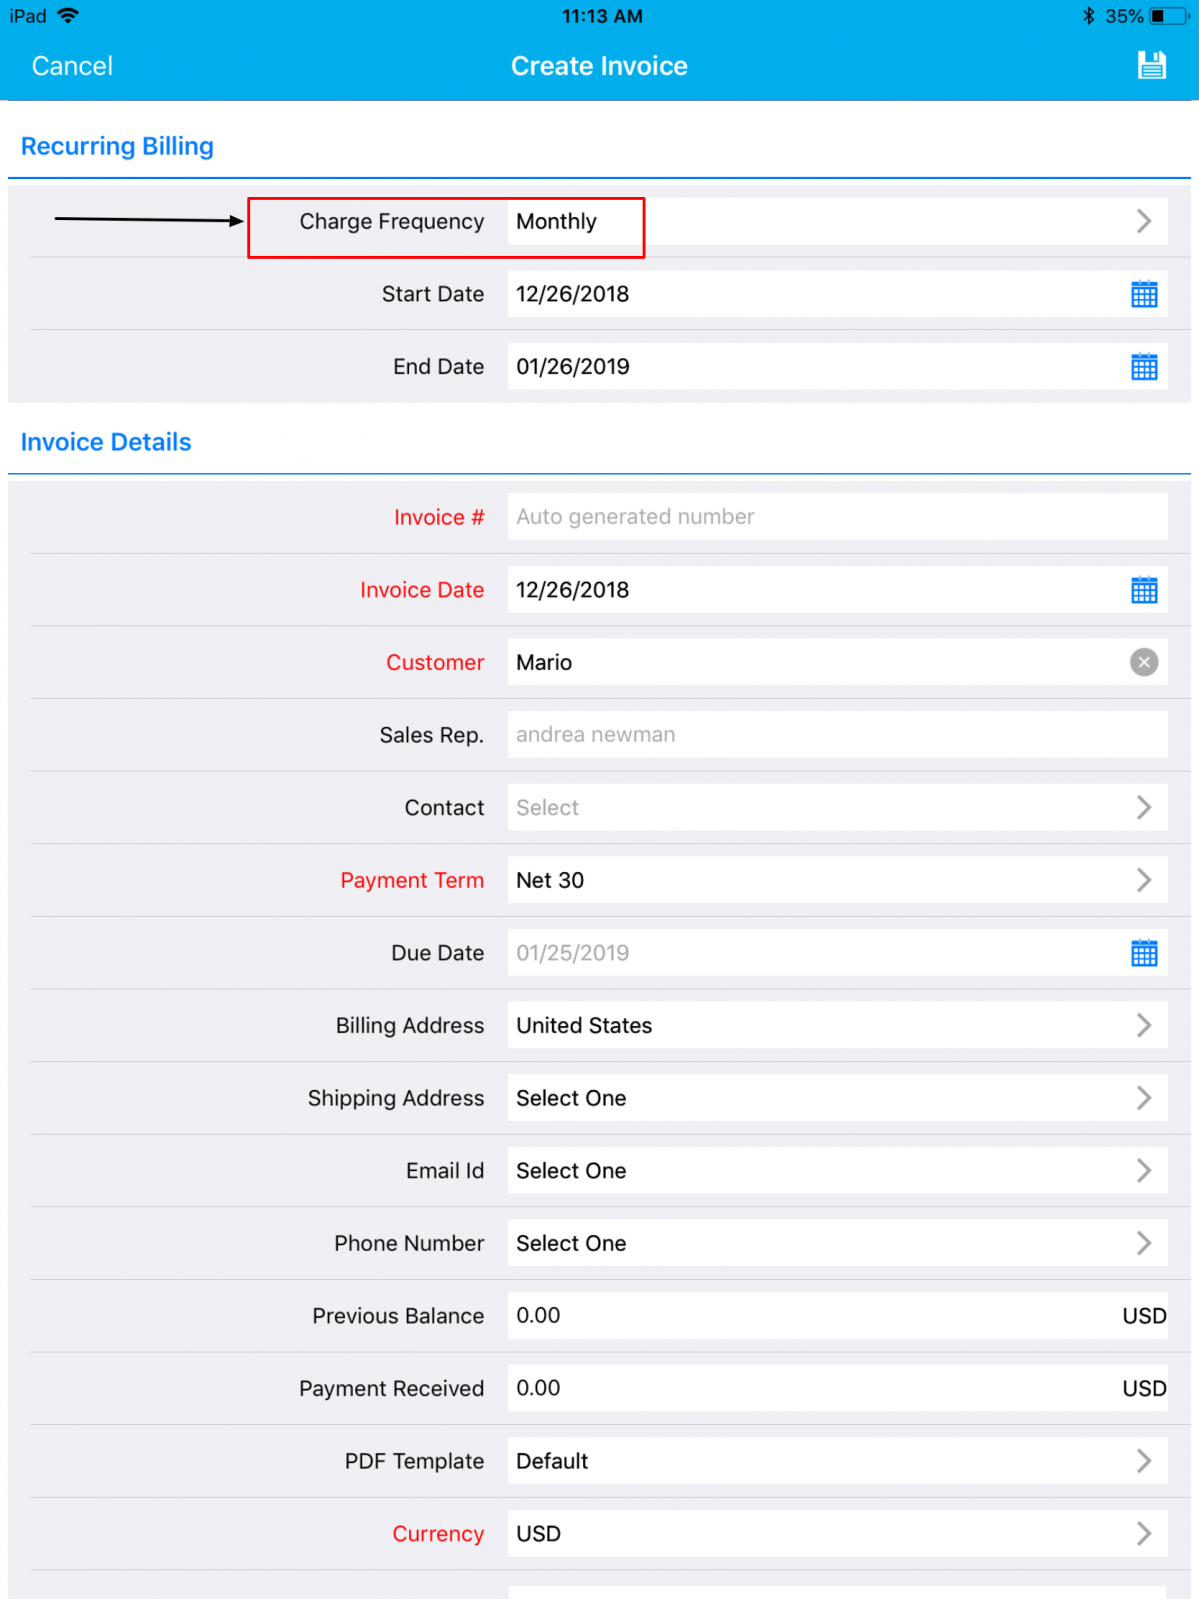
When Charge Frequency is set to something else other than Weekly, the section will be hidden:
|
Conditional Feature in Apps
The Conditional Dependencies is now implemented in the Invoices, Estimates, Expense Reports, Projects, and Orders. You can now grant access at the entity levels for both the standard and custom fields. (Note: All these customizations should be done in your web version which will get reflected)
Conditional Visibility Dependency
With this feature, you can make a field visible when a certain criterion or condition is met. You can provide a condition that has to be satisfied to make the field visible on the creation page.
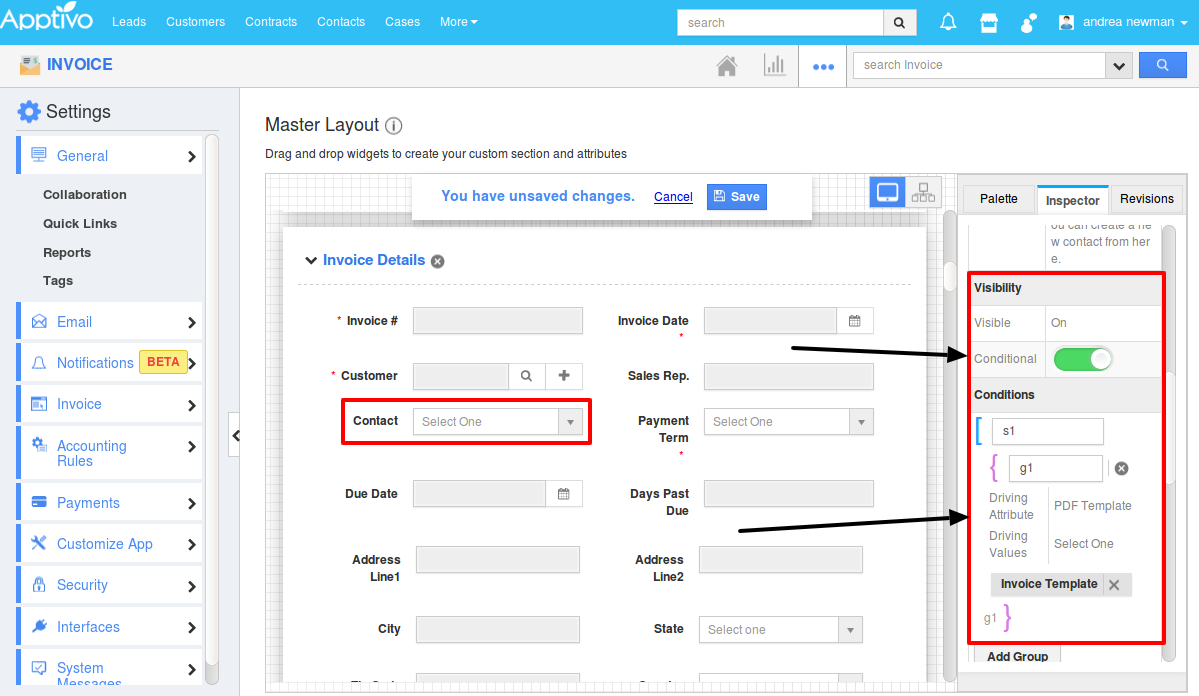
For instance: Consider the Invoices App. Go to Settings -> Customize App -> Master Layout -> Click on Contact field and enable the Conditional toggle ON under Visibility section from the Inspector tab and specify the condition.
|
This depicts that the field Contact should be made visible when the PDF template is set to Invoice Template. So now when creating an Invoice from your iOS device, the Contact field will initially not be visible in the Creation page.
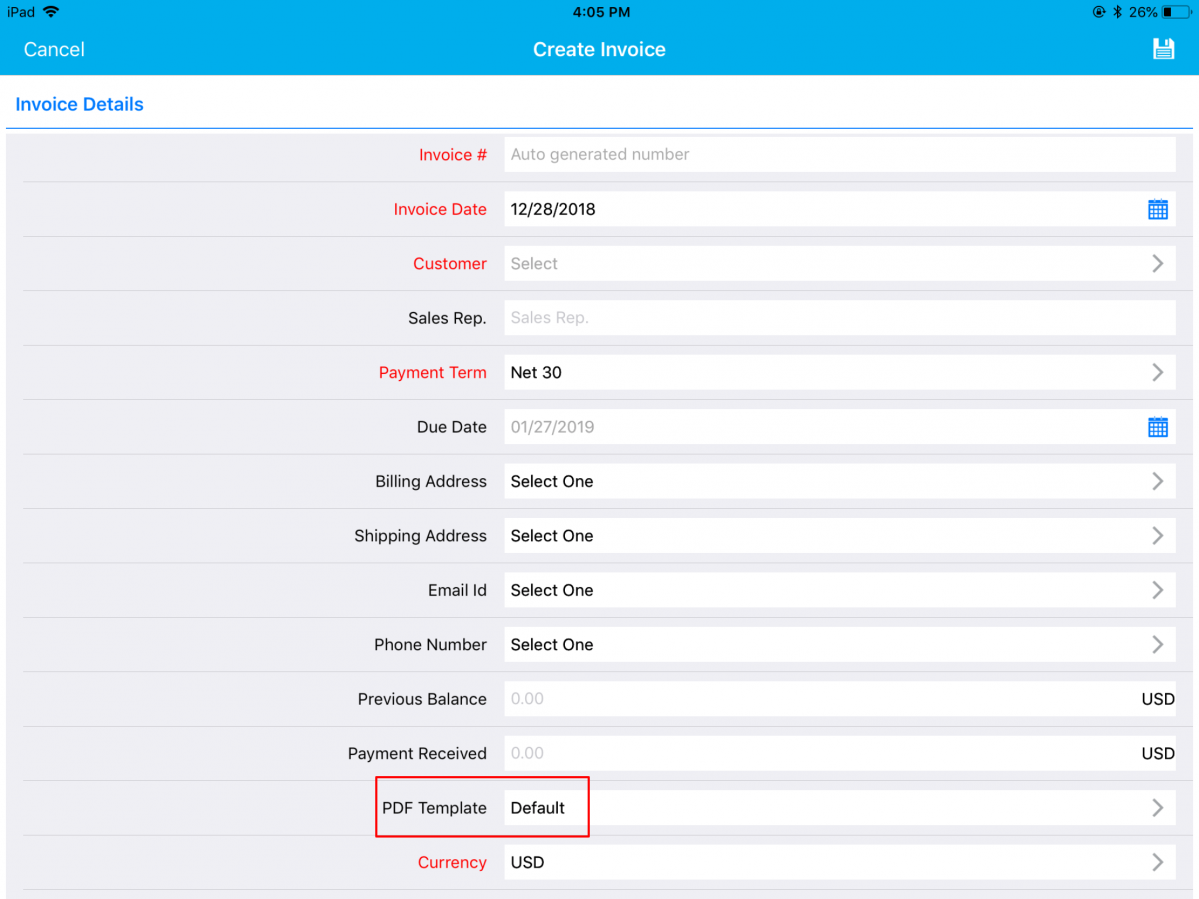
|
The Contact field will be made visible when PDF Template is set to Invoice Template, as shown in the below image:

|
Conditional Mandatory Dependency
With this feature, you can make an attribute mandatory when a certain criterion or condition is met. You can provide a condition that has to be satisfied to make the field mandatory on the creation page.
For instance: Consider the Invoices App. Go to Settings -> Customize App -> Master Layout. Click on Contact field and enable the Conditional toggle ON under Mandatory section from the Inspector tab and specify the condition.
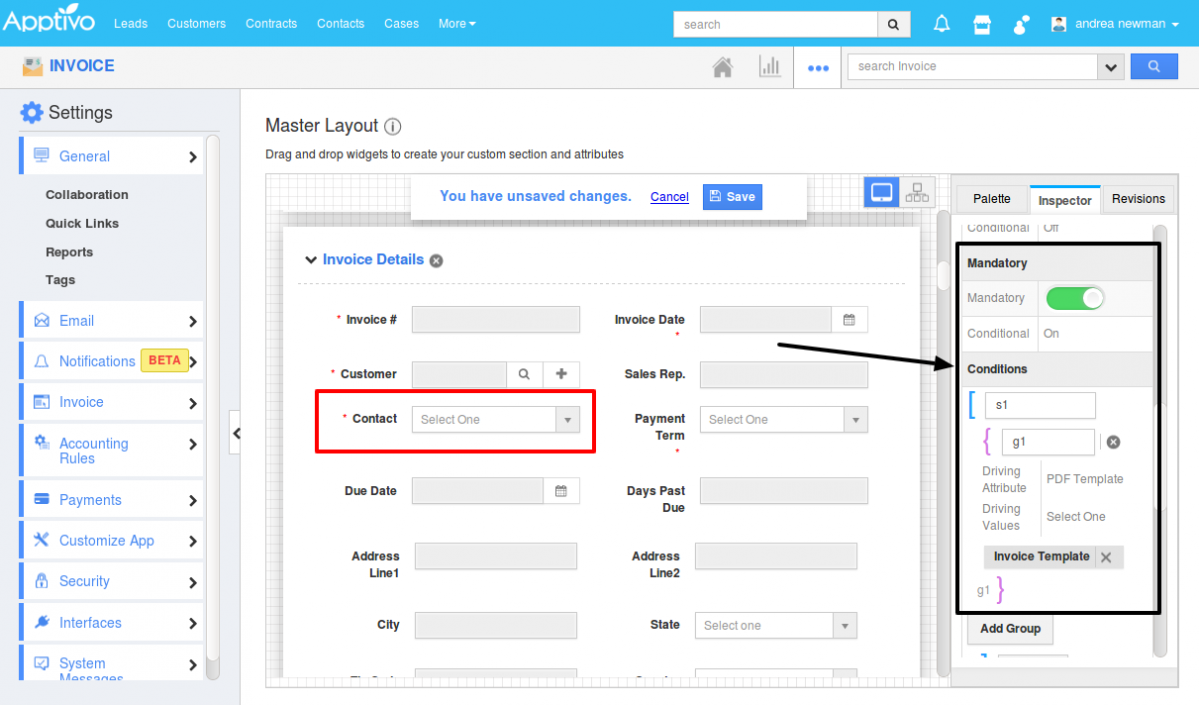
|
This depicts that, the field Contact should be made mandatory when the PDF Template is set to Invoice Template. So now when creating an Invoice from your iOS device, the Contact field will initially be a non-mandatory one in the Creation page.
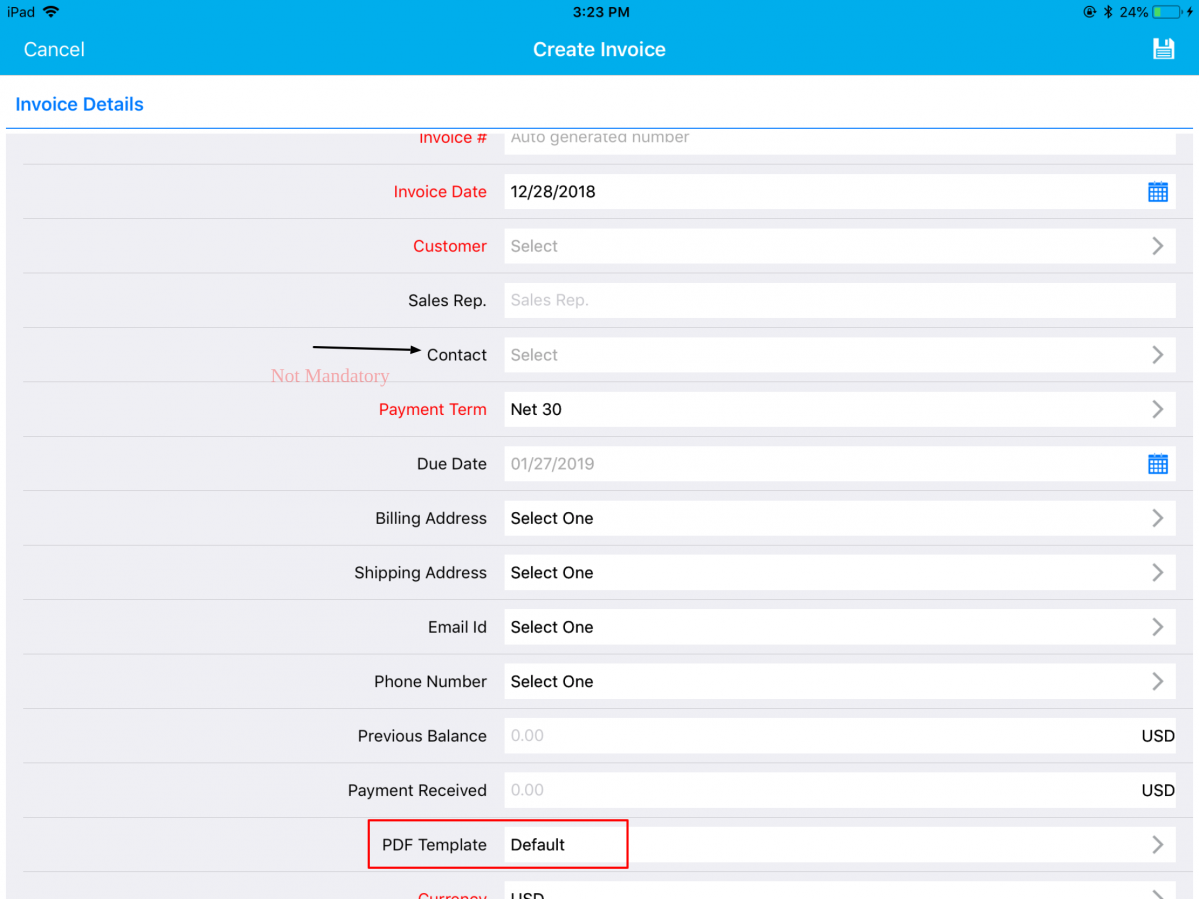
|
The Contact field will be made mandatory when PDF Template is set to Invoice Template, as shown in the below image:
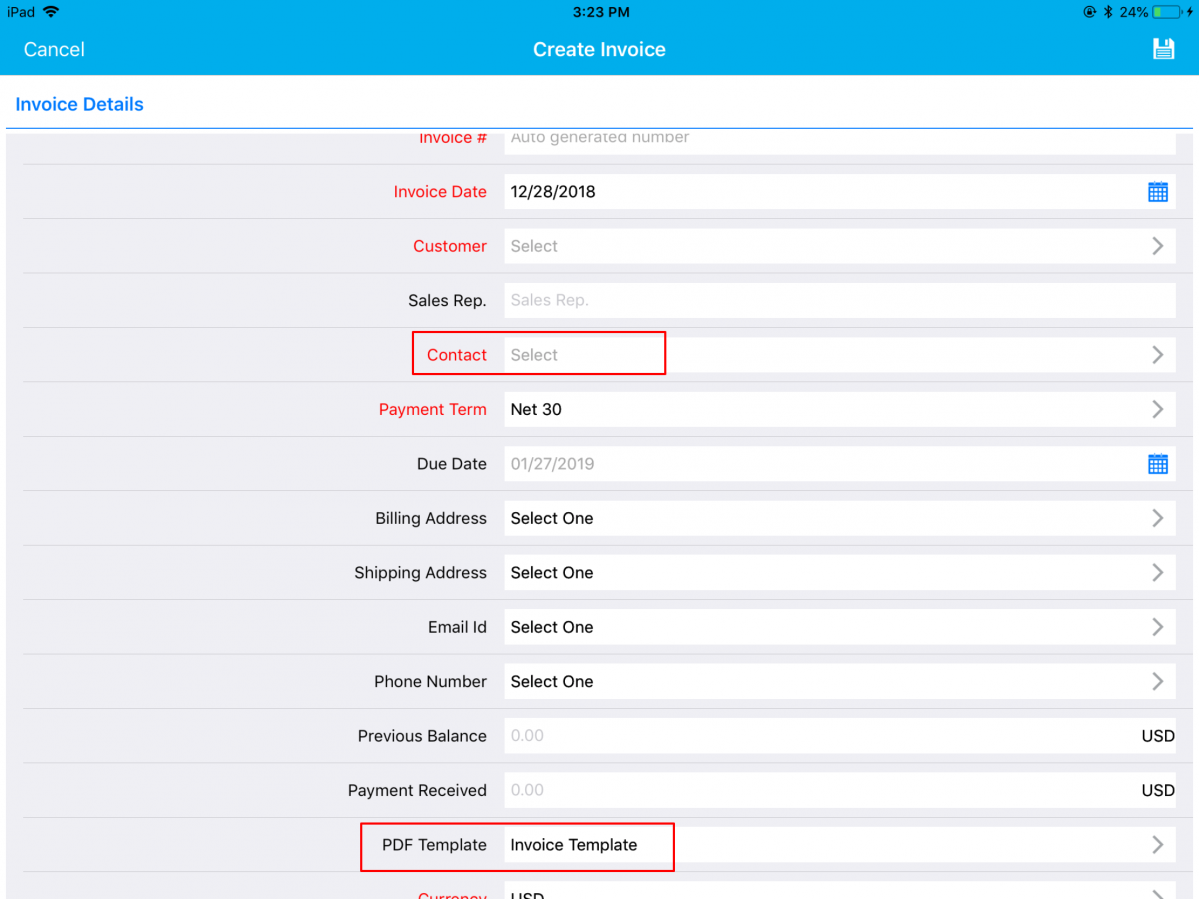
|
Conditional Value Dependency
This feature allows you to define a criteria/condition based on which an attribute value can be restricted when the defined condition is met. You can provide a condition that has to be satisfied to make the field’s value to show/hide on the creation page.
For instance: Consider the Invoices App. Go to Settings -> Customize App -> Master Layout. Click on PDF Template field and enable the Conditional toggle ON under Value Restriction section from the Inspector tab and specify the condition.
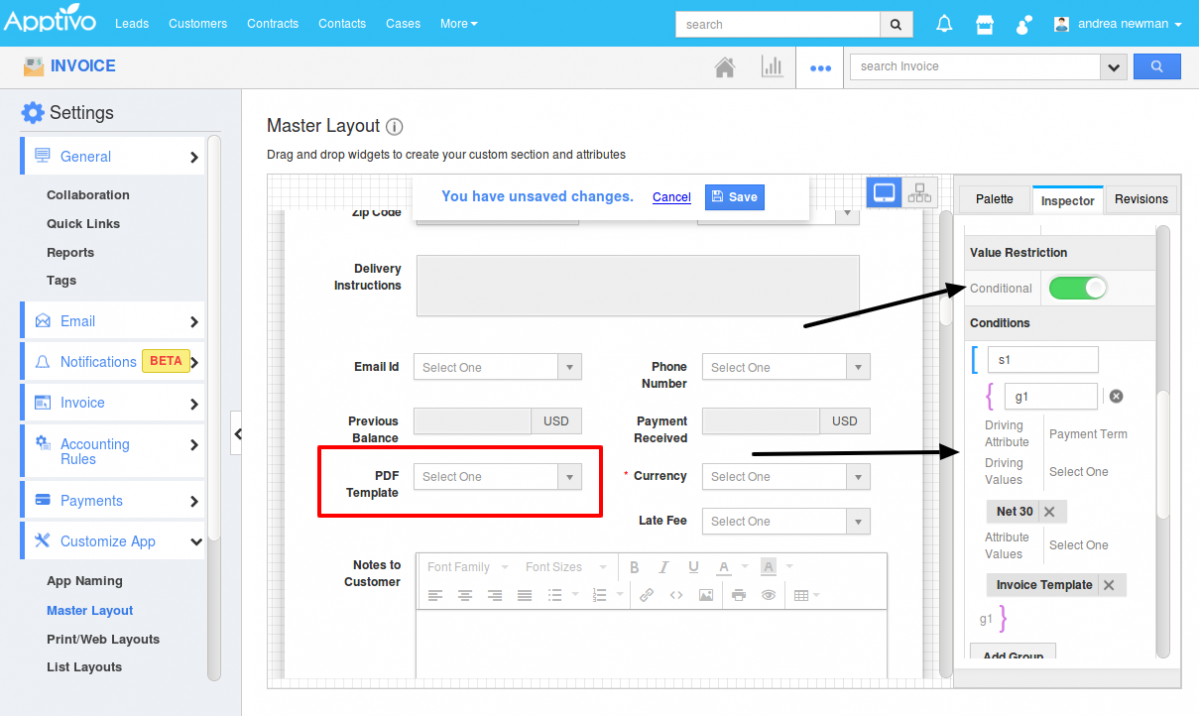
|
This depicts that, the field PDF Template should automatically be set to Invoice Template when the Payment Term is set to Net 30. So now when creating an Invoice from your iOS device, the PDF Template field will be set to Invoice Template when Payment Term is equal to Net 30.
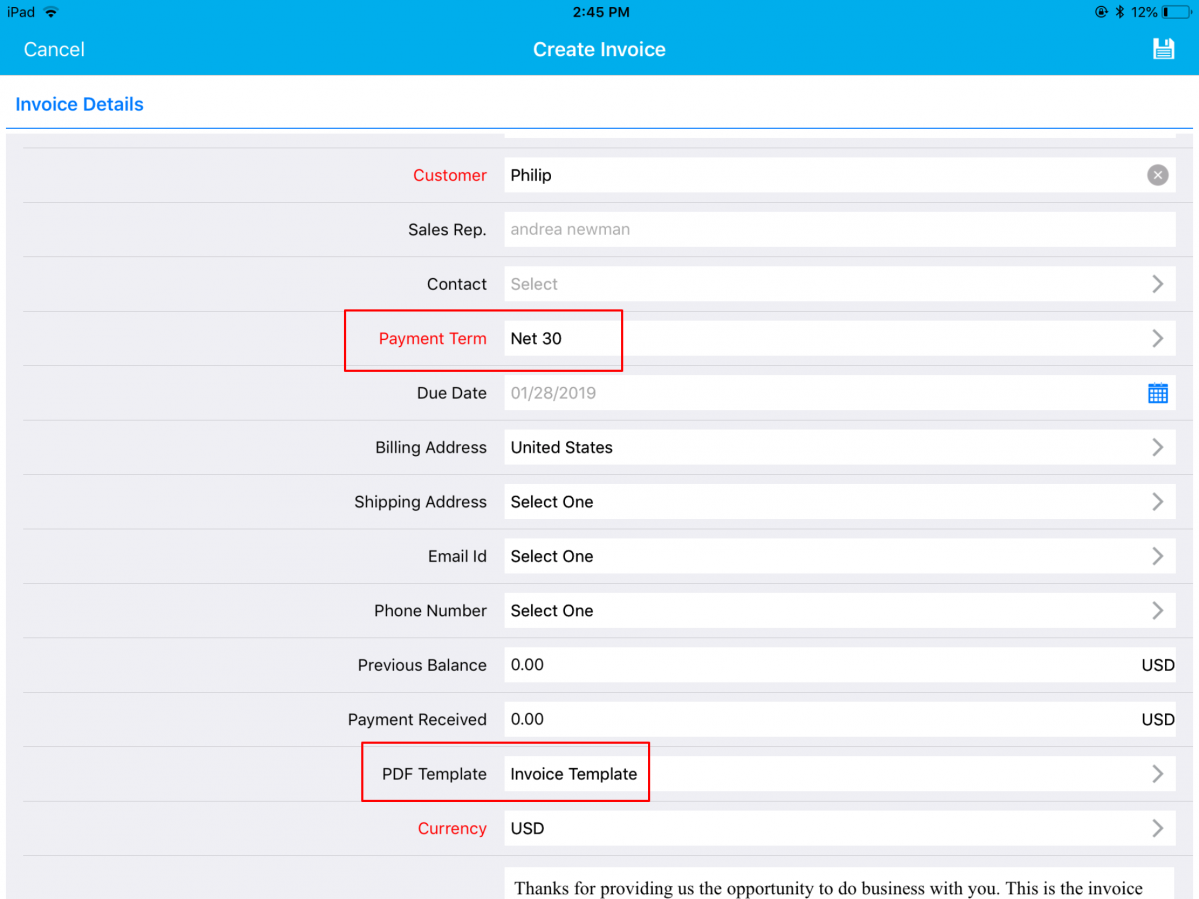
|
Custom Calculations using Functional Attributes (Numeric, Date, String)
A significant feature in this iOS update is the support of function formulas in Invoices, Estimates, Expense Reports, Projects, and Orders Apps. To support this, we have added the “Function” attribute, which includes three types of formulas – String, Numeric, and Date. (Note: To make use of the functional attributes in your iOS device, you are required to configure it from your web settings, which will get reflected in your iOS devices)
For instance: Consider the Invoices App and select Numeric Formula attribute. With this, you can now find the difference between the existing balance amount and the amount paid (Balance amount = Previous Balance – Payment Received).
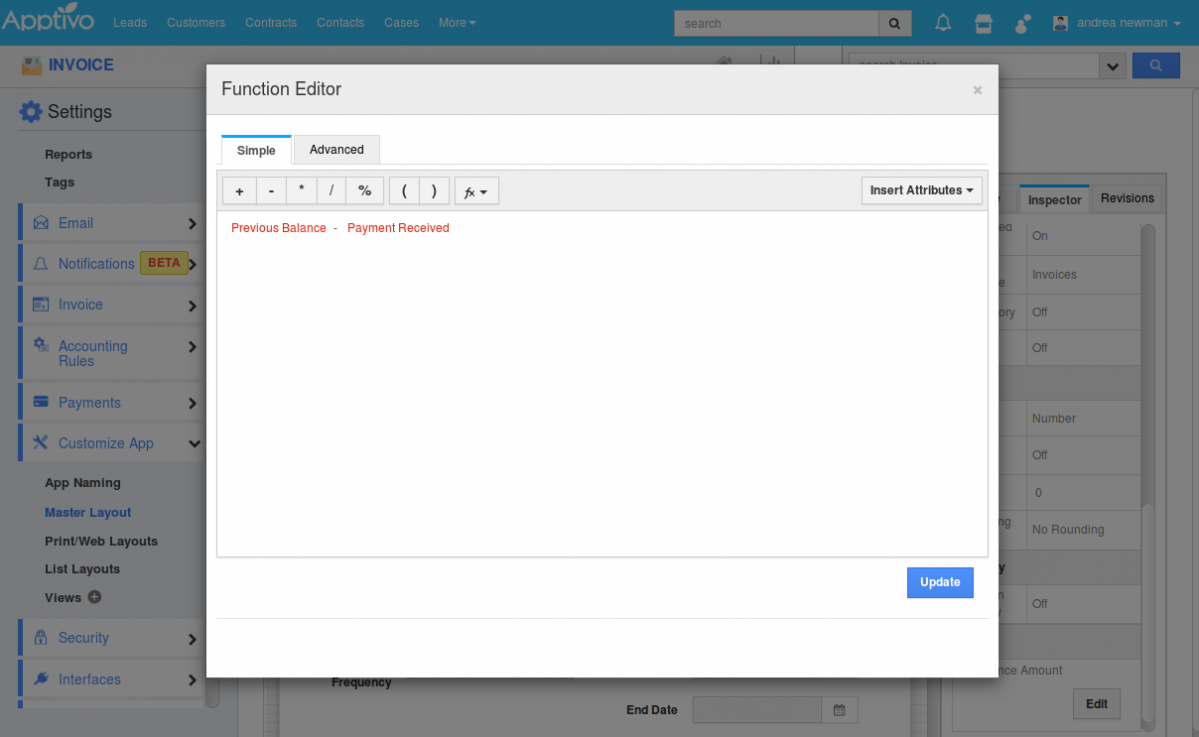
|
Now in your iOS device, on creating a new invoice, you can view the created function Balance Amount automatically.
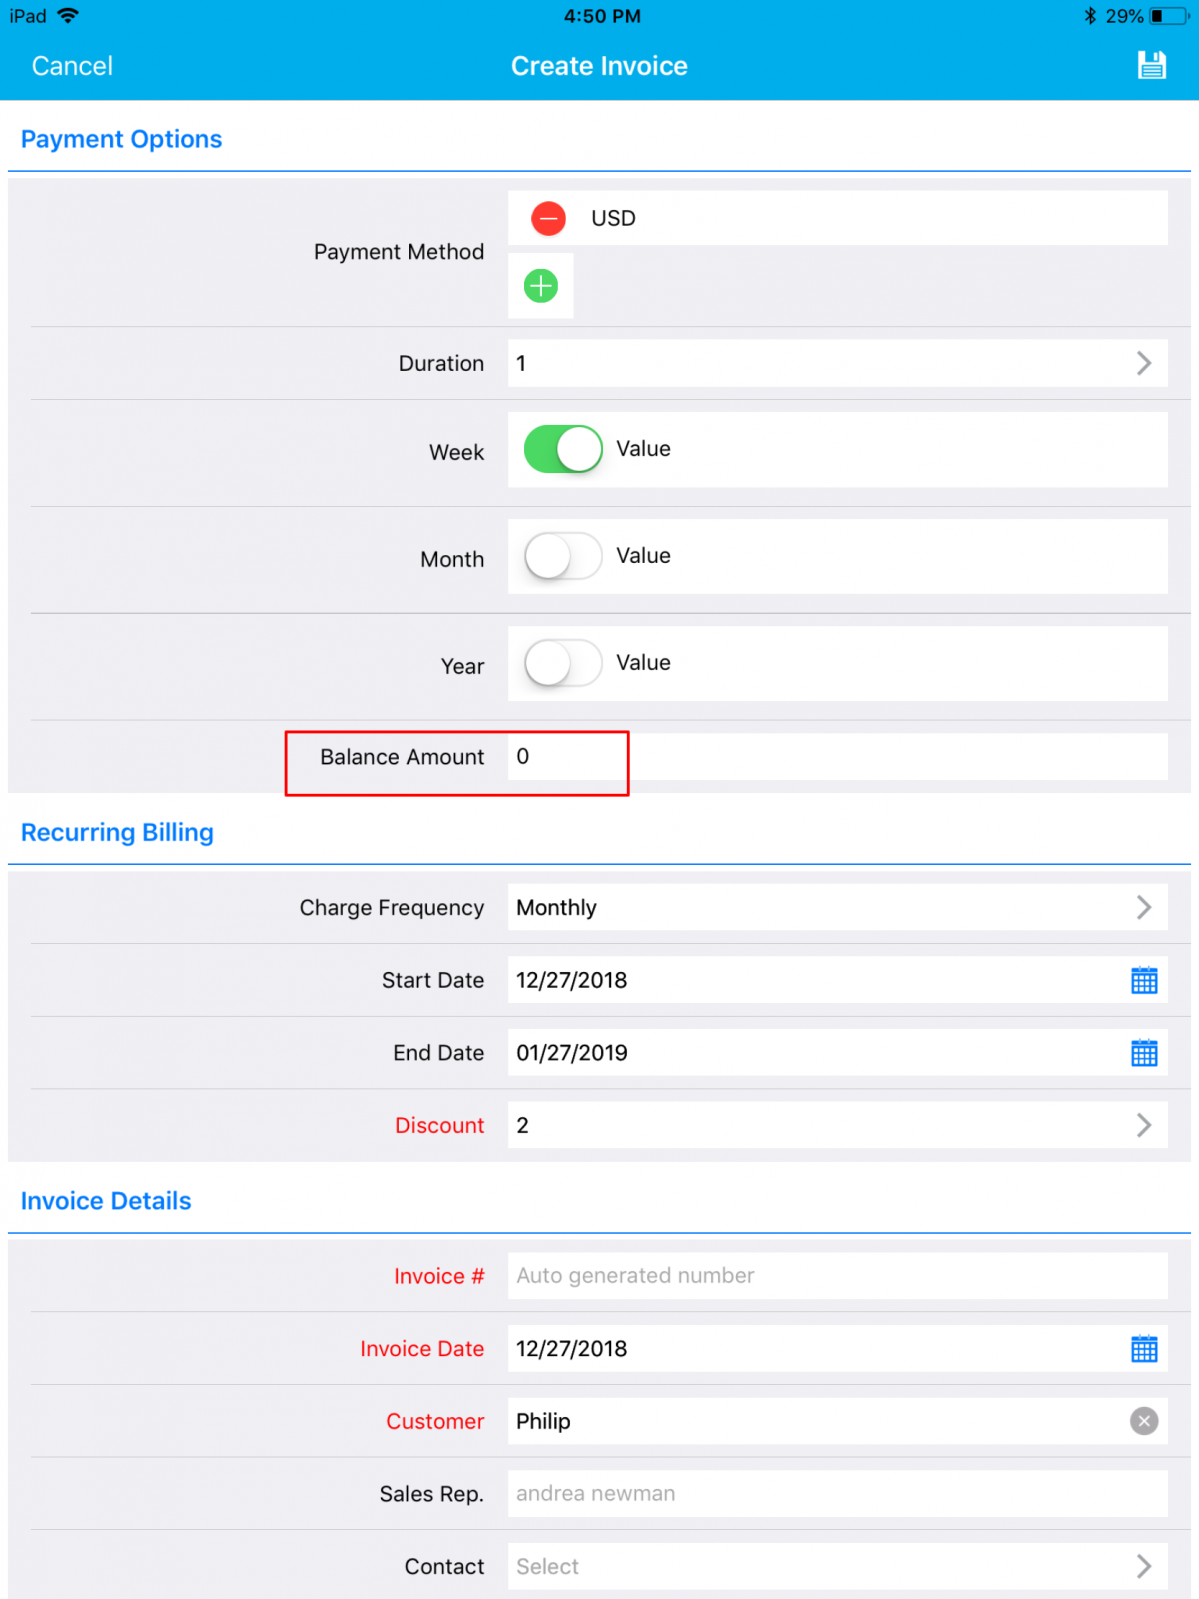
|
Calendar View in Activities
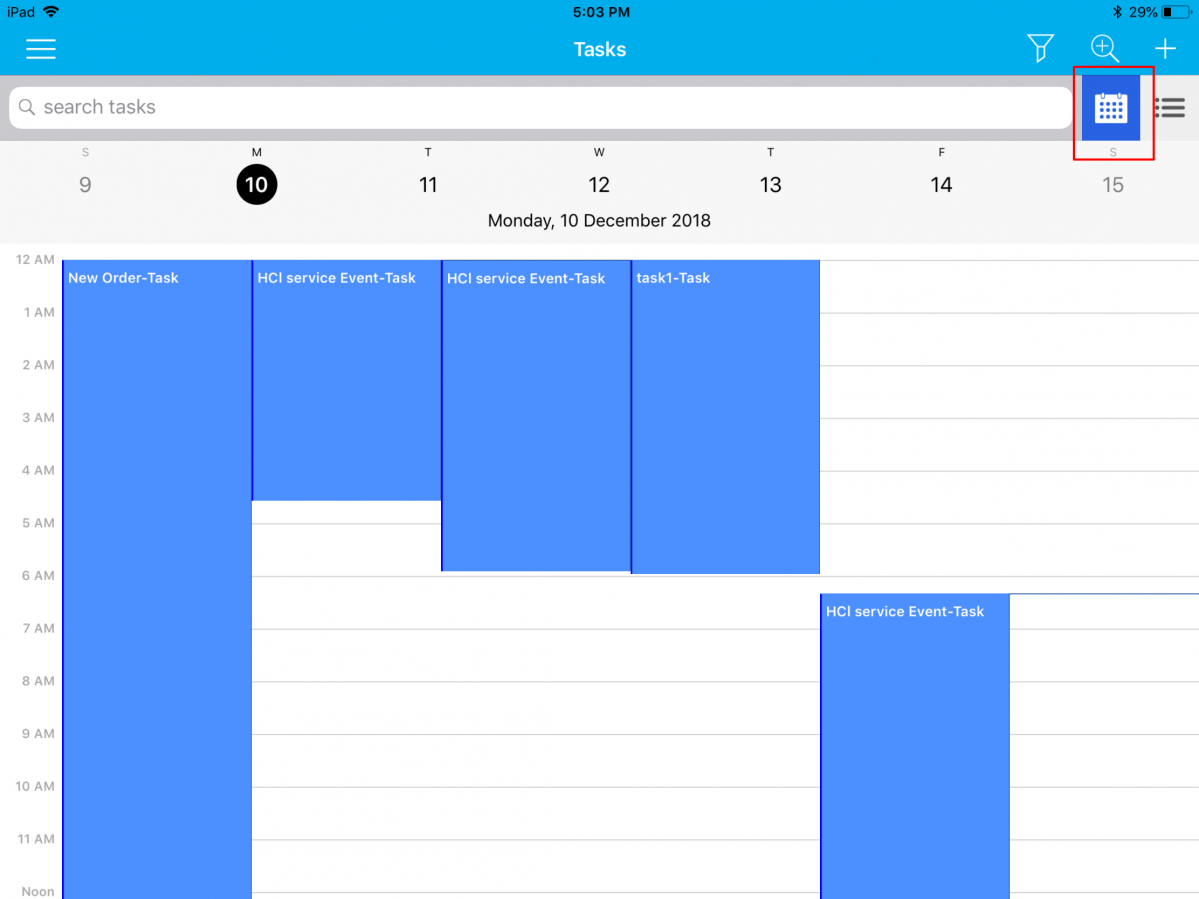
The coolest implementation in this release is the Calendar View in Activities such as My Agenda, Event, Tasks, and Follow-Ups. This is an addition to the existing table view.
For Instance: Let us consider the Tasks. Create your tasks and you can view the created tasks in the Calendar View, which makes your work easy to manage the tasks.
|
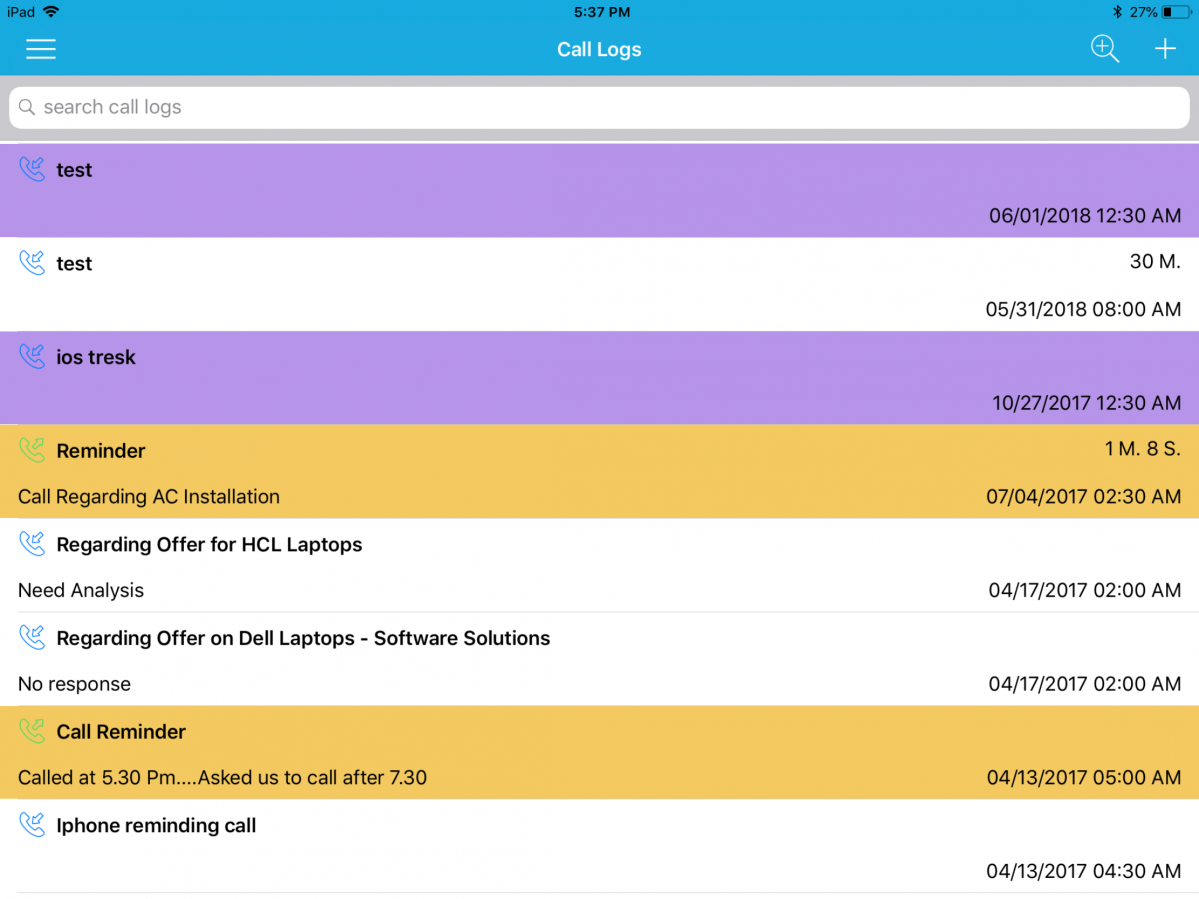
Highlighting Activities
We have added the highlighting feature in Activities of iOS this release. This highlighting feature allows you to easily track the Activities based on the highlighting condition. (Note: You need to configure the highlighting rules from the web version which will get reflected instantly in your iOS app)
For instance: Consider the Call Logs. In the Web, Go to Call Logs. Click on “More -> Settings -> Highlights”. Click on the Create button to create new highlights with the prior condition. Here, we have given Call Type = Outgoing. So, whenever the Call Log is created with Outgoing Type, it will be highlighted. On successful configuration of the highlighting condition, the Call Logs will be highlighted whenever the highlighting criteria are met. You can have a view of the Call Logs being highlighted in your iOS device, as shown in the below image:
|
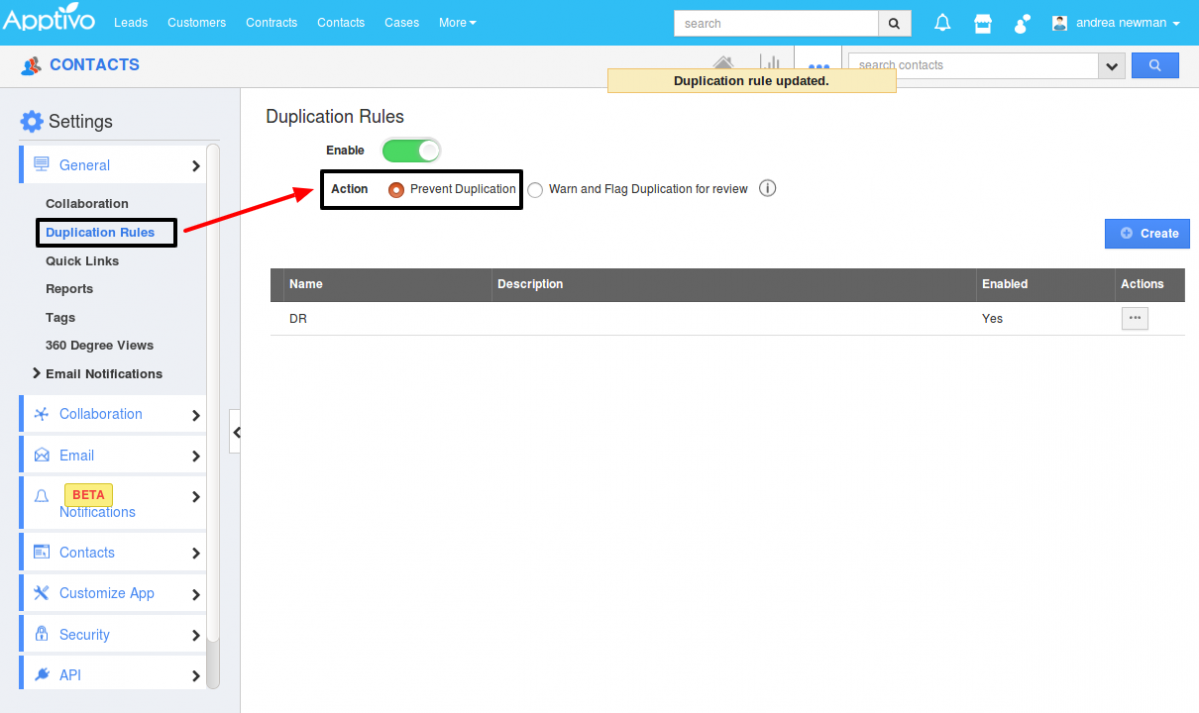
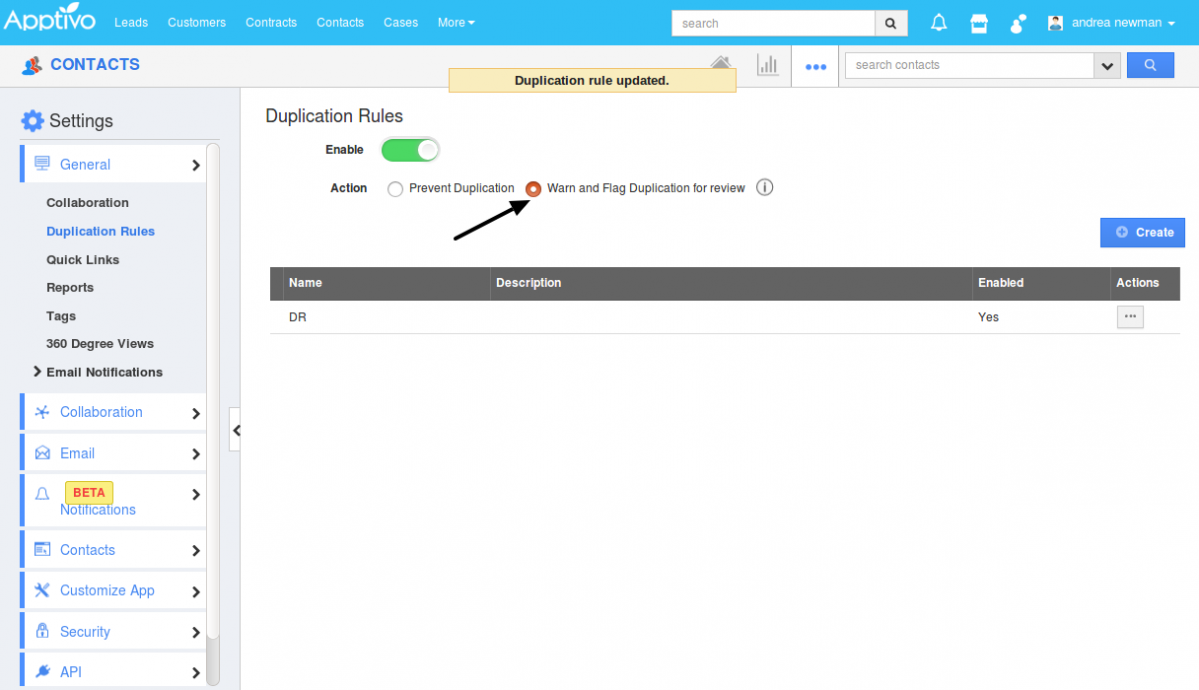
Duplication
We have added the Duplication Rule to our Apptivo apps like Customers, Contacts, and Invoices. Enabling the Duplicate Rule in web gets reflected in the iOS devices. It helps you to check for Duplicate records when creating new contacts and displays you the duplicated contacts as an alert pop up in your creation page. Let’s move on to Contacts App. There are two actions.
- Prevent Duplication
- Warn and Flag duplication for review
|
“Prevent Duplication” radio button is enabled in Web which gets reflected in iOS devices.
|
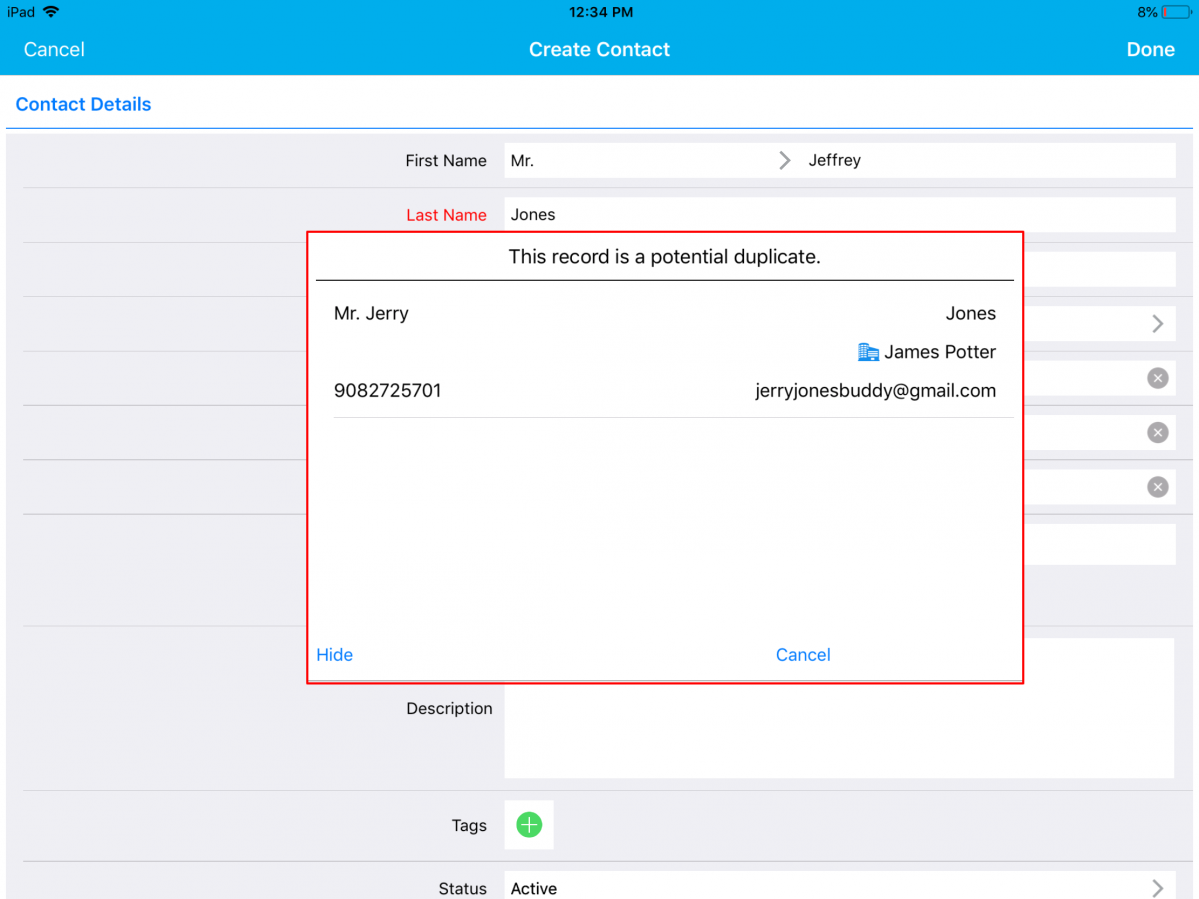
When “Prevent Duplication” is enabled, it (in iOS) helps you to check for the Duplicate when creating new contacts and displays you the duplicated contact as a pop up in your creation page. You can hide and change the information on the contact.
|
“Warn and Flag Duplication for Review” toggle button is enabled in web.

|
When “Warn and Flag Duplication for Review” is enabled, it (in iOS) helps you to check for duplicates when creating a new contact and displays you the duplicated contact as a pop up in your creation page. You can either change the information or ignore the Duplication and create a new contact by clicking on “Ignore and Create”.
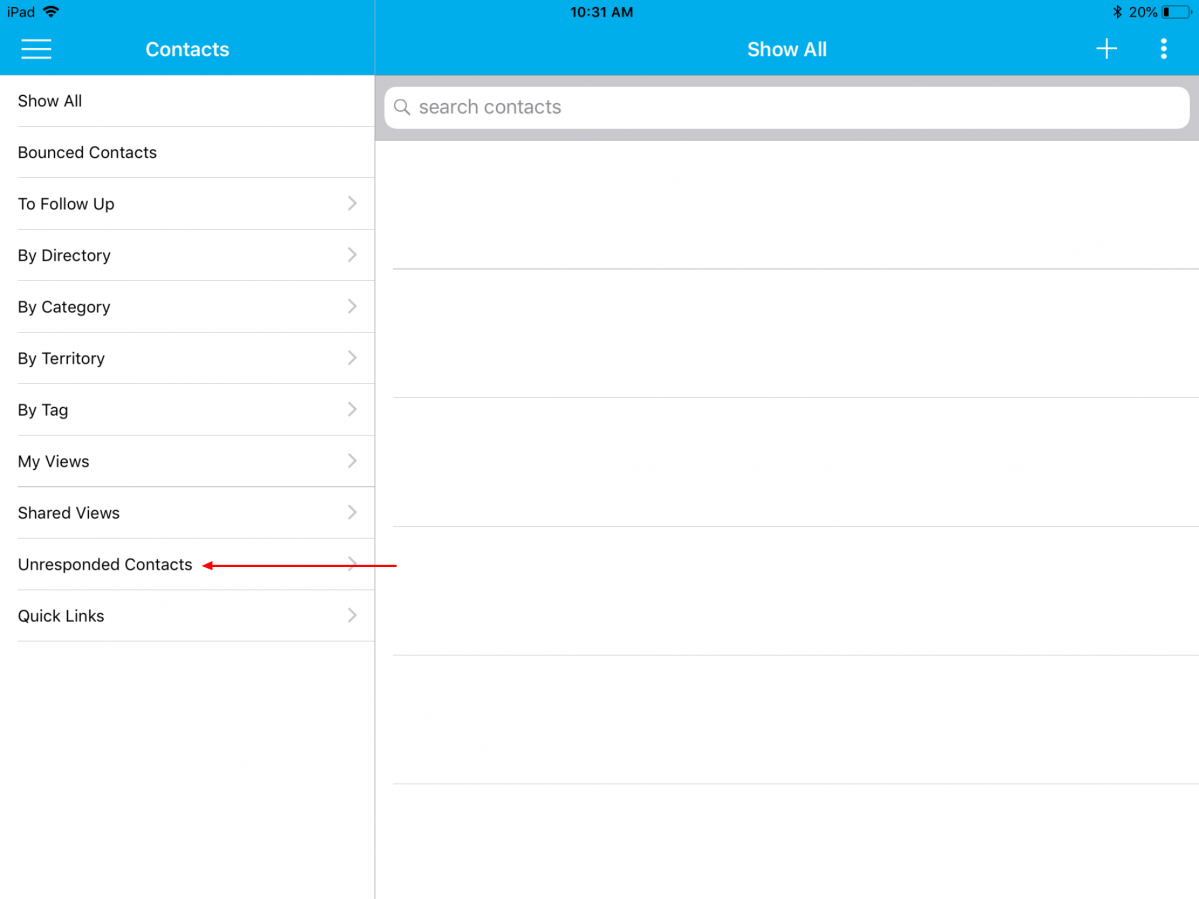
Filter and View Unresponded Objects
We have implemented the feature of Unresponded Objects, which gives you the ability to filter and view the object records in Invoices, Contacts, Customers, Opportunities, Cases, and Estimates Apps, who have not responded back.
For instance: Click on the Contacts App -> Unresponded Contacts.
|
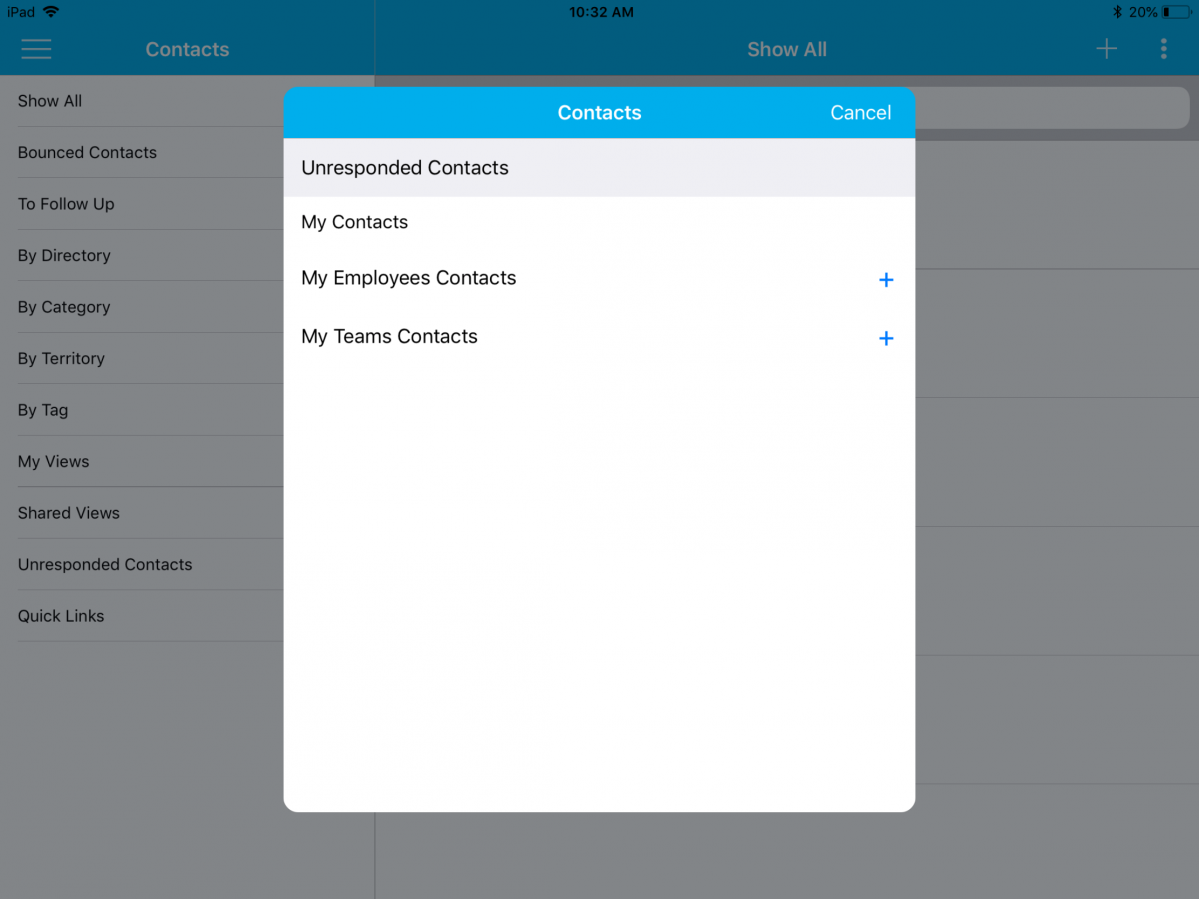
The Unresponded Contacts page will be displayed where you can select to view your unresponded contacts, your employees’ unresponded contacts or your teams’ unresponded contacts, where, by clicking on you can view the list of unresponded contacts.
|
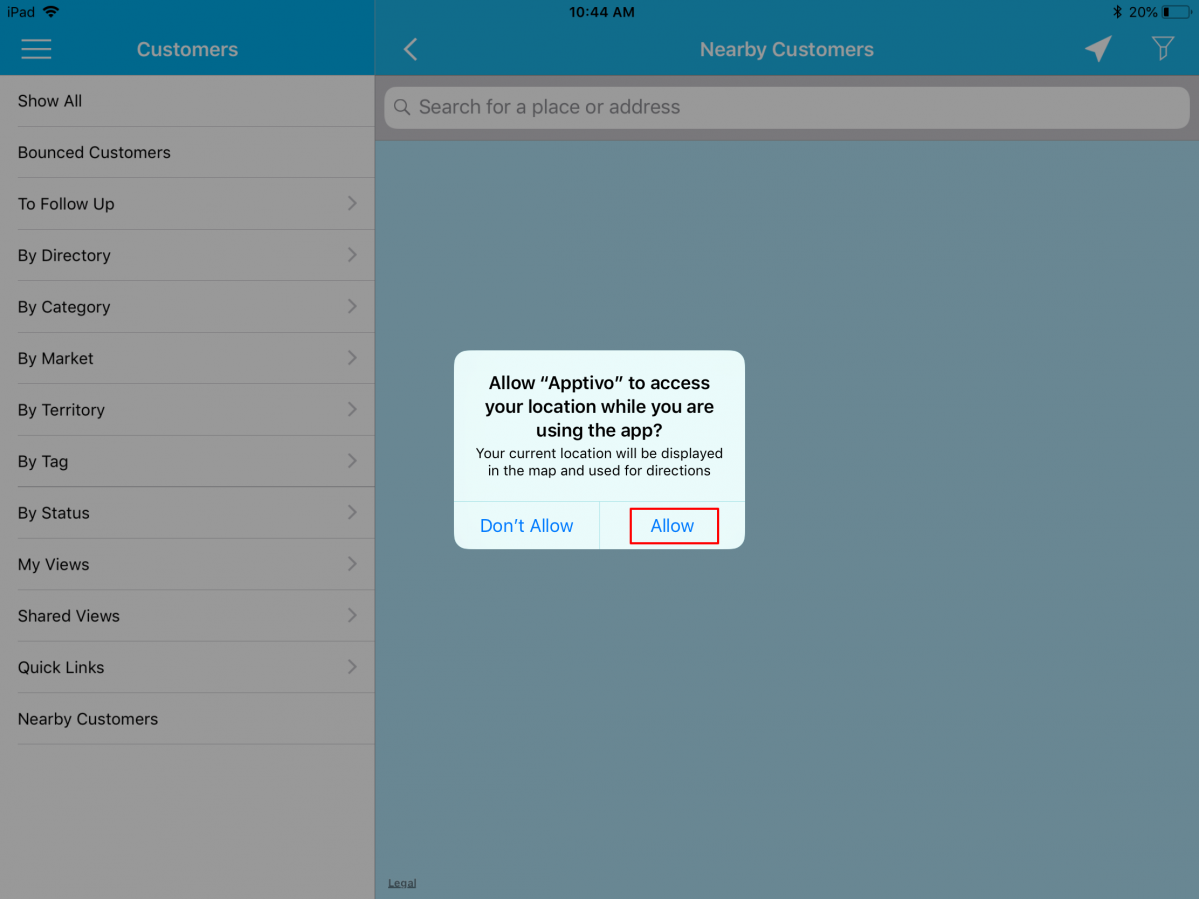
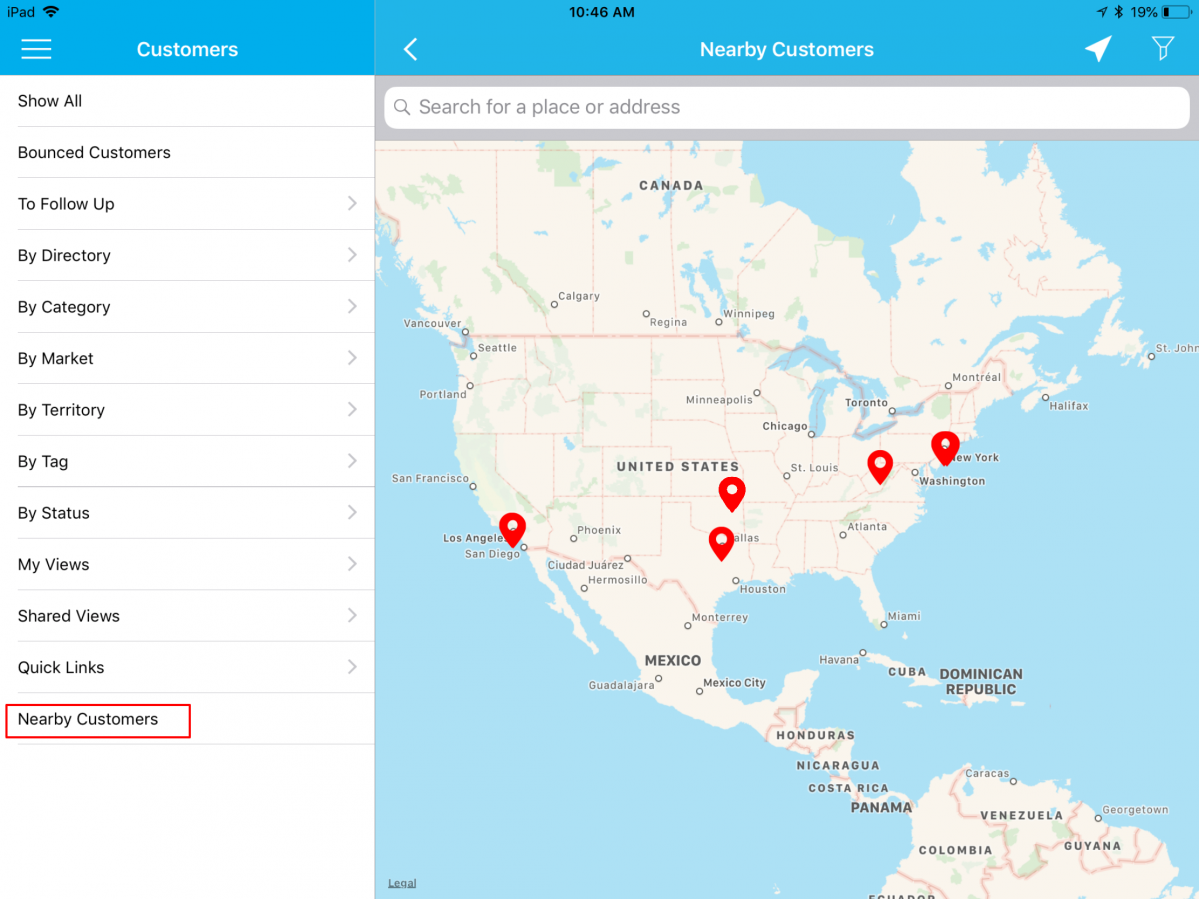
Nearby Customers
We have made fresh changes for the “Map View” in Customers App. By using the Search field, you can search with any location that your Customers are available. If you would like to gather more details about Customers, just select it. A pop-up will display with the “Shows Details”(Customer details) and “Get Directions” (navigate you to the shortest route of your Customers) buttons.
|
Note: You need to enable the Location in your iOS device settings. Just follow this navigation: “Settings” -> “Privacy” -> “Location Services”. If your current location is not shown in the map view, just reset the location in your iOS device settings (“Settings” -> “General” -> Reset -> “Reset Location & Privacy”).
|
Email Hashtag
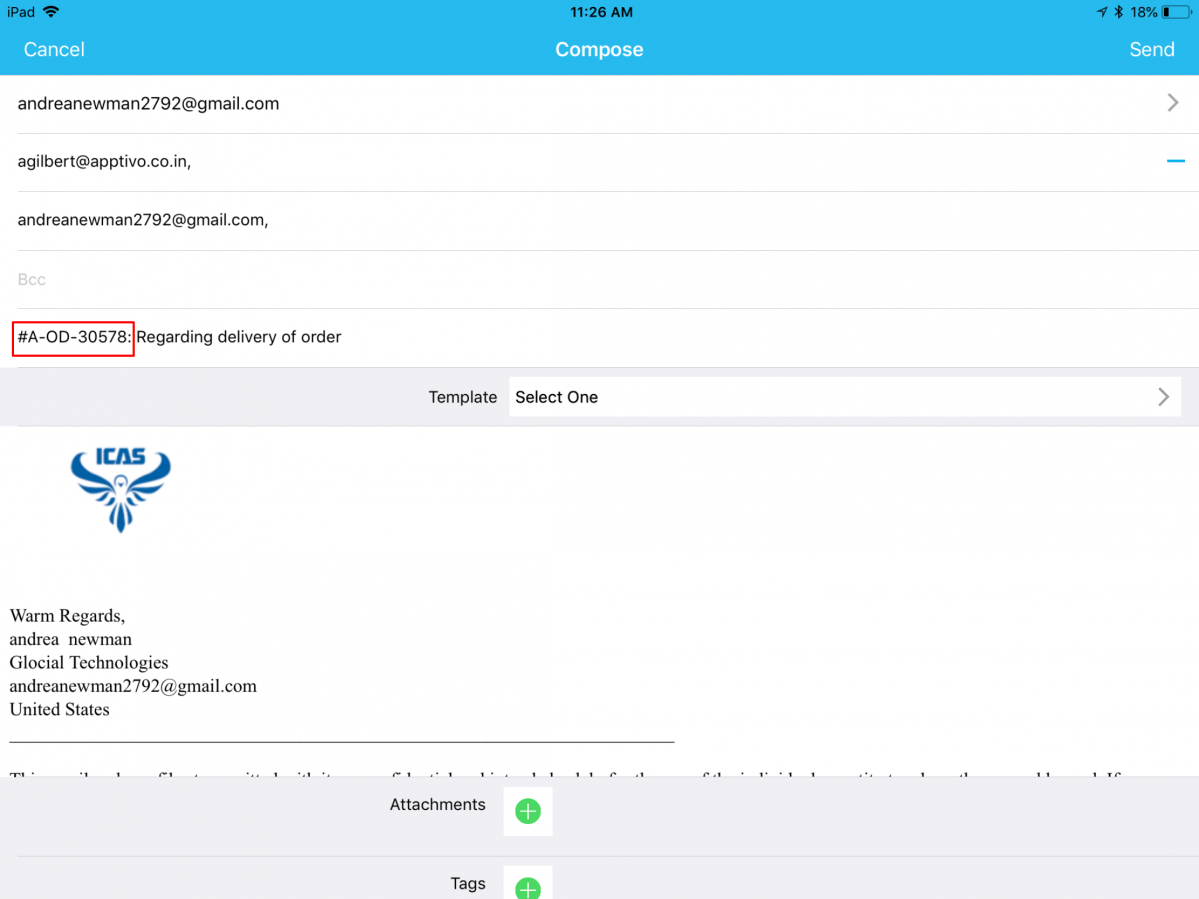
In this update, we have included the new Hashtag functionality in the Projects, Orders, and Expense Reports Apps. The feature of hashtag allows you to associate emails with the respective record in the above-mentioned Apps. (Note: The configuration of Hashtag should be done from the web version)
Kindly check our online documentation on How to Enable Hashtag in Apptivo for a complete list of steps to enable hashtag in the web. For instance: Consider the Orders App. On successful configuration, the emails which you compose for an object from its application will generate an automated hashtag in the “Subject” field, this represents the association of a particular object for order.
|
Probability Override notes in Opportunities App
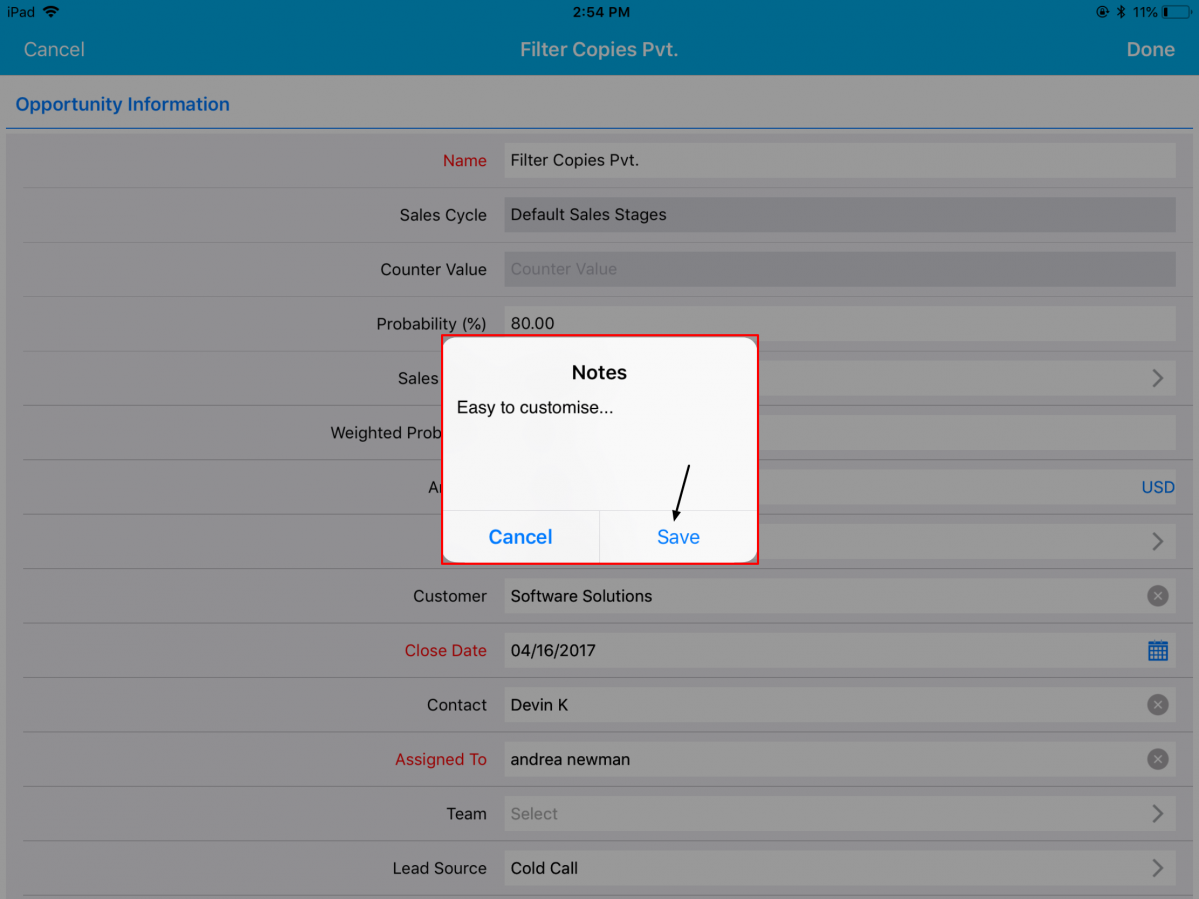
As we all know, each Sales stage in the Opportunities App will be having a Probability value, which will be considered as the Opportunities probability, when set to that sales stage. In this release, we have now enhanced the Probability Override feature for the iOS devices. With this enhancement, on changing the probability value (increasing/decreasing) of an opportunity, you can now enter your reasons in a popup and it will be automatically collected as a Note in the Notes tab, which can be used for future references.
On changing the probability value of an opportunity from your iOS App, you will be displayed with the Notes popup as shown. Enter the note and click Save.
|
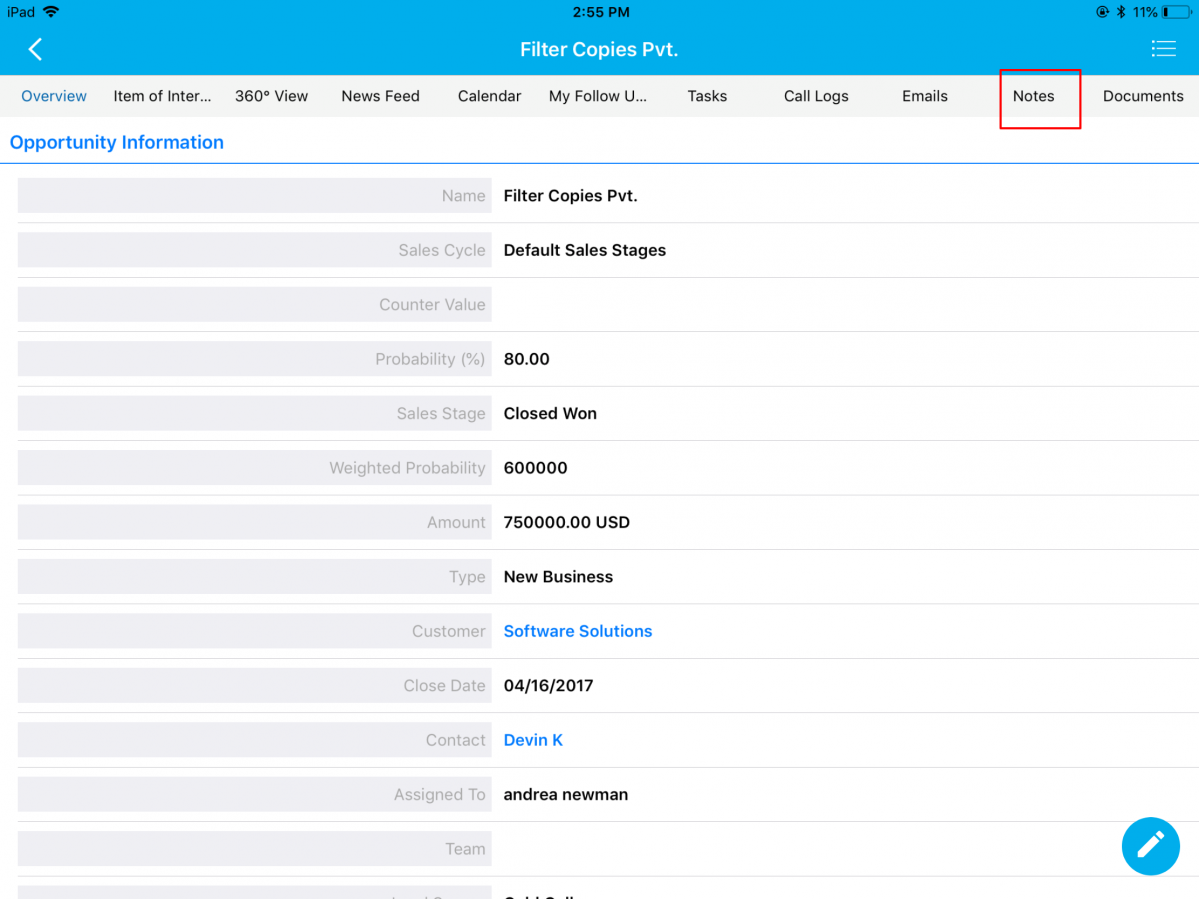
Click Save, a note will automatically be created. To view the created note, click on Overview dropdown -> Notes.
|
The created note will be listed in your iOS device as shown in the below image:
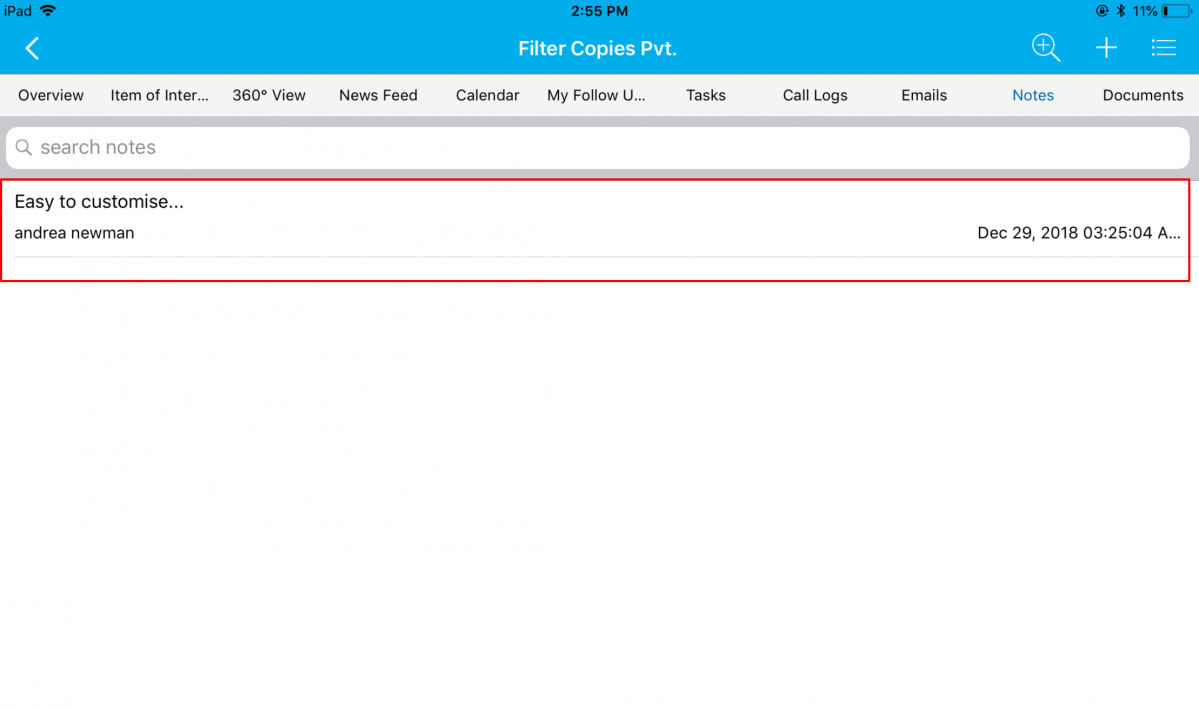
|
App Duplication
In addition to the various actions that can be performed in a Cases and Suppliers, we have now the added the ability to duplicate to create new ones and edit the particulars if needed in these Apps. For instance: Consider the Suppliers App. Click on the More icon found at the top right corner.
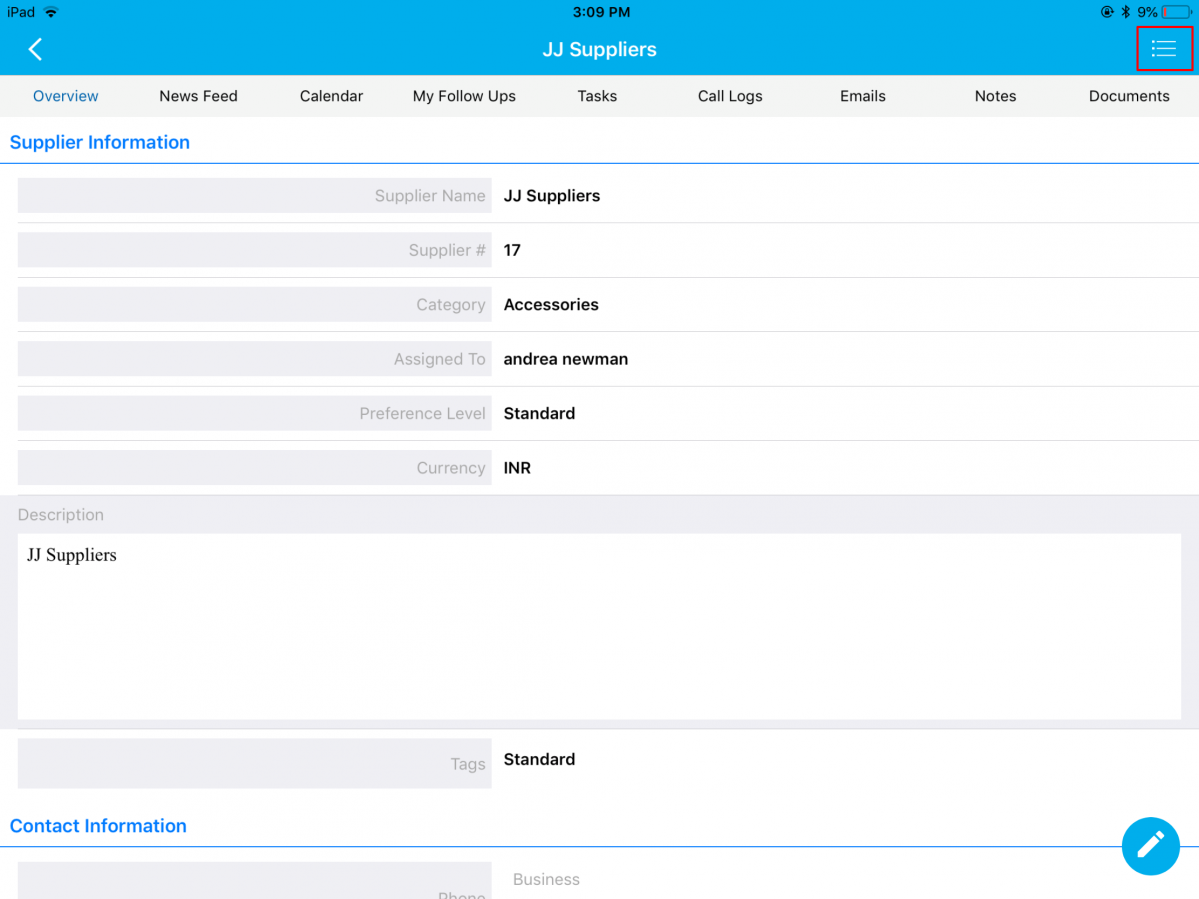
|
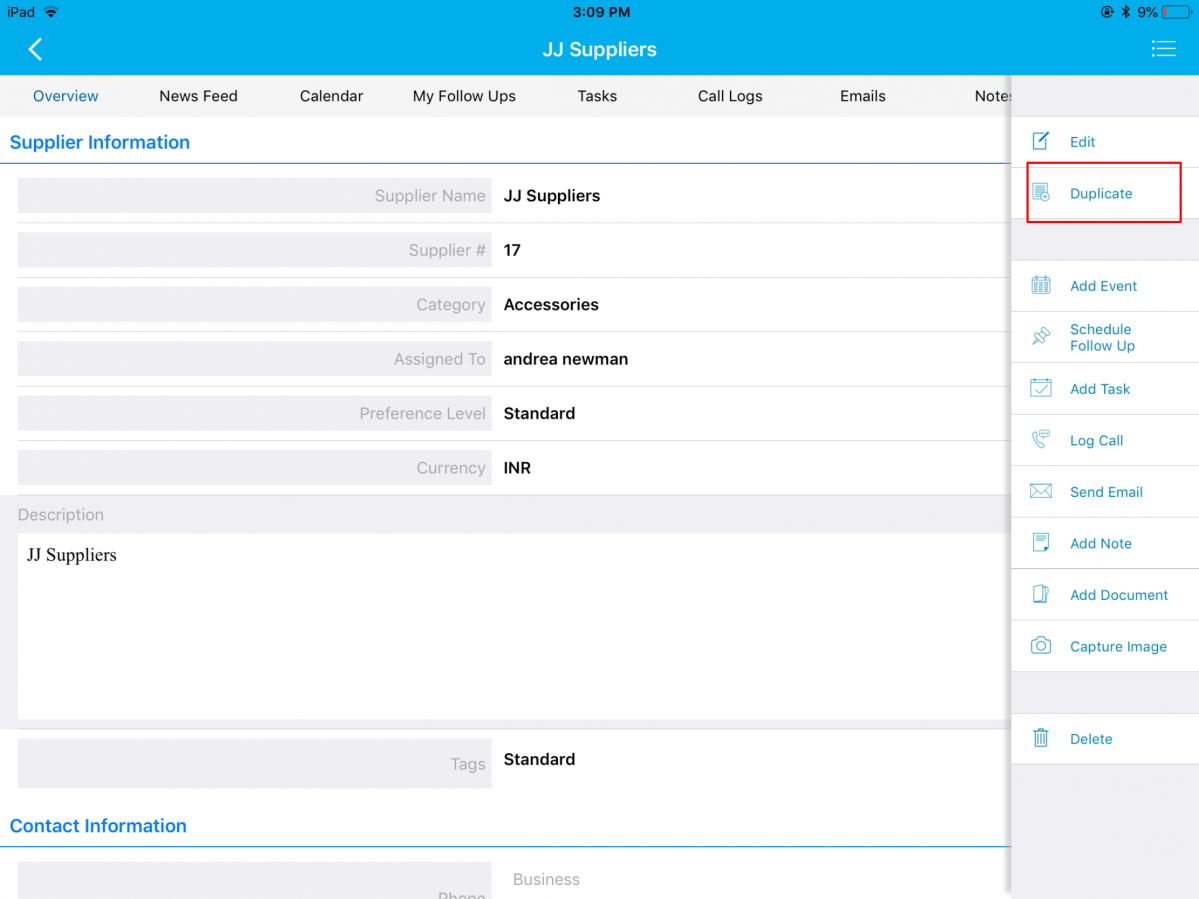
From the list that appears in Suppliers App, click on Duplicate.
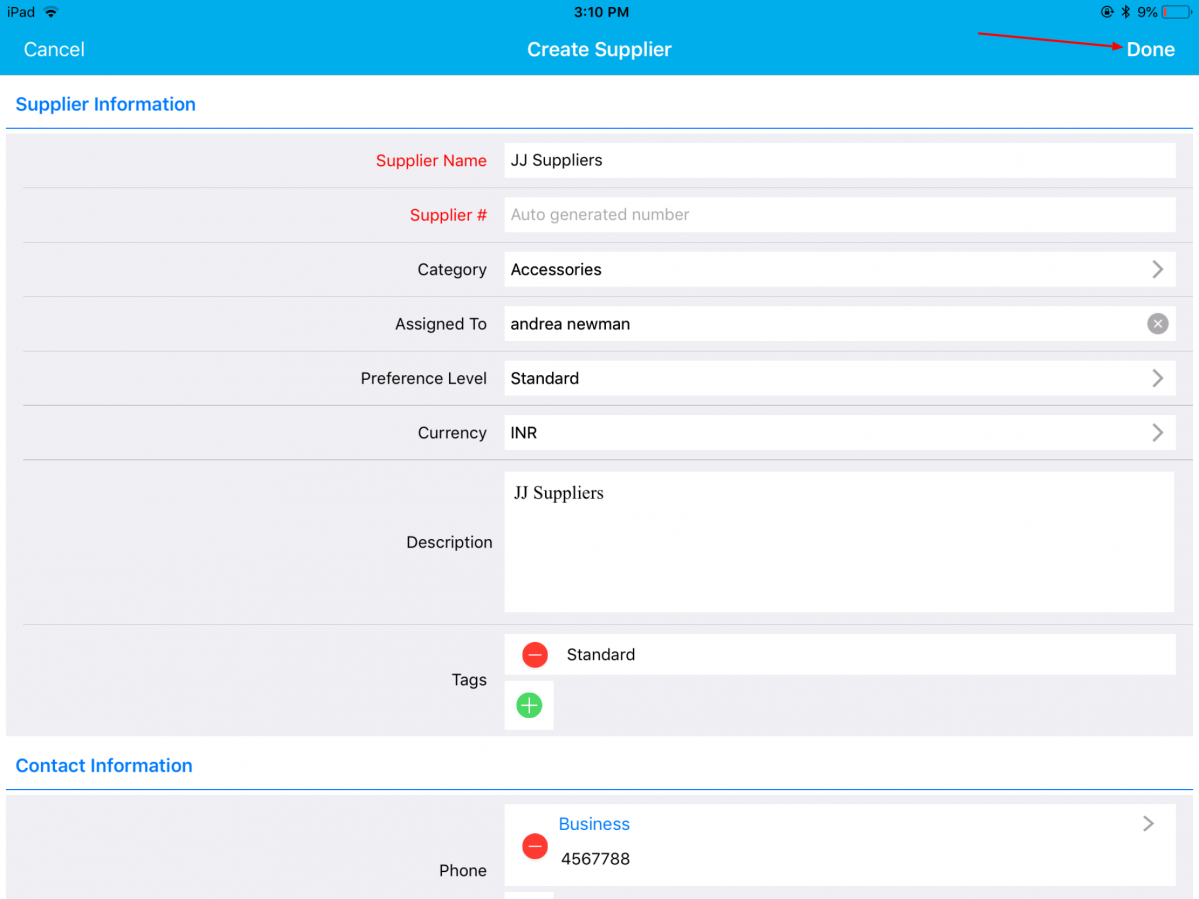
New Supplier creation page will be displayed, populating the details of the existing Supplier. You can also add or remove information accordingly and once complete click on Create.
|
Conversion
A notable feature in this release is the feature of Conversion of apps like Opportunities to Orders, Estimates to Orders, and Orders to Invoices in your iOS devices.
For Instance: Let us consider the conversion of Opportunities to Orders. Your Opportunities can now be converted to a Orders. To convert, click on the More drop-down found in the Opportunities Overview page -> Convert option.
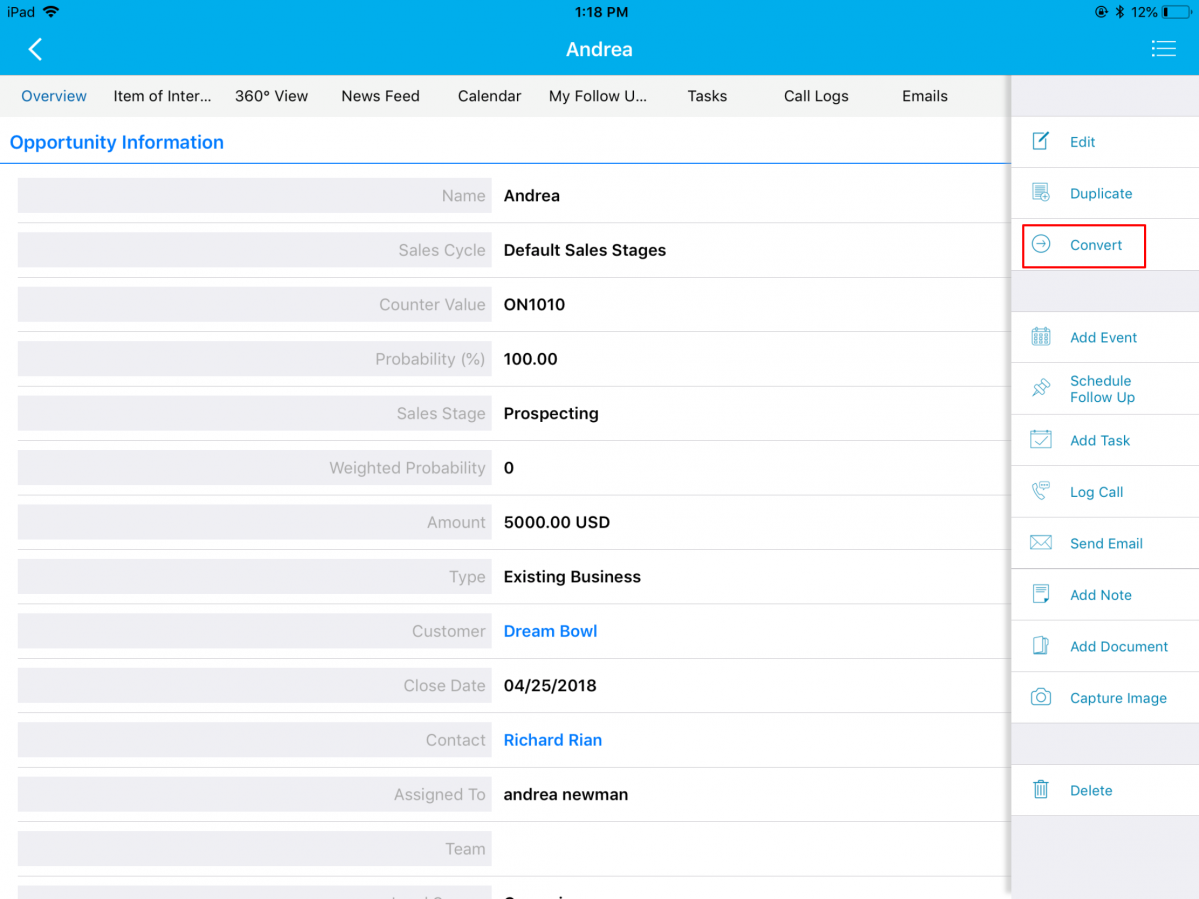
|
You can find a pop-up with the various choices to convert the existing Opportunity. Select Orders from the choices.
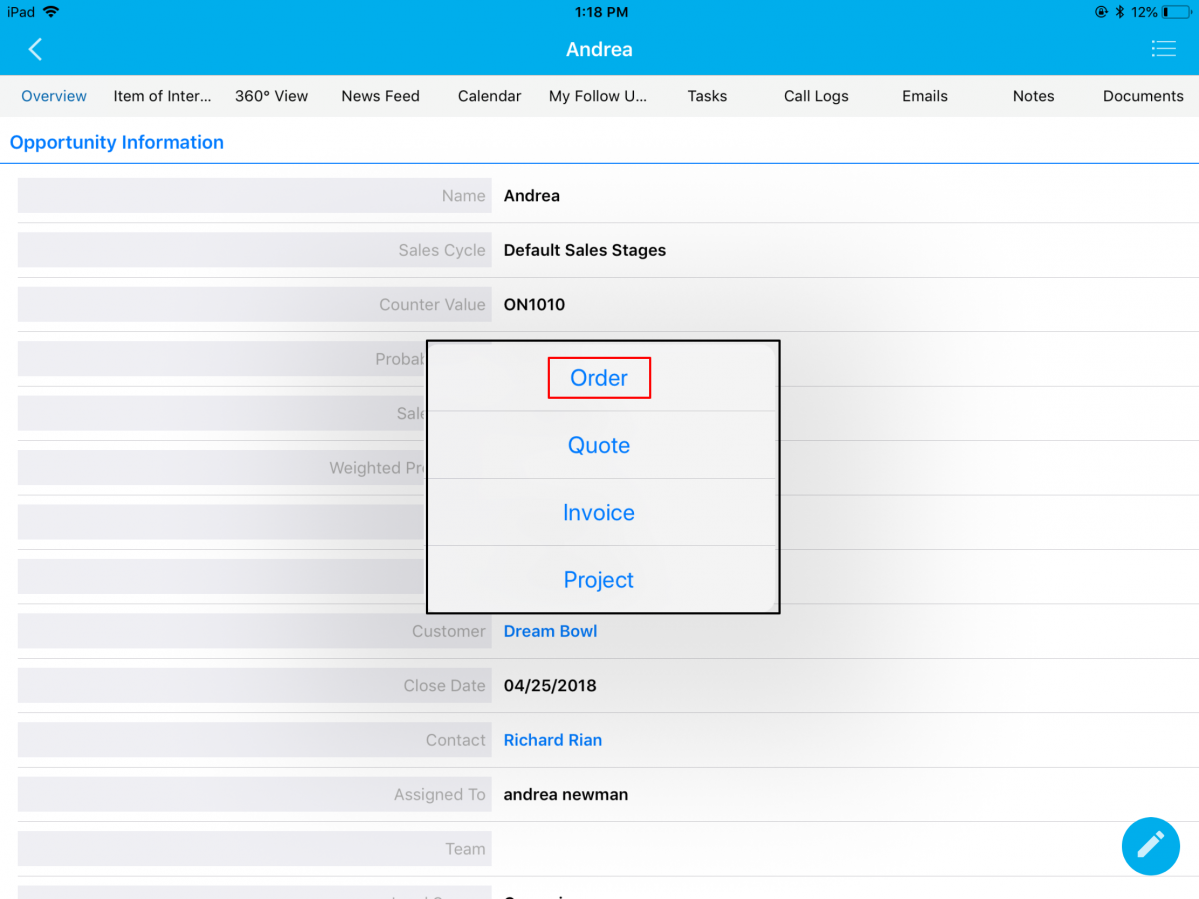
|
You can find the Opportunity converted as Order with the objects from the Opportunity auto-populated as shown in the below image:
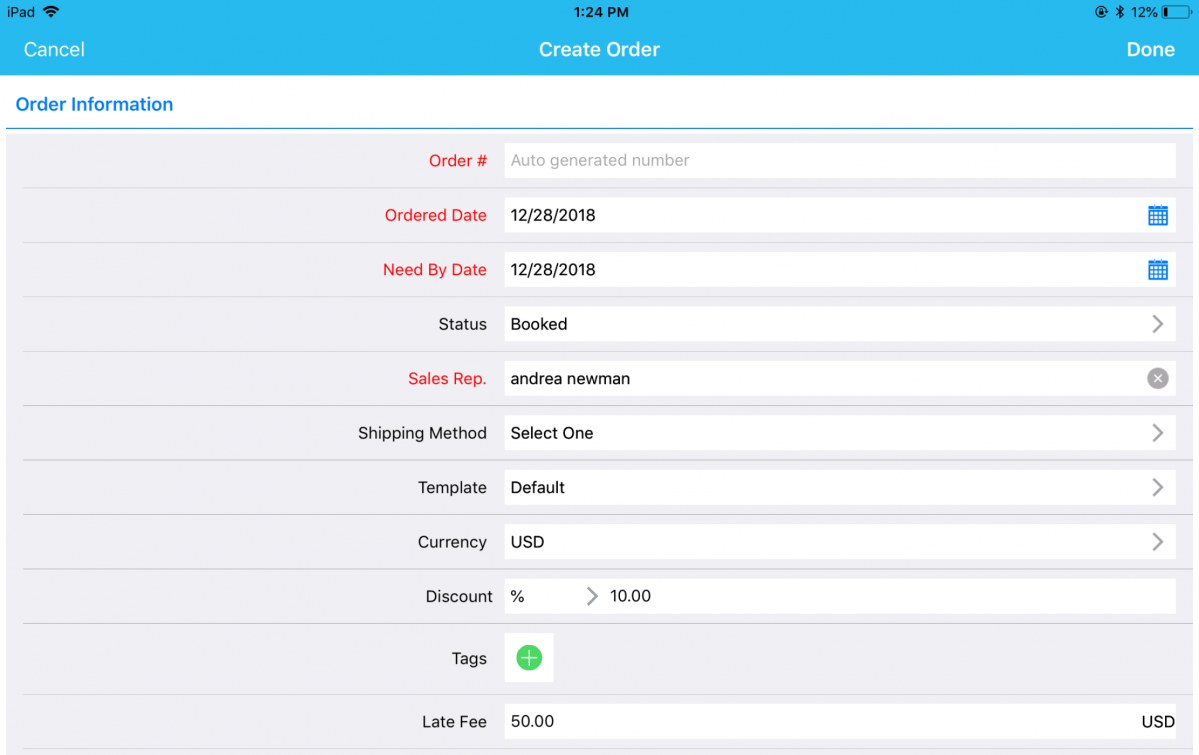
|
Custom Conversion
In this update, we have enhanced the Custom Conversion feature in the Opportunities app with Estimates. This update will now give you the ability to map the attributes of the source app (Opportunities App) with the destination app, according to your business requirements. Note: The custom conversion should be configured from the web version. Go to Settings > Opportunities > Conversion > Custom Conversion.
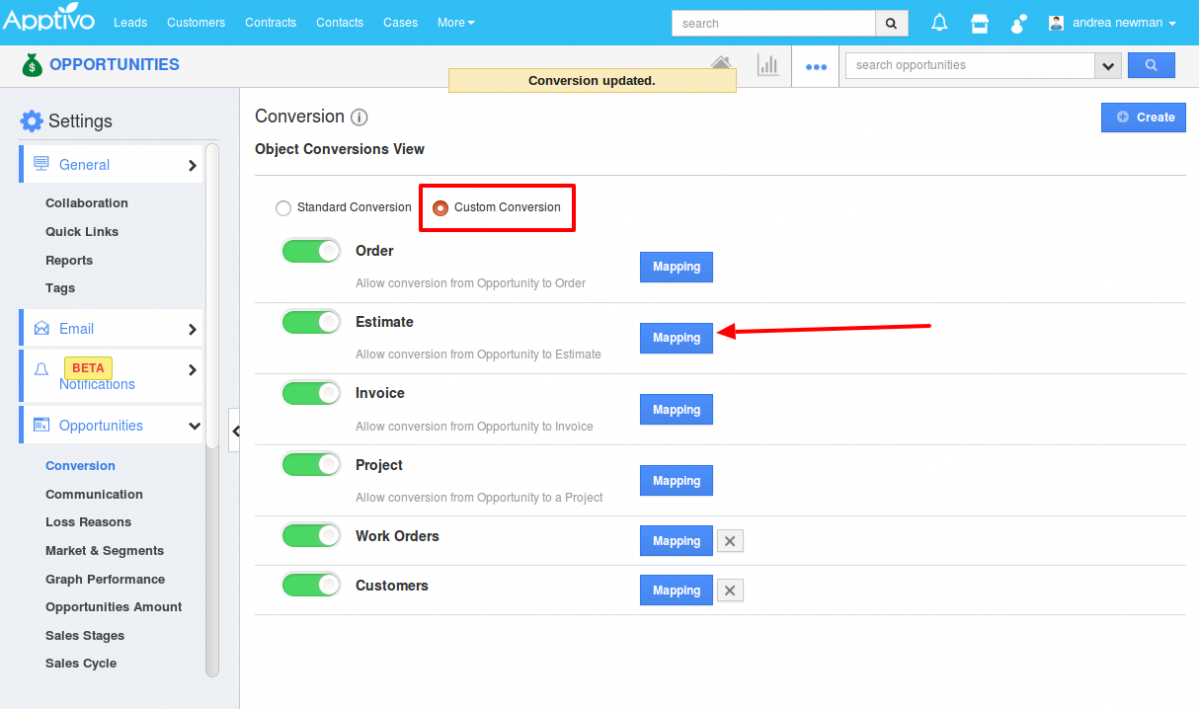
|
On clicking Mapping, you can now select and map the fieldsfrom Opportunities with the Estimates.
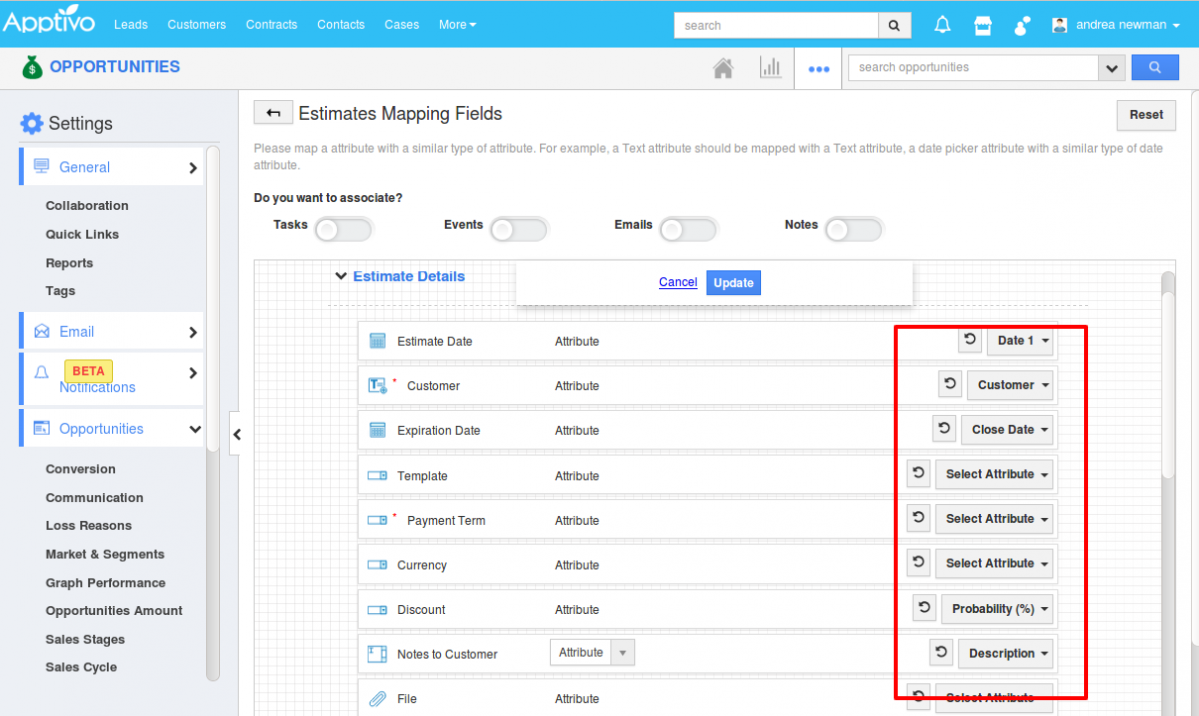
|
Click on the Convert option in your iOS device, from the Opportunities Overview page.
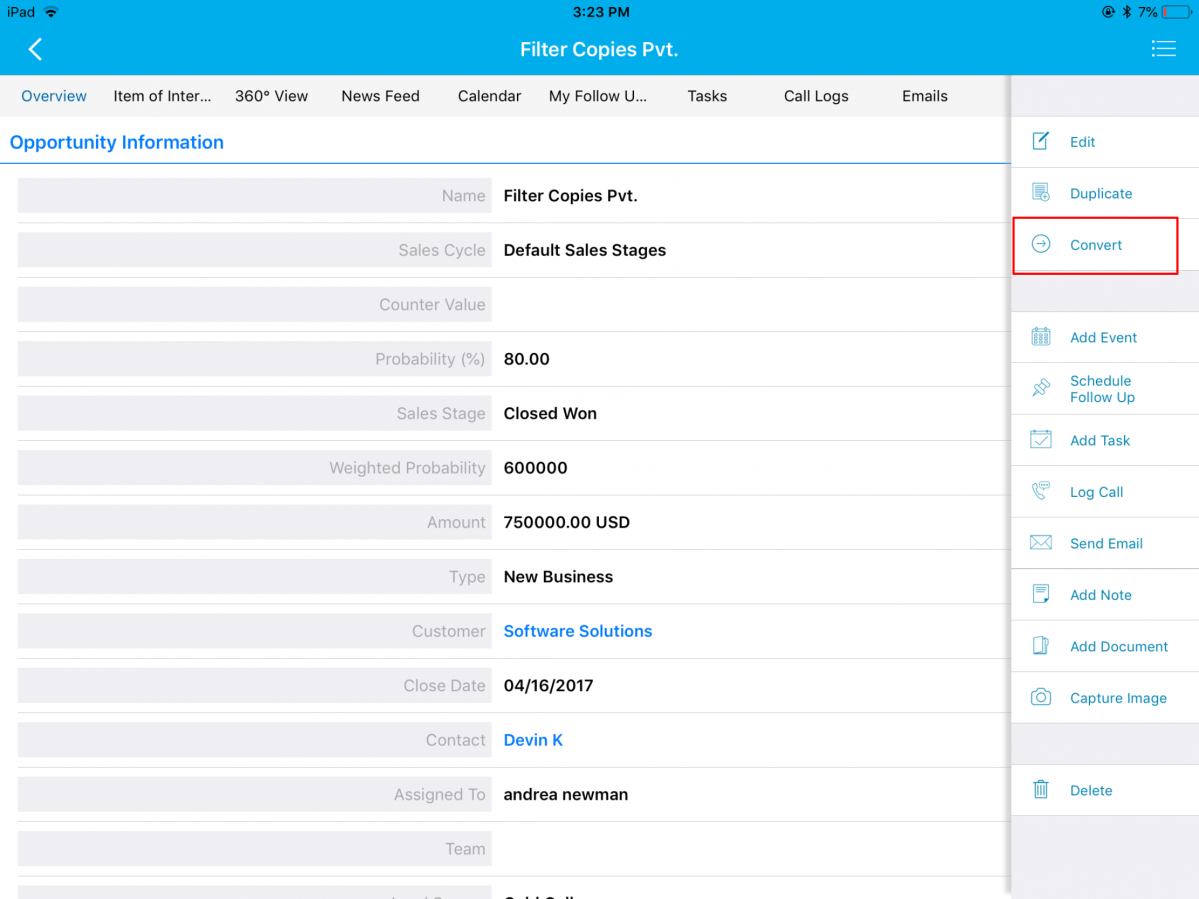
|
A Select popup will open up, that displays the following options – Order, Estimate, Invoice, and Project.
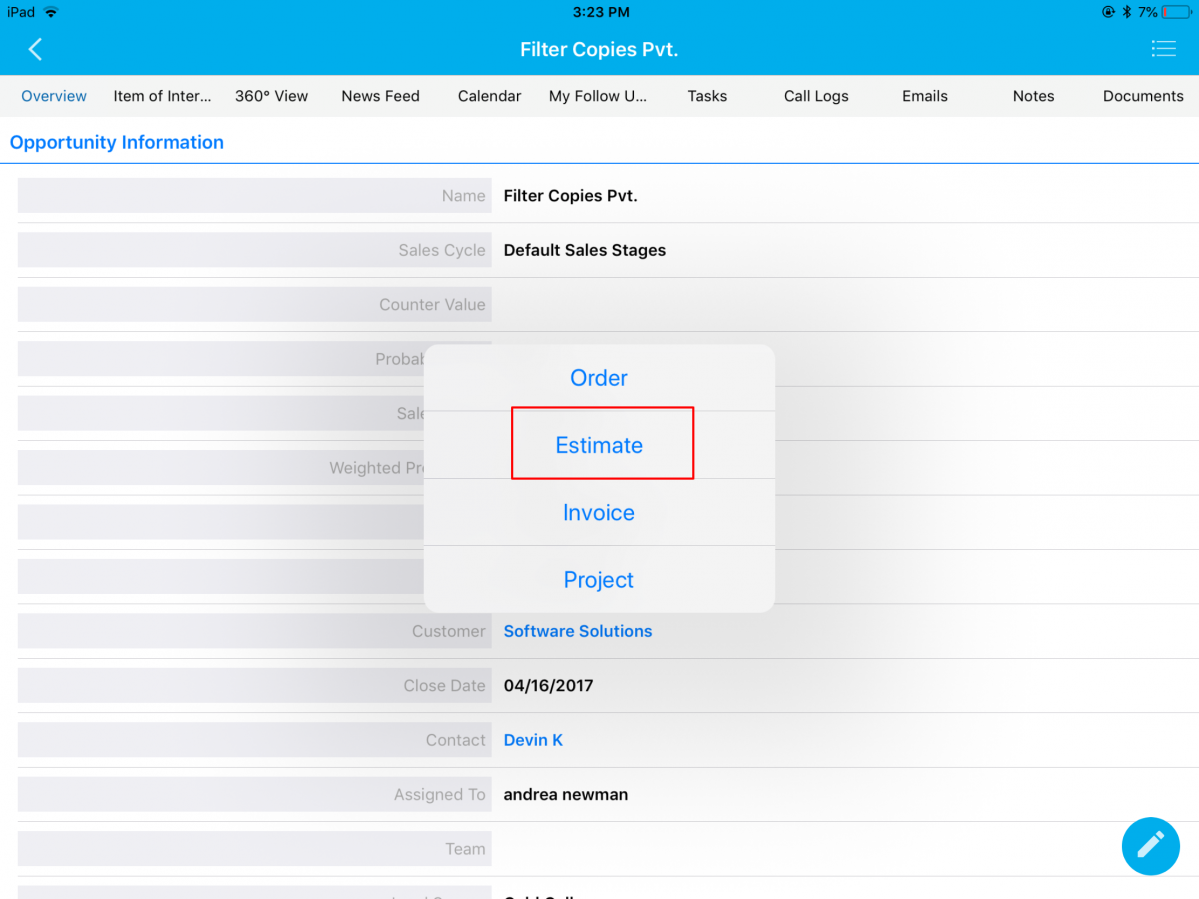
|
Based on the mapping of the fields, when you convert an Opportunity to an Estimate from your iOS device, the values will get populated accordingly.
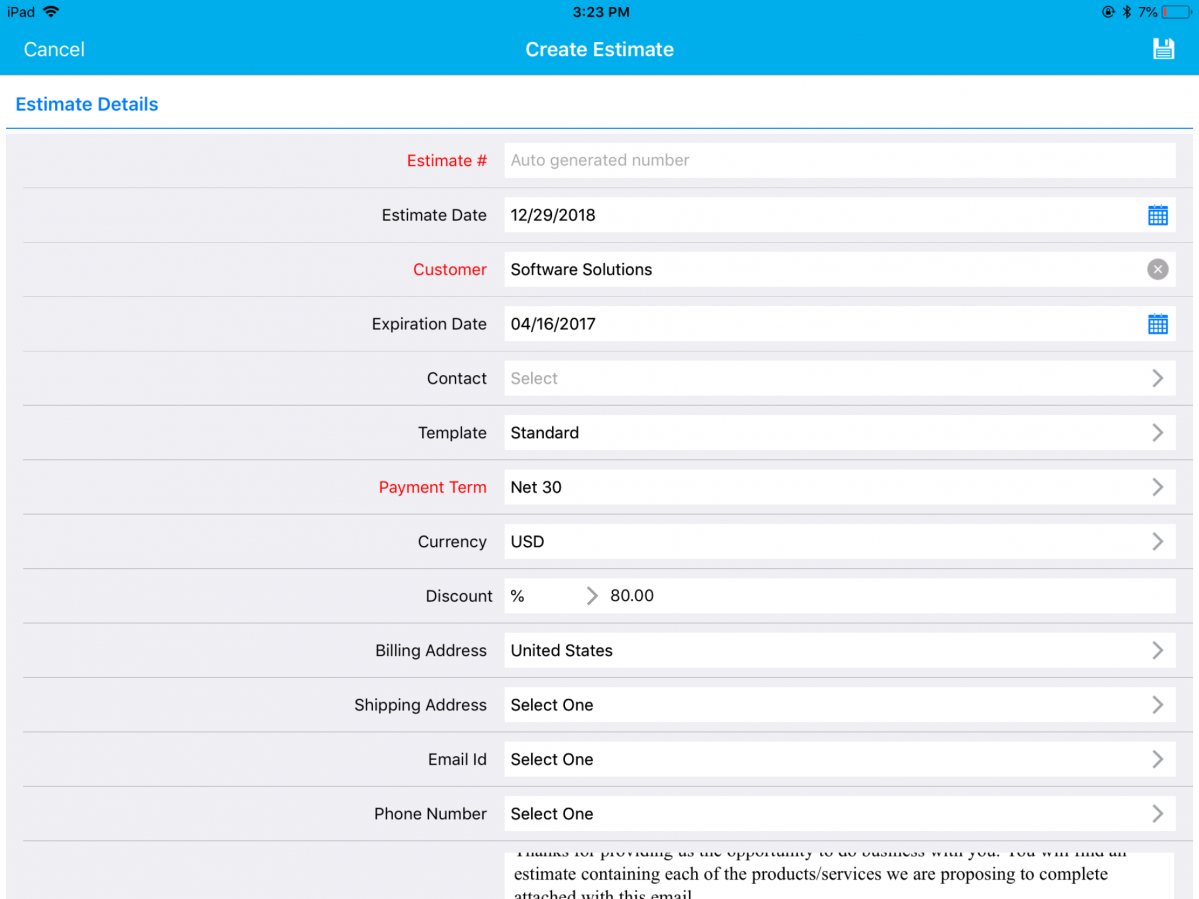
|
Download our latest version of the iOS All-In-One App.
Give these features a try and feel free to contact our support engineers anytime you require at support@apptivo.com. Stay tuned for much more feature updates and releases.
Have a Prosperous New Year!!!
Cheers,
Grace
Apptivo, Team
Latest Blogs

Role Of CRM In Travel And Tourism Industry
Travel and tourism have been a significant part of everyone’s life since the ancient period. When we skim through the pages of history, It should be noted that humans were initially nomads before they became settled in one place. They...
Read more →
WHAT IS CRM TECHNOLOGY?
Introduction CRM is a technology that helps manage the entire customer information and interactions in order to build and maintain superior customer relationships. The CRM solution replaces spreadsheets and other different applications, which makes it easy for the businesses to...
Read more →
Everything you need to know about the Annual Maintenance Contract!
1. What is an Annual Maintenance Contract? 2. Benefits of Maintenance Contracts 3. How can Apptivo CRM help you manage maintenance agreements and vendors? 4. Summary Think about getting the confidence that the machinery is well-maintained and performing optimally, without...
Read more →
