If your domain provider is Office365, you must create/update both your SPF records and DKIM keys within your DNS records settings to ensure emails are delivered properly from Apptivo.
Read below for the steps you’ll need to complete to configure your Office365 email with Apptivo.
Steps to Add SPF Record in Office365 Domain
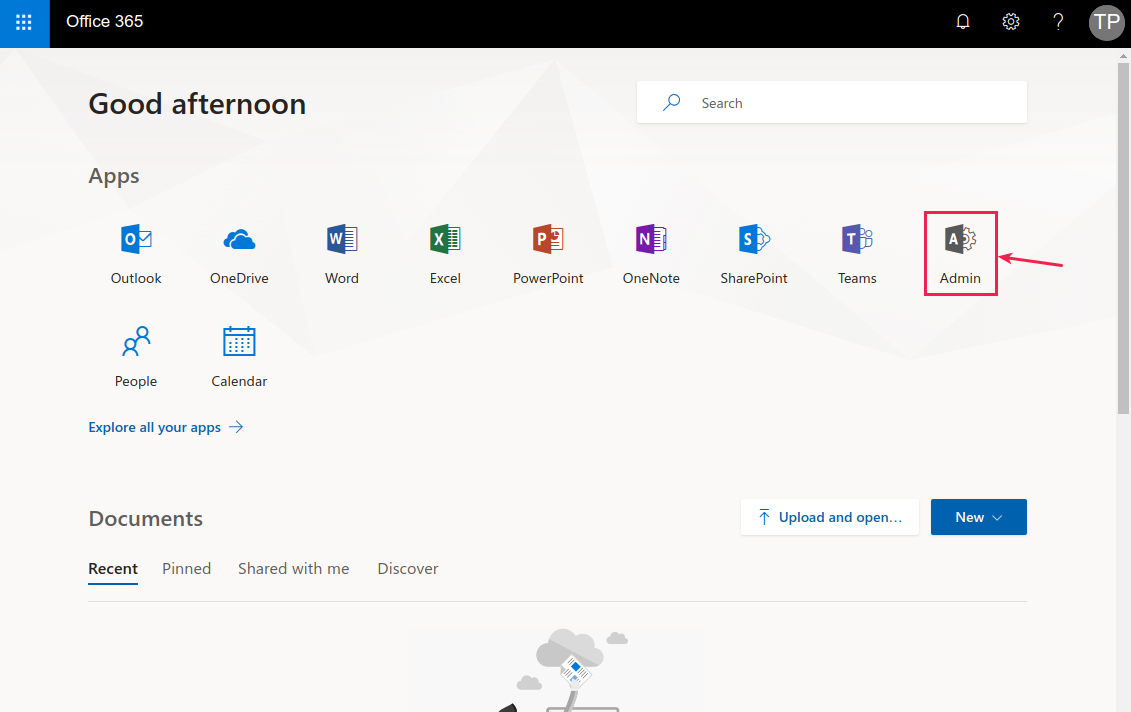
- Log in to your Office365 account (Admin login).
- Click on Admin from the Apps section.
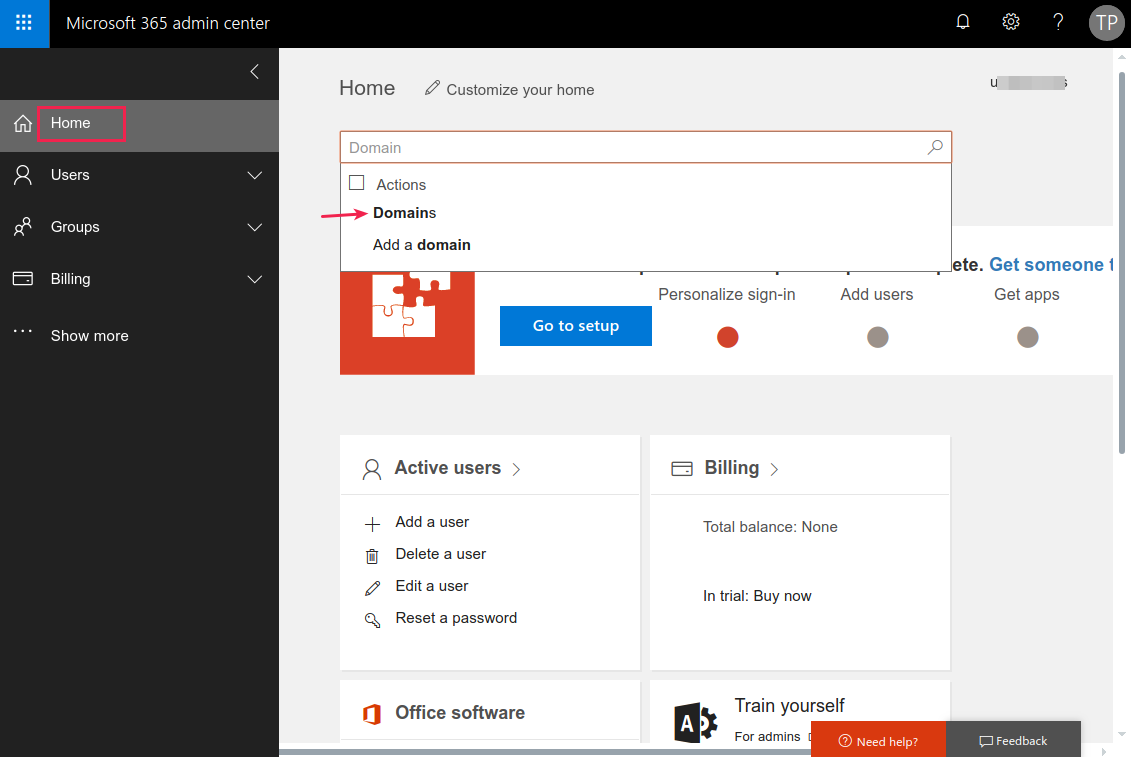
- In the Admin Center Home page, enter Domains in the search bar found at the top and click on Search icon.
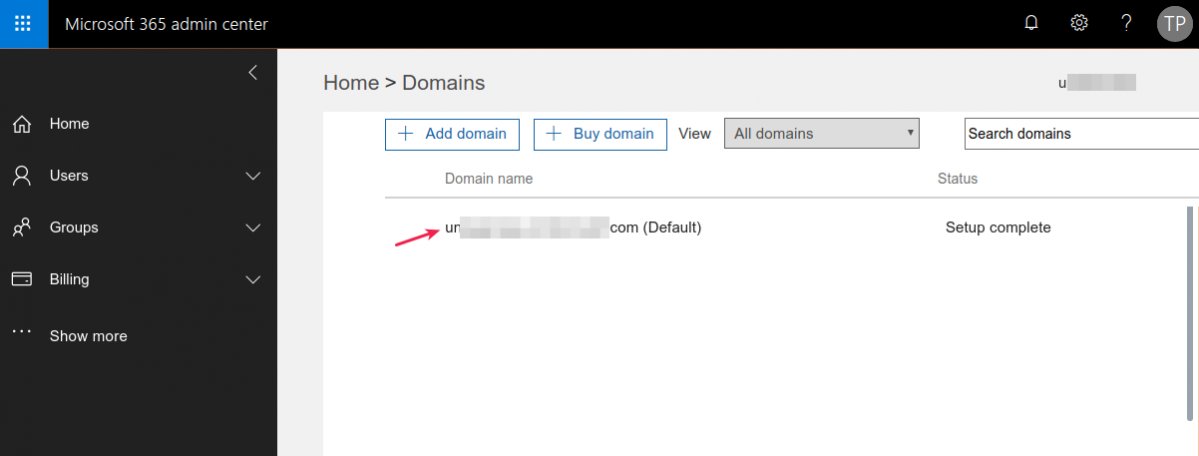
- Now, in the Domains page, click on you required domain name.
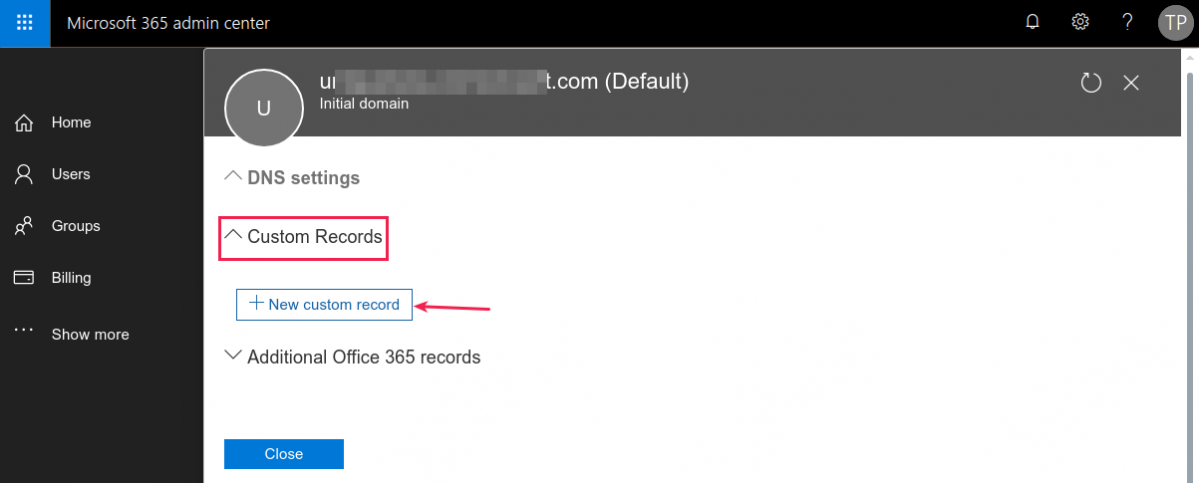
- In the page next, click New custom record under the Custom Records section.
- Next, select
- Select DNS type – Select TXT (Text) from the DNS Type dropdown.
- TXT name – Enter Host as @.
- TXT value – Here, you need to provide the SPF key (You can get it from Apptivo using Email Deliverability under “IN TXT”).
- TTL – Select how long the server should cache the information.

- NOTE: No extra white spaces and double quotes must be enclosed in the key. It should be copied and pasted the same.
- Click Save once done.
Steps to setup DKIM Record in Office365 Domain
- For DKIM, repeat the steps from 1 to 5 explained above for SPF.
- Next, select
- Select DNS type – Select TXT (Text) from the DNS Type dropdown.
- TXT name – Provide the public key (You can get it from Apptivo using Email Deliverability). Note: The Host value for DKIM has been changed from apptivomail._domainkey.apptivo.com to apptivomail._domainkey as of July 2018. If you’re a customer who configured DKIM before July 2018, you need not worry. It will continue to work fine. This new change is only for those who are configuring DKIM from July 2018 (Enter Host as apptivomail._domainkey).
- TXT value – Here, you need to provide the SPF key (You can get it from Apptivo using Email Deliverability under “IN TXT”).
- TTL – Select how long the server should cache the information.
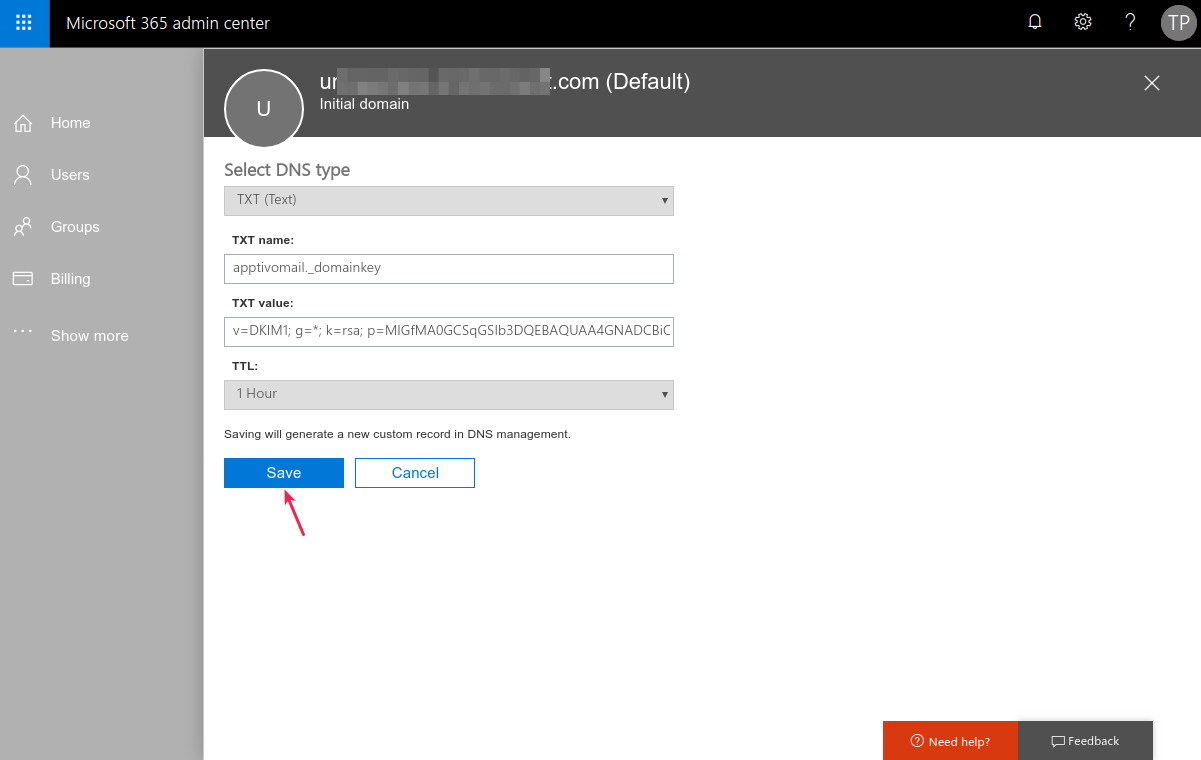
- NOTE: No extra white spaces and double quotes must be enclosed in the key. It should be copied and pasted the same.
- Click Save once done.
Thats’ it! You are now done with setting up SPF and DKIM for Office365. Once the TXT records has been updated, you will view the UI as shown in the image below:
Once you have added the appropriate SPF and DKIM records in your email service provider, it can nearly take about 24 hours for the changes to get reflected in Apptivo. You can check if your SPF and DKIM keys are updated correctly.
Office 365 was last modified: November 3rd, 2020 by

